Prerequisites
The Google Workspace Admin SDK Reports API has several prerequisites, which can be found in the Google Admin SDK Documentation. Most importantly, for access to the Google Admin Console, you need:
-
A Super Administrator account to enable API Access; and
-
An admin account with the Reports Administrator privilege to create and grant permission to the application.
The following Google documentation can assist you with the process of configuring the Google Workspace portal in preparation for connecting to the Open Collector:
Create a Project
-
Open the Google API Console: https://console.developers.google.com
-
Open the Select a Project window, and then click New Project.
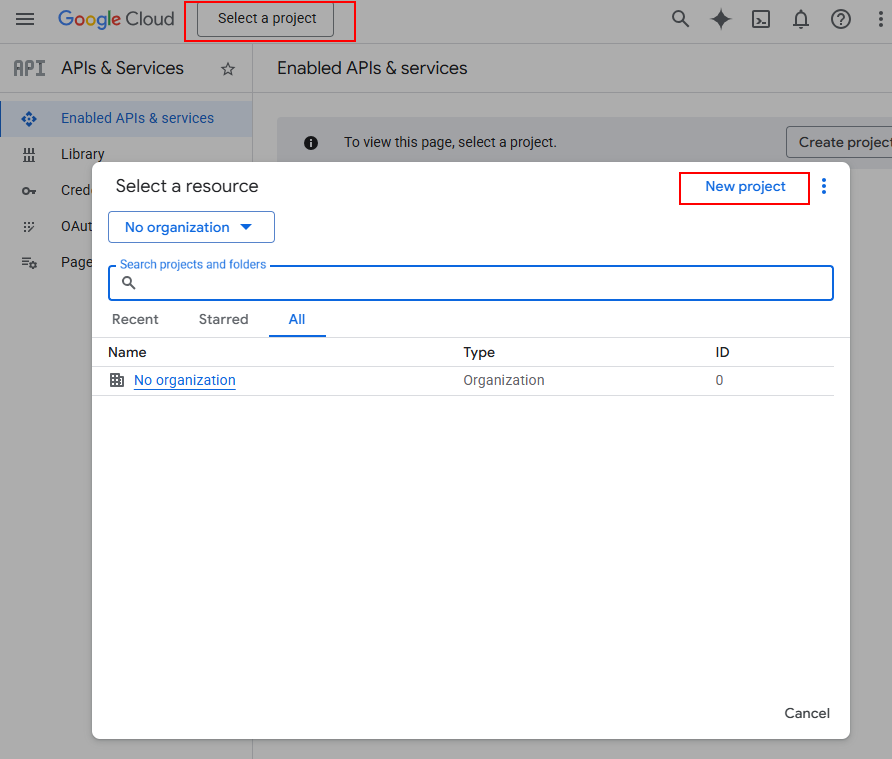
If you are familiar with Google APIs and projects, you can select an existing project from the list instead.
-
Give the project a unique name.
-
Open the Billing account drop-down and select the account that will be billed for charges accrued by this project.
A project cannot have APIs enabled unless a billing account is attached.
-
Open the Organization drop-list and select an organization to which this project will be attached.
-
Click Browse in the Parent resource bar and select the parent organization or folder where this project will be stored.
-
Click Create.
The project is added to your account and the Overview page displays. -
Click APIs and Services, and then click Library.
-
Click Admin SDK API, and then click Enable.
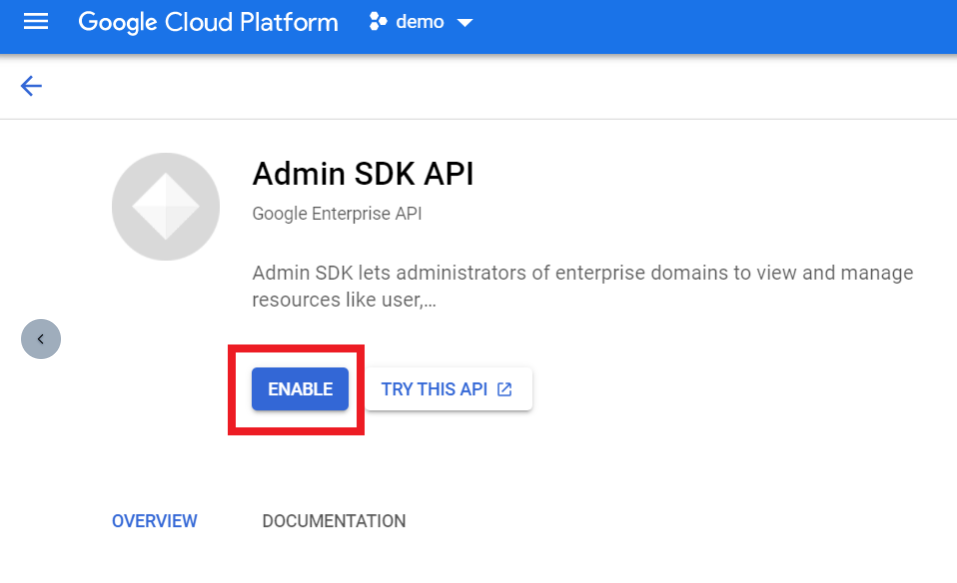
Depending on the logs you are trying to collect, you may also need to enable the Google Drive API.
All Login, Token, and Reports datasets are enabled by the Admin SDK API.
Configure OAuth Consent Screen
In order to connect your Google project to the Open Collector, you must give consent for OAuth verification.
This action only needs to be completed once per project.
To enable OAuth verification, from the Google API Console:
-
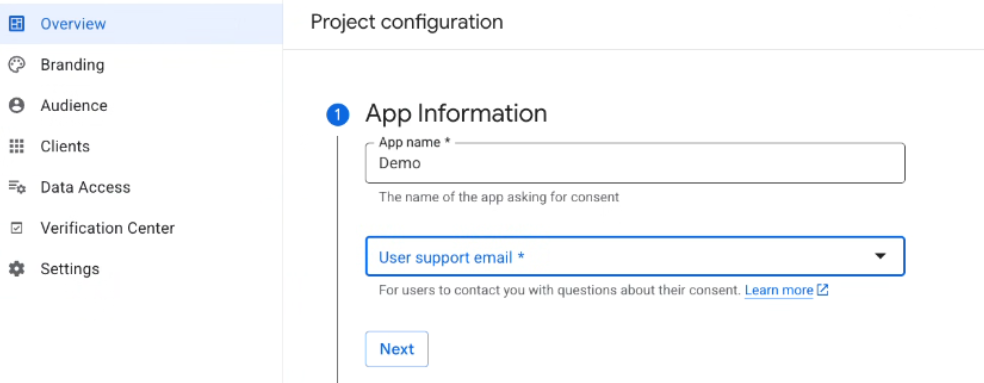
With your project selected, navigate to APIs & Services, and then OAuth Consent Screen.
The Project configuration screen opens. -
Create an App name (for example, Workspace Audit Beat).
-
Enter the User support email, the email address at which users can contact you with questions about their consent.
-
Click Next.
-
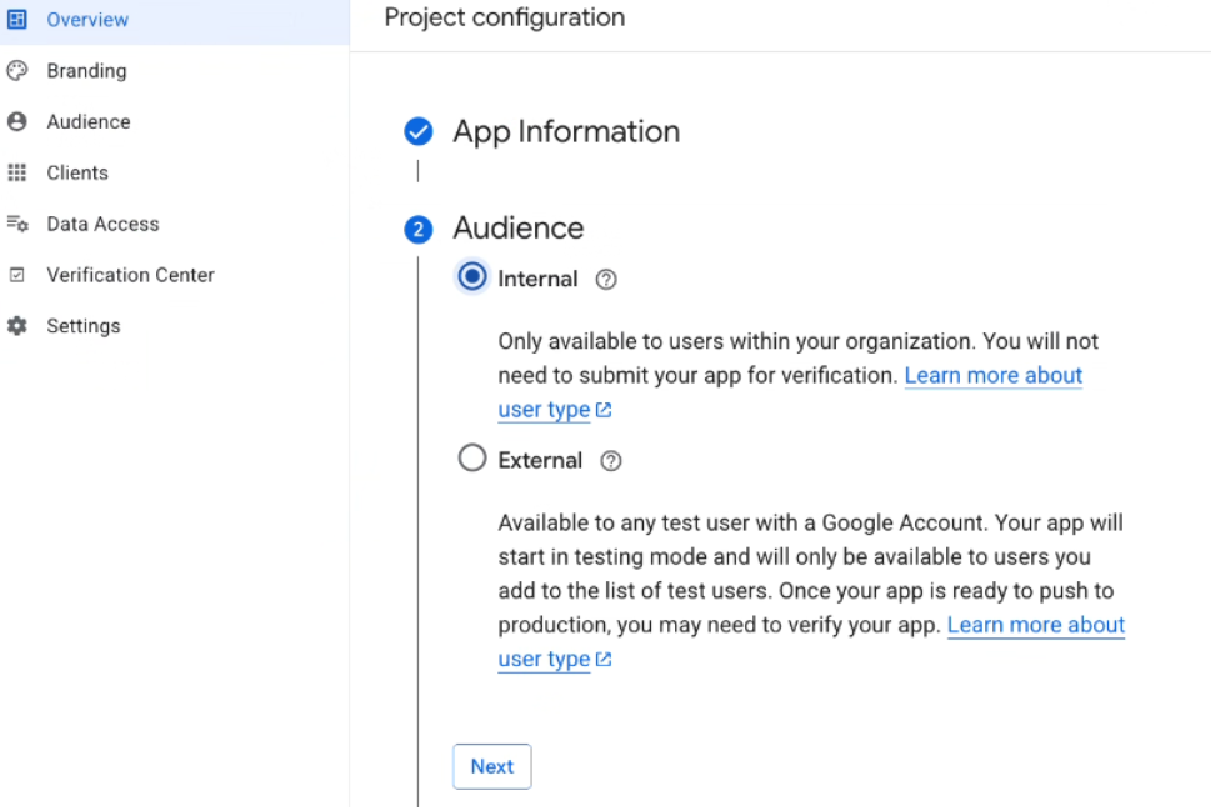
For user type, select Internal, and then click Next.
-
Enter one or more Contact email(s), the email address(es) at which Google will notify you about changes to your project.
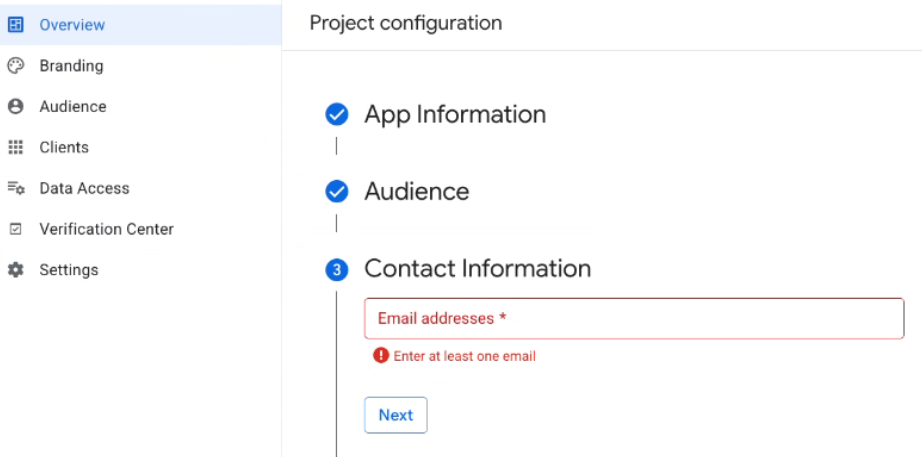
-
Click Next.
-
Click Create.
OAuth consent is enabled for the project.
Create Credentials
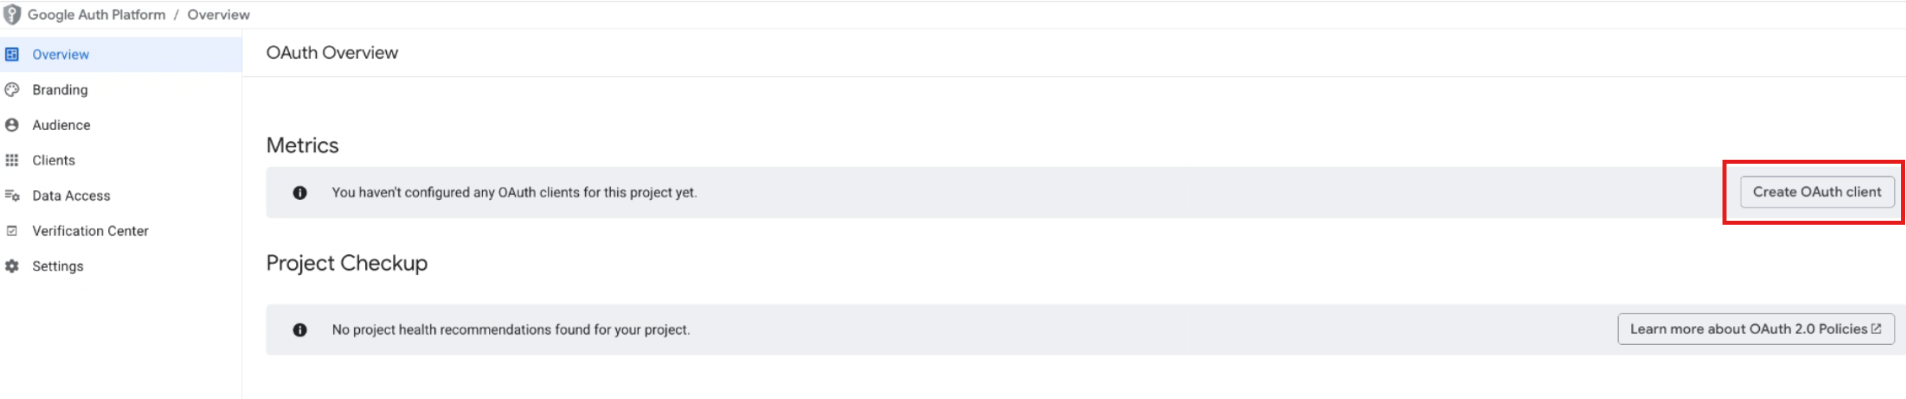
-
From the project’s Overview page, click Create OAuth Client on the right-hand side.
-
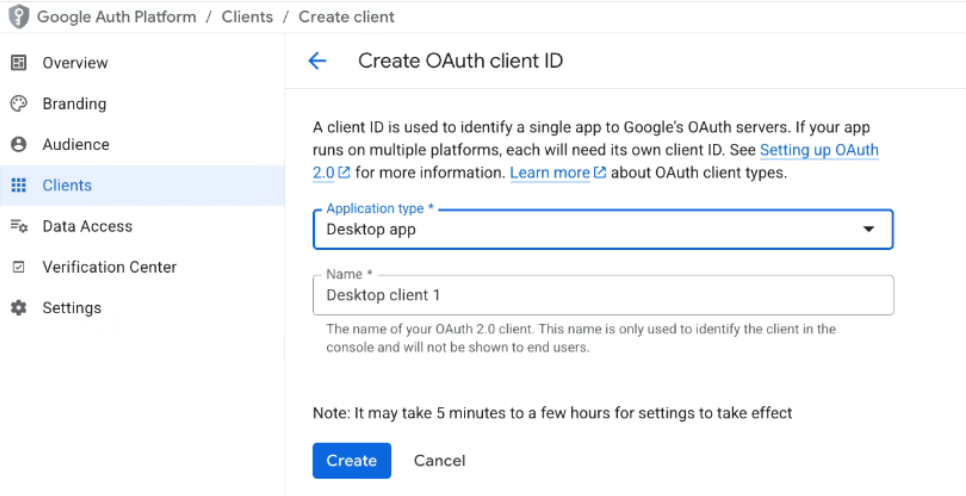
On the Create OAuth Client ID page, do the following:
-
For Application type, select Desktop App.
-
Enter a Name, such as "lr-gsbeat."
-
Click Create.
-
-
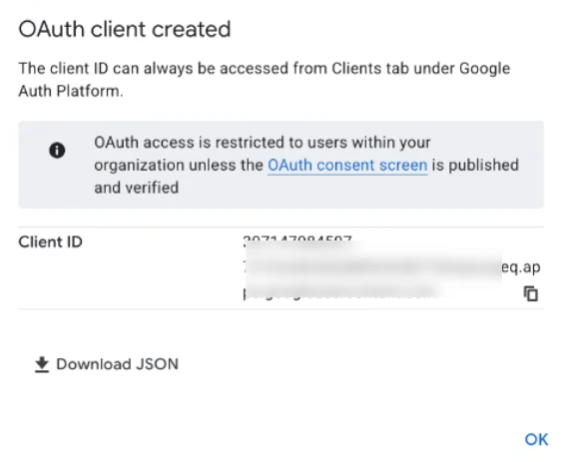
The OAuth client window appears with your client ID.
Copy the Client ID and paste it into a text editor. This will be used to configure the app in the workspace admin portal. -
Click the Download JSON button.
These credentials are required to Initialize the Google Workspace Beat.
-
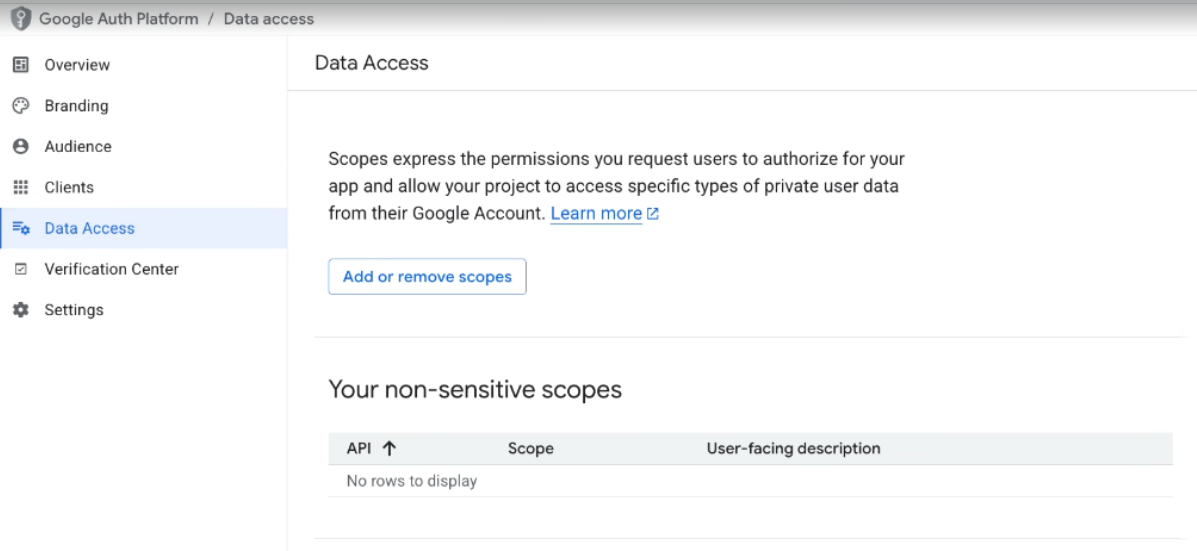
On the left-hand side, click Data Access.
-
Click Add or Remove Scopes.
-
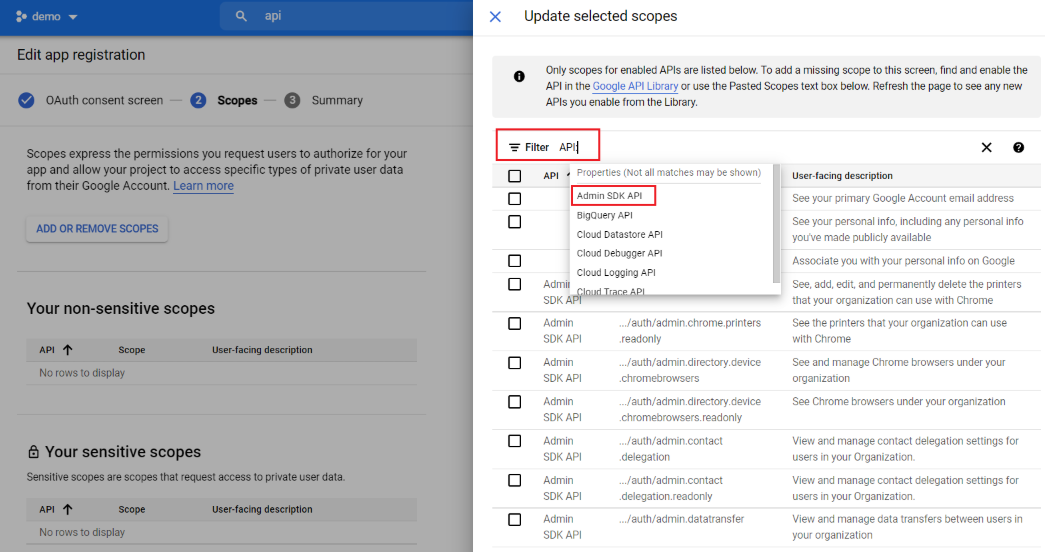
Click on the Filter field, type and then select API, and then select Admin SDK API from the drop-down.
-
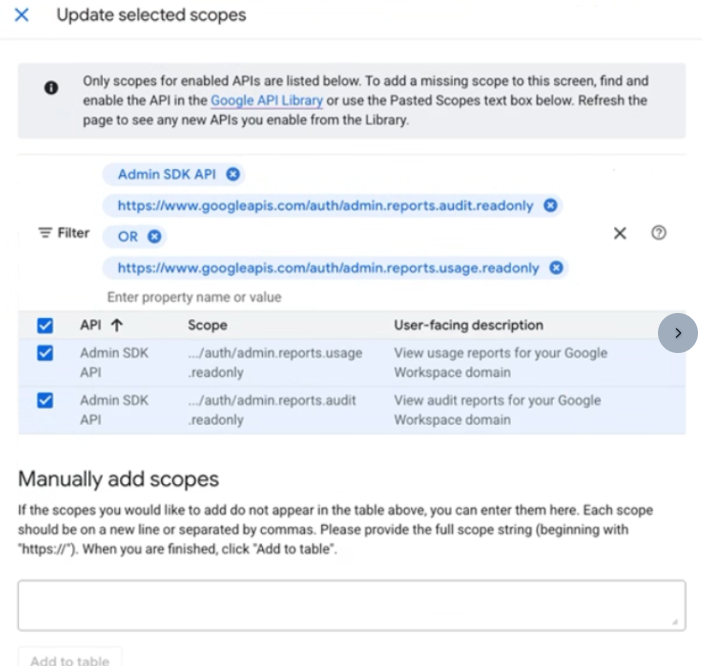
Click on the Filter field again, type and then select Reports, and select both of the APIs listed below:
-
Click Update.
-
Click Save and Continue.
Enable API Access
-
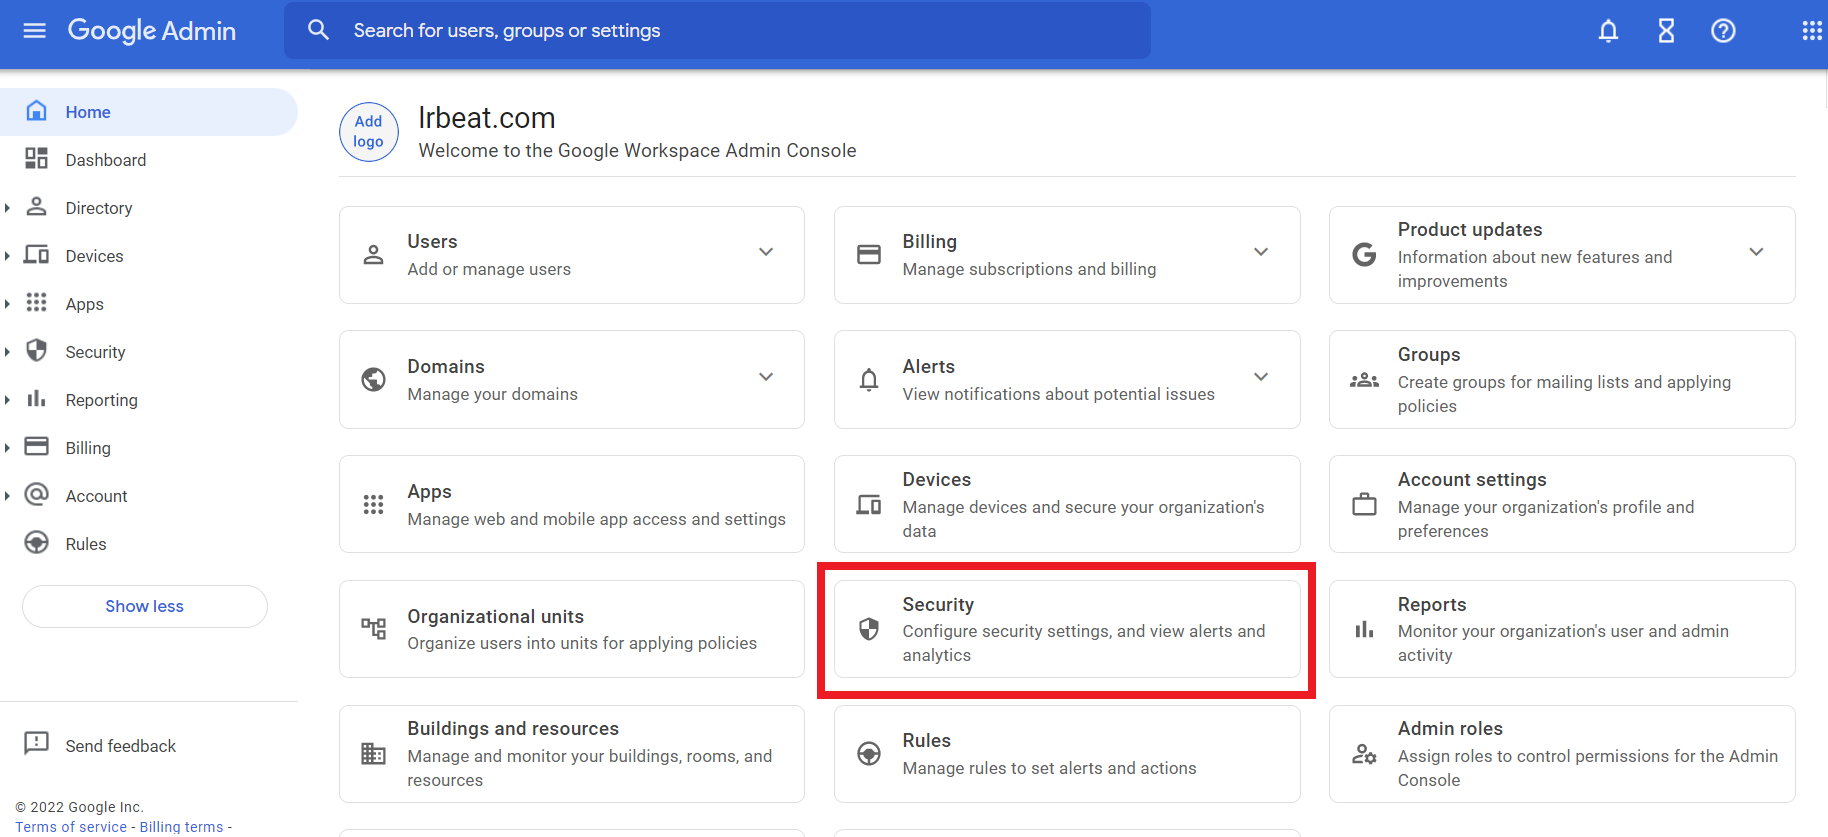
Open the Google Admin console: https://accounts.google.com/o/oauth2/auth?.
You need to be logged in as a Super Admin to perform these actions.
-
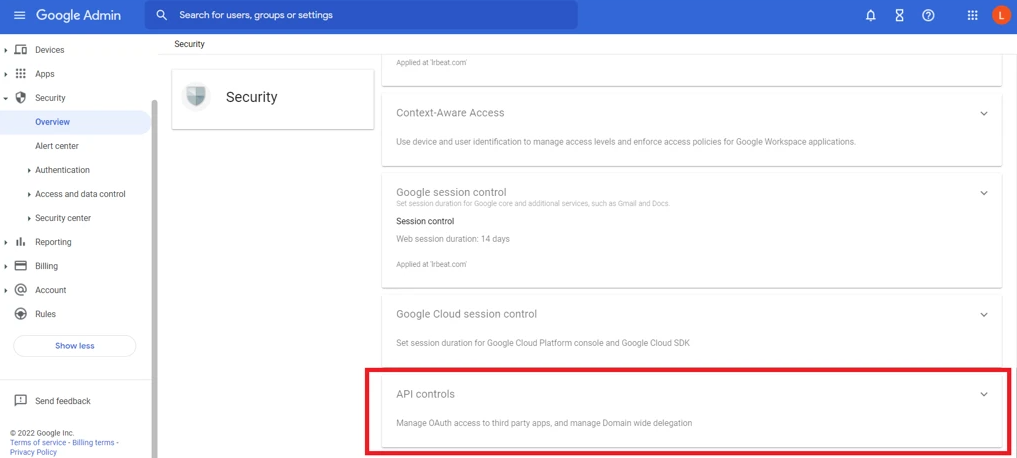
On the home page, click Security.
-
Click API Controls.
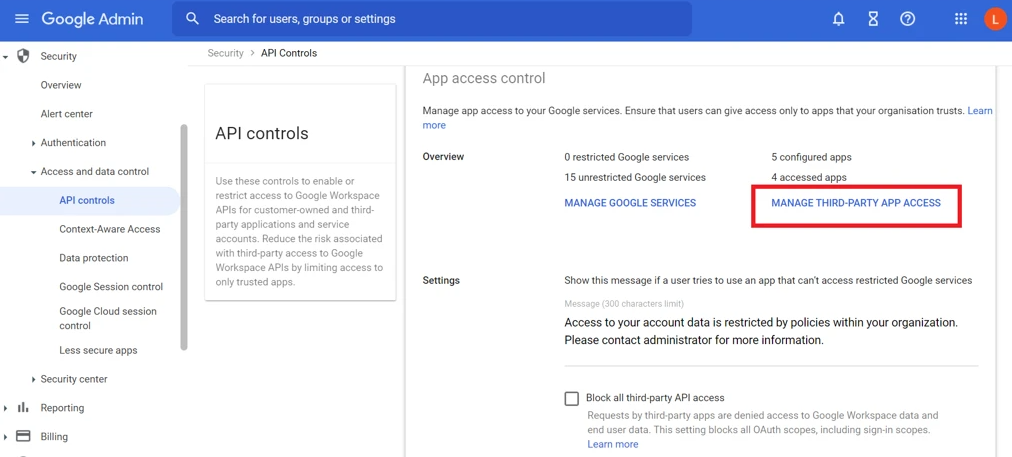
-
Click Manage Third-Party App Access.
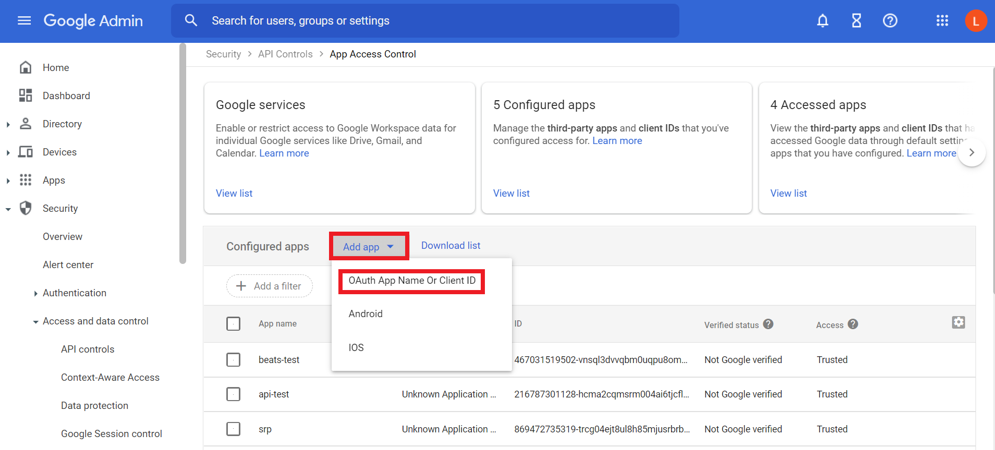
-
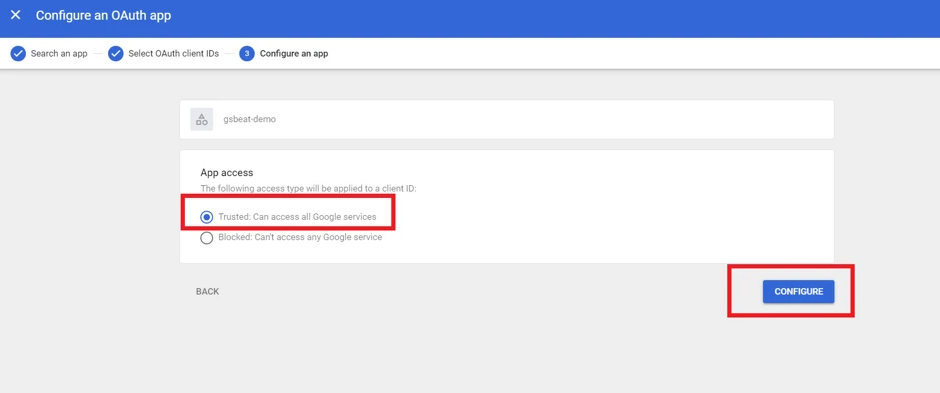
Click on Add app, and select OAuth App Name or Client ID.
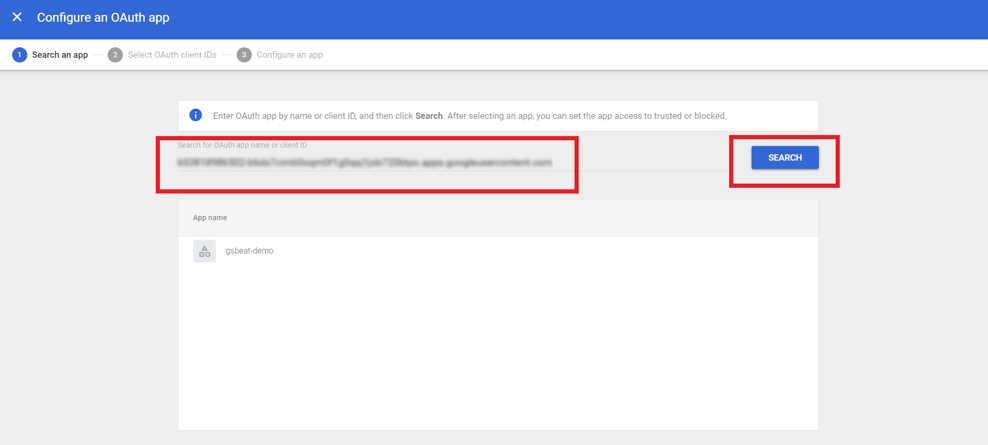
-
Paste the Client ID copied in the Create Credentials section, and click Search.
-
Select OAuth Client ID and the client ID you pasted, then click Select.

-
Select the Trusted: Can access all Google services option, and then click Configure.
-
Your app is configured to be used, and you can now Initialize the Google Workspace Beat.
(Optional.) Domain-Wide Delegation Using a Service Account
In certain situations (for example, when using the Elastic Fleet or Filebeat Google Workspace Module), it may be required to use a service account instead of OAuth verification.
In this situation:
-
Create a Service Account in the Google Workspace Console.
-
Enable Domain-wide Delegation on the service account.
-
Click Security, and then click API Controls.
-
Add the Client ID and OAuth Scopes.
Complete instructions for this process can be found in the Google Workspace Documentation.