
Manage Cases
All case management post-creation is handled using the Case Details screen. Here, you can change the severity and status of the case as it progresses, add collaborators to the case, and add comments and relevant links to the case for posterity.
To view the Case Details for any case, click the name of the case in the Case List.
Case Details
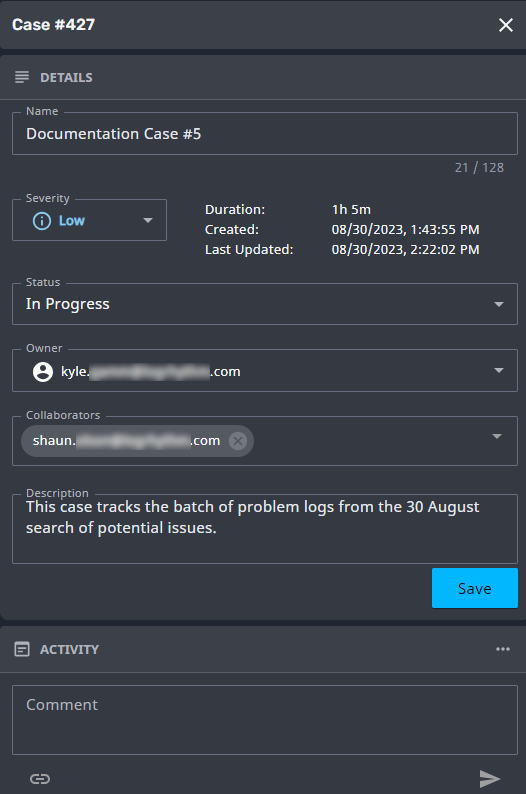
The Case Details screen opens as a panel on the right-hand side of the Case List. This screen can be used to get at-a-glance information about a case, as well as to progress a case through its life cycle.
The top of the Case Details screen shows the Axon-generated Case ID. Click the X at the top-right to close the Case Details screen.
The following fields are available on the Case Details screen. For information on changing or modifying any of these details, click the field name in the left-hand column or see the Modify the Details of an Existing Case and Case Activity Log sections below.
Field | Description |
|---|---|
Displays the name given to the case. | |
Displays the current severity/priority of the case. | |
Duration | Displays the amount of time the case has been open. |
Created | Displays the date and time on which the case was created. |
Last Updated | Displays the date and time on which the case was last updated or modified. |
Displays the current status of the case. | |
Displays the case’s owner. Owners are sent email notifications regarding case updates. | |
Displays any collaborators who have been added to the case. Collaborators are sent email notifications regarding case updates. | |
Displays the detailed description of the case. | |
Displays the case log, showing all information regarding comments, status or severity changes, log additions, etc. |
Modify the Details of an Existing Case
To make a change to the case details, modify the case as desired, and then click the Save button. The changed will be saved and the Last Updated date and time will update.
See the sections below for more information on modifying a case’s details.
Change the Name or Description of a Case
To modify a case’s name or description, from the Case Details screen:
Make changes to the Name and/or Description fields as desired.
Click Save at the bottom of the Case Details screen.
The case is saved successfully.
Change the Severity or Status of a Case
To modify a case’s severity and/or status, from the Case Details screen:
Open the Severity drop-list and select one of the following options:
Option | Description |
|---|---|
None | Select to assign no severity to the case. |
Low | Select to give the case low priority. |
Medium | Select to give the case moderate or normal priority. |
High | Select to give the case high priority. |
Critical | Select to give the case critical (the highest possible) priority. |
Open the Status drop-list and select one of the following options:
Option | Description |
|---|---|
New | Select to signify that this is a new case on which work has not yet begun. |
In Progress | Select to signify that this case is currently being worked. |
Waiting | Select to signify that this case is waiting on more information, more logs, direction from management, etc. |
Closed - False Positive | Select to signify that this case has been closed and marked as a false positive - after research, it was determined that the attached logs did not pose a threat. |
Closed - No Action | Select to signify that this case has been closed and no further action will be taken, or no action is currently required. |
Closed - Resolved | Select to signify that this case has been closed and the issue presented by the case has been fully resolved. |
Click Save at the bottom of the Case Details screen.
The case is saved successfully.
Change the Owner of a Case or Add Collaborators to a Case
To change a case’s owner and/or to add collaborators to a case, from the Case Details screen:
Open the Owner drop-list and select the email address of the Axon user to own this case.
Open the Collaborators drop-list and check the email address(es) of the Axon user(s) to be added as case collaborators.
Click the X next to a collaborator’s name to remove them from the case.
Click Save at the bottom of the Case Details screen.
The case is saved successfully.
The new owner and any new collaborators will receive an email notifying them of the case once it is saved.
Each case can only have a single owner, but as many collaborators as necessary.
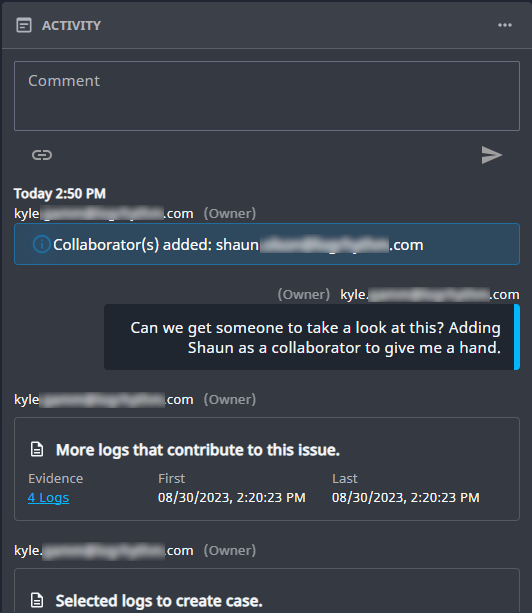
Case Activity Log
The Activity Log shows each time the case is updated or modified in some way, including changes to owners, collaborators, and statuses, as well as each time new logs are added to the case. Additionally, you can use the Activity Log to make comments about the case, or add links that may be helpful to the resolution of the case.
Add Comments or Links to an Existing Case
To add a comment and/or link to a case, from the Case Details Activity Log:
Click in the Comment field and type either information related to the case, or a description of the link to be provided.
(Optional.) Click the link icon under the Comment field.
Enter the name of the website or location of the link.
Paste the URL or path to the file.
Click Add.
Click the Send arrow.
The comment and/or link are posted successfully.
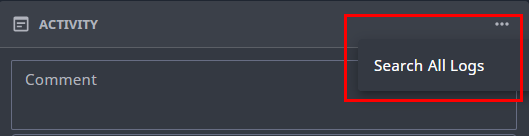
Manage Case Logs
Logs that are added to a case are saved and tracked in the Activity Log. To view a complete listing of all logs associated with the current case, click the three-dot menu at the top of the Activity Log, and select Search All Logs.
Add New Logs to an Existing Case
To add a new batch of logs to an existing case:
Execute a Search as normal.
In the left-hand column of the search results, check each log to be added to the case.
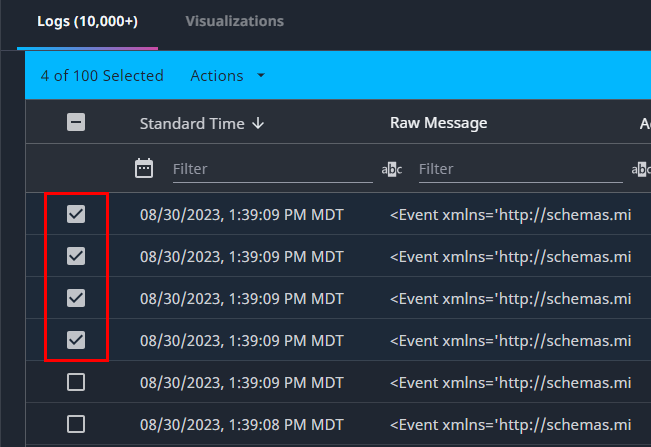
In the blue bar at the top of the search results, click Actions.
Click Add to Existing Case.
The Add to Existing Case pop-up appears.Open the Search cases drop-list and select the name of the case to which the logs should be added.
To narrow the results in the drop-list, begin typing a case’s name, ID, or description.In the Log Group Description field, enter a short explanation of why these logs are being added to the case.
Click Add.
The logs are successfully added to the case.
Logs can also be added to a case through the triggering of an Analytics Rule. Rules with case creation enabled can either create new cases, or update existing cases to add additional logs.
To determine whether Axon creates a new case or updates an existing case when a rule that has case creation enabled fires, Axon considers the following:
Are there any cases with an Open status that were created by the same rule firing?
If yes, Axon evaluates the “group by” fields of the rule.
If all of the “group by” fields match exactly, then the triggering logs are added to the existing open case.
If the “group by” fields do not exactly match, then a new case is created and the triggering logs are added to that new case.
View or Modify Case Logs
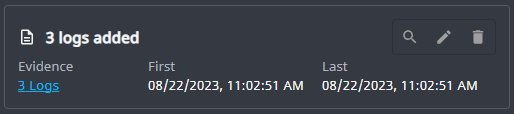
Each new addition of logs to a case is tracked in the Activity Log. These log entries have additional options that other Activity Log entries do not.
Use any of the following options to manage logs added to a case:
Option | Description |
|---|---|
Evidence | Under the Evidence header is a link displaying the number of logs added to the case for the entry. Click this link to open a panel containing just these logs. Refer to the Case Search Panel section below for more information on the search panel. |
Search | Click the Search icon to open a panel containing just the logs from this entry. Refer to the Case Search Panel section below for more information on the search panel. |
Edit | Click the Edit icon to change the description of the log entry. Click Save when finished. |
Delete | Click the Delete icon to remove the selected log entry from the case’s Activity Log. To verify the action, click Yes, Delete. |
Case Search Panel
Logs can be examined directly from a case’s details, without having to leave the Case Management screen or open a new search page. Click the link displaying the number of logs added in an entry or the Search icon to open a fly-out panel displaying basic information about the logs added as part of that entry.
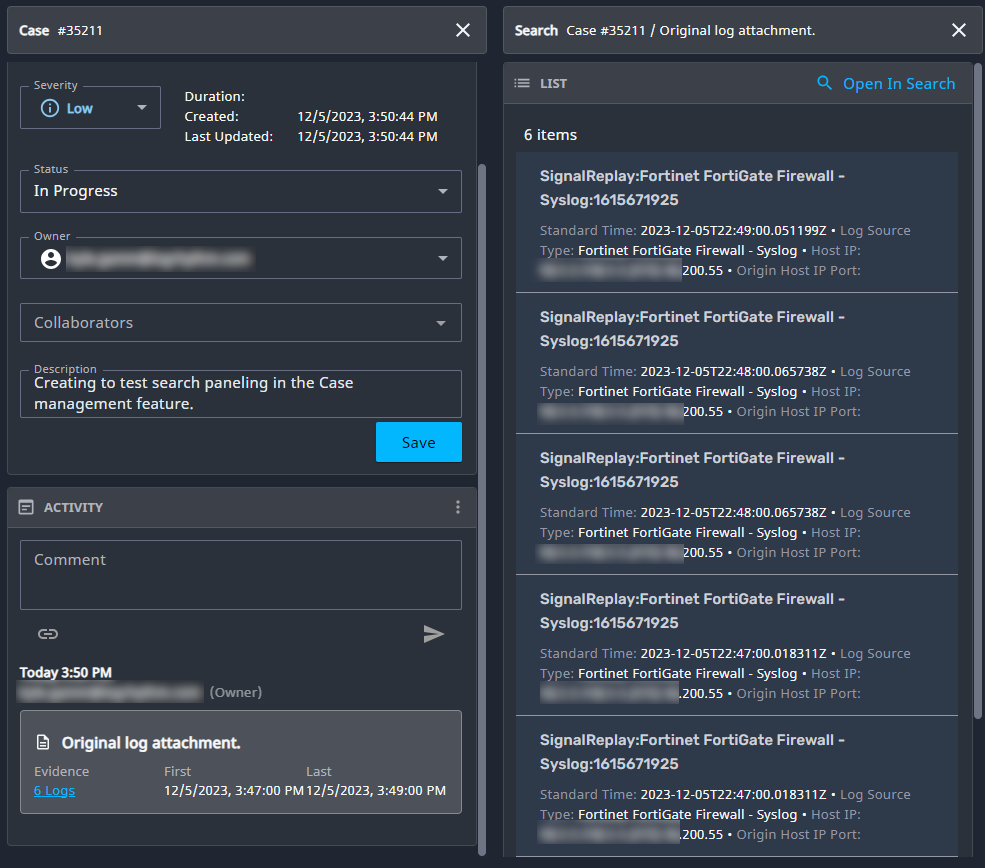
The information displayed can vary based on the log’s contents, but generally the time at which the log was collected, the log source type, and the Host IP are displayed for each log.
Clicking on one of the logs in the panel opens another panel to the right displaying the Inspector information for that log.
The only action available for each line in the Inspector panel is Copy Value.
To open a new search window containing just these logs, click Open in Search at the top-right of the panel.