
Case List
The Case List contains a record of every case opened within Axon. This list can be searched and filtered to provide the case data that is most relevant to you.
All cases and their activity are visible to all Axon users. Cases cannot be restricted to only certain users.
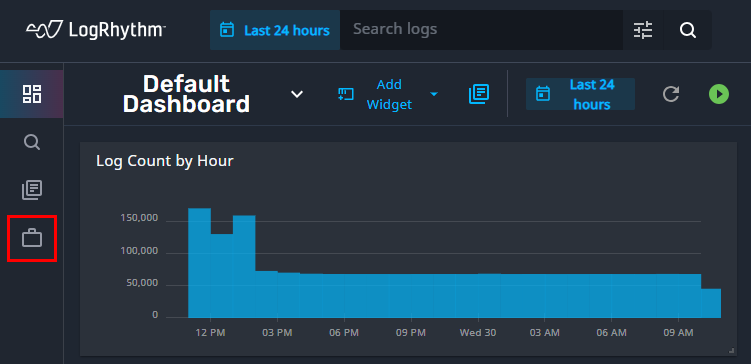
To view the Case List, click the briefcase icon in the left-hand panel.
View Cases
By default, the Case List shows only the 40 most recently created cases. If there are more than 40 cases in your Axon database, scrolling to the bottom of the list will load the next 40 cases until all cases are shown.
To view more information about a single case, click on the name of the case in the list. For more information about the Case Details page, see Manage Cases.
Case List Columns
The following columns display data about each case in the Case List. Optionally, click the column name to sort the list by that metric.
Column | Description | |
|---|---|---|
Priority | Displays the case’s current Severity. The severity is initially assigned during case creation, but can be changed as the case is worked. There are five possible options, and the meaning of these priorities can be determined by your business need. The five priorities and their intended definitions are as follows: | |
None | No severity was selected during case creation. | |
Low | This case has low priority. | |
Medium | This case has moderate or normal priority. | |
High | This case has high priority. | |
Critical | This case is critical and has the highest possible priority. | |
Name | Displays the name given to each case upon creation in bold text. Below the name, in lighter text, the internal Case ID (which is automatically assigned by Axon and cannot be changed) and the description provided upon case creation are displayed. | |
Status | Displays the current status of the case. The status is initially assigned during case creation, but can be changed as the case is worked. There are six possible options, and the meaning of these statuses can be determined by your business need. The six statuses and their intended definitions are as follows: | |
New | This is a new case on which work has not yet begun. | |
In Progress | This case is currently being worked. | |
Waiting | This case is waiting on more information, more logs, direction from management, etc. | |
Closed - False Positive | This case has been closed and marked as a false positive - after research, it was determined that the attached logs did not pose a threat. | |
Closed - No Action | This case has been closed and no further action will be taken, or no action is currently required. | |
Closed - Resolved | This case has been closed and the issue presented by the case has been fully resolved. | |
Owner | Displays the emails address of the Axon user who is responsible for this case. The owner is initially assigned during case creation, but can be changed as the case is worked. | |
Created | Displays the date and time on which the case was originally created. | |
Last Updated | Displays the date and time on which the case was most recently updated. | |
Case List Metrics
At the top of the Case List, you can find quick, at-a-glance information about the cases open in your Axon environment.
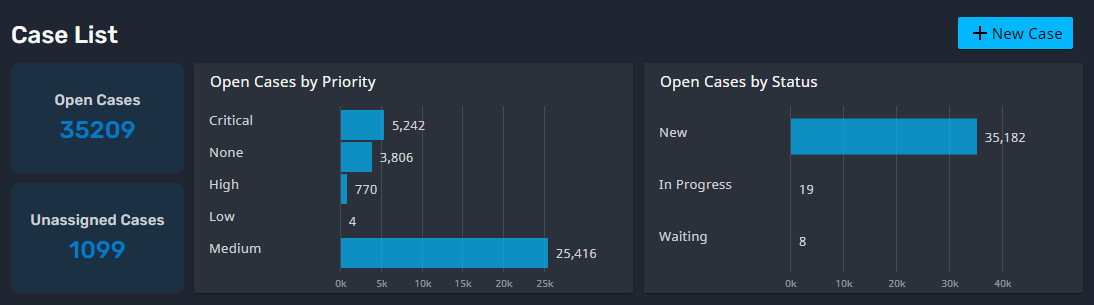
The following four metrics are available:
Metric/Table | Description |
|---|---|
Open Cases | Displays the number of cases that have a status other than Closed. This includes New, In Progress, and Waiting cases. |
Unassigned Cases | Displays the number of cases that do not have an Owner. |
Open Cases by Priority | Displays a bar chart showing the number of open cases with each priority - Critical, High, Medium, Low, and None. |
Open Cases by Status | Displays a bar chart showing the number of open cases with each non-closed status - New, In Progress, and Waiting. |
Search & Filter Cases
From the Case List, you can search for specific cases or use filters to only show cases that meet certain criteria.
Search for Cases
To search for a case:
Click within the Search cases by name, ID, or description field at the top of the case list.
Begin typing a case name, internal Axon ID, or description.
As you type, the Case List updates to show results that meet your search criteria.
Filter Cases
The Case List can be filtered by the following three columns:
Column | Description |
|---|---|
Priority | Click the Filter field in the Priority column to open a list of the five severity types. Click one of the severity options to filter the list to only show cases of the selected severity. |
Status | Click the Filter field in the Status column to open a list of the six statuses. Click one of the statuses to filter the list to only show cases of the selected status. |
Owner | Click the Filter field in the Owner column to open a list of all Axon user email addresses. Click one of the email addresses (or Unassigned) to filter the list to only show cases owned by the selected user. |
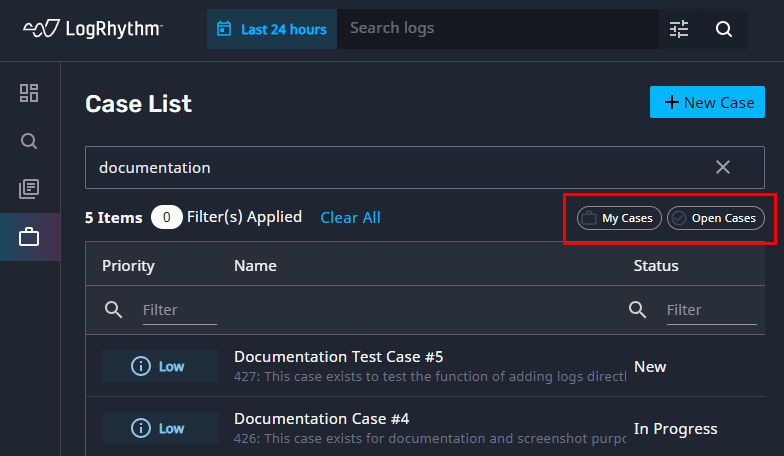
There are also two preset options that can be used to filter the Case List, located at the top-right of the window.
Option | Description |
|---|---|
My Cases | Click to only show cases that list you as an Owner or Collaborator. |
Open Cases | Click to exclude from the list any cases that have one of the three “Closed” statuses. |
Modify Multiple Cases
Cases can be edited in a batch using the far-left column in the Case List. Check each case to be edited, as shown in this example:
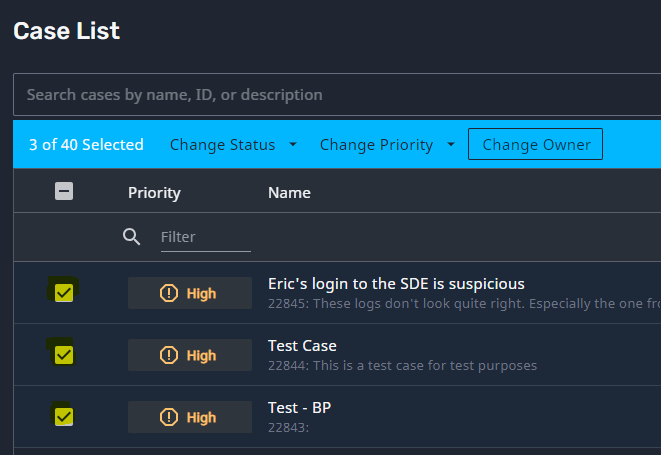
To select all displayed cases at once, click the box at the top of the far-left column. To deselect all displayed cases at once, click the box again.
Once the desired cases have been selected, choose one of the following options from the blue bar at the top of the Case List to make changes to all of the selected cases:
Option | Description |
|---|---|
Change Status | Open the drop-list and select a status to update each selected case to that status. Optionally, enter a comment in the Change Status window. This comment is saved to the Case Details for each case. When finished, click Confirm. Refer to the Case List Columns section above for more information on case statuses. |
Change Priority | Open the drop-list and select a priority to update each selected case to that priority. Optionally, enter a comment in the Change Priority window. This comment is saved to the Case Details for each case. When finished, click Confirm. Refer to the Case List Columns section above for more information on case priorities. |
Change Owner | Click to open the Change Owner window. Open the drop-list and select an owner to update each selected case to that owner. Alternatively, click Assign to Me to assign all selected cases to yourself. Optionally, enter a comment about the ownership change. This comment is saved to the Case Details for each case. When finished, click Confirm. |
Add New Case from Case List
To add a new case from within the Case List, click the New Case button at the top-right of the screen.
For more information on creating new cases, see Add New Case.