This section provides instructions for configuring the AWS S3 log source in the LogRhythm SIEM using the log source virtualization template.
The Open Collector sends the output of every Beat to the Agent in a single syslog stream. The parent log source is a generic type: "Syslog - Open Collector." A log source virtualization template included with the LogRhythm Knowledge Base (KB) creates child log sources for each beat.
Prerequisites
-
LogRhythm Client Console
-
LogRhythm Administrator Account
-
Open the following port:
Direction
Port
Protocol
Source
Purpose
Outbound
443
HTTPS
AWSS3 Beat
Used by AWS SDK for Go to make https calls to get sqs queue events and to download bucket data
Step 1: Configure Syslog Relay
This step explains how to configure the Syslog Relay. The Open Collector needs Syslog Relay for the following reasons:
-
By default, the agent timestamps syslog messages as they come in. The timestamp in the SIEM should reflect when the log was generated, not when the agent received this log.
-
An additional Syslog Relay Regular Expression is required to correctly extract the timestamp.
Beats configured using the JSON parsing method should use the regex relay outlined in the Configure Beats for JSON Parsing topic and skip this step.
To configure Syslog Relay:
-
Click the System Monitors tab.
-
Double-click the agent to which you will send the Open Collector syslog.
-
Click the Syslog and Flow Settings tab.
-
Select the Enable Syslog Server check box, if it is not already selected.
-
Type the Open Collector IP Address in the Syslog Relay Hosts field on the left.
-
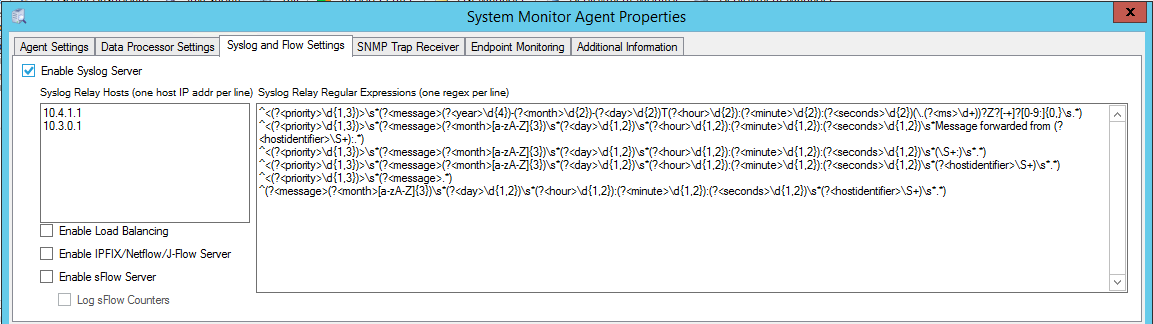
Type the following regular expression as the first line in Syslog Relay Regular Expressions:
^<(?<priority>\d{1,3})>\s*(?<message>(?<year>\d{4})-(?<month>\d{2})-(?<day>\d{2})T(?<hour>\d{2}):(?<minute>\d{2}):(?<seconds>\d{2})(\.(?<ms>\d+))?Z?[-+]?[0-9:]{0,}\s.*)
-
Click OK.
Here is an example of a configured Syslog Relay, where the Open Collector IP address is 10.3.0.1.
Step 2: Accept the Pending Log Source
After Open Collector logs are sent to the Windows System Monitor Agent, you need to accept the pending log source.
-
Click the Log Sources tab.
-
In the New Log Sources grid, select the Action check boxes for the following:
-
Log Source Type. Syslog - Open Collector
Do not select the AWS-specific log source types yet. You will do that in a later step.
-
Log Processing Policy. LogRhythm Default
-
-
Right-click the selection, click Actions, and then click Accept.
-
Select one of the following:
-
Customize and change the following as needed:
-
Collection System Monitor Entity
-
Log Message Processing Settings
-
Log Data Management and Processing Settings
-
Silent Log Message Source Settings
-
-
Default to select customized defaults that were previously selected.
-
Select a default batch amount between 100 and 5000.
-
-
Click OK.
-
Click Refresh to see the newly accepted Log Source in the grid.
Step 3: Apply the Log Source Virtualization Template for AWS S3 Log Messages
Use the log source virtualization template included in the KB to create a log source specifically for AWS S3 logs.
-
Double-click the newly accepted Open Collector Log Source.
The Log Message Source Properties window appears. -
Click the Log Source Virtualization tab.
-
Select the Enable Virtualization check box.
-
Click Create Virtual Log Sources.
The Create Virtual Log Sources dialog box appears. -
In the Log Source Virtualization Template drop-down menu, right-click and select Uncheck All.
-
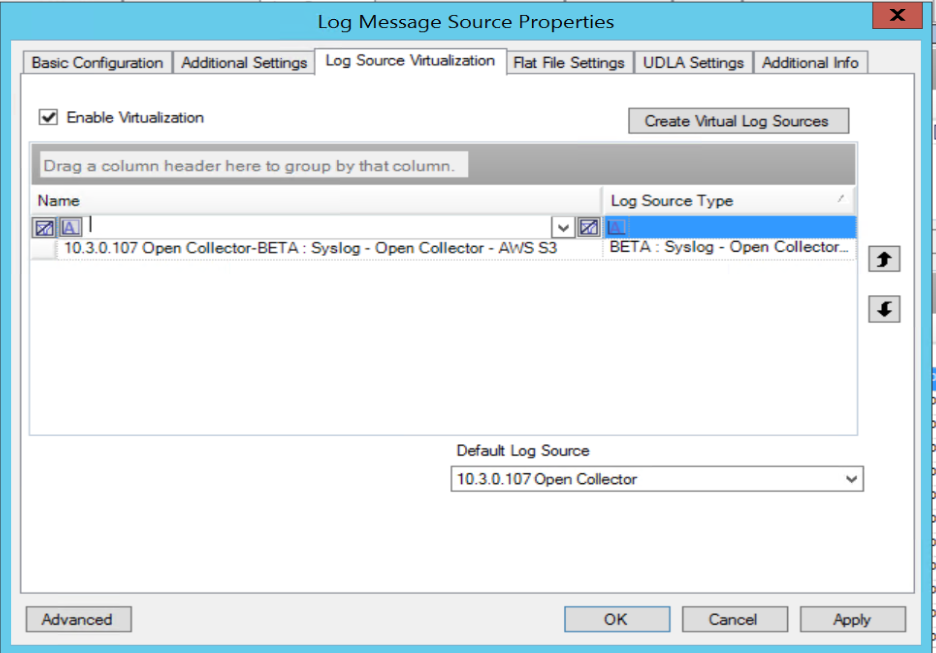
Select Open Collector - AWS S3.
This should be the only template checked.
-
Click Save.
The confirmation prompt appears. -
Click OK.
New Log Sources appear in the grid as children of your parent log source.

Step 4: Apply the Log Source Virtualization Template for AWS S3 Beat Heartbeat Messages
Use the log source virtualization template included in the KB to create a log source specifically for AWS S3 heartbeat logs.
This step is not required for beats configured using the JSON Parsing method that have had Long-Running LRCTL configured so that their heartbeat status can be monitored in the Beats Grid in the Web Console UI.
-
Double-click the newly accepted Open Collector Log Source.
The Log Message Source Properties window appears. -
Click the Log Source Virtualization tab.
-
Select the Enable Virtualization check box.
-
Click Create Virtual Log Sources.
The Create Virtual Log Sources dialog box appears. -
In the Log Source Virtualization Template menu, right-click and select Uncheck All.
-
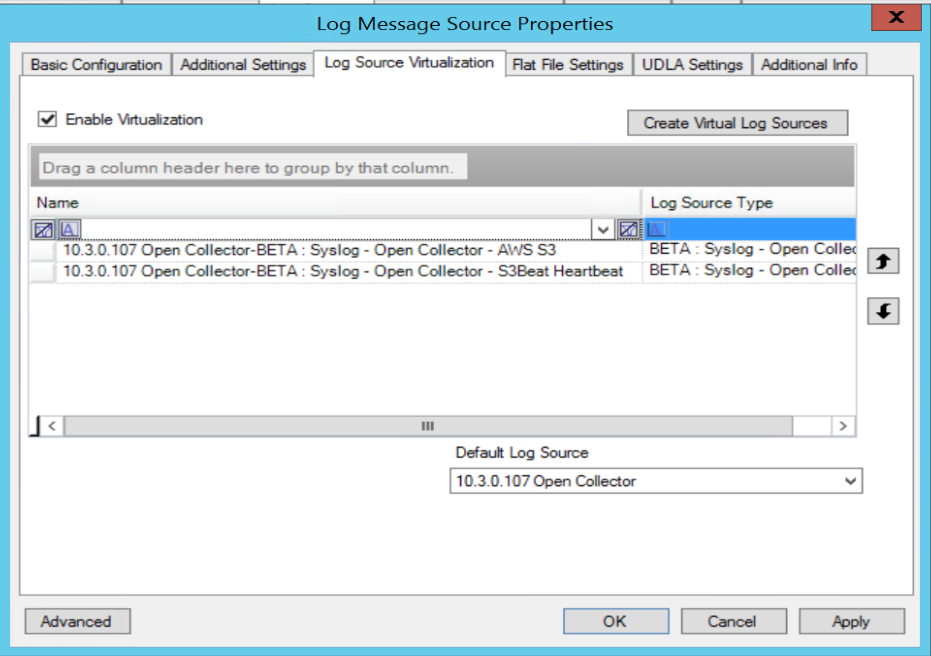
Select Open Collector - S3beat Heartbeat.
This should be the only template checked.
-
Click Save.
The confirmation prompt appears. -
Click OK.
New log sources appear in the grid as children of your parent log source.

Step 5: (Optional) Enable Silent Log Source Detection
Silent Log Source Detection tells you when one of your log sources has stopped reporting logs.
-
Double-click a child log source—for example, Syslog - Open Collector - AWS S3.
The Virtual Log Message Source Properties window appears. -
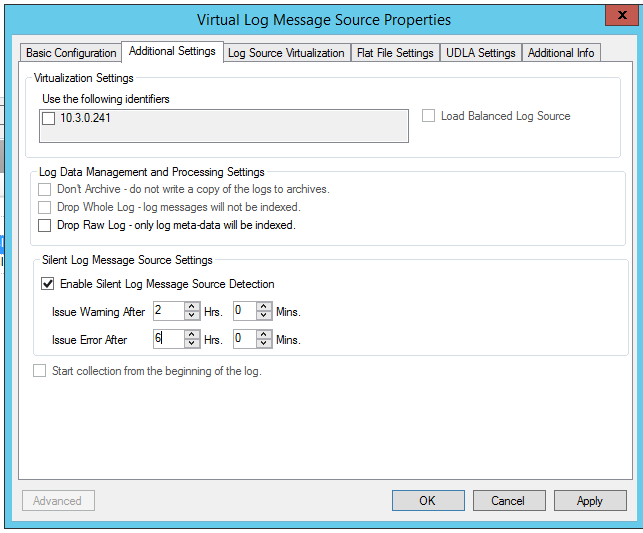
Go to the Additional Settings tab.
-
Select the Enable Silent Log Source Detection check box.
-
Configure warning and error intervals. LogRhythm recommends warning after 1 hour and error after 2 hours.
-
Click OK.
-
Go to the Alarm Rules tab.
-
Search for LogRhythm Silent Log Source Error and ensure that the value in the Status column is Enabled.
