Test Your Custom IPsec Policy on both Computers
Test Your Custom IPsec policy
In the left pane of the MMC console on both computers, select IP Security Policies on Local Machine.
The folder named IP Security Policies on Local Machine/Computer is nested within the Local Computer Policy tree. To find the folder, double-click Local Computer Policy, double-click Computer Configuration, double-click Windows Settings, and then double-click Security Settings.
The new security policy Partner appears.
In the left-side navigation pane of the MMC console on both computers, double-click IP Security Monitor. Double-click Quick Mode, and then click Security Associations.
In the left pane of the MMC console on ComputerA, select IP Security Policies on Local Machine.
The Partner policy you just configured is listed in the right pane.
Right-click Partner, and then click Assign. The status in the Policy Assigned column changes from No to Yes. Perform this step on both machines before continuing.
From both computers, open a command prompt window, and then type ping [partners-ip-address]. Press Enter to receive four successful replies.
At the MMC Console, check Security Associations under IP Security Monitor. Use the Refresh button from the MMC Console toolbar to see details of the Security Association currently in use between your two computers, as well as statistics on the number of Authenticated and Confidential bytes transmitted, among others.
Test data
- On both computers, in the left pane of the MMC console, select IP Security Policies on Local Machine.
The Partner policy you just configured is listed in the right pane. - Right-click Partner, and then click Un-Assign.
The status in the Policy Assigned column should change from Yes to No. Install Wireshark with defaults on both computers.
- Download link: https://www.wireshark.org/download.html
- Installation instructions: https://www.wireshark.org/docs/wsug_html_chunked/ChBuildInstallWinInstall.html
- Start Wireshark on ComputerA to capture all network traffic.
- Open a command prompt window, and then type ping [ComputerB-ip-address] -t.
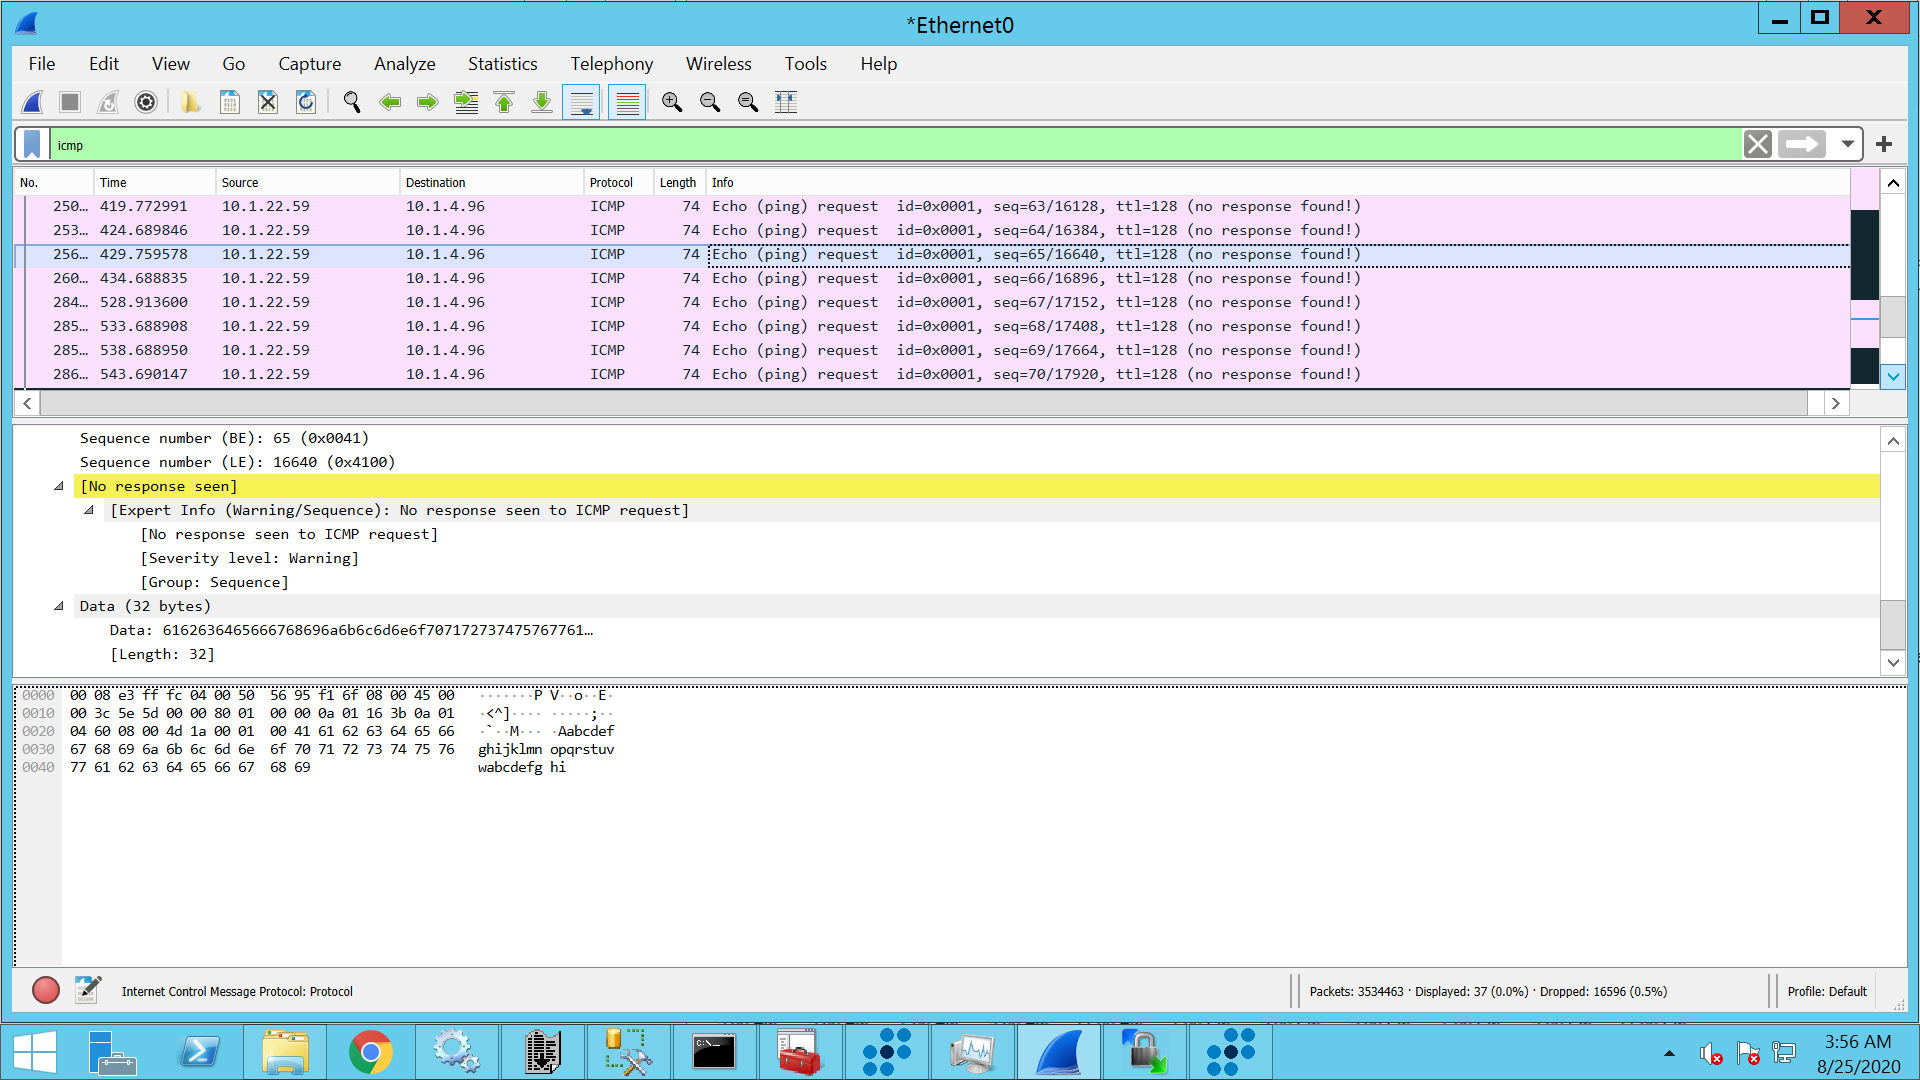
Go back to Wireshark, type icmp in the Filter text box, and then click Apply. Stop Wireshark live capture after some time by clicking the Stop button (red square) on the Wireshark toolbar. You should be able to see traffic as shown below.
- Repeat the same steps on ComputerB to see data being exchanged in cleartext format.
- On both computers, in the left pane of the MMC console, select IP Security Policies on Local Machine.
The Partner policy you just configured is listed in the right pane. - Right-click Partner, and then click Assign.
The status in the Policy Assigned column changes from No to Yes. - In Wireshark on ComputerA, click the Clear button next to the Filter text box to clear the icmp filter.
- In the Wireshark toolbar, click the green shark fin icon to start Wireshark live capture again.
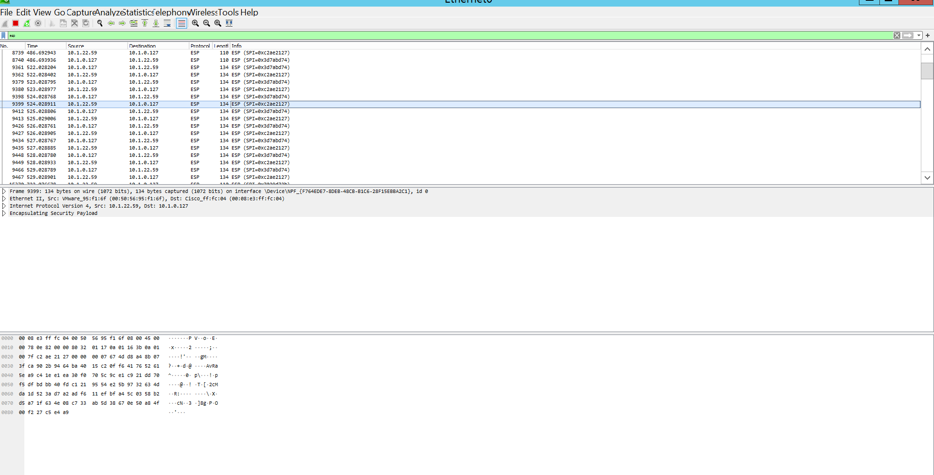
Type icmp in the Filter text box, and then click Apply. You should now be able to see traffic as shown below, where data is being exchanged in encrypted format.
In this document, open source IPsec implementation Libreswan is successfully compiled and installed on the Centos VM.

To check traffic on ESP protocol: