
Windows Installation Instructions
Add a Firewall Exception for Windows Agent Syslog Collection
If the installed agent will be used to collect syslogs, a firewall exception must be added using Windows Defender for the port's incoming traffic.
If the agent will not be used to collect syslogs, continue to the next section, Install the Axon Agent.
To add a firewall exception for a port:
- Open the Windows Start menu.
- Navigate to or search for Windows Defender Firewall.
- Click Advanced Settings in the menu on the left.
The Windows Defender Firewall with Advanced Security window appears. - Click Inbound Rules in the menu on the left, and then right-click on it.
- Click New Rule.
The New Inbound Rule Wizard appears. - Click Port, and then click Next.
- Select whether the port applies to UDP or TCP.
- Click Specific local ports, and then enter the port number in the field.
- Click Next.
- Click Allow the connection, and then click Next.
- Ensure all three options (Domain, Private, and Public) are selected, and then click Next.
- Enter a unique name for the rule, and, optionally, a description.
- Click Finish.
The firewall exception is created and allows for syslog collection over the configured port.
Install the Axon Agent
Please refer to the Port/Protocol/Process and Anti-virus Exclusions documentation before installation.
Once the Agent Package installer has been downloaded, install the Agent by doing the following:
- Move the Agent Package installer to the device on which collection will occur.
- Unzip the contents to the device's hard drive.
Double-click the Axon_Agent_Installer_vX.X.X.msi file.
The Axon Agent Setup window appears.vX.X.X represents the version of the Axon Agent you are installing.
Click Next through the window until the agent installs.
Your current user must have permissions to the C:\Windows\Temp directory, or the installation will fail. This is a requirement of the .MSI installer.
Click Finish once the installation is complete.
The Agent starts once the window is closed.Your newly installed Agent appears on the Agents page of Axon in the Active Agents tab.
To verify current running status, see Axon Agent Windows Troubleshooting Guide.
Uninstall the Axon Agent
Perform the following steps to uninstall a Windows Axon Agent.
- Retire the Agent being uninstalled in the LogRhythm Axon UI.
Refer to View and Modify Axon Agents for more information on retiring an Axon Agent. - Stop the "LogRhythm Axon Agent" service through the services.msc window.

Stopping the service is not required, however a restart may be required to complete uninstallation if the service is not stopped before uninstallation.
Open the Apps & features window, and select the Axon Agent from the list.

In some versions of Windows, this area is called the Add and Remove Programs window.
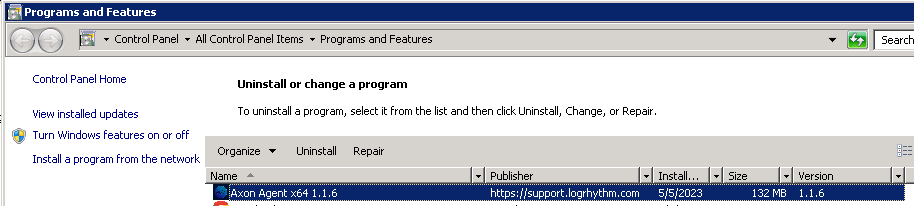
Click the Uninstall button.
Alternatively, the original LogRhythm Axon Agent installer .MSI may be run, and the Remove option can be selected. This is functionally the same as using the Uninstall option in Apps & features.

After uninstallation, verify that the LogRhythm Axon Agent service has been stopped. Also verify the C:\opt and C:\var folders have been deleted.
If the LogRhythm Axon Agent service is still present in the services list, a reboot of the OS is recommended. The service should be automatically removed after reboot.
If the C:\opt or C:\var folders are still present, a reboot of the OS is recommended. The folders should be automatically removed after reboot.