Configure Role-Based Access for an AWS EC2 Instance
This section provides instructions for configuring role-based access for an AWS EC2 instance on which the s3beats service runs. If you are deploying the Beat on-premise, this topic is not relevant to your implementation.
Understand Roles in an EC2 Instance
In the following example, a developer runs an S3 Beat application on an EC2 instance that requires access to the S3 bucket named s3-logs. An administrator creates the Get-Logs service role and attaches the role to the EC2 instance. The role includes a permissions policy that grants read-only access to the specified S3-logs bucket. It also includes a trust policy that allows the EC2 instance to assume the role and retrieve the temporary credentials. When the application runs on the instance, it uses the role's temporary credentials to access the S3-logs bucket. The administrator doesn't have to grant the developer permission to access the s3-logs bucket, and the developer never has to share or manage credentials.
.png?inst-v=246f6d72-69fd-473a-84fd-626cb4734e48)
Create a Permissions Policy on AWS
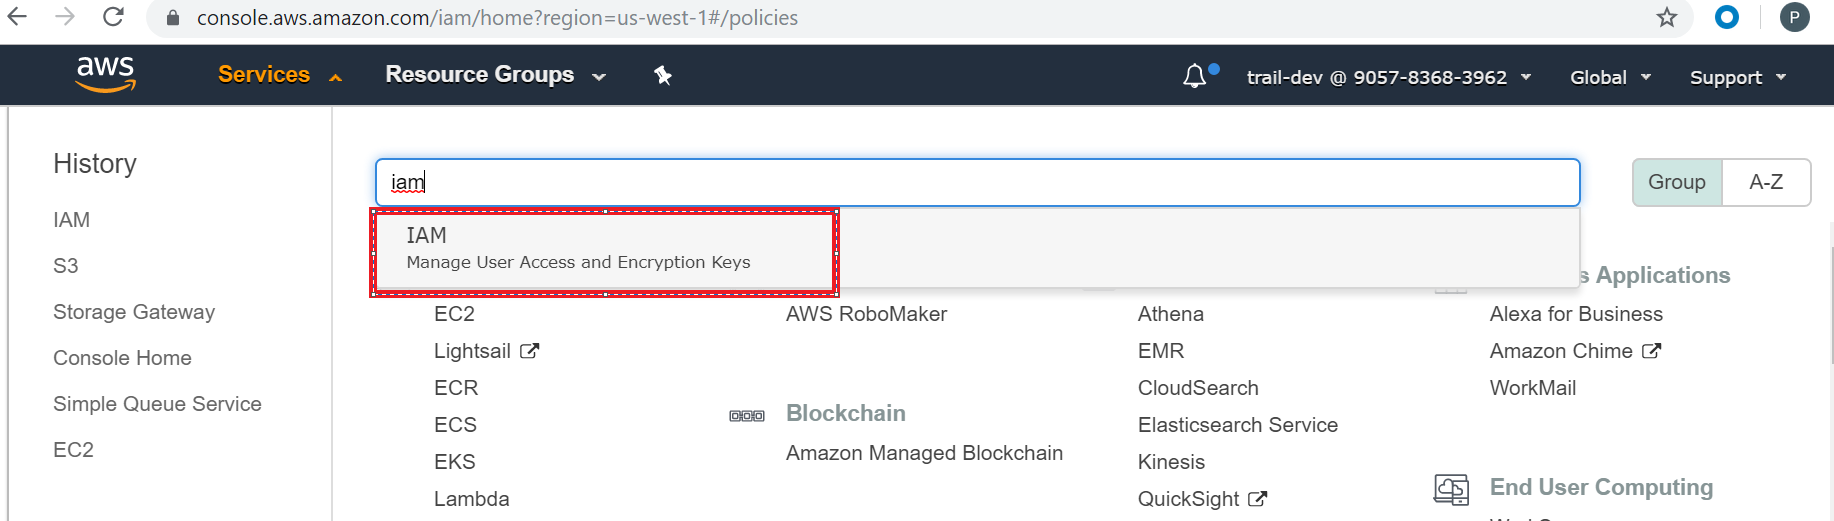
Log on to your AWS account.
On the menu bar at the top, click Services.
In the search bar, enter IAM, and then select IAM (Manage User Access and Encryption Keys) from the suggested search results.
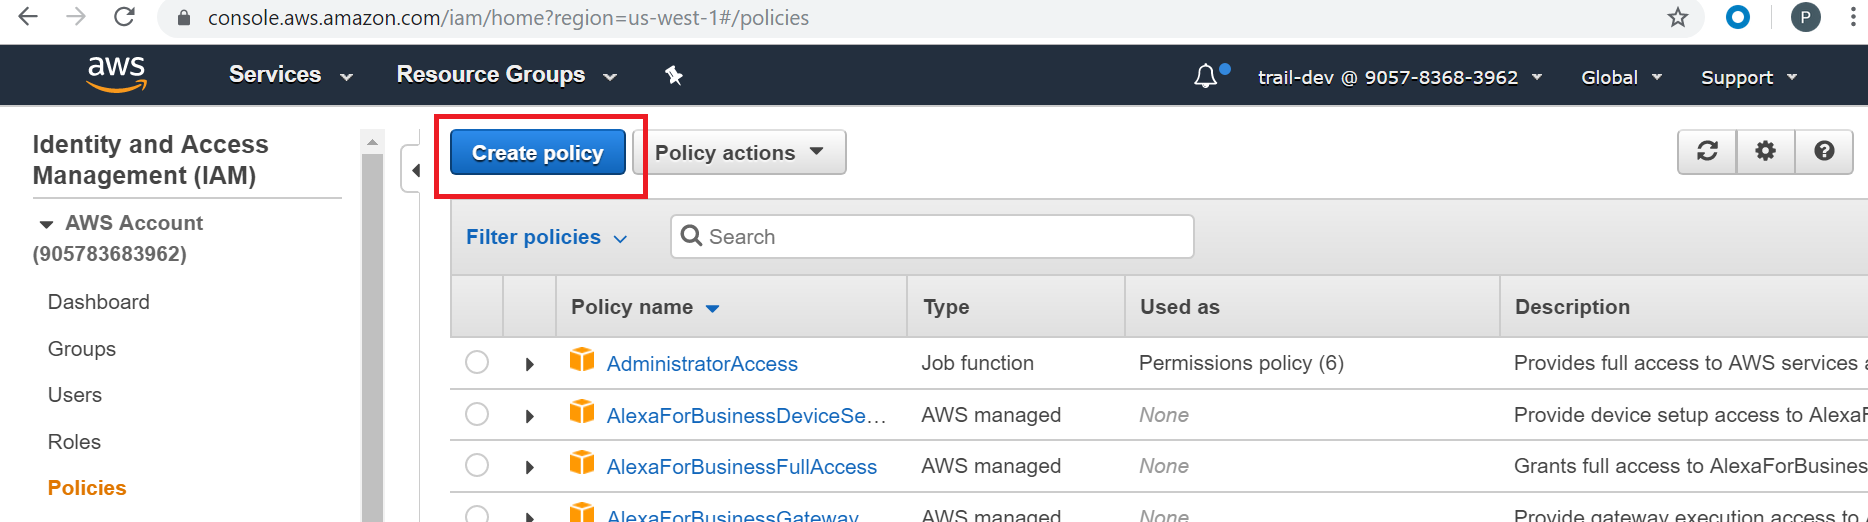
On the left-side menu, click Policies, and then click Create policy.
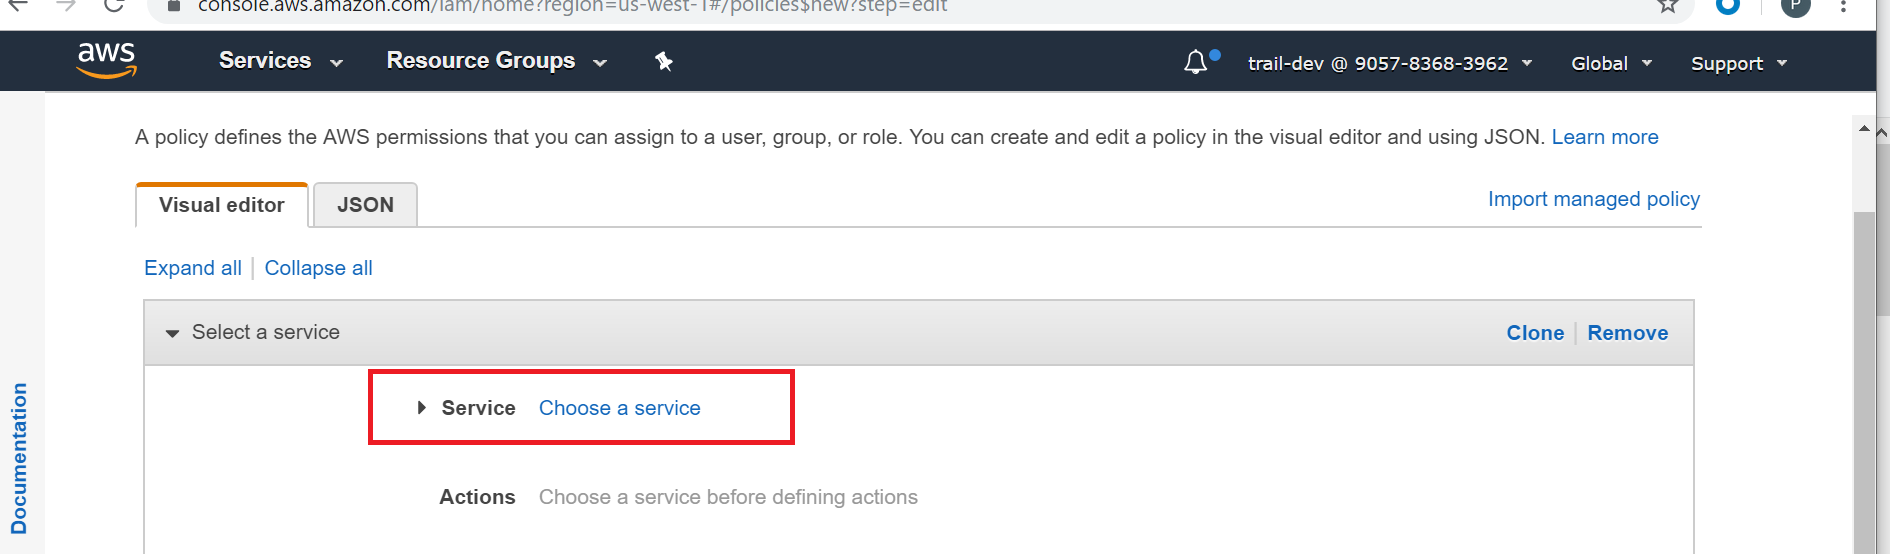
On the Visual editor tab, expand the Service section, and then click Choose a service.
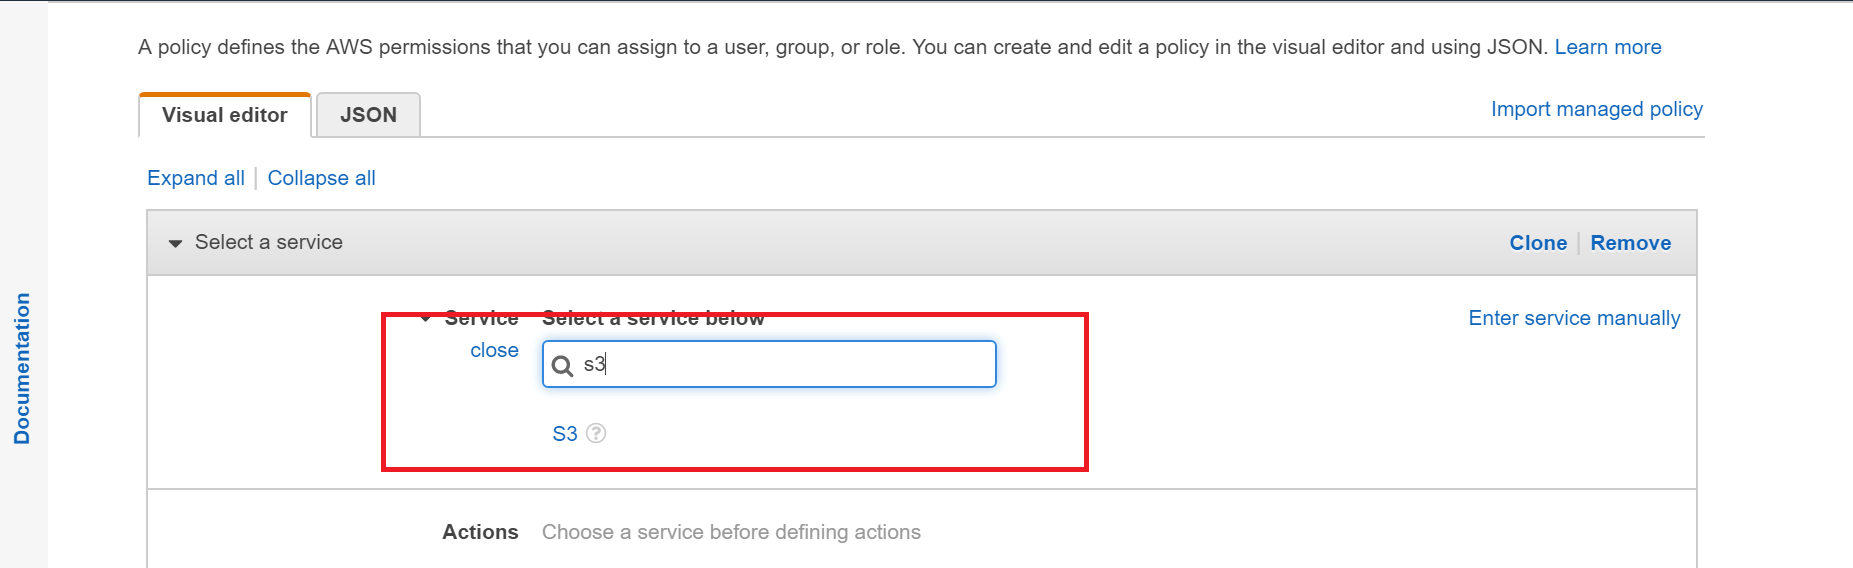
In the search bar, enter s3, and then select S3 service from the suggested search results.
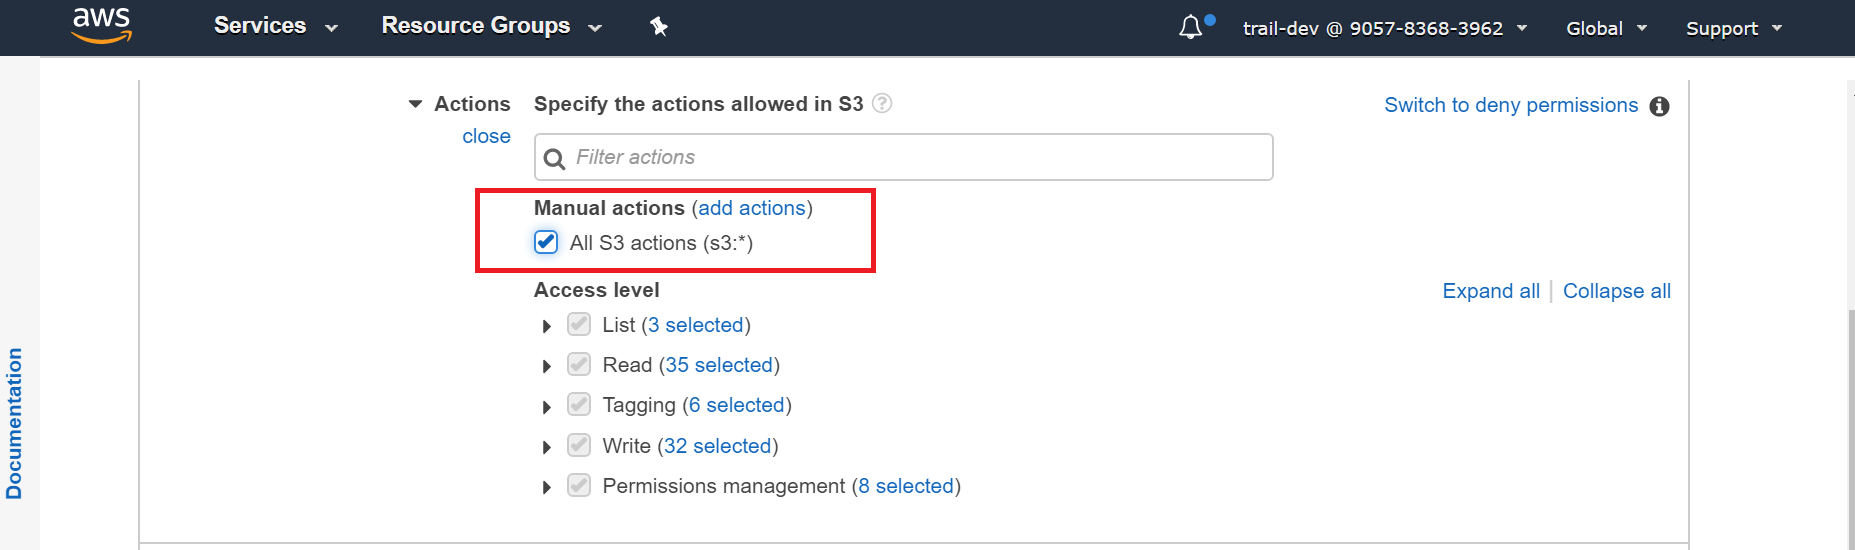
Expand the Actions section, and under Manual actions, select the All S3 actions(s3.*) checkbox.
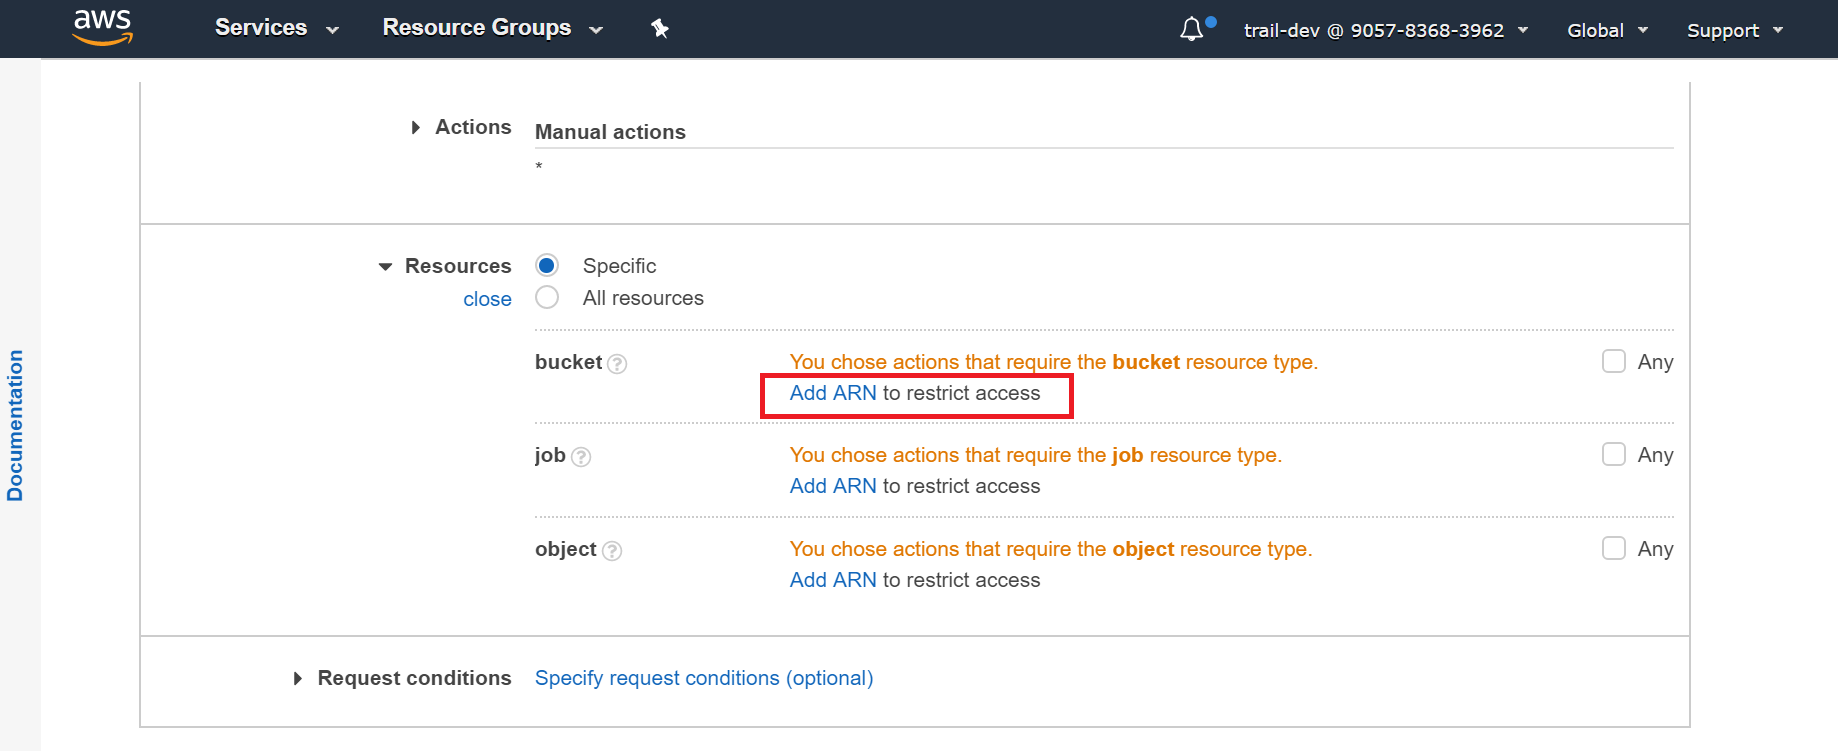
Expand the Resources section, and then complete the following:
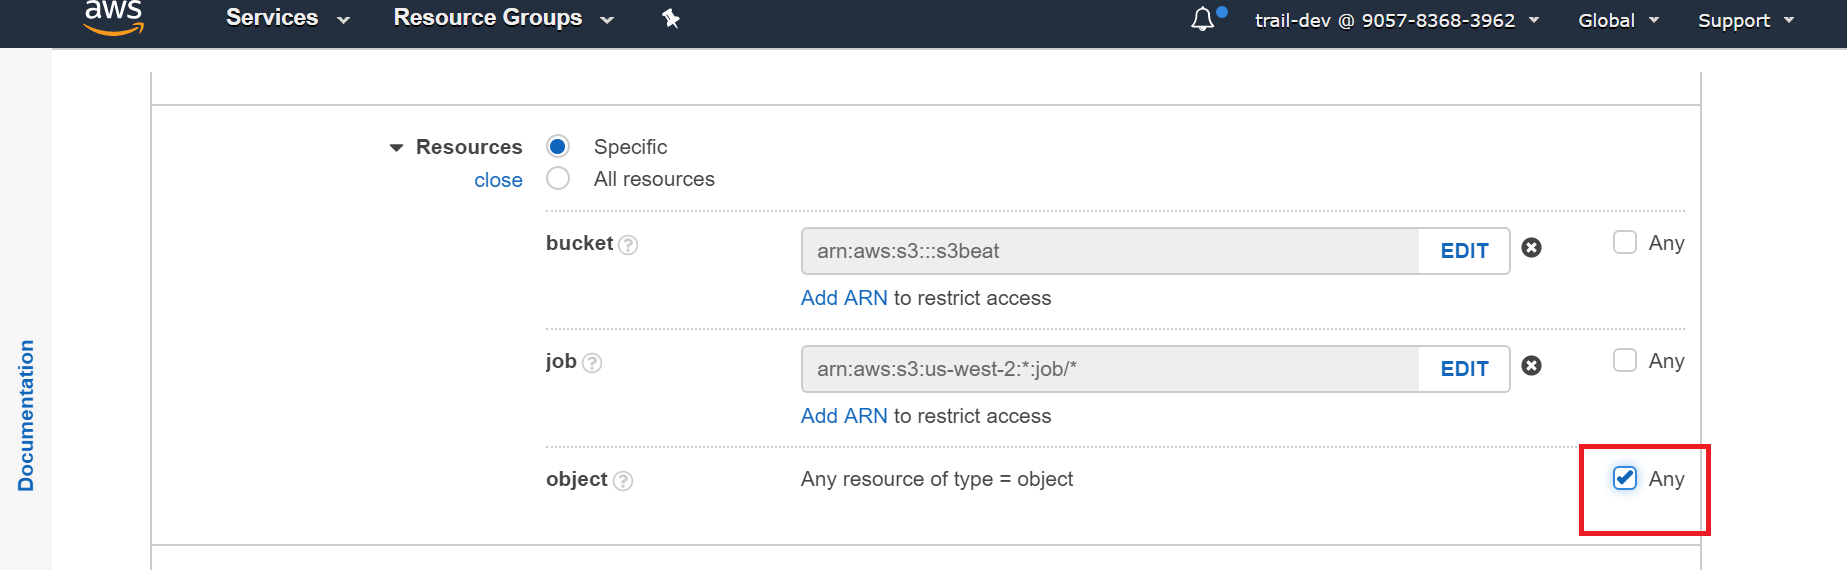
In the bucket section, click Add ARN to add the bucket resource that this policy needs to access. If you select the Any checkbox, the policy has permission to access all public bucket resources.
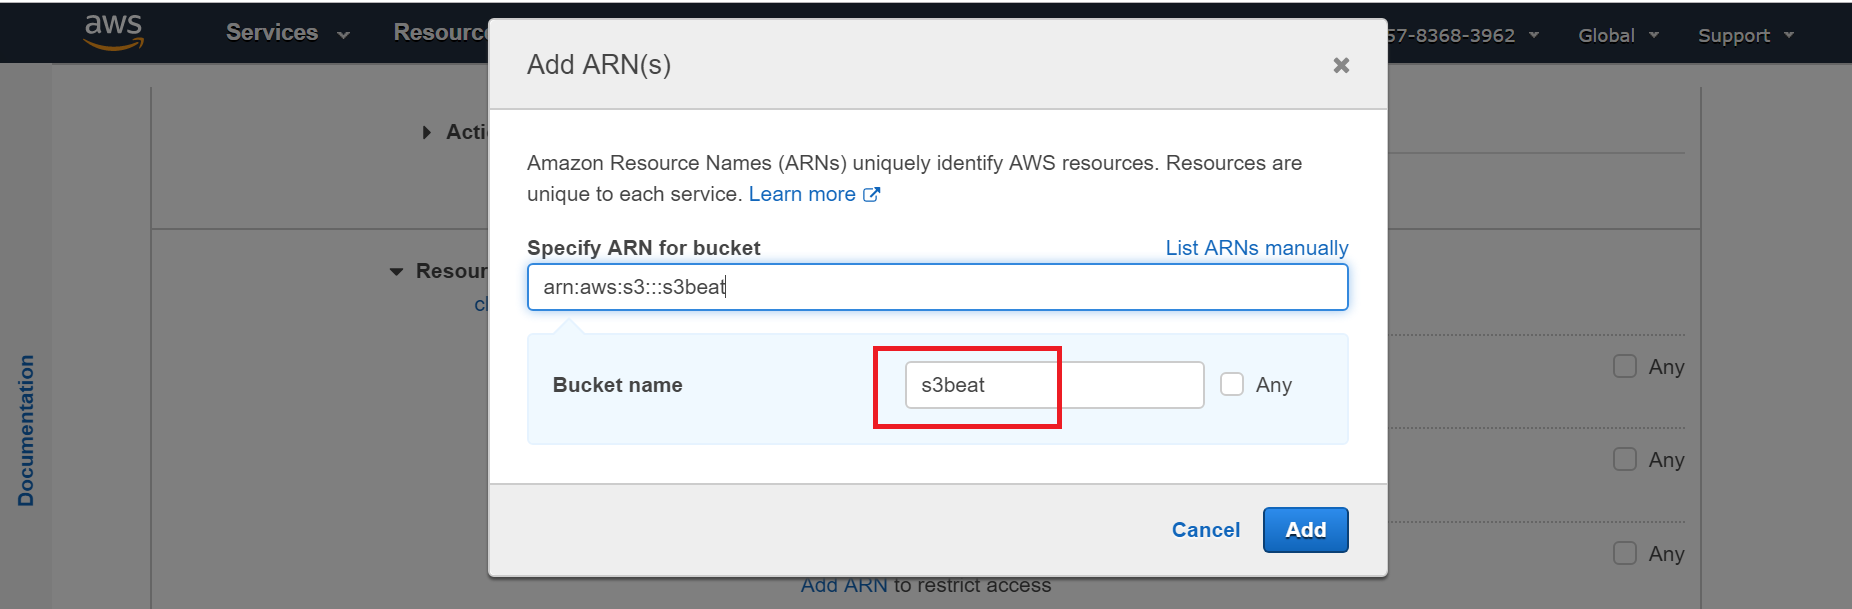
In the Bucket name field, add the bucket name or the Amazon Resource Name for the bucket resource you want to list in this policy, and then click Add.
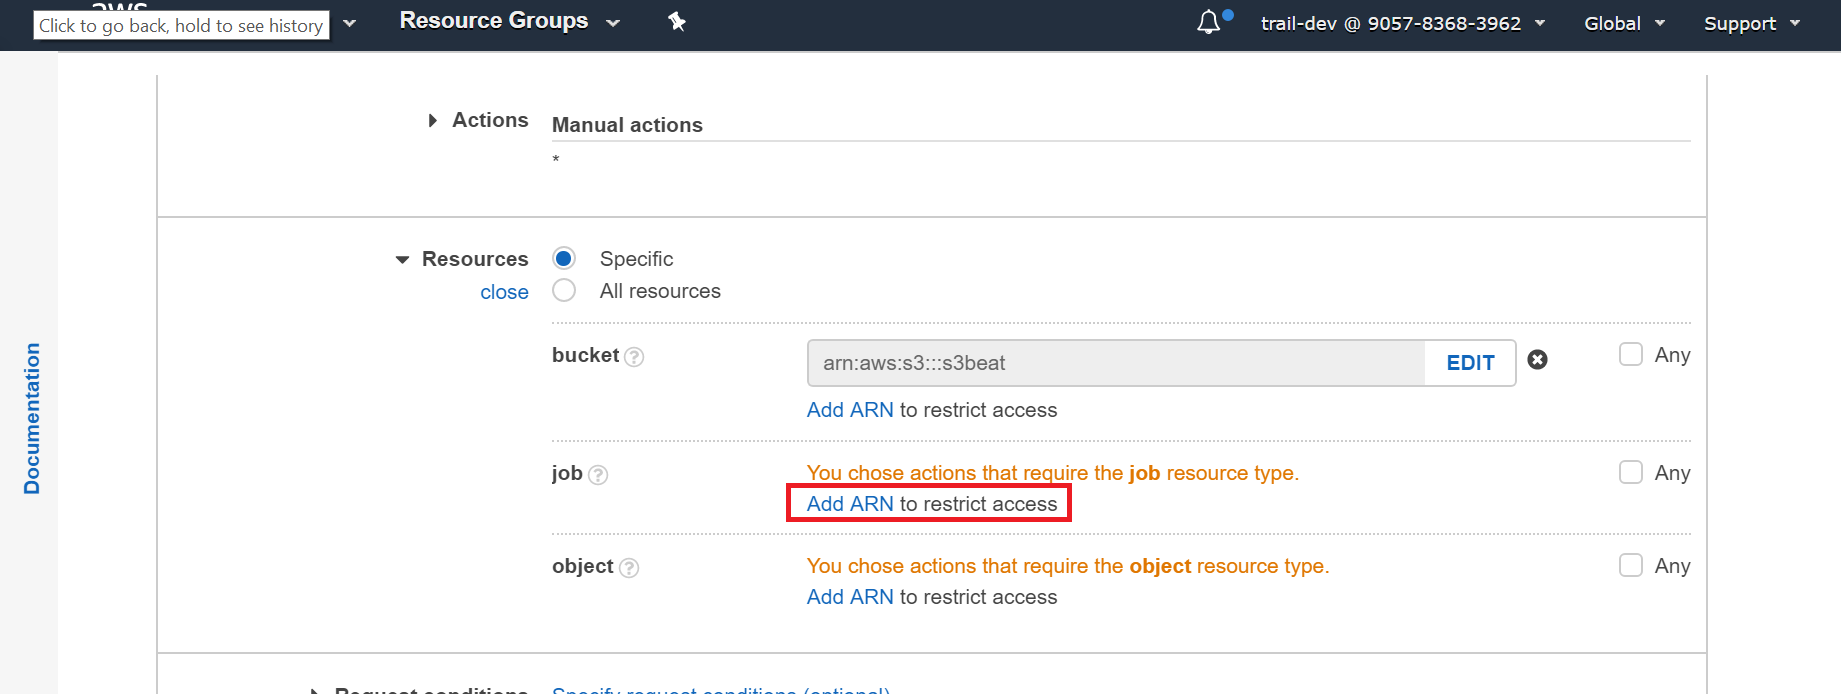
In the job section, click Add ARN.
The Add ARN(s) dialog appears. Complete the following and click Add.
In the Region field, enter the region of the bucket resource.
In the Account field, select the Any checkbox.
In the Job id field, select the Any checkbox.
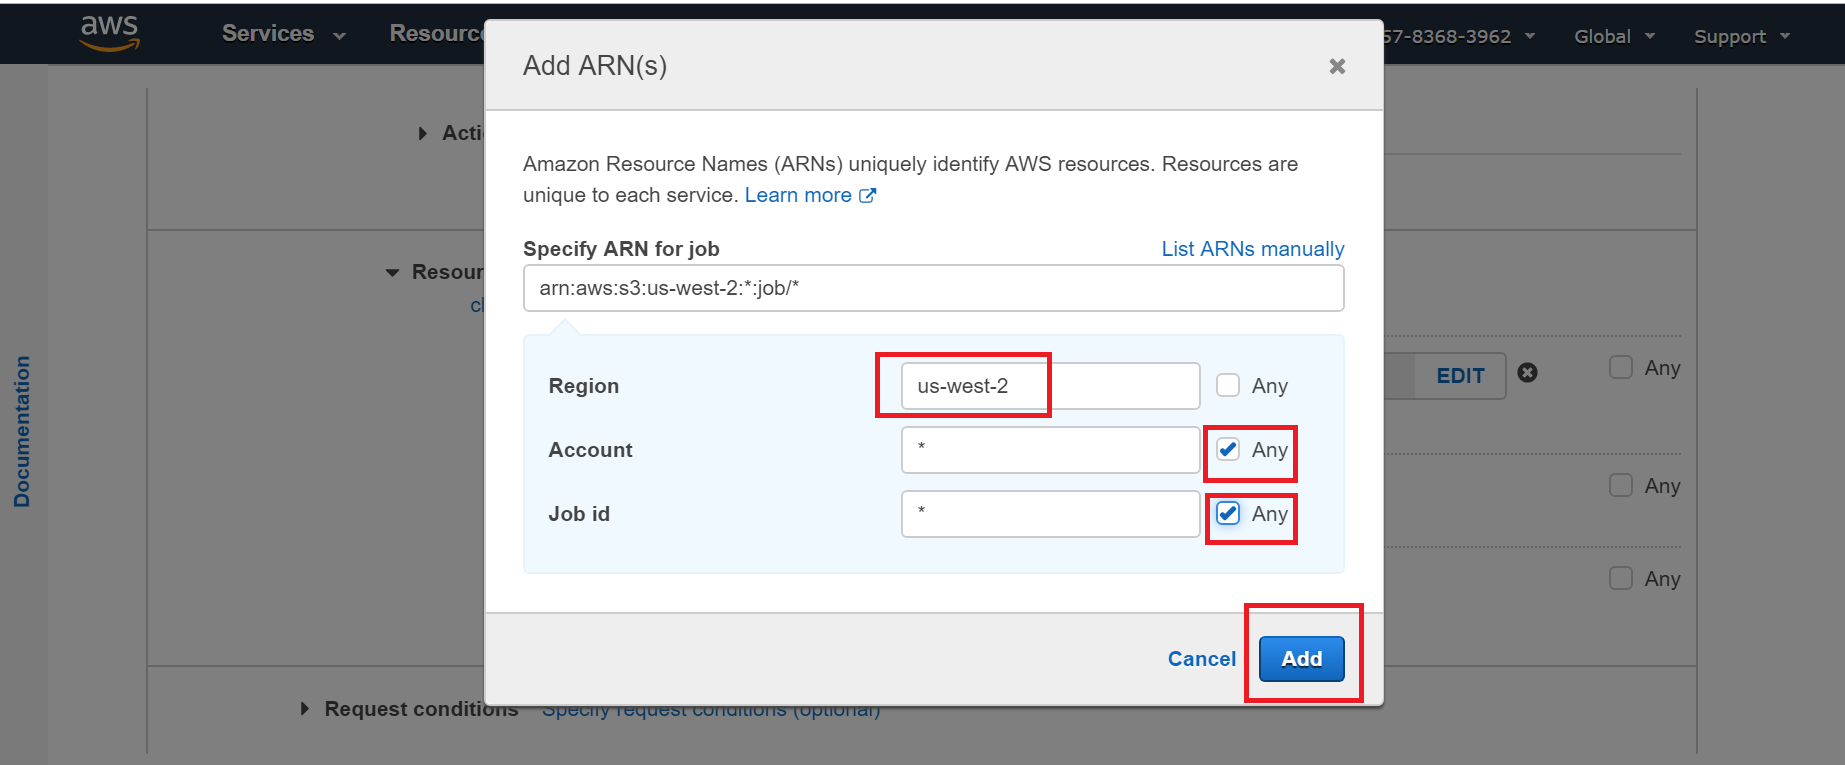
In the object section, select the Any checkbox.
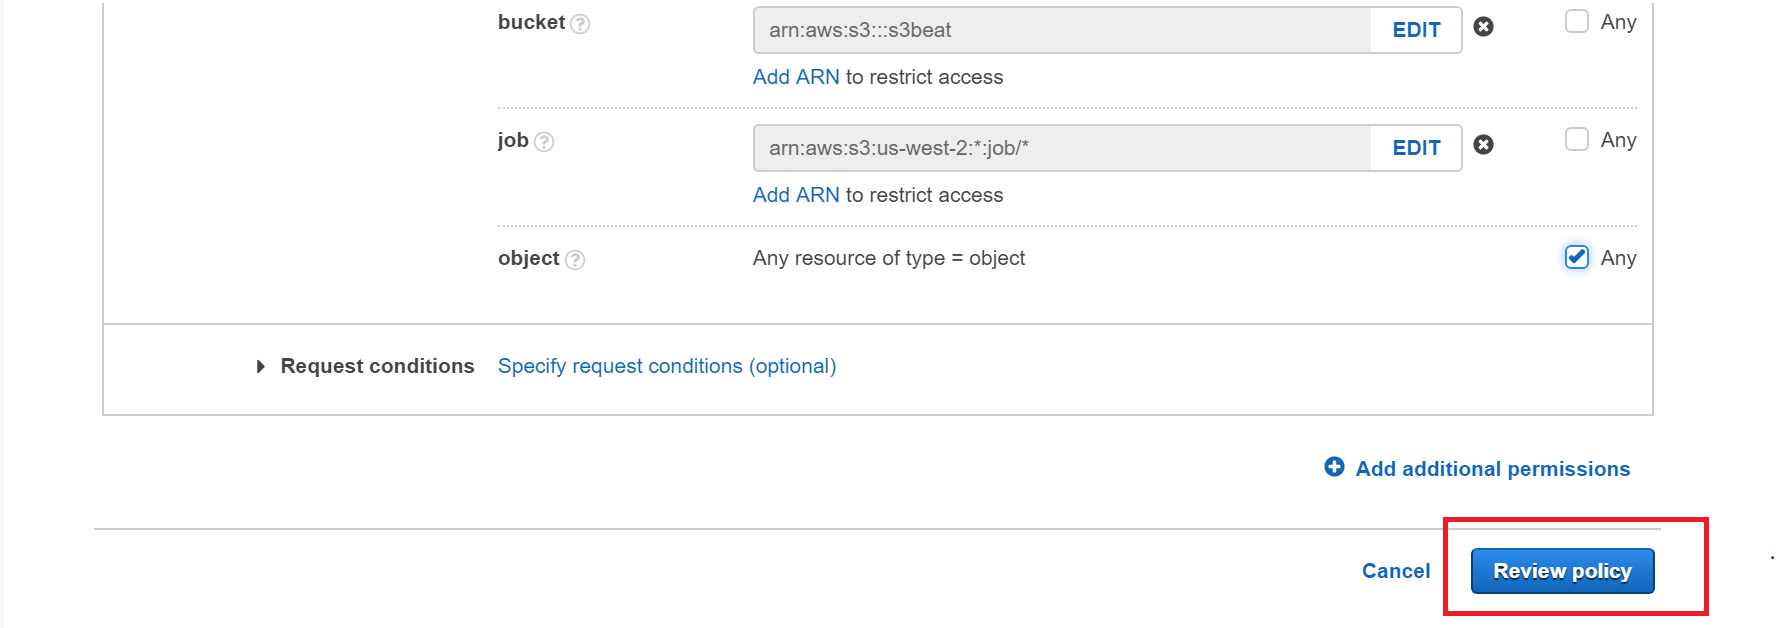
Click Review policy.
Enter a name and description for the policy.
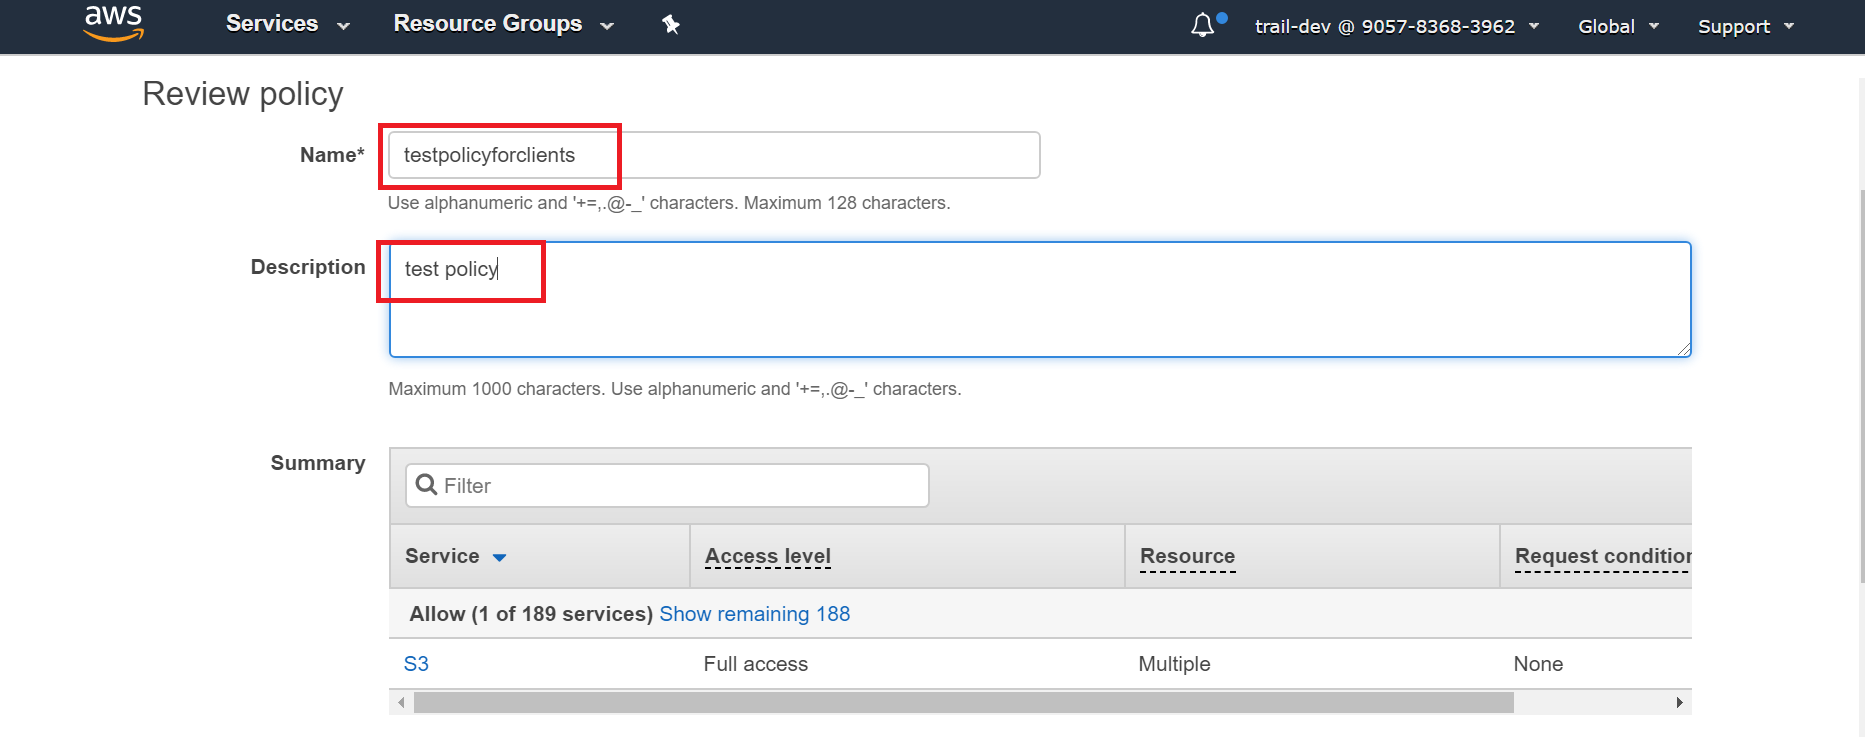
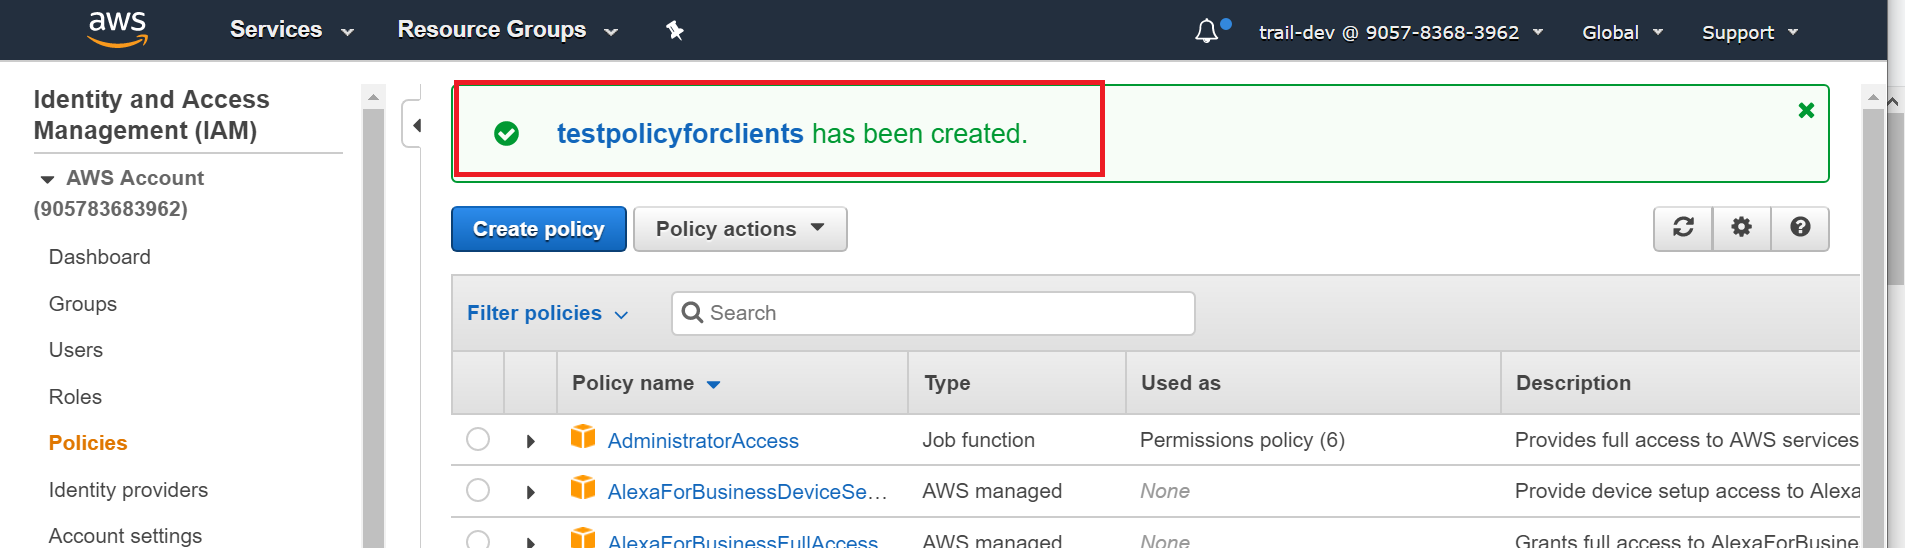
Click Create policy.
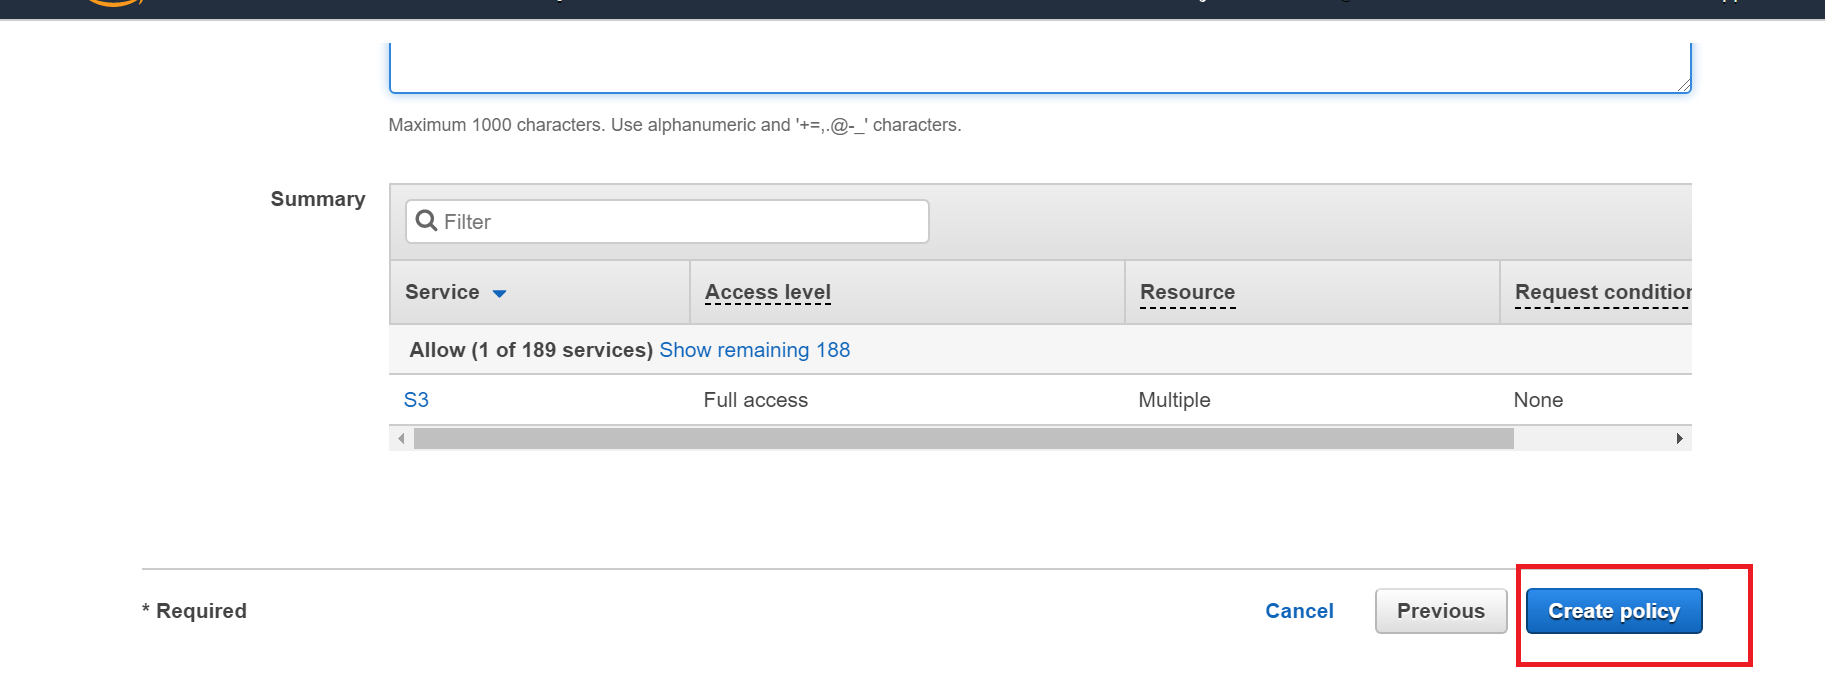
The new policy appears in the list of policies.
Create a Role for a Policy
- Log on to your AWS account.
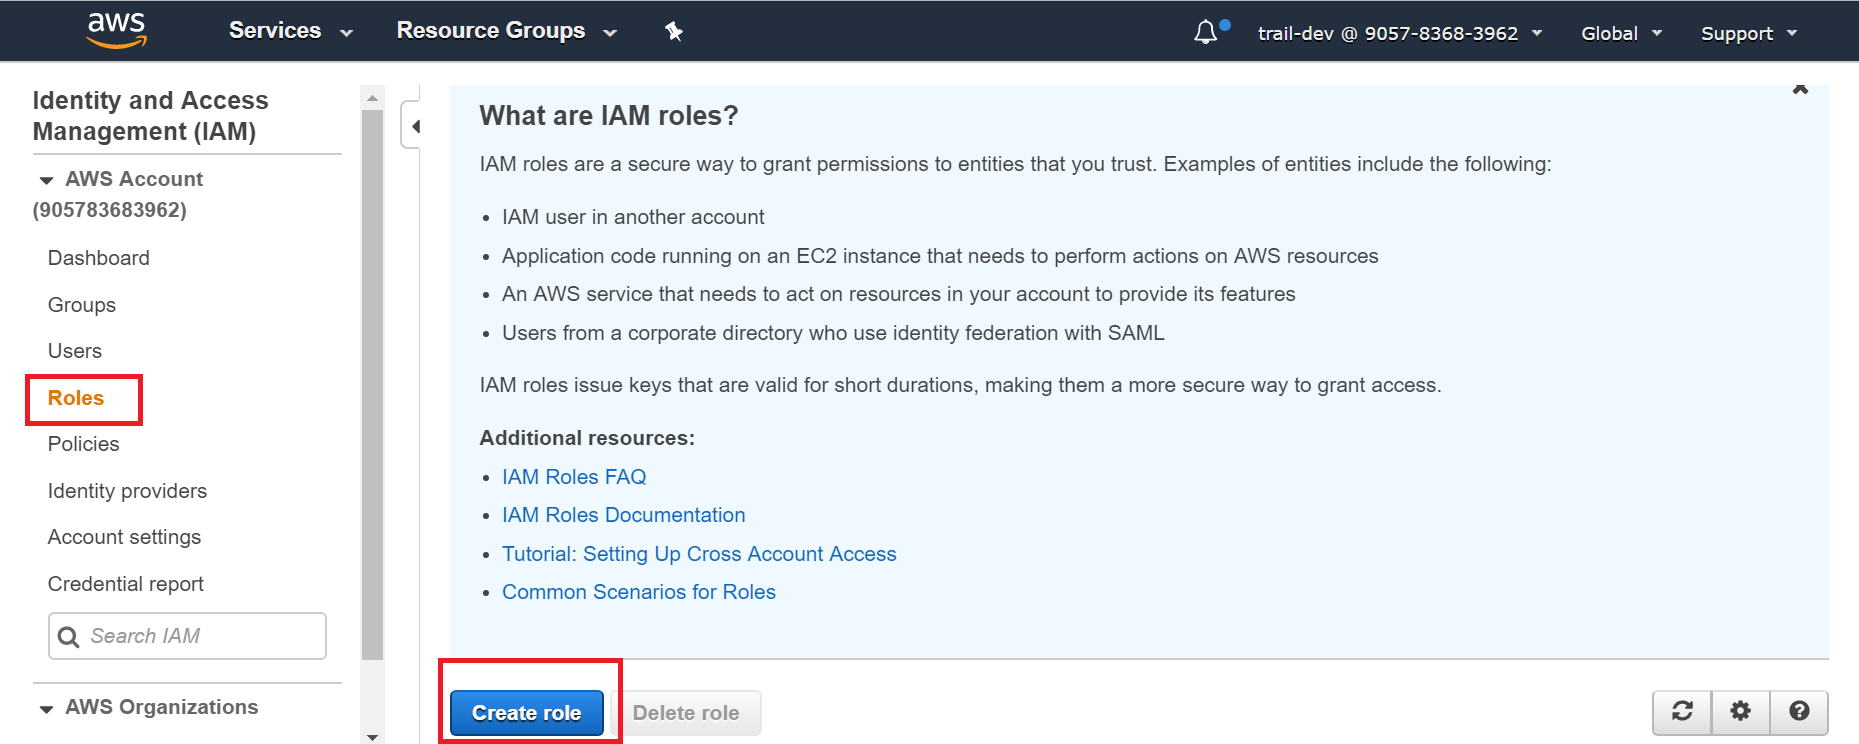
On the left-side menu, click Roles, and then click Create role.
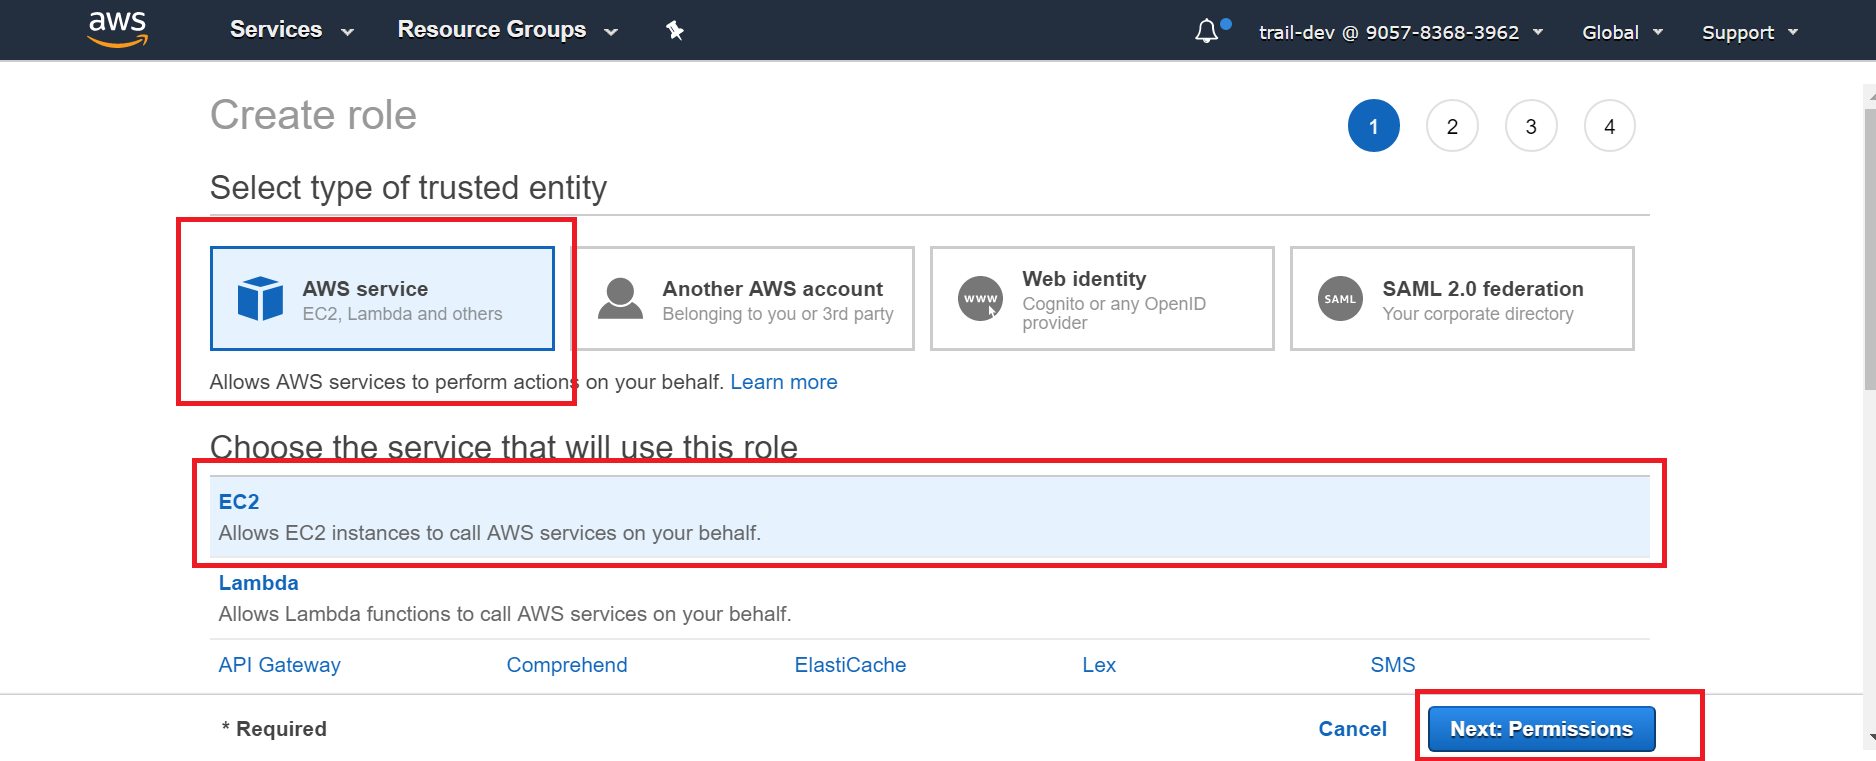
Select the type of trusted entity, and the service that will use this role, and then click Next: Permissions.
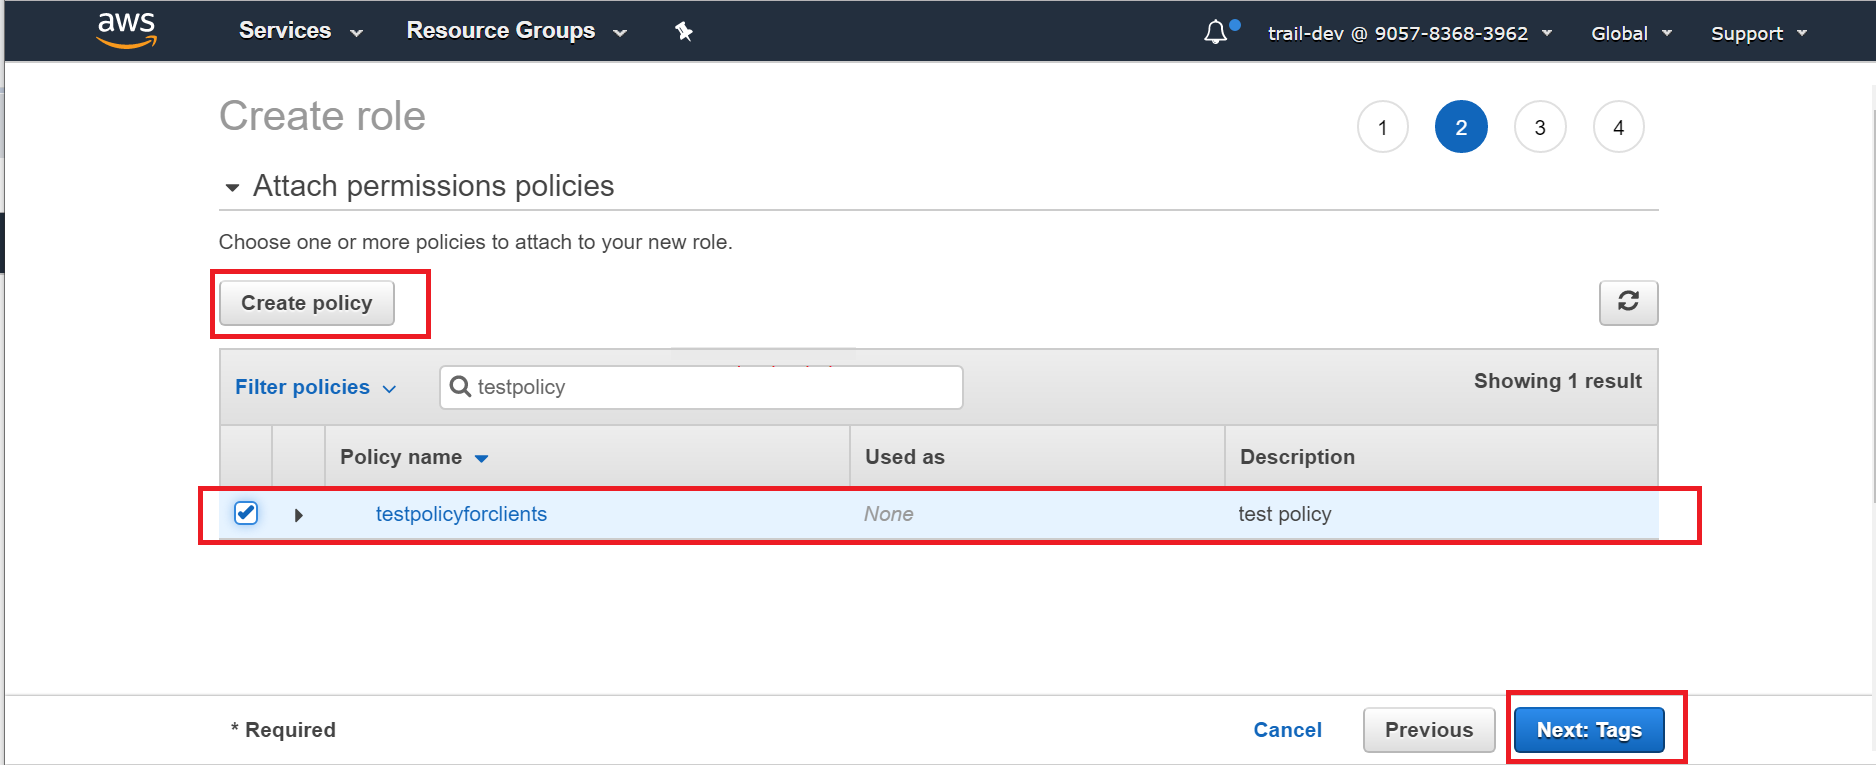
Select an existing policy or create a new policy, and then click Next: Tags.
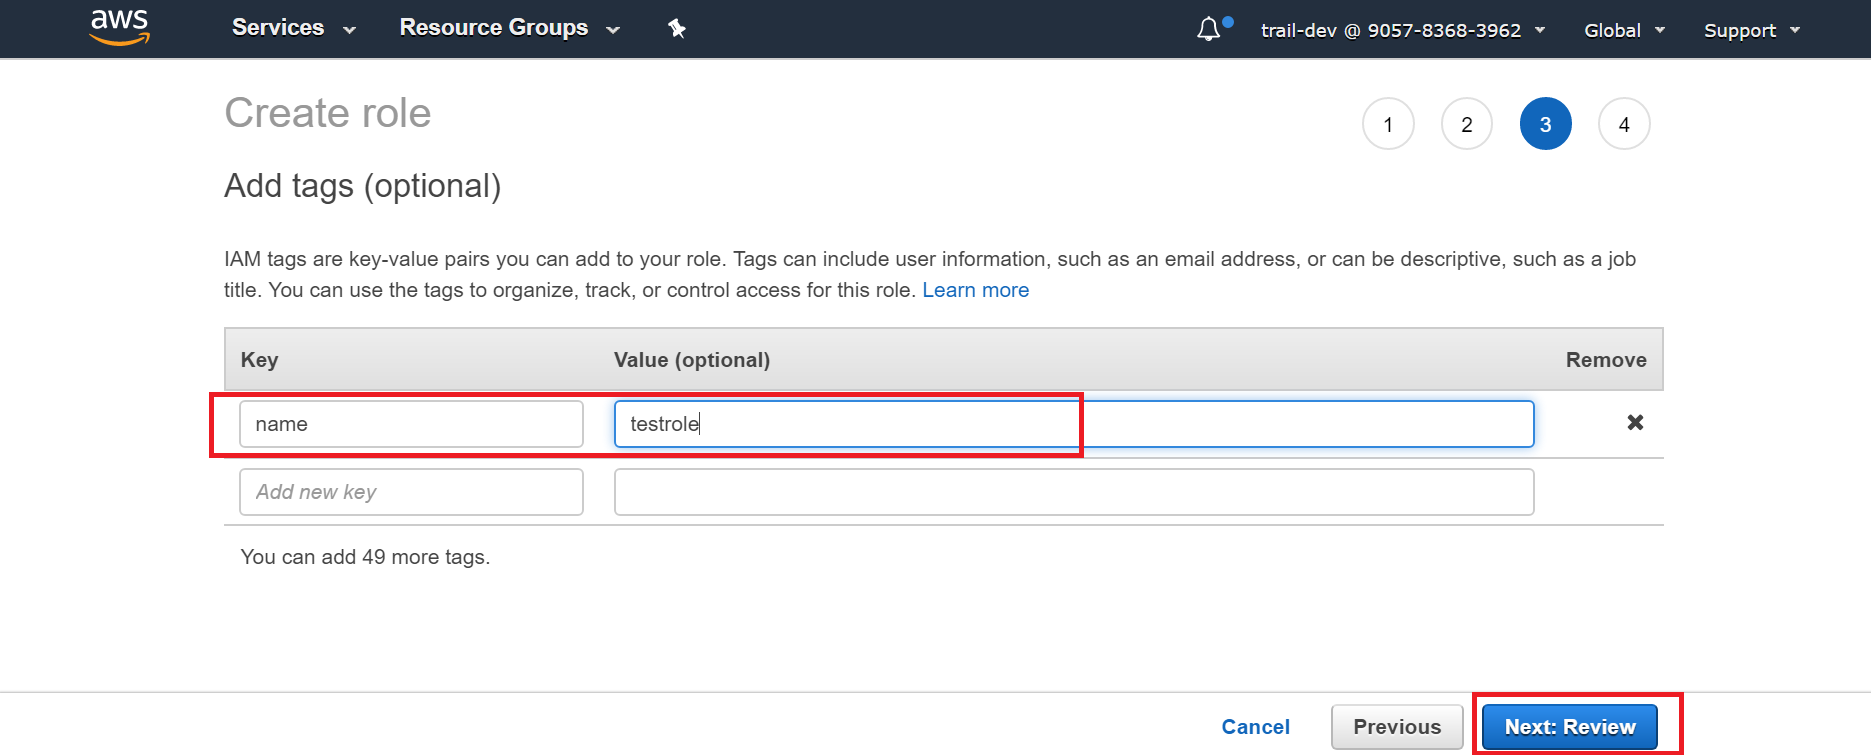
(Optional) Specify tags for the role in the form of key-value pairs, and then click Next: Review.
Enter a name for the role, and then click Create role.

The new role appears in the list of roles.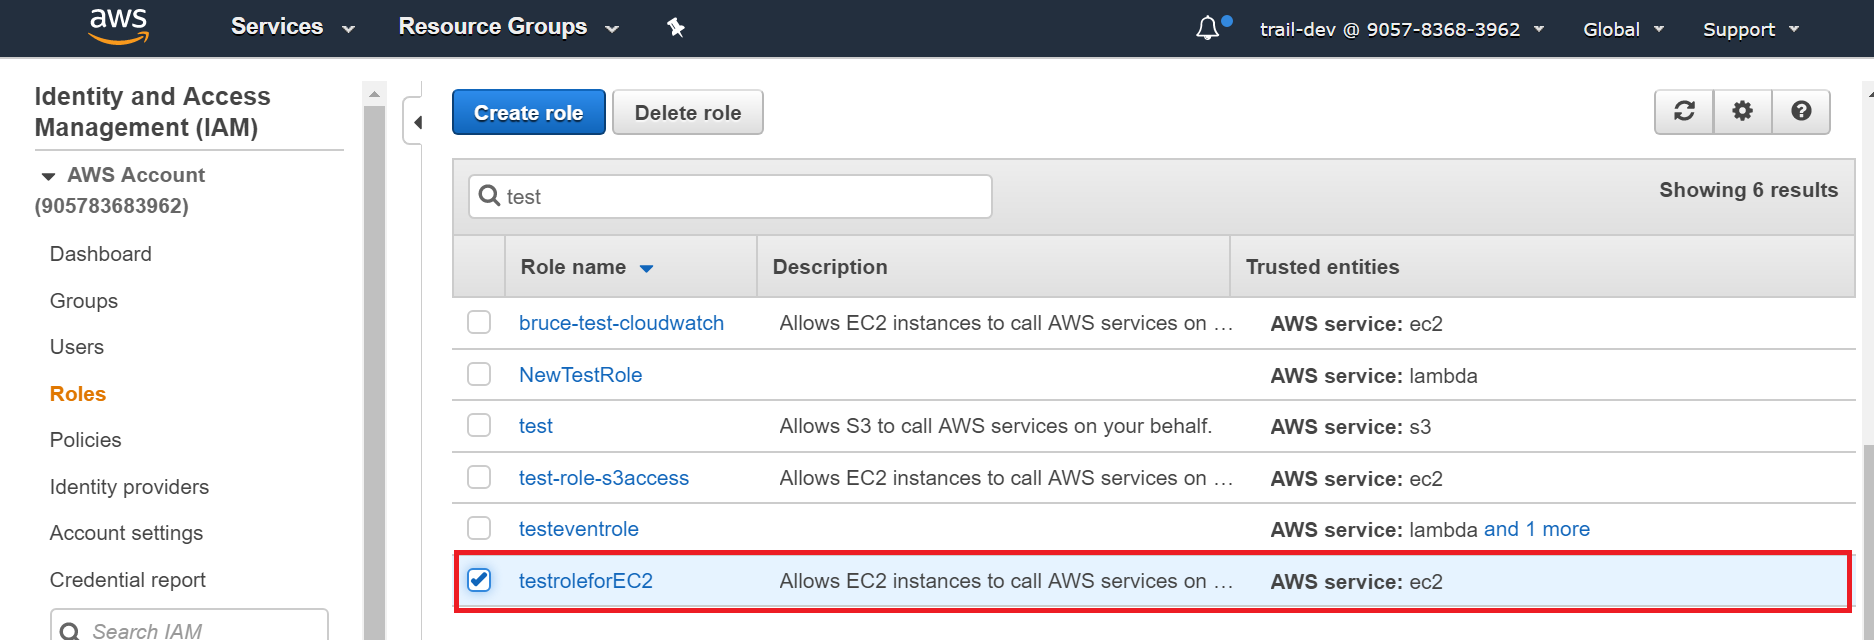
Create an EC2 Instance and Assign a Role
Log on to your AWS account.
On the menu bar at the top, click Services.
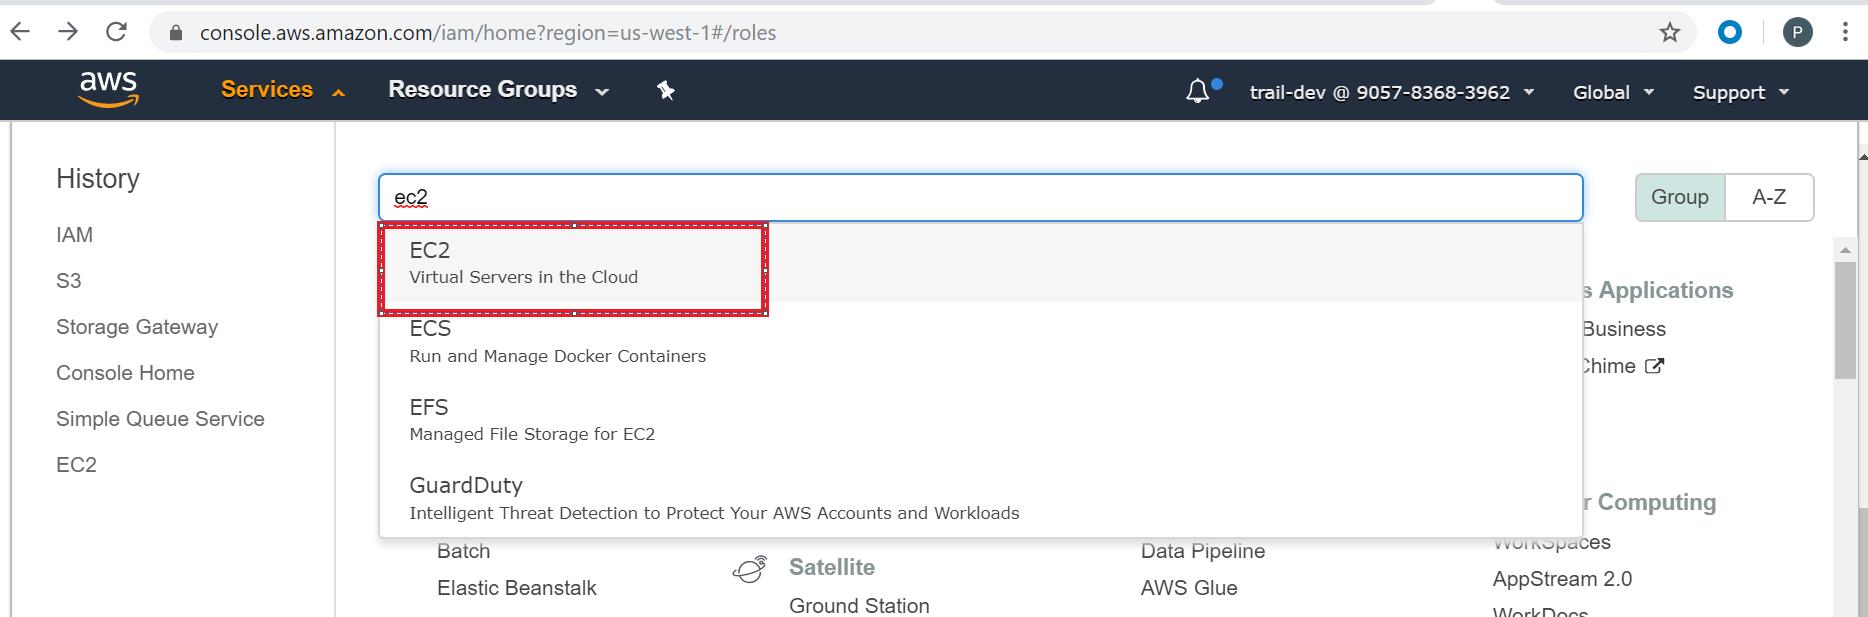
In the search bar, enter EC2, and then click EC2 (Virtual Servers in the Cloud) from the suggested search results.
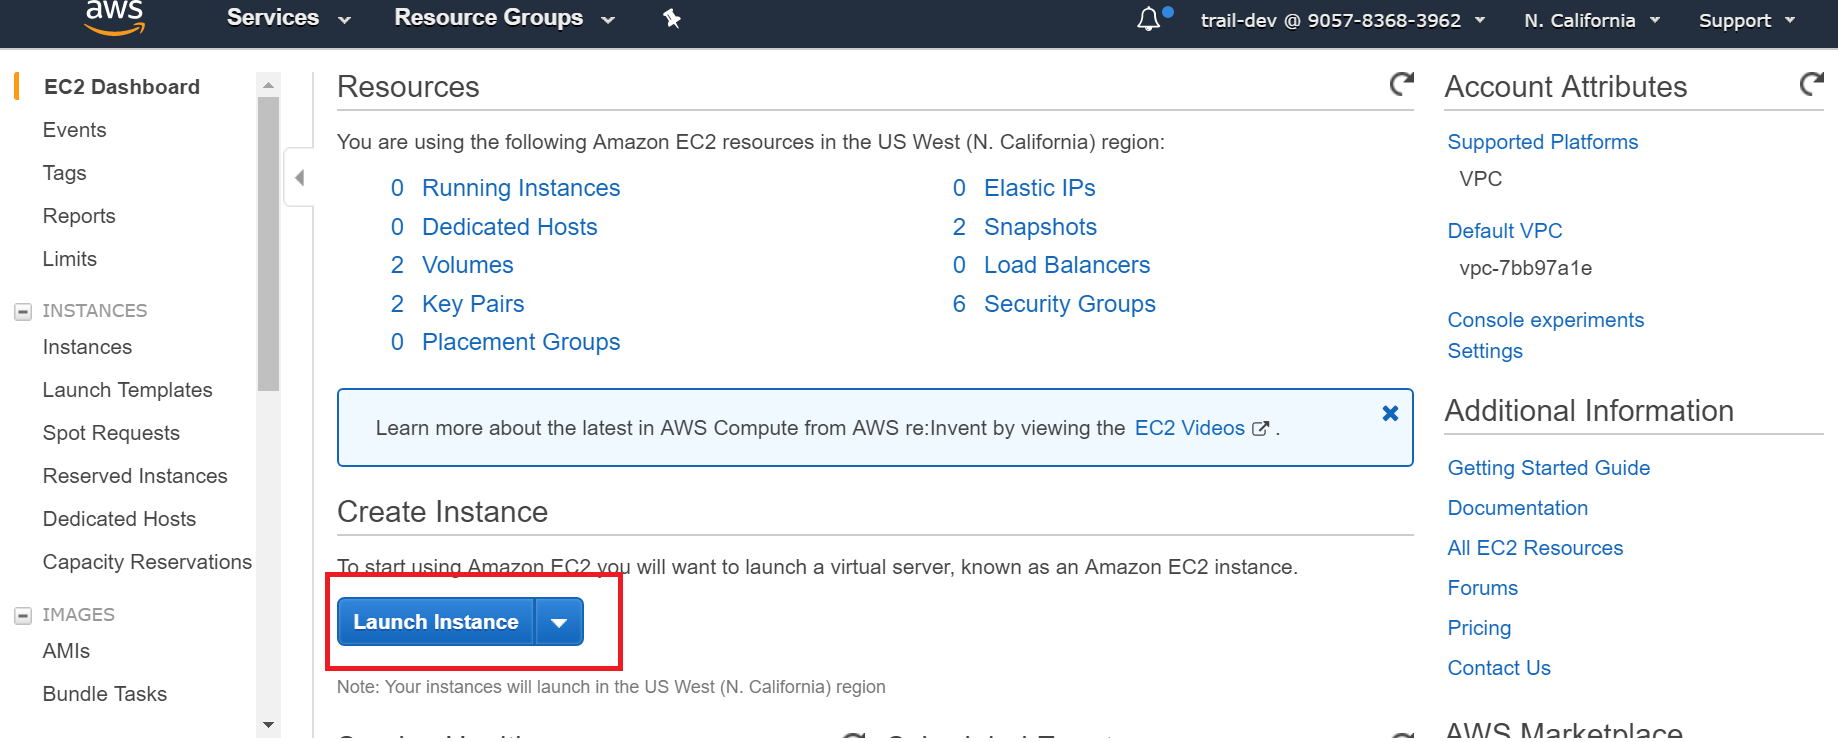
On the main screen, under the Create Instance header, click Launch Instance.
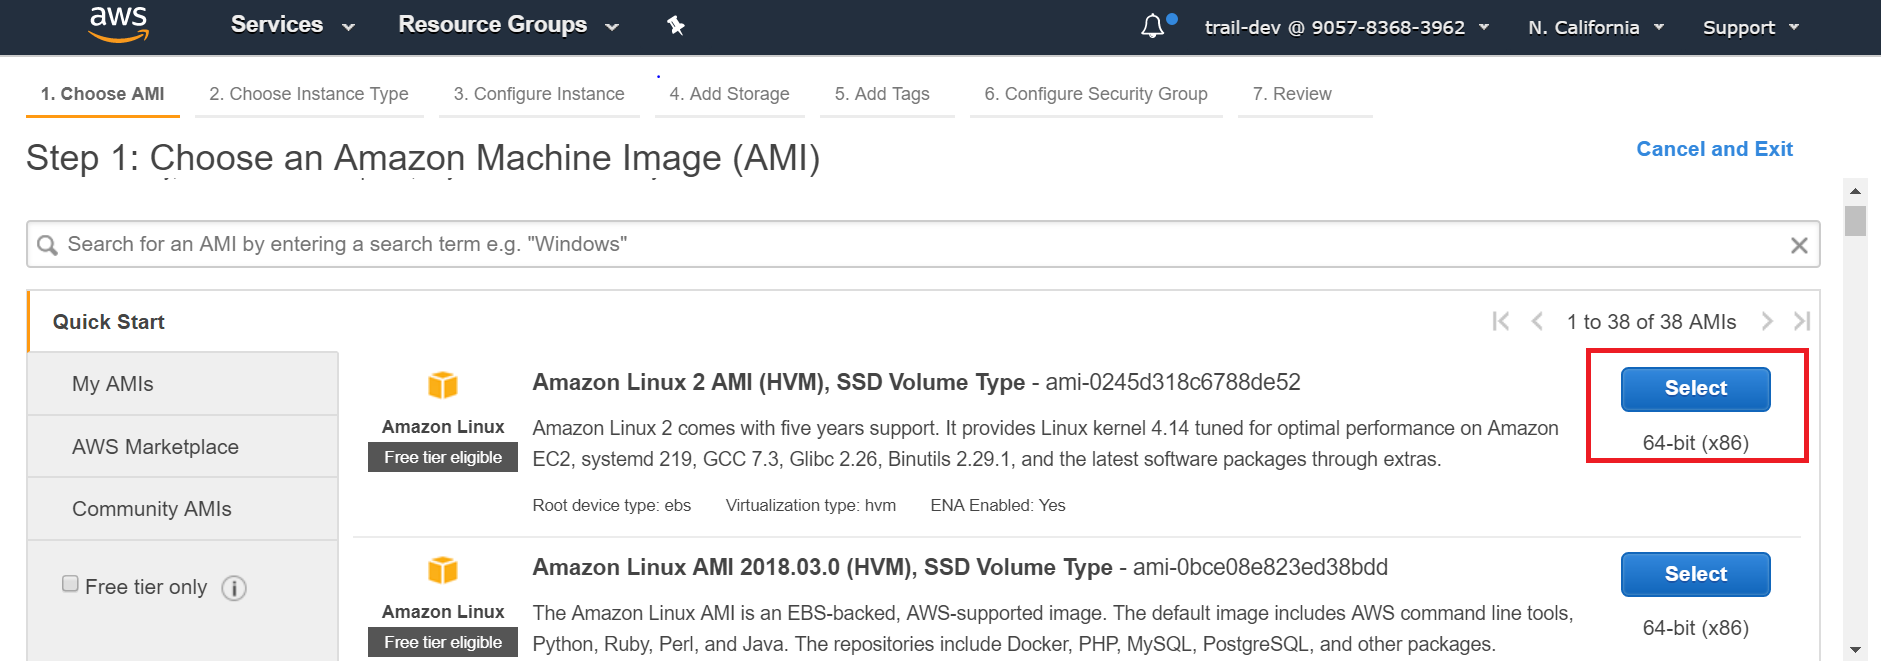
Select an Amazon Machine Image (AMI) that fits your requirements. (Please use any Centos Machine)
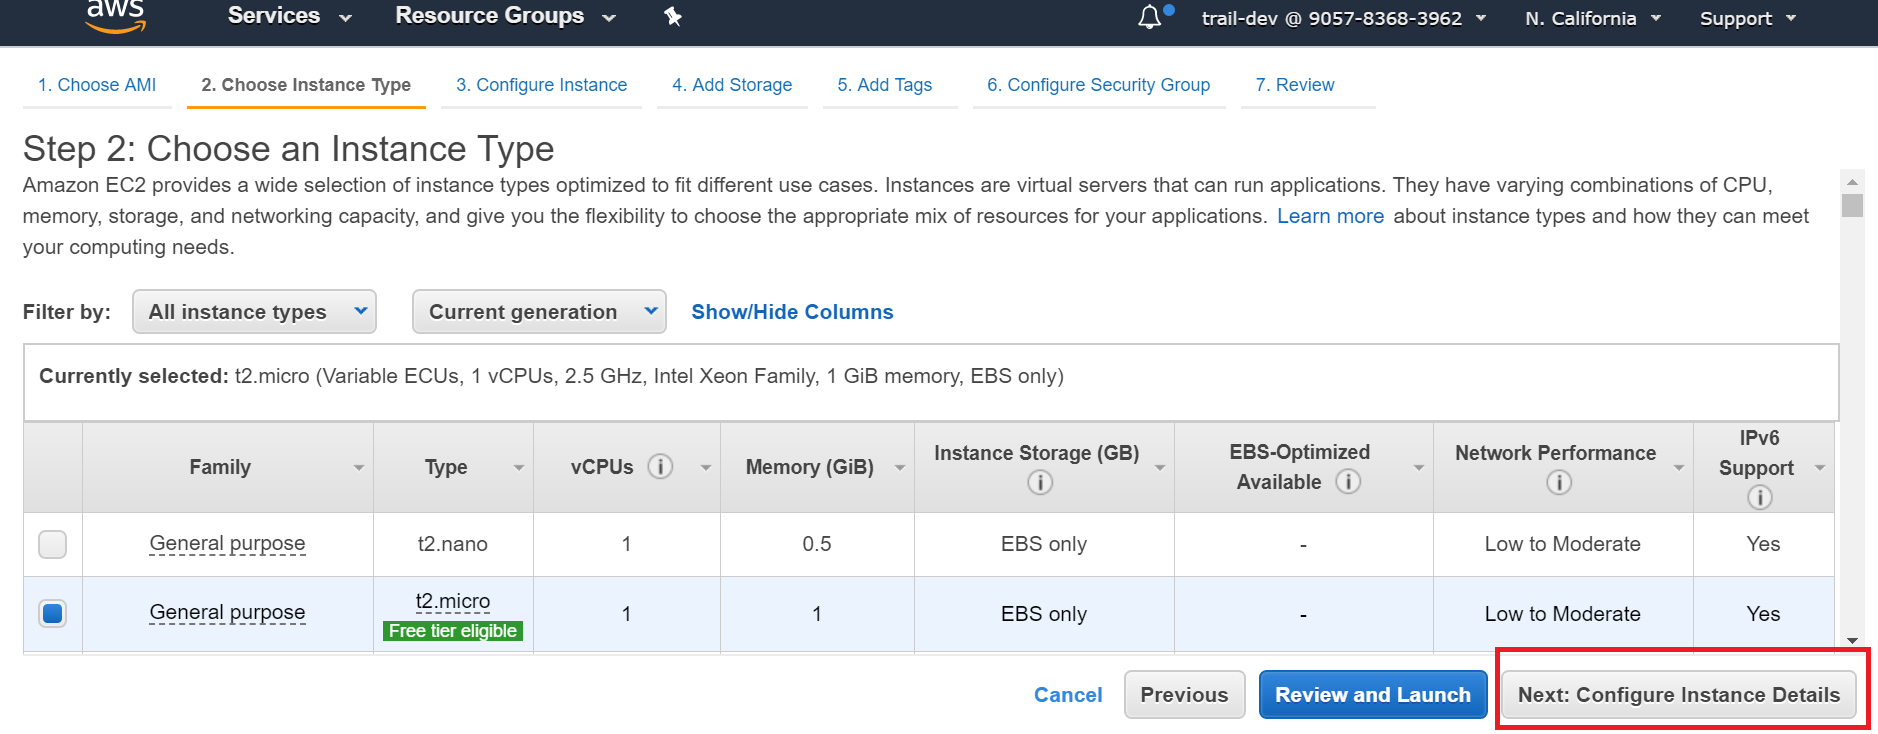
Select an Instance Type that fits your requirements, and then click Next: Configure Instance Details.
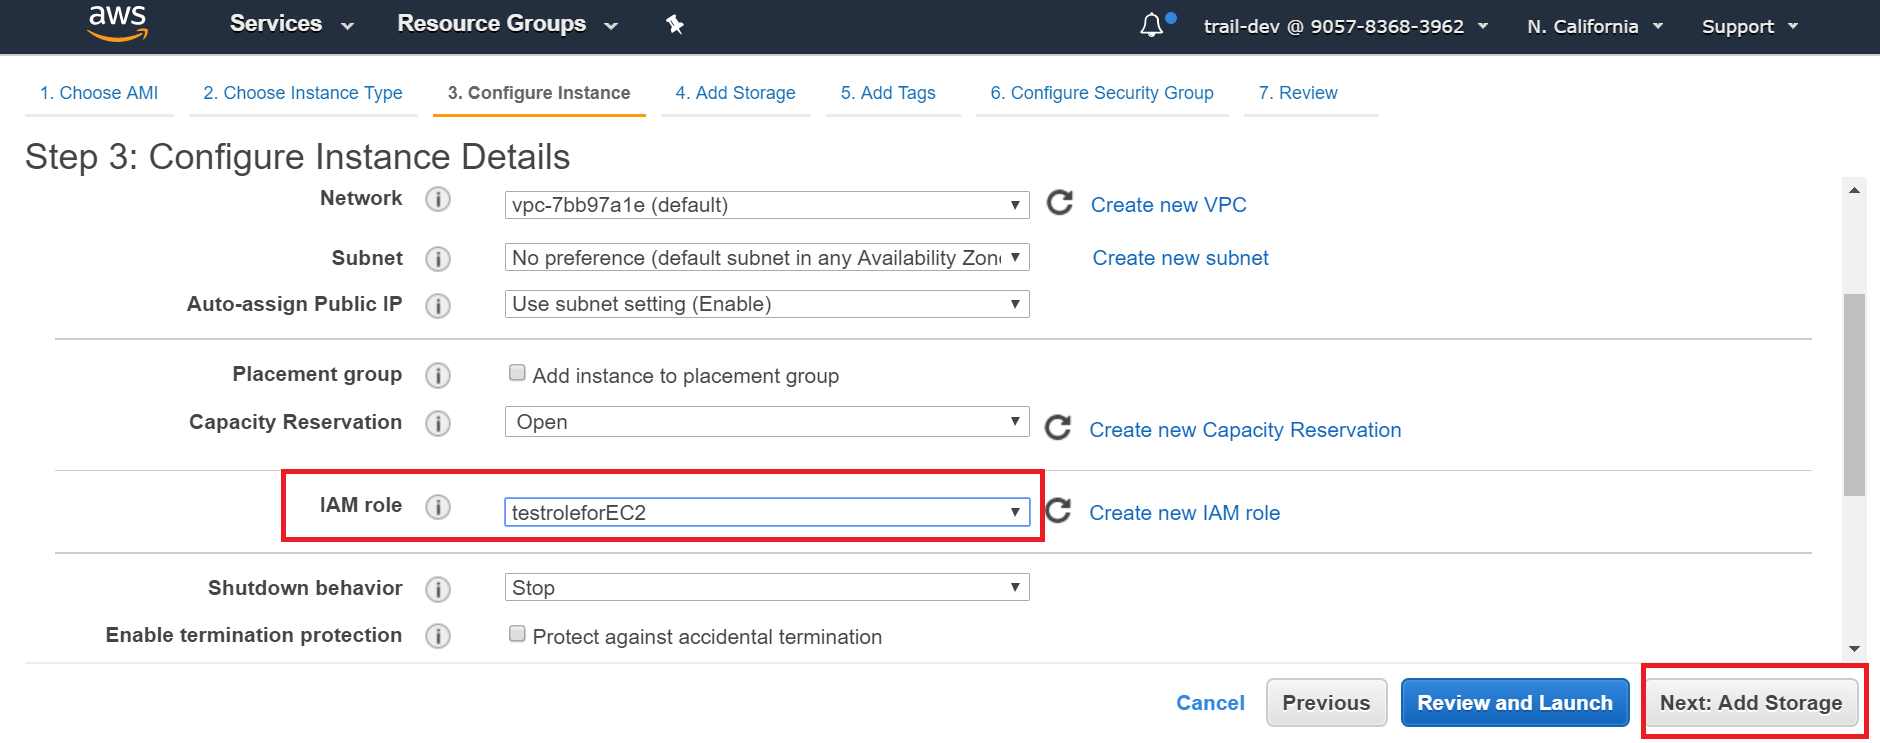
Verify that the role you created in the previous procedure is selected in the IAM role menu, and then click Next: Add Storage.
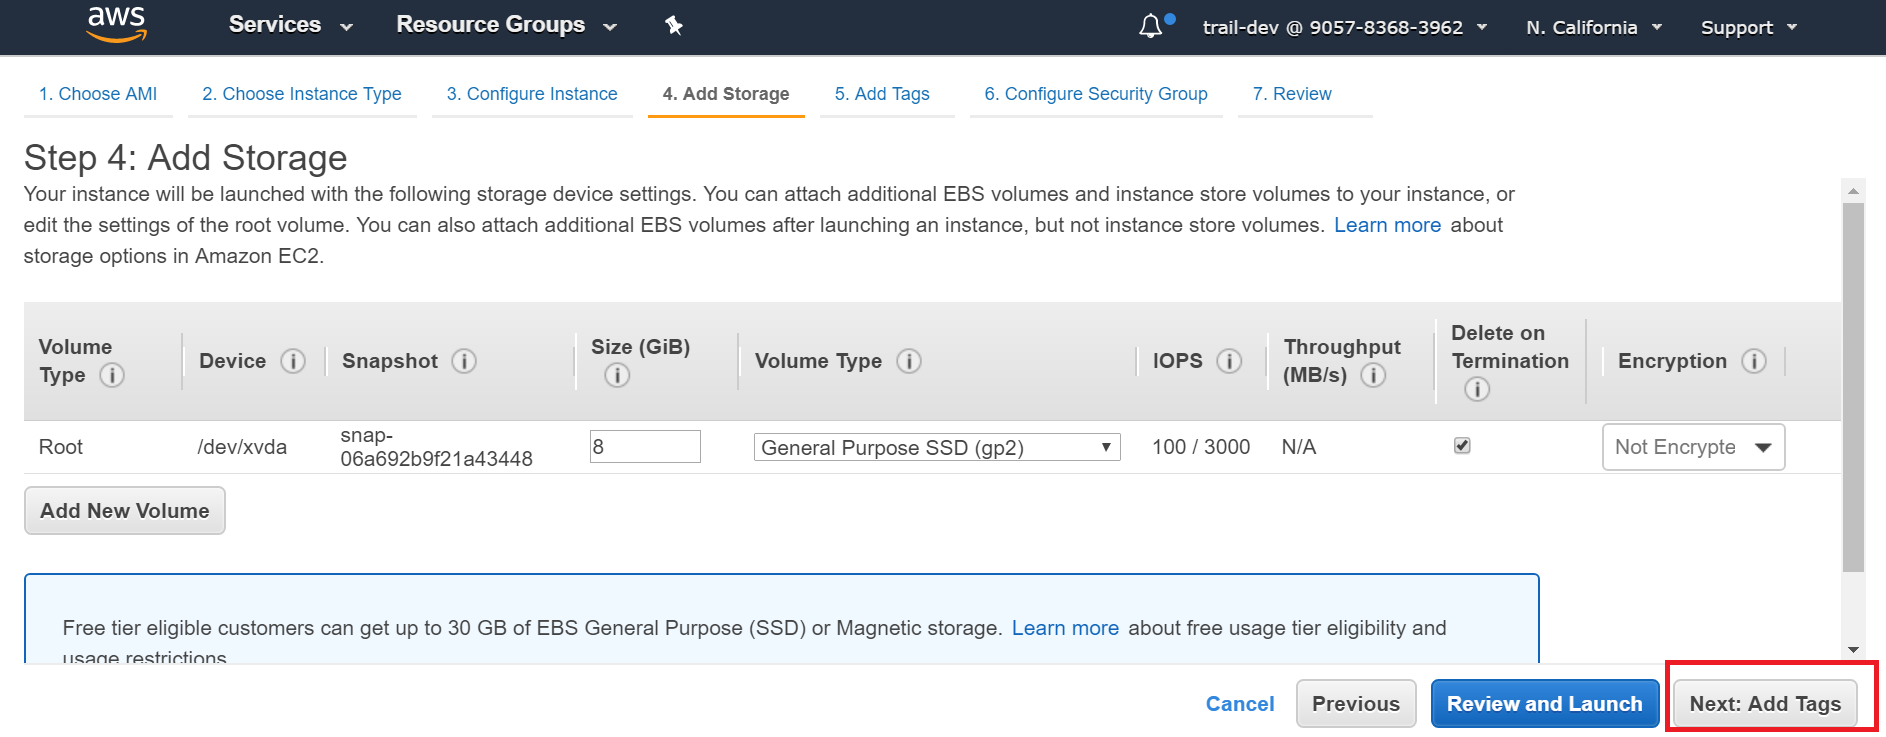
Review the storage parameters and adjust them according to your requirements, and then click Next: Add Tags.
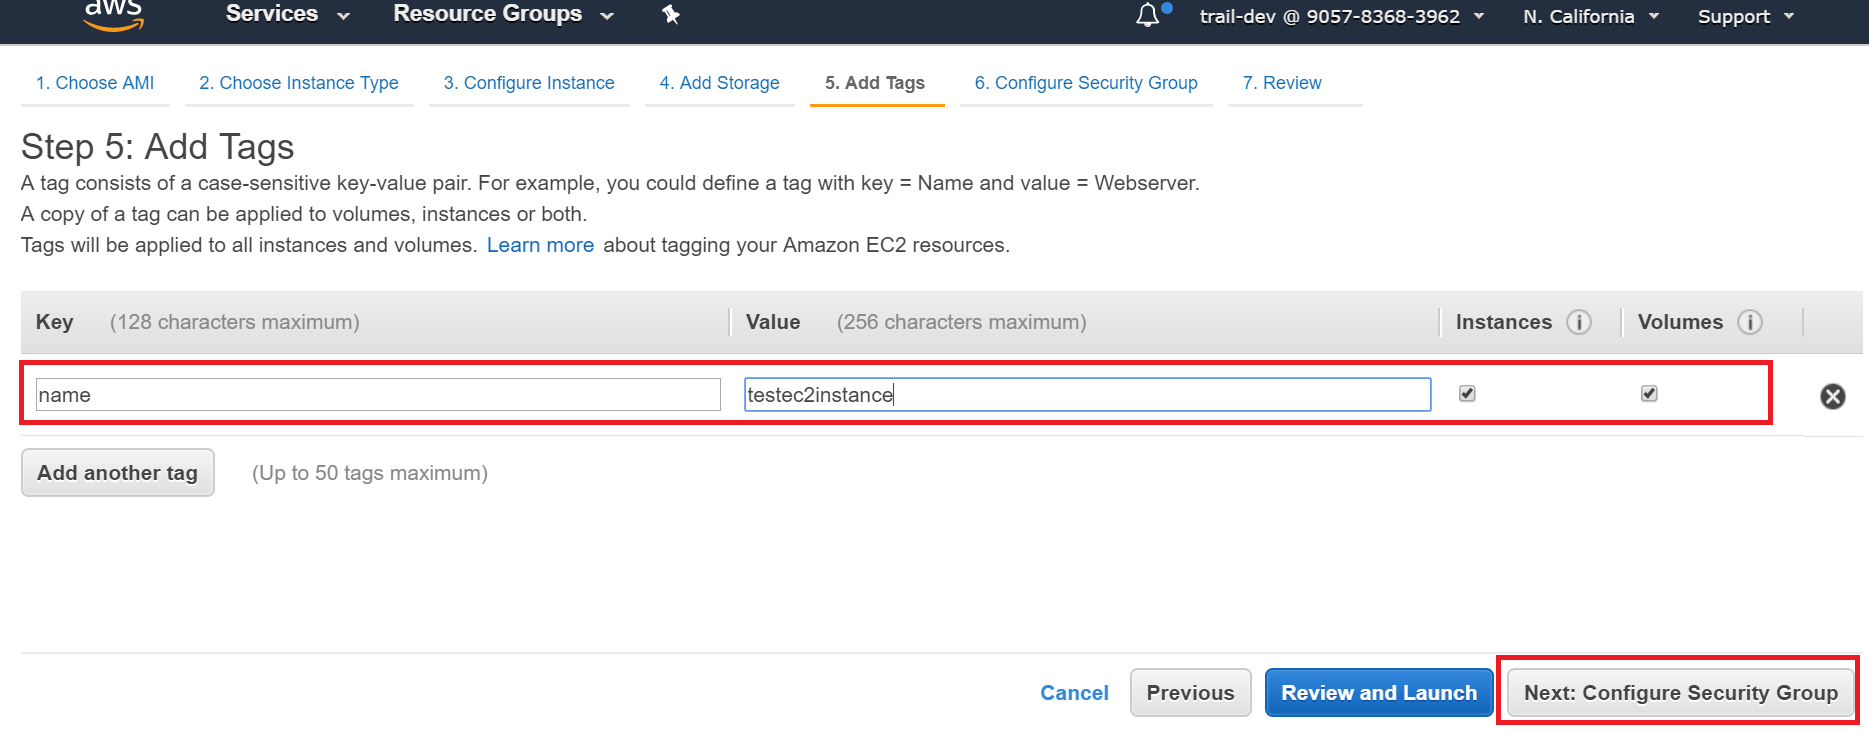
Specify the case-sensitive tags for the EC2 instance, and then click Next: Configure Security Group.
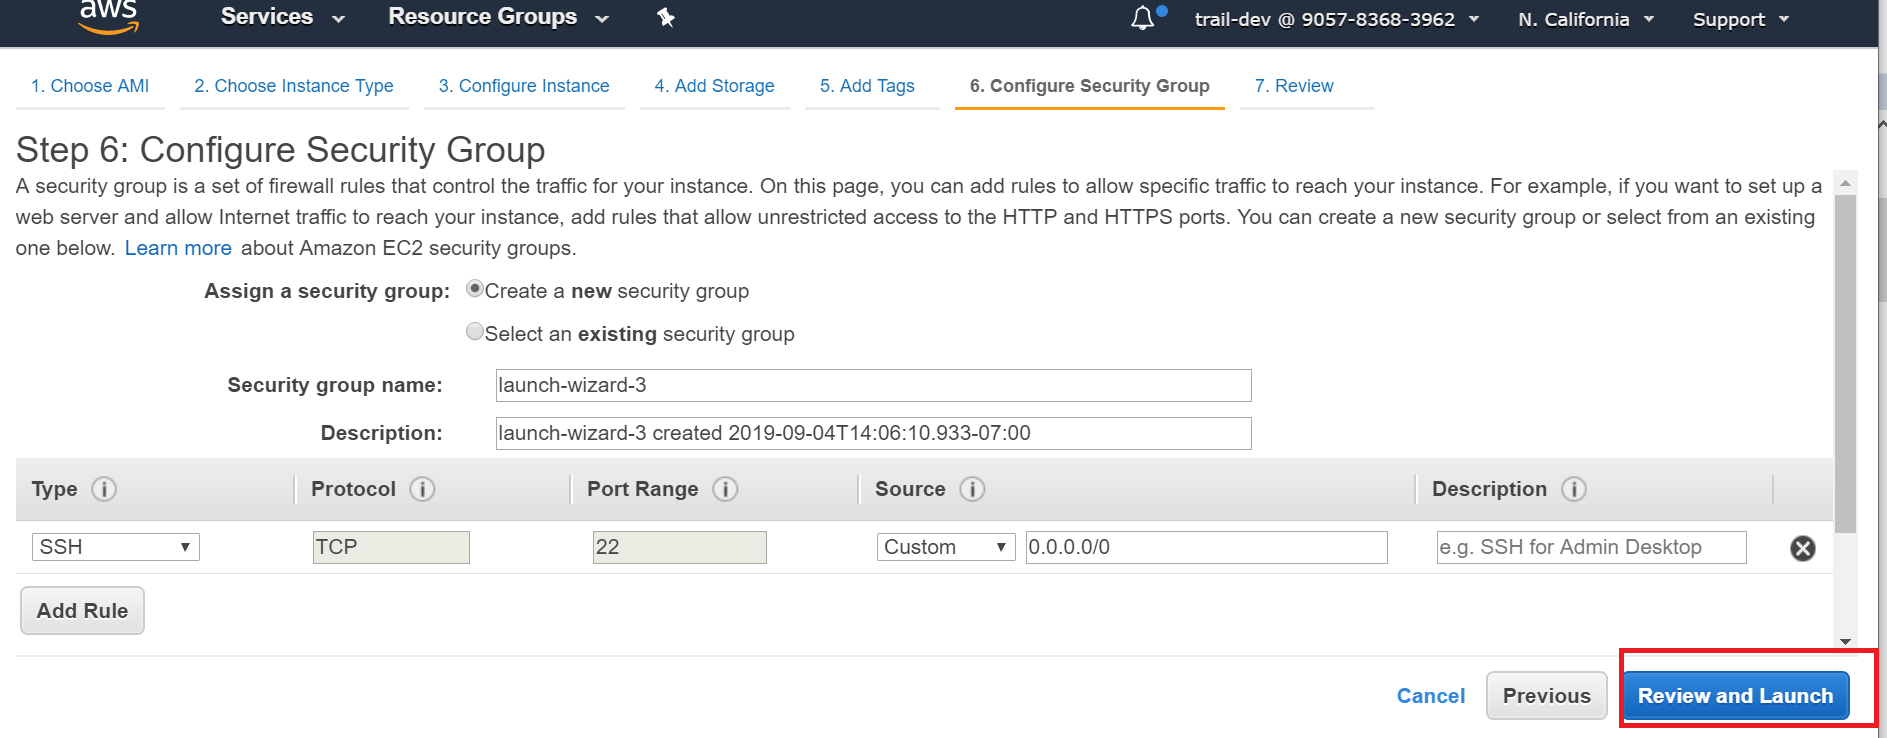
Select an existing security group or create a new security group, and then click Review and Launch.
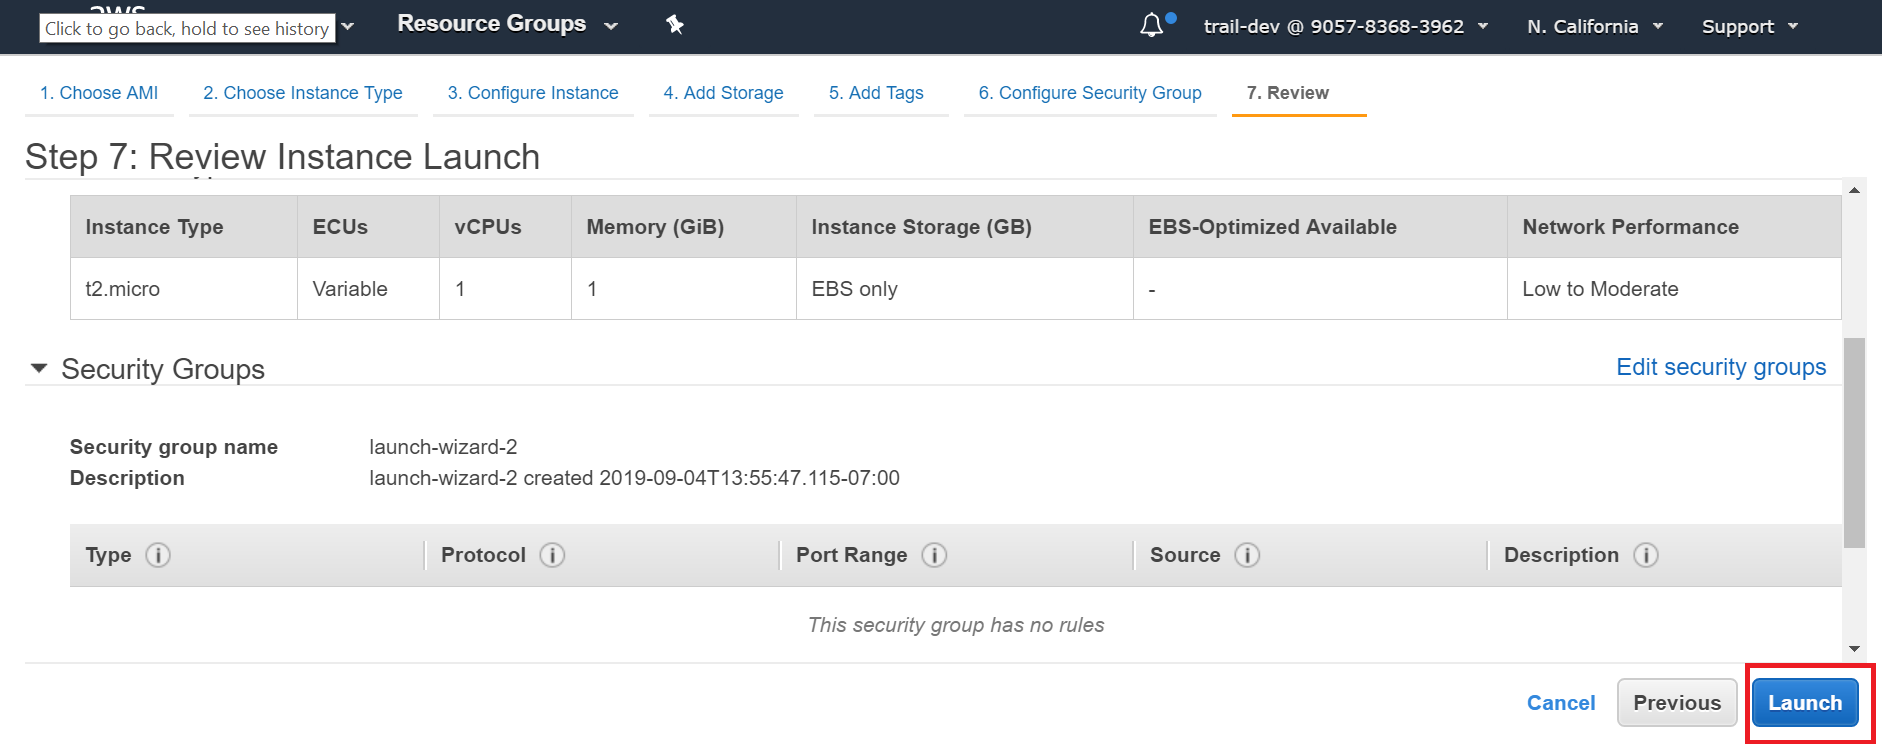
Review the instance properties, and then click Launch.
A window appears prompting you to create a key pair that consists of a public key, which AWS stores, and a private key file, which LogRhythm stores.
Enter a name and download the key pair by clicking Download Key Pair.
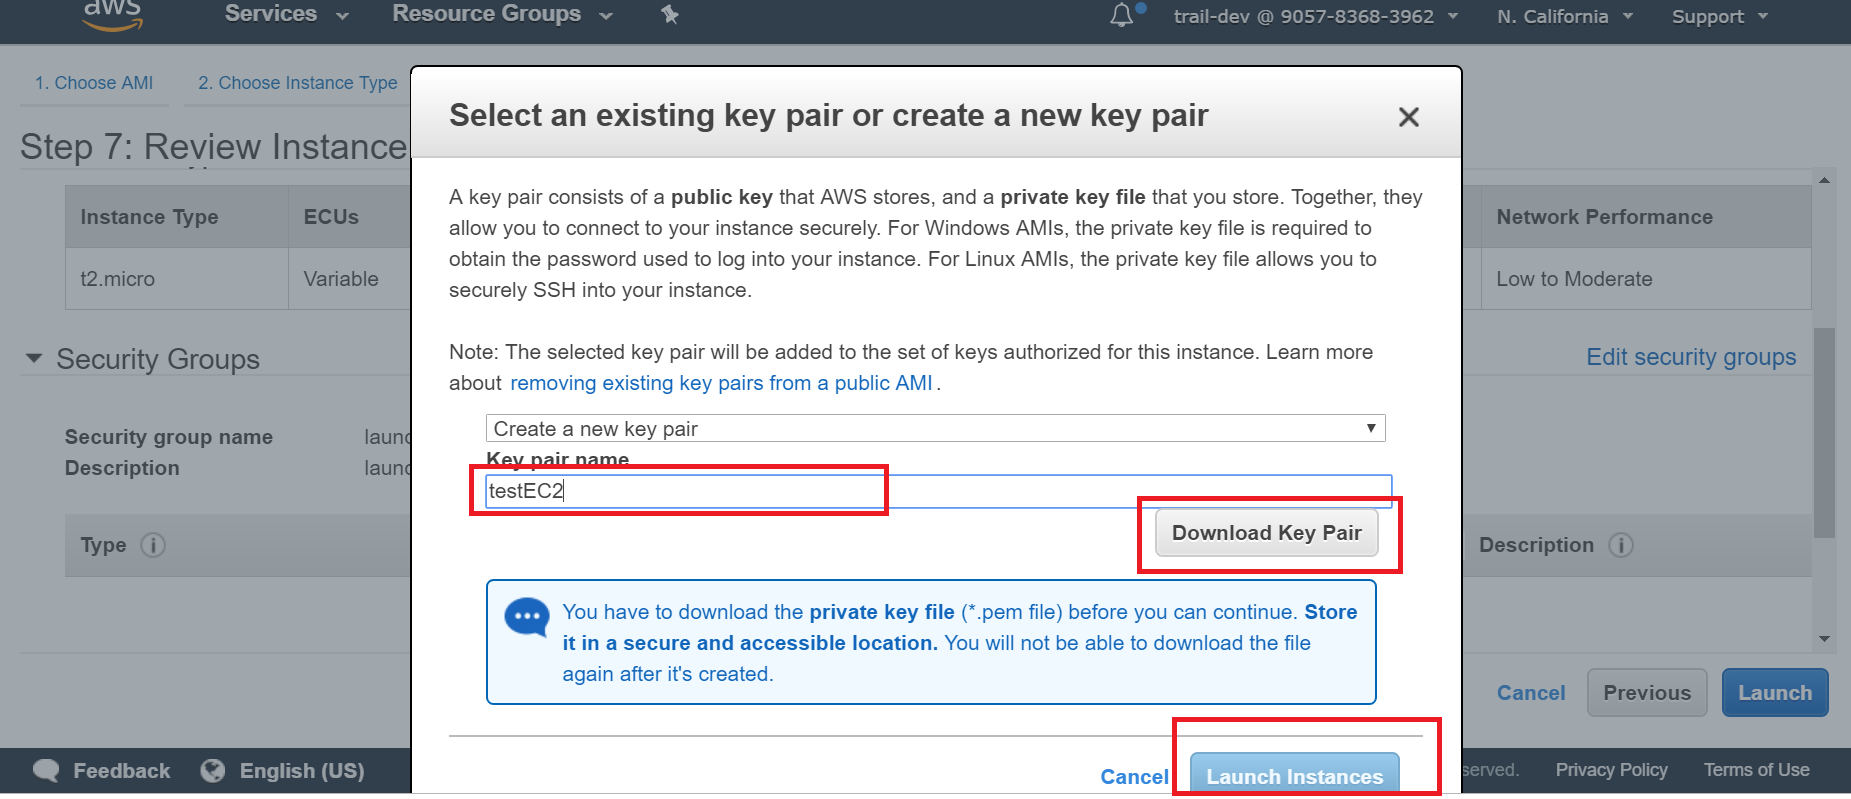
Click Launch Instances and verify that the instance has been launched.

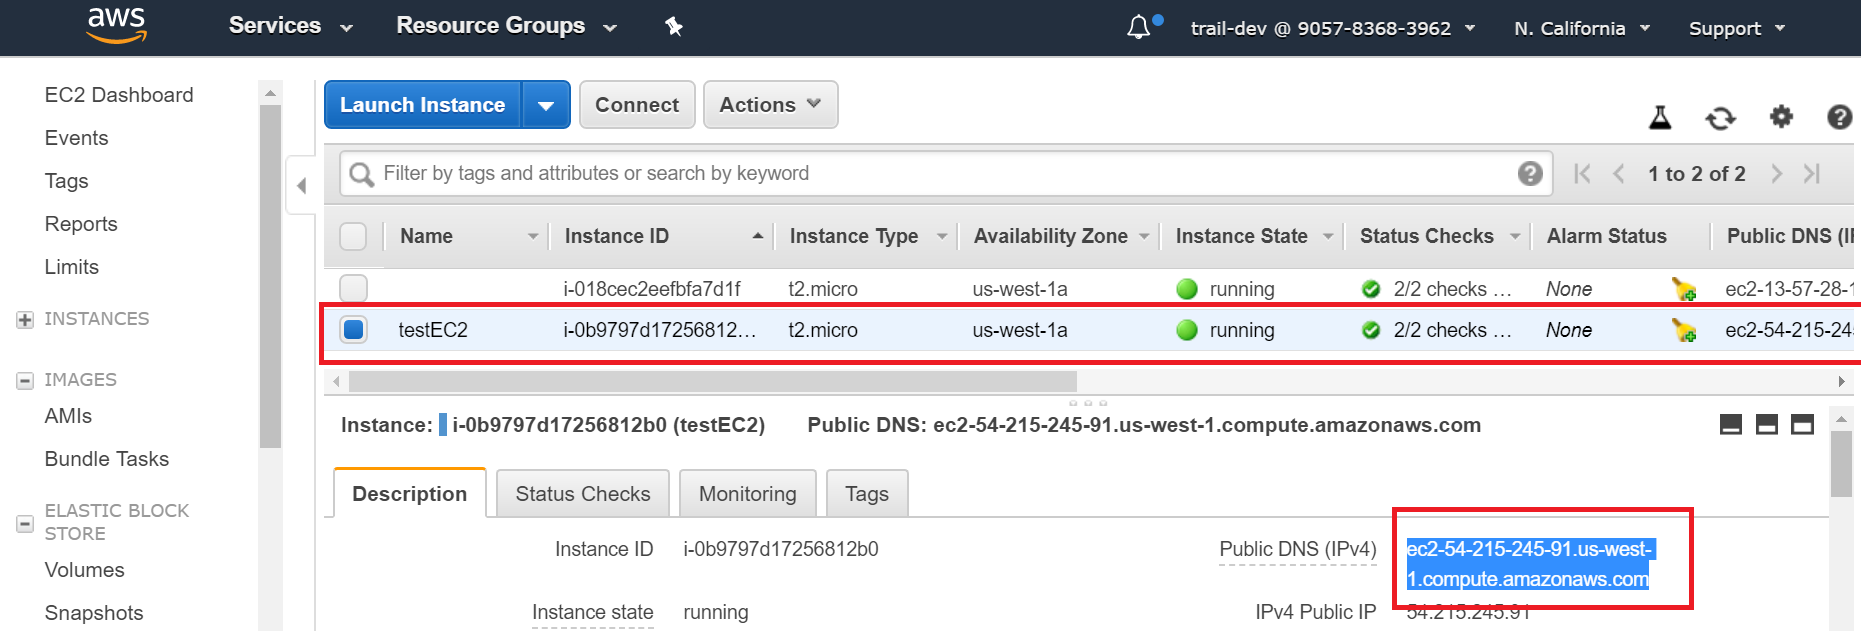
To see the instance running status, click Instances on the left-side EC2 Dashboard menu.
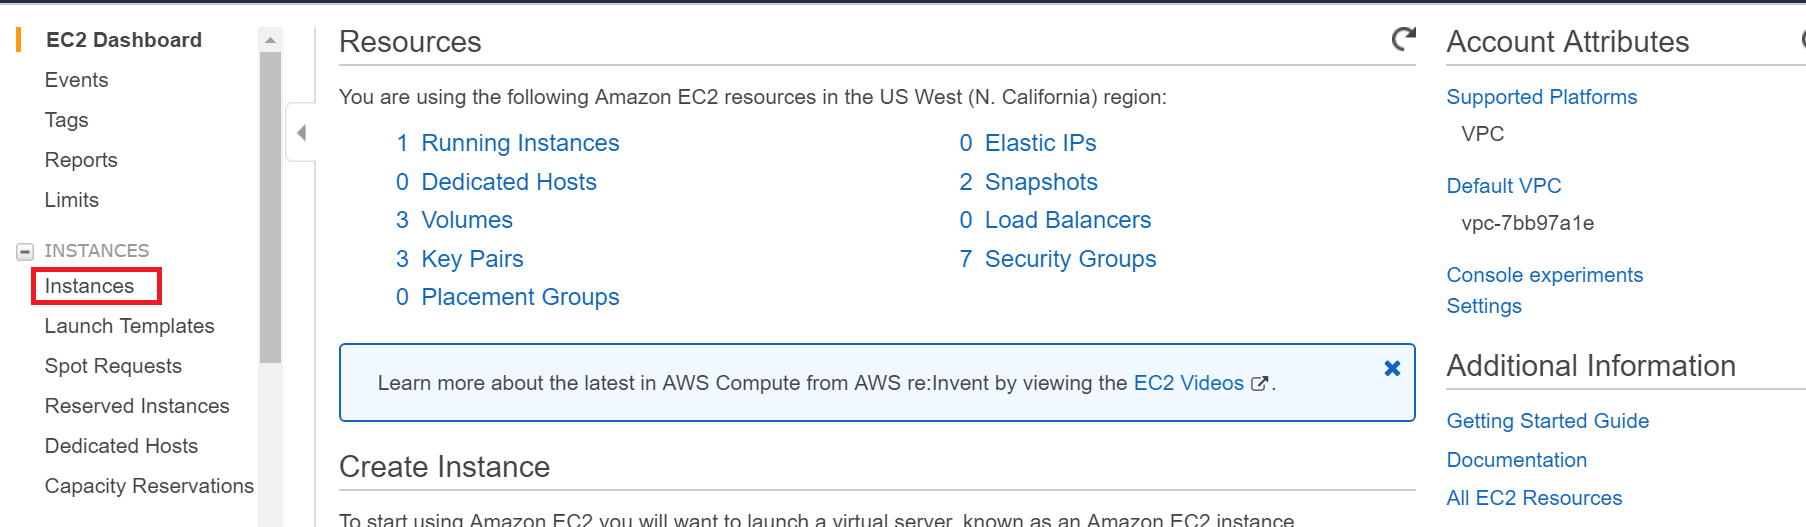
The Instance State column indicates the status. Copy the public DNS IPv4 from the Description section to log on to this instance.
Log on to the EC2 Instance
Verify that you have successfully downloaded the .pem file (key pair) in the previous procedure to log on to the created EC2 instance.
Open the terminal on your local system and go to the directory where the .pem file is saved.
Run the following command, replacing "ec2-user" with the correct user name.
CODEssh -i testEC2.pem ec2-user@ec2-54-215-245-91.us-west-1.compute.amazonaws.com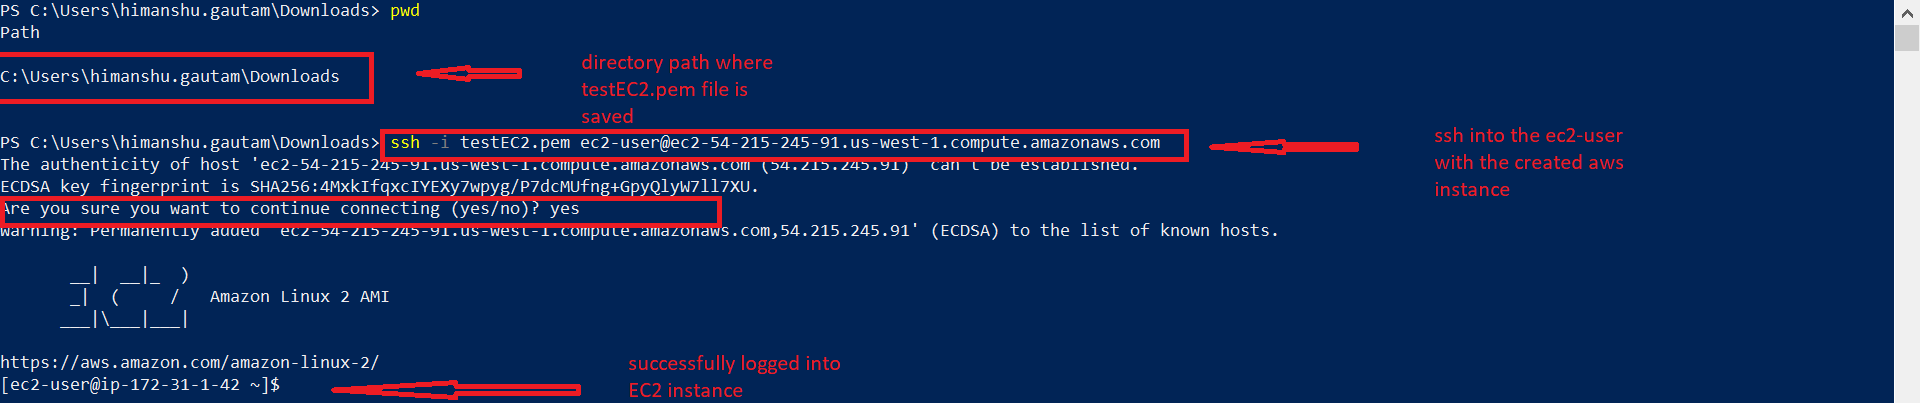
After successfully logging on to the instance, initialize the s3beat service using the instructions in the Initialize the AWS S3 Beat topic.