Instructions in this section contain the following designations:
-
Account A refers to the AWS Production account
-
Account B refers to the AWS Development account
Prerequisites
-
Two separate AWS accounts that you can use, one to represent the Production account (Account A), and one to represent the Development account (Account B).
-
An Amazon S3 bucket created in Account A (Production). For instructions on how to create your S3 bucket, see https://docs.aws.amazon.com/AmazonS3/latest/gsg/CreatingABucket.html.
-
An SQS Queue on Account B (Development).
-
Each SQS Queue must be in the same AWS Region as the S3 bucket on Account A.
-
Each S3 bucket requires ReceiveMessage, DeleteMessage, and GetQueueUrl Actions in the SQS Queue.
-
Configure S3-SQS Cross-Account Access
Update SQS Access policy
-
Log on to Account B as a user with administrator privileges.
-
On the top menu bar, click Services, and then click Simple Queue Service.
-
In the top-right corner, select your queue region.

-
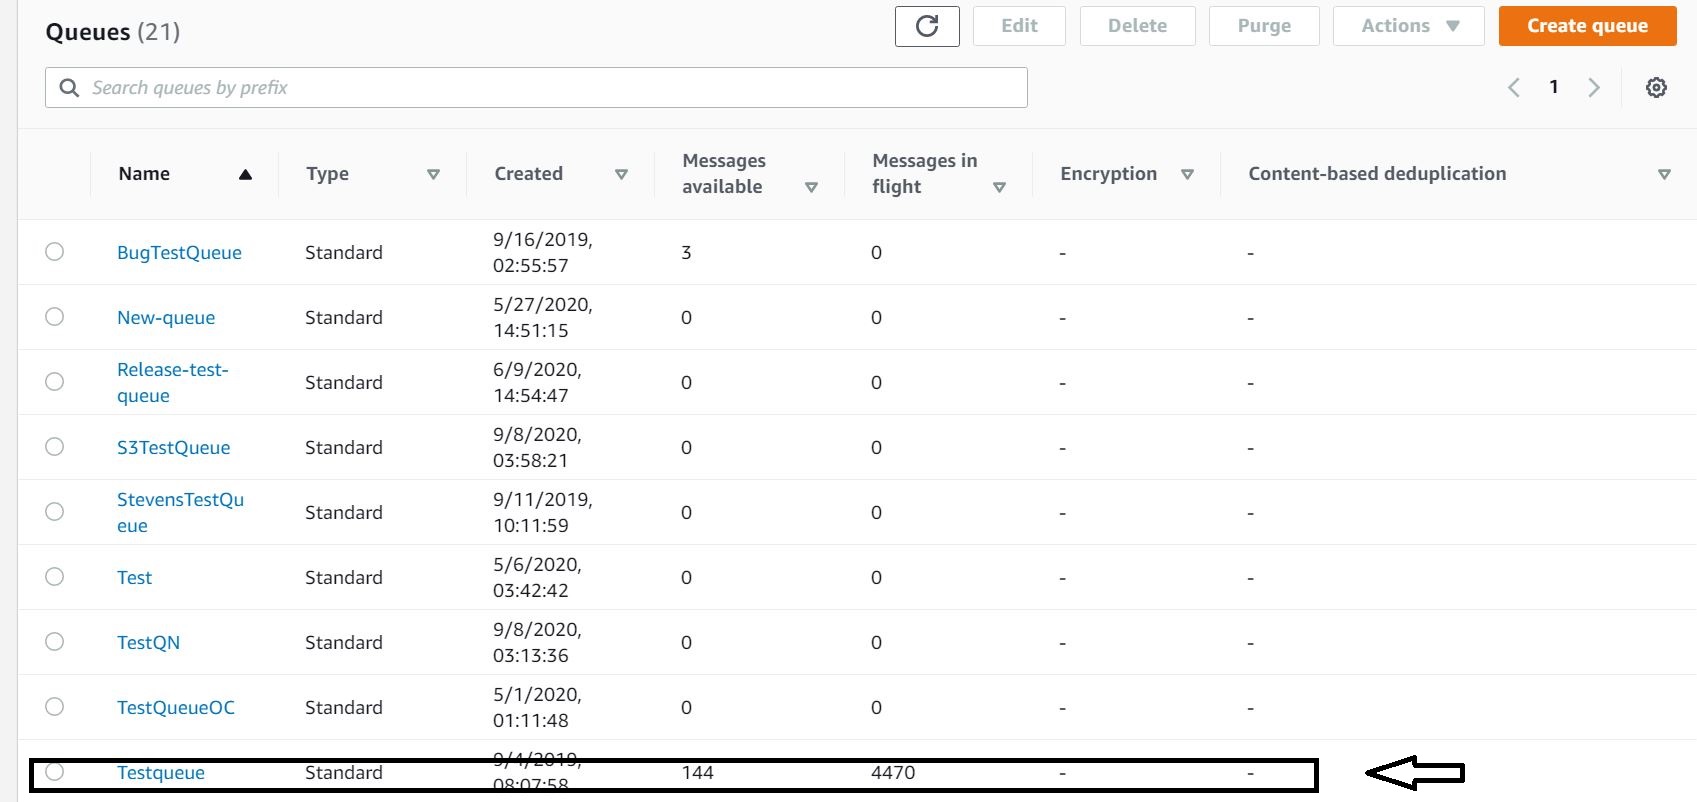
Select your queue from the queue list.
-
At the top of the window, click Edit.

-
Click Access Policy, and then at the bottom click Policy generator.
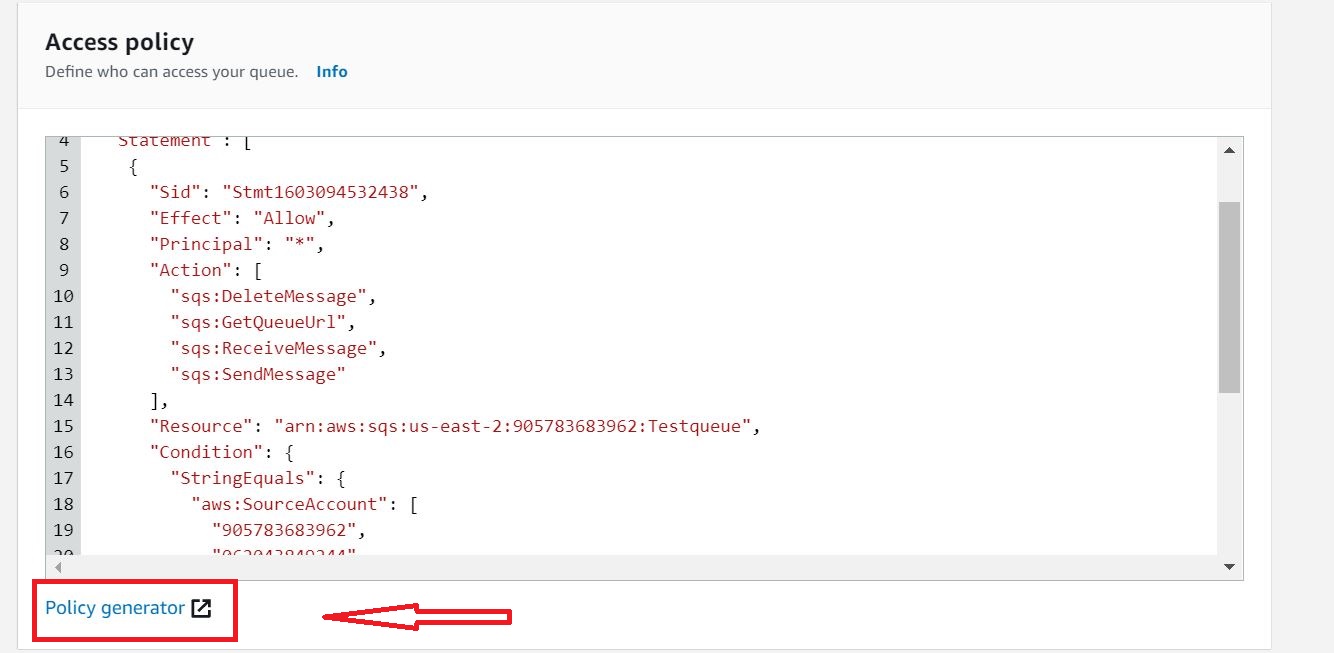
A new tab opens. -
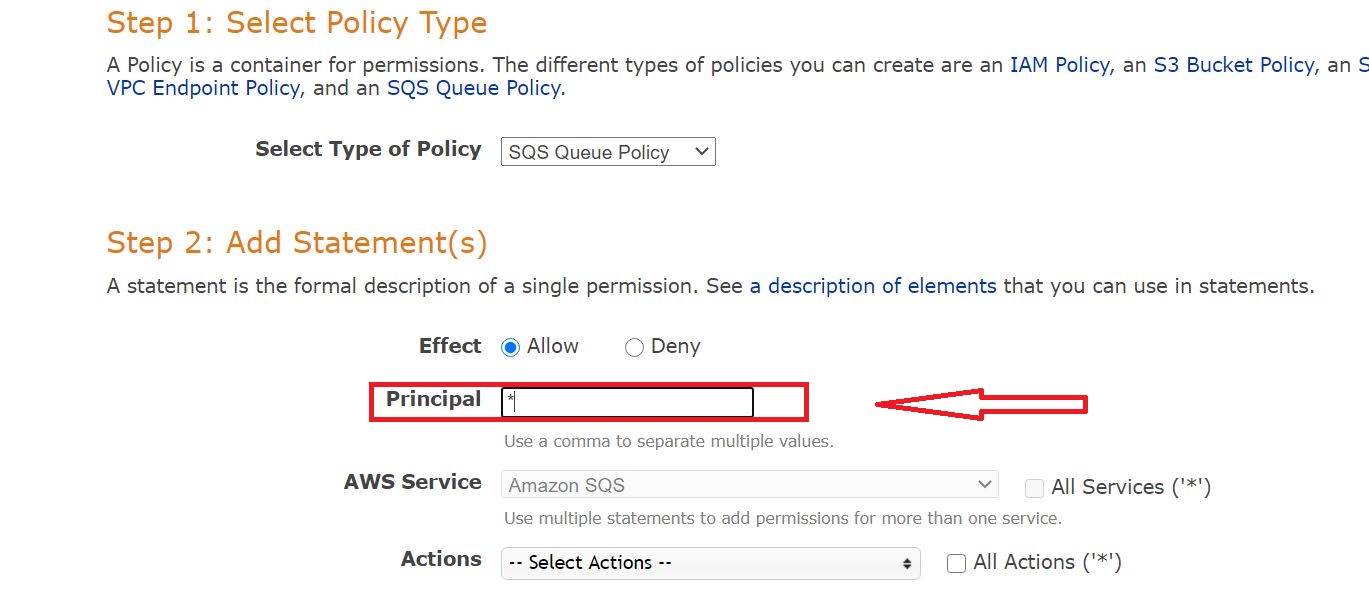
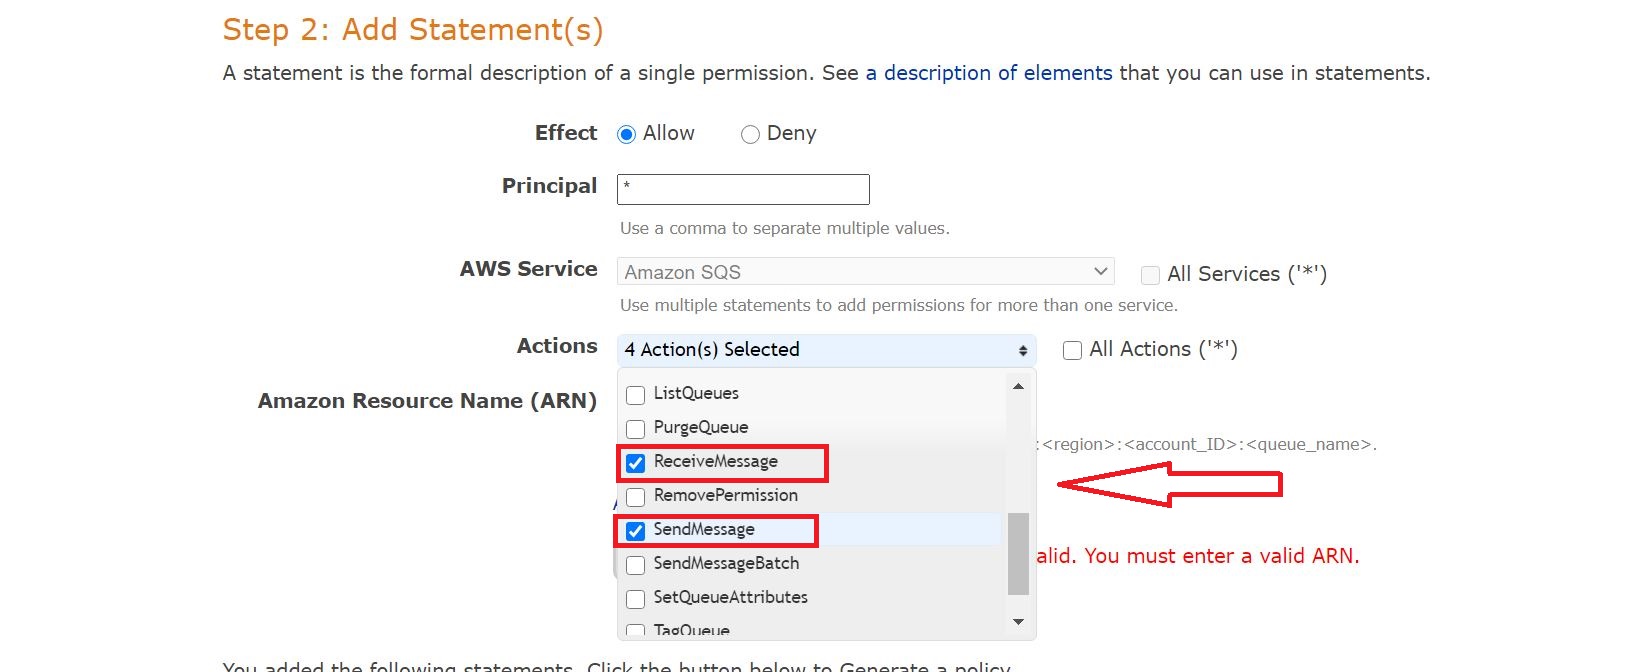
In the Principal field under Step 2: Add Statement(s), type *.
-
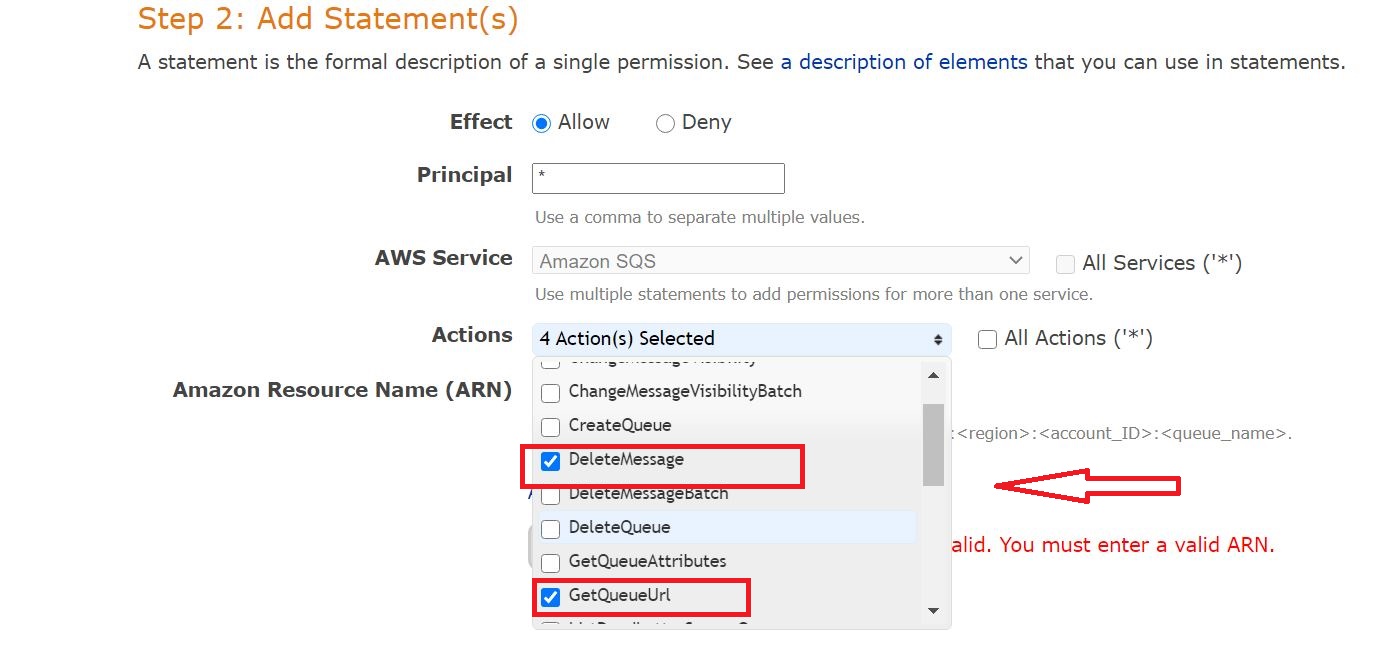
In the Actions drop down list, select Delete Message, Get Queue Url, Receive Message, and Send Message.
-
In the Amazon Resource Name (ARN) field, enter your Queue ARN in the following format (replace <accountid> with the account ID of Account B and <queue name> with your queue name):
arn:aws:sqs:<region>:<account_ID>:<queue_name>
-
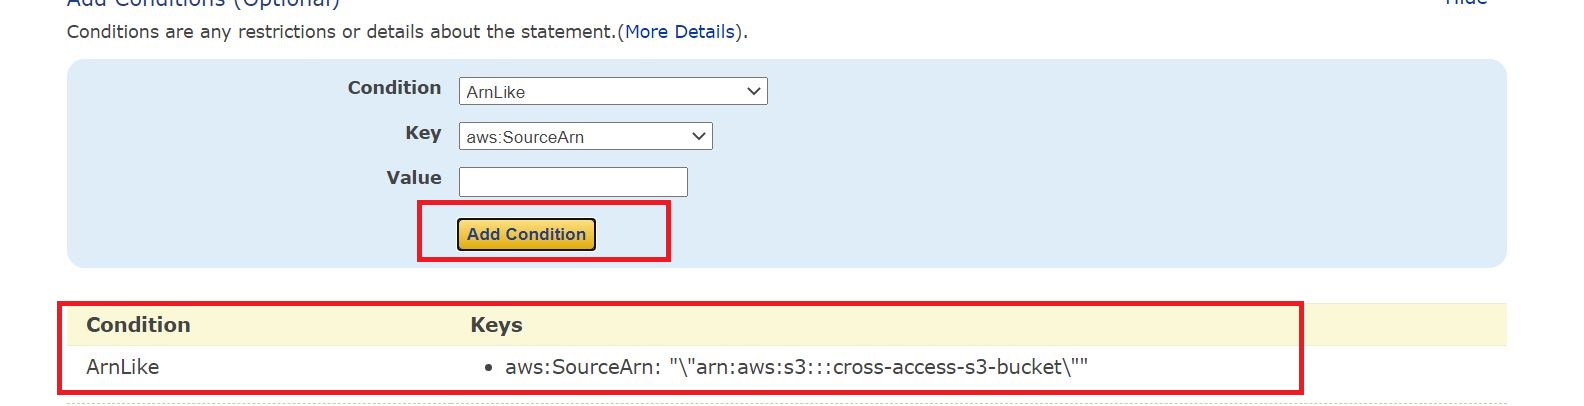
Click Add conditions.
-
In the Condition drop down list, select ArnLike.
-
In the Key drop down list, select aws:sourceArn.
-
In the Value field, enter arn:aws:s3:::<bucket_name> (replace <bucket_name> with the name of the bucket you created on Account A).
To add more than one bucket, enter the additional buckets separated with a comma.

-
-
Click Add condition. The added condition will display and you will be allowed to add more conditions.
-
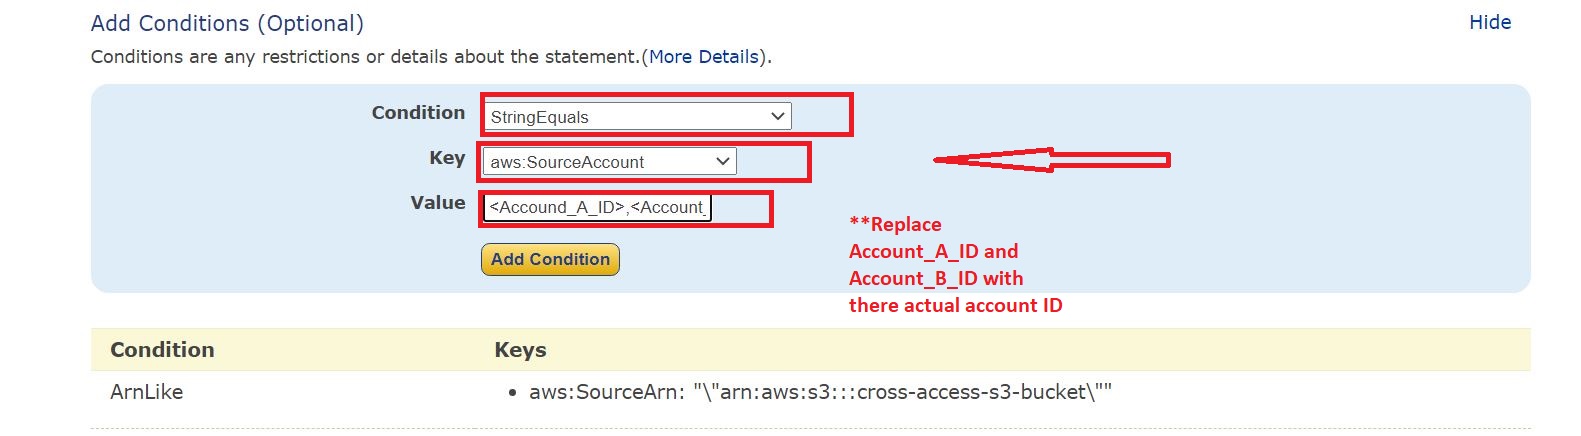
In the Condition drop down list, select StringEquals.
-
In the Key drop down list, select aws:SourceAccount.
-
In the Value field, enter the account IDs for Account A and Account B separated by a comma (for example, Account_A_ID, Account_B_ID).
(Replace Account_A_ID, Account_B_ID with their actual account IDs.)
-
-
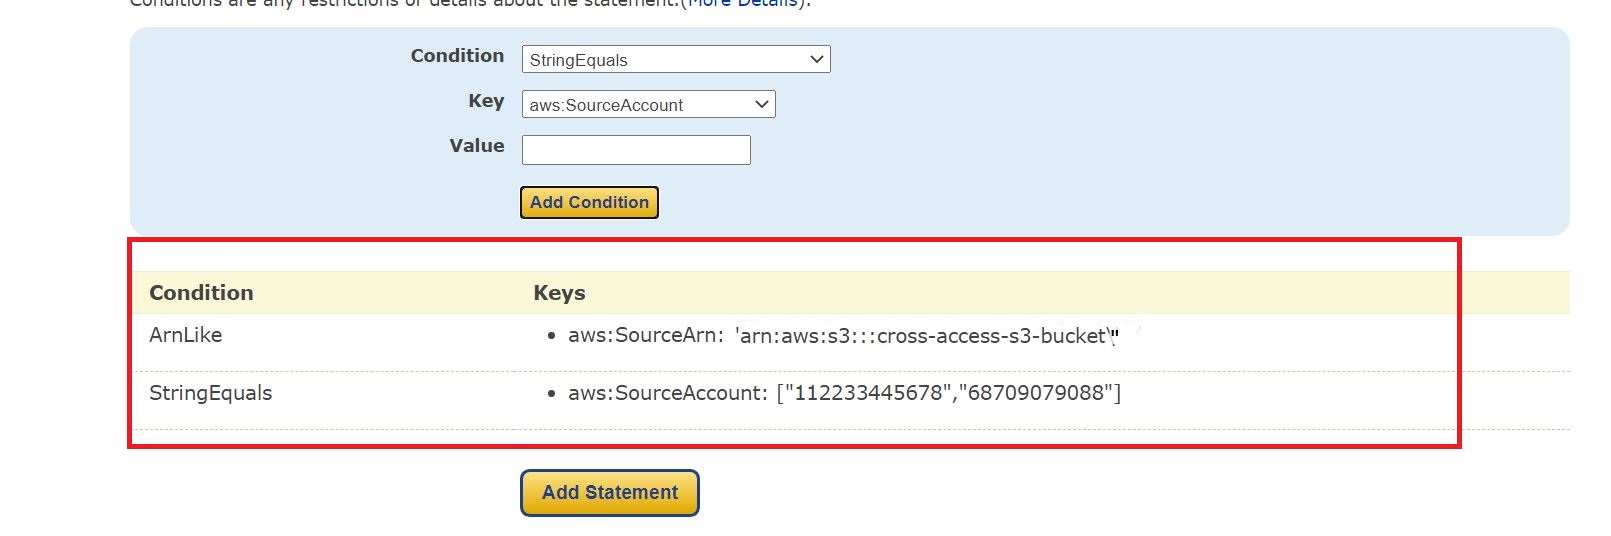
Click Add Condition. Both of the added conditions will display.
-
Click Add Statement.
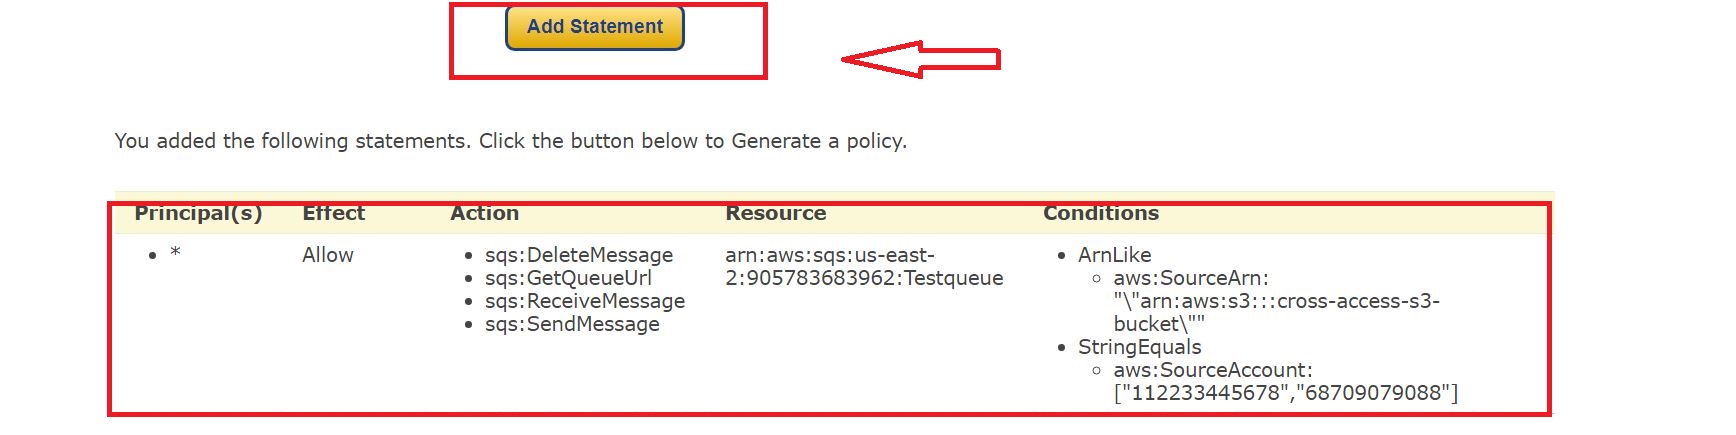
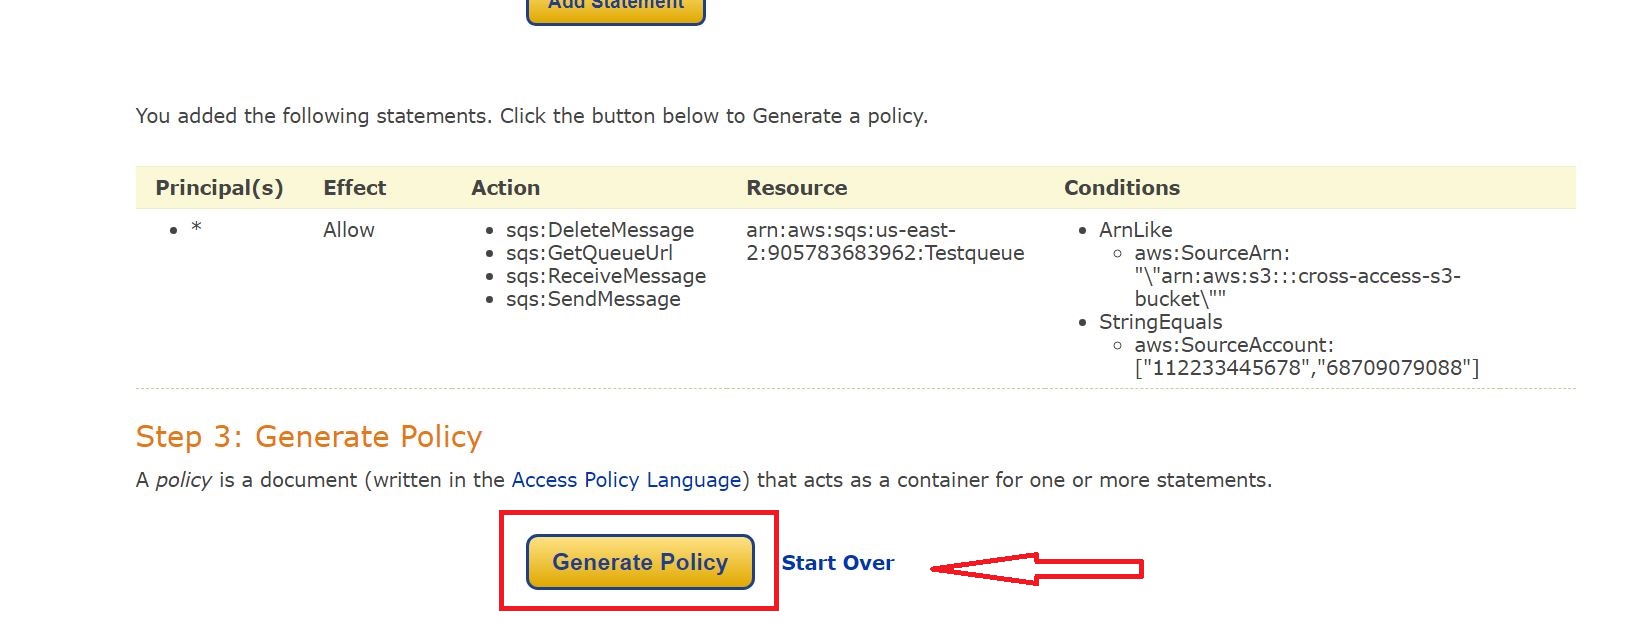
The entire statement appears. -
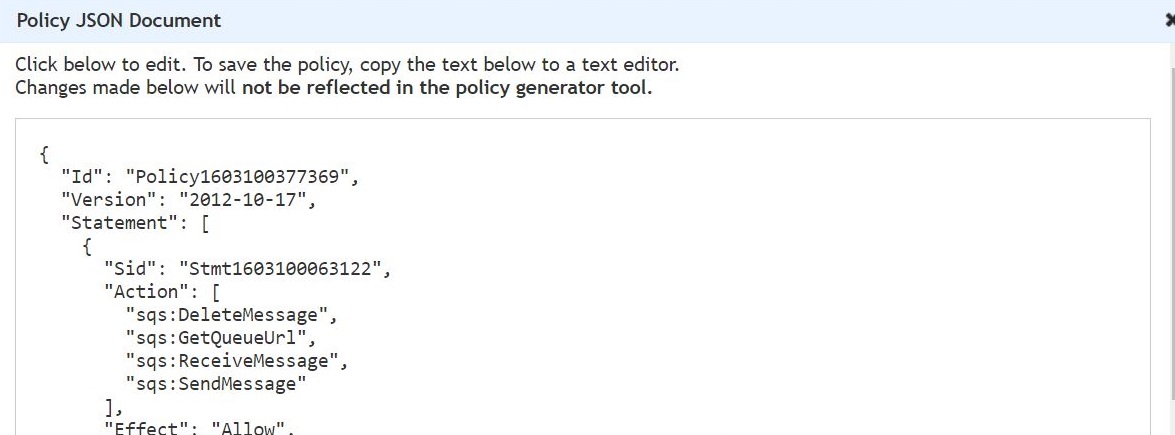
Click Generate Policy.
-
Copy the generated policy JSON.
-
Go back to the SQS policy tab, and paste the generated policy JSON into the access policy text box. If you already have an SQS policy in use, then append it.
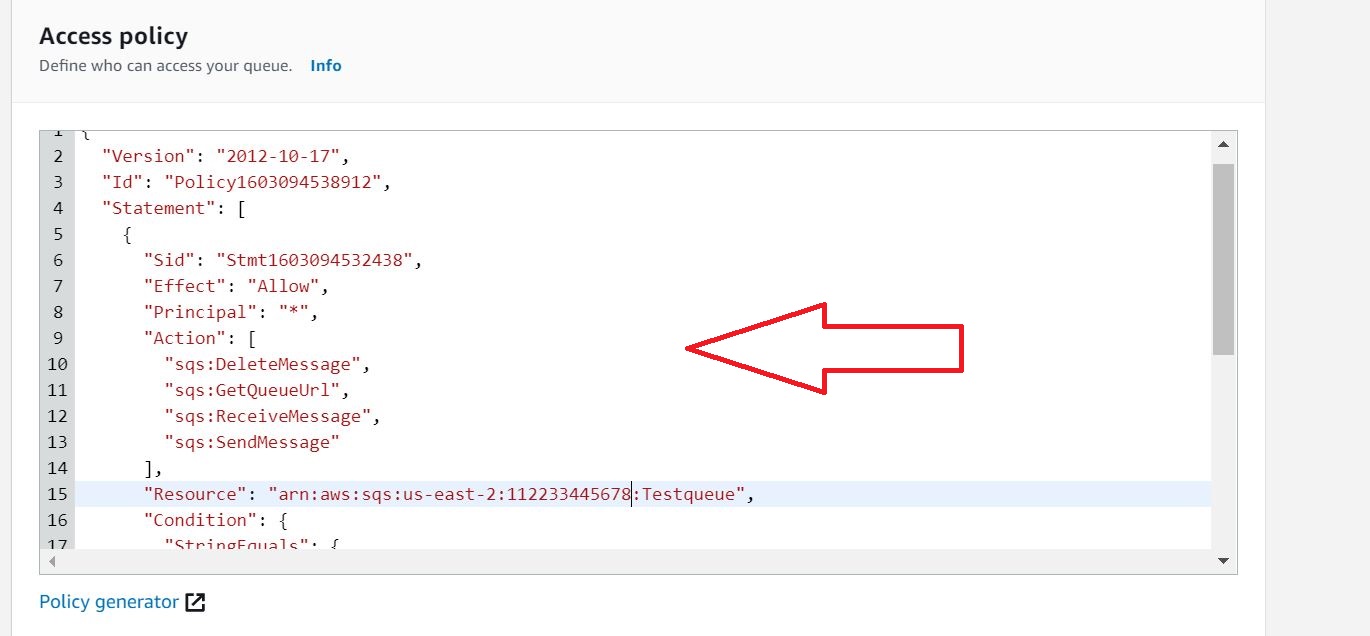
-
Click Save.

Configure S3 Bucket on Account A to Send Message on SQS of Account B
-
Log on to Account A as a user with administrator privileges.
-
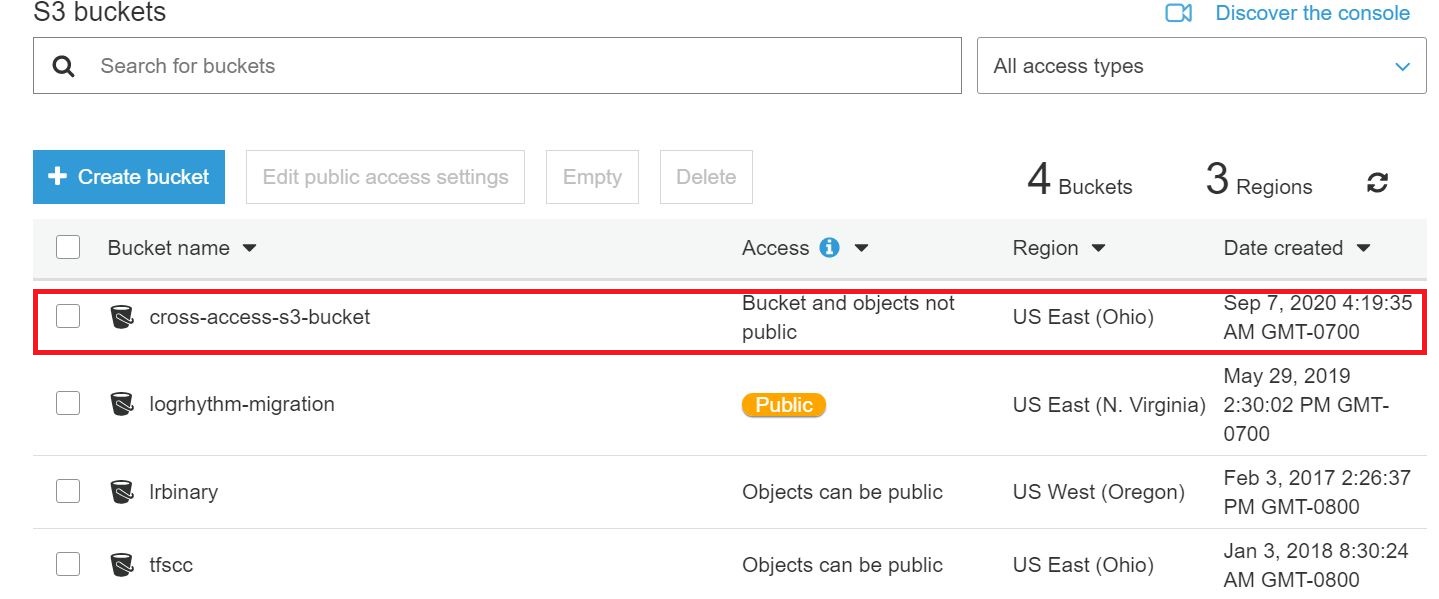
On the menu bar at the top, click Services, and then click S3.
-
Click on the S3 bucket. (It should be in the same region as SQS on Account B).
-
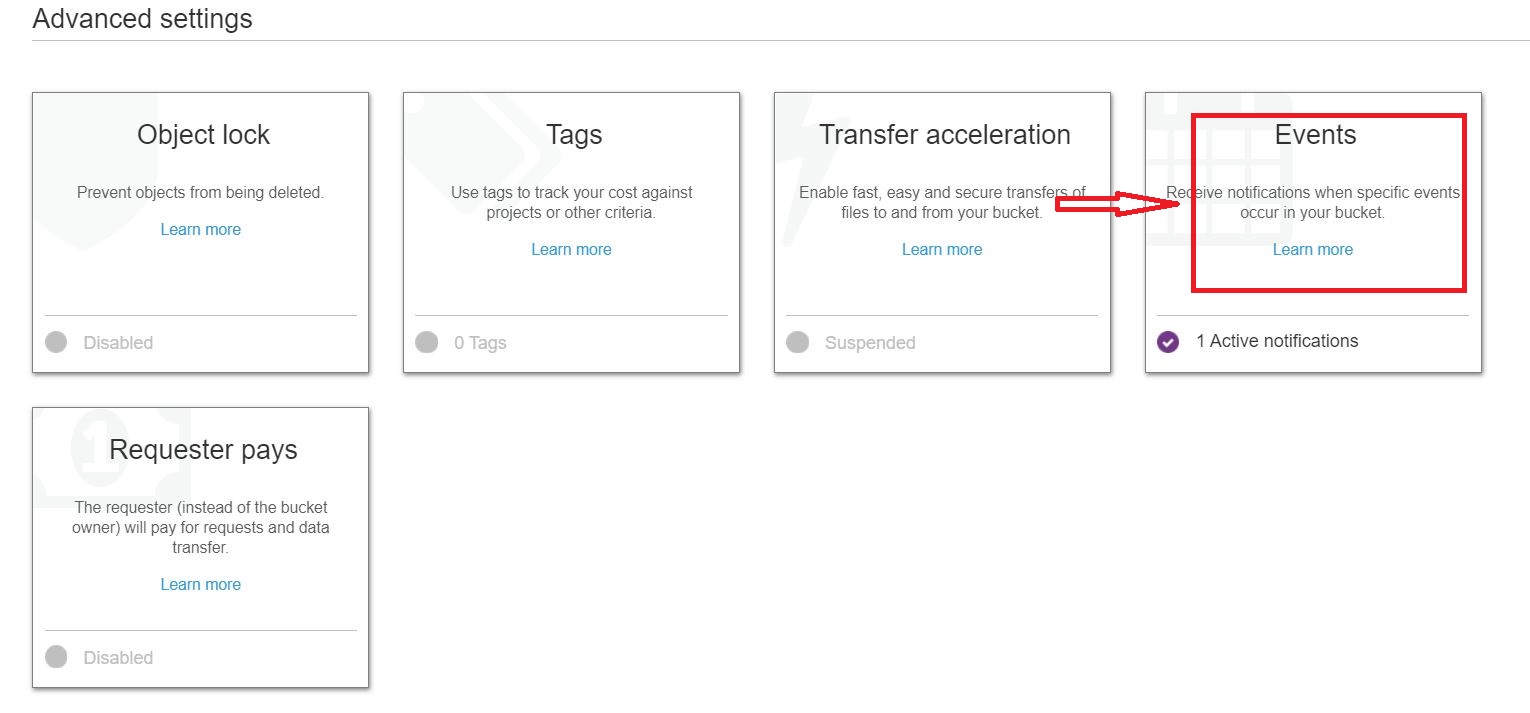
Click the Properties tab.

-
Under Advanced settings, click Events.
-
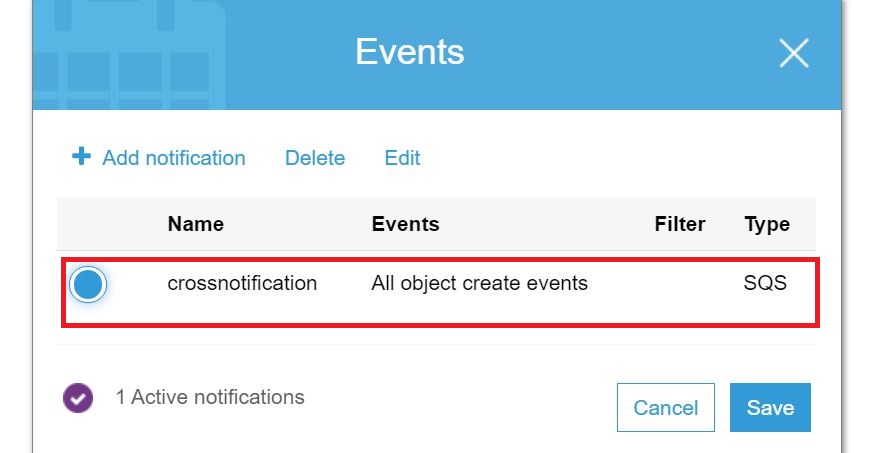
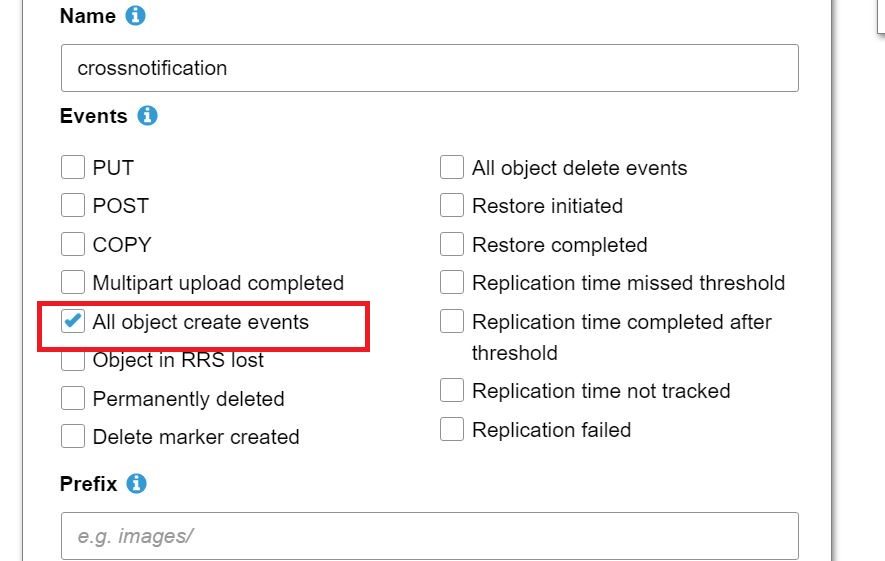
Select the Event identifier.
-
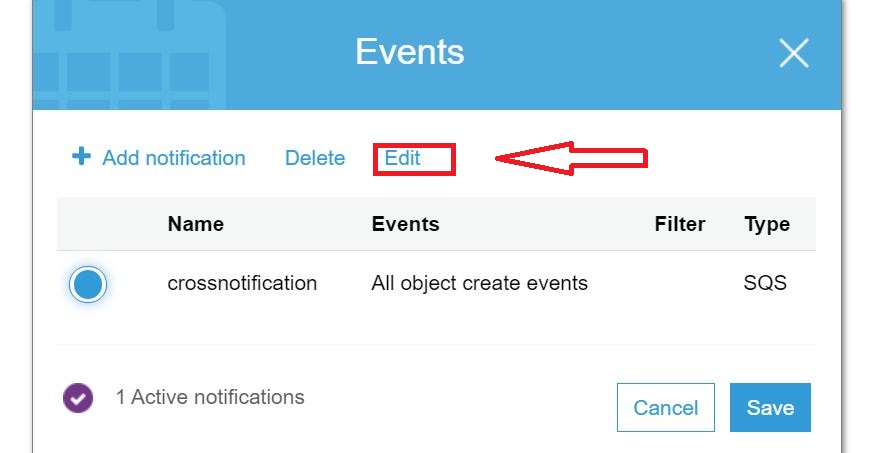
Click Edit.
-
In the Events list, select All object create events.
-
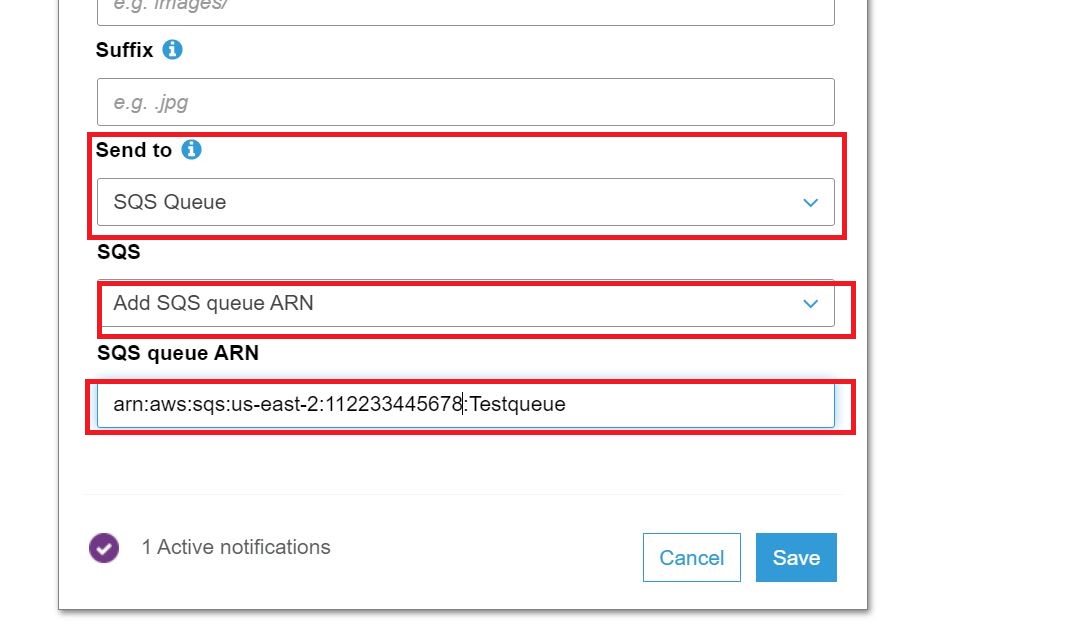
In the Send to drop down list, select SQS Queue.
-
In the SQS to drop down list, select Add SQS queue ARN.
-
In the SQS queue ARN field, type the SQS ARN of Account B.
-
-
Click Save.
Verify the Configuration
-
Log on to AWS Account A.
-
On the menu bar at the top, click Services, and then click S3.
-
Select the S3 bucket you just configured.
-
Upload any file on the bucket.
-
Log on to AWS Account B.
-
On the top menu bar, click Services.
-
In the search field, enter sqs, and then select Simple Queue Service from the suggested search results.
-
Select the SQS you just configured.
-
In the top-right of the window, click Send and receive messages.

-
Click Receive messages.

-
At the bottom, click Poll for messages.
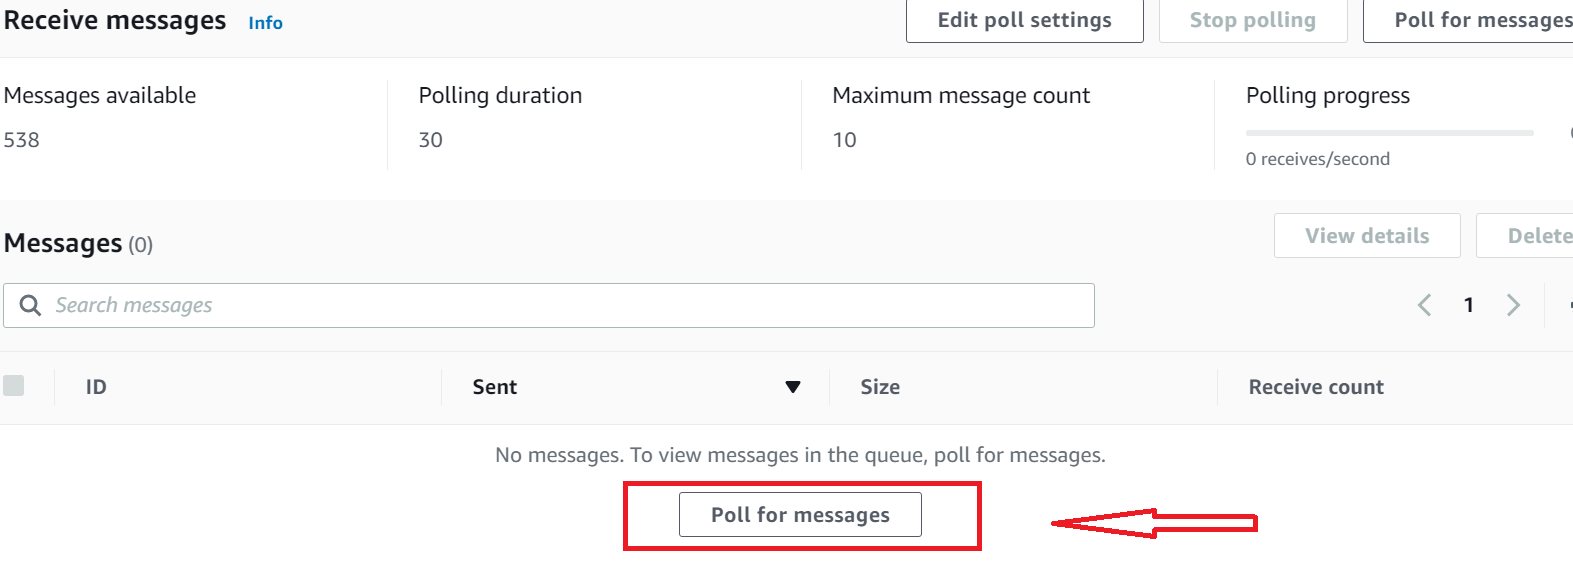
A list of received messages appears. -
Click on the message to view the body of message and verify the file name that you previously uploaded on the bucket.