Create a Certificate for Microsoft SQL Server Connections
This topic provides information about configuring certificates for SQL Server connections.
The following code snippet can be executed via PowerShell to create a self-signed certificate on a computer running SQL Server. The certificate meets requirements for encryption for a stand-alone SQL Server instance and is saved in the local computer's certificate store (PowerShell must be launched as an administrator).
CODE
# Define parameters
# Update Subject with FQDN of server
$certificateParams = @{
	Type = "SSLServerAuthentication"
	Subject = "CN=USR123456789.qa.site.com"
	DnsName = @("{0}" -f [System.Net.Dns]::GetHostByName($env:computerName).HostName, 'localhost')
	KeyAlgorithm = "RSA"
	KeyLength = 2048
	HashAlgorithm = "SHA256"
	TextExtension = "2.5.29.37={text}1.3.6.1.5.5.7.3.1"
	NotAfter = (Get-Date).AddMonths(36)
	KeySpec = "KeyExchange"
	Provider = "Microsoft RSA SChannel Cryptographic Provider"
	CertStoreLocation = "cert:\LocalMachine\My"
}

# Call the cmdlet
New-SelfSignedCertificate @certificateParams
Create and Export the SQL Certificate
To create the SQL certificate:
- Update the Subject line of the code snippet above with the FQDN of the server. e.g. Subject = "CN=USR123456789.qa.site.com"
- Verify that there is a new certificate in the computer's cert store, as shown below:

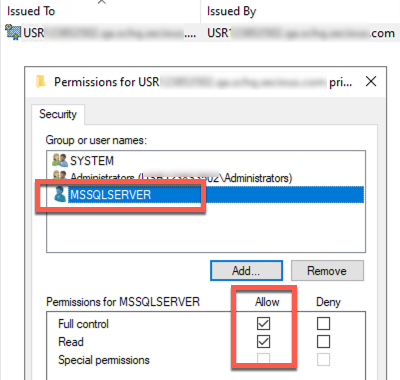
- Grant the SQL Server service account “NT Service\MSSQLSERVER” to the certificate's private key by clicking on Manage Private Keys.


- Open the SQL Server Configuration Manager tool.
- Right-click on Protocols for MSSQLSERVER and open the Properties pop-up.
The newly-generated certificate appears on the Certificate tab.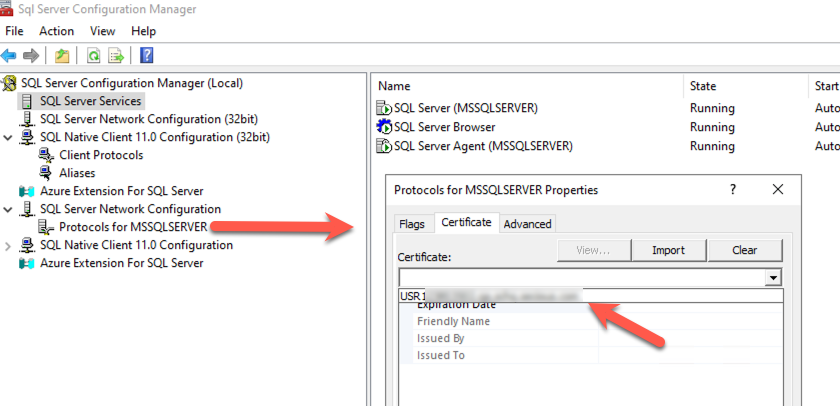
- Select this certificate from the drop-down and then select OK.
- Restart the SQL service.
Import the SQL Certificate into Windows Trusted Certificates
You will need to manually import this certificate into the Trust Root Certification Authorities on all LogRhythm servers that connect to SQL (such as Platform Manager, Data Processors, Web Consoles, and AI Engines).
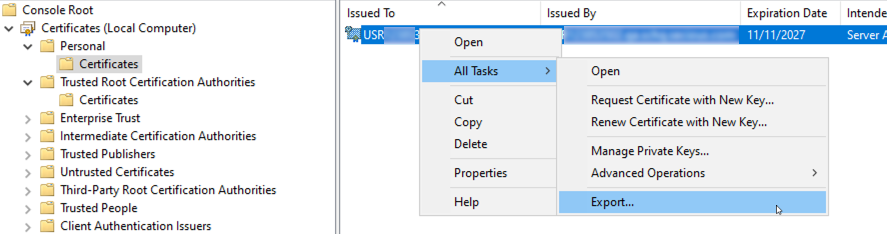
- Open the Microsoft Management Console and click Export.
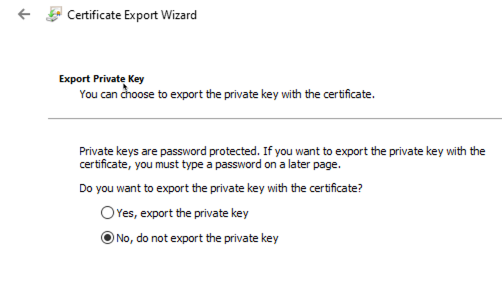
- Select No when asked whether to export the private key:
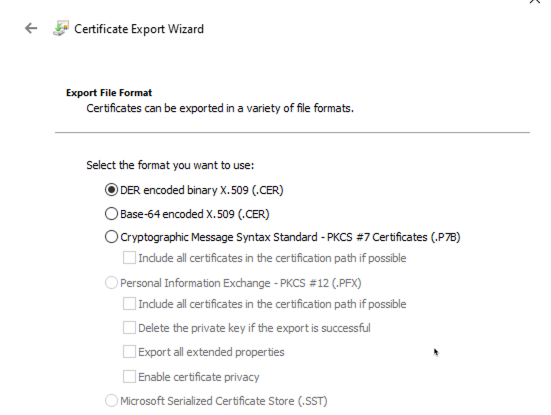
- Choose the DER encoded format:
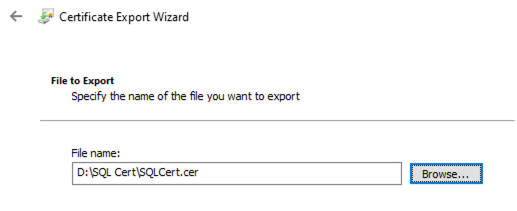
- Specify the name of the certificate being exported:
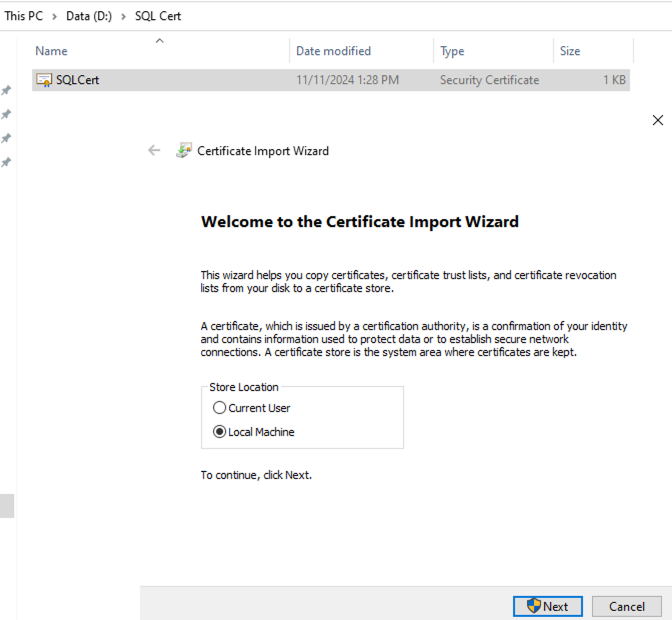
- On the client machine, right-click on the exported certificate and select Install Certificate to open the certificate import wizard.
- Select Local Machine, and then click Next.
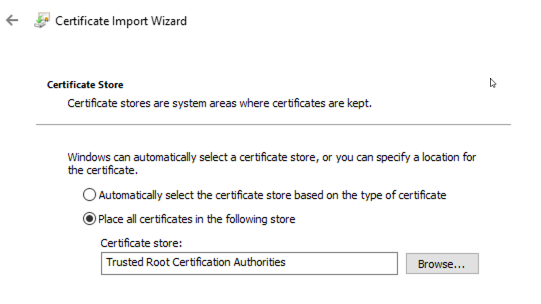
- Select Place all certificates in the following store and then click Browse.
- Select Trusted Root Certificate Authorities.
- Click Finish.
- Open the Microsoft Management Console and verify the certificate:

- Open all LogRhythm server Configuration Managers (listed below) and update the server setting to the FQDN used in certificate creation (in our example above, this was USR123456789.qa.site.com).
This FQDN also needs to be used in SQL Server Management Studio connection properties.
Configuration Manager Options
| Configuration Manager | Documentation for the Configuration Manager |
|---|---|
| Platform Manager | Use the Platform Manager Configuration Manager |
| Job Manager | Use the Job Manager Configuration Manager |
| Data Processor | Use the Data Processor Configuration Manager |
| AI Engine | Use the AI Engine Local Configuration Manager |