Device Details
|
Device Name |
Syslog - Apache Access Log |
|---|---|
|
Vendor |
Apache |
|
Device Type |
Linux-based Web Server |
|
Supported Model Name/Number |
N/A |
|
Supported Software Version(s) |
N/A |
|
Collection Method |
Syslog |
|
Configurable Log Output? |
N/A |
|
Log Source Type |
Syslog - Apache Access Log |
|
Log Processing Policy |
LogRhythm Default |
|
Exceptions |
N/A |
|
Additional Information |
This guide is explains how to configure Apache web server installed on a Linux CentOS7 to send the Apache access logs via syslog protocol to the LogRhythm System Monitor Agent. |
Prerequisites
-
Apache Web Server is installed, and its service is enabled.
-
Rsyslog utility is installed, and its service is enabled.
-
Vim or any Linux text editor is available.
-
User with sudo access on Linux machine.
-
Port 514 TCP/UDP allowed from Apache Web Server to LogRhythm System Monitor Agent.
-
Port 514 TCP/UDP allowed on LogRhythm System Monitor Agent to receive syslog packets from Apache Web Server.
-
LogRhythm Global Admins or Restricted Admins with elevated View and Manage privileges.
Configure Apache
This guide is explains how to configure an Apache web server installed on a Linux CentOS7 to send the Apache access logs via syslog protocol to the LogRhythm System Monitor Agent.
Configure Apache to send its access logs to a syslog service.
-
Confirm the Apache web server is installed:
sudo rpm -qa | grep httpdExample of expected output:
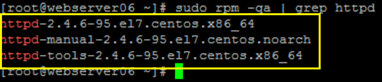
Version of packages may vary based on your configurations.
-
Confirm the Apache web server service is Active:
sudo systemctl status httpd.serviceExample of expected output:

If the Apache web server is not installed or enabled, consult your system admin.
-
Edit the Apache configuration file:
sudo vim /etc/httpd/conf/httpd.conf
Your default location might be different based on your Linux distro or Apache HTTPD version.
-
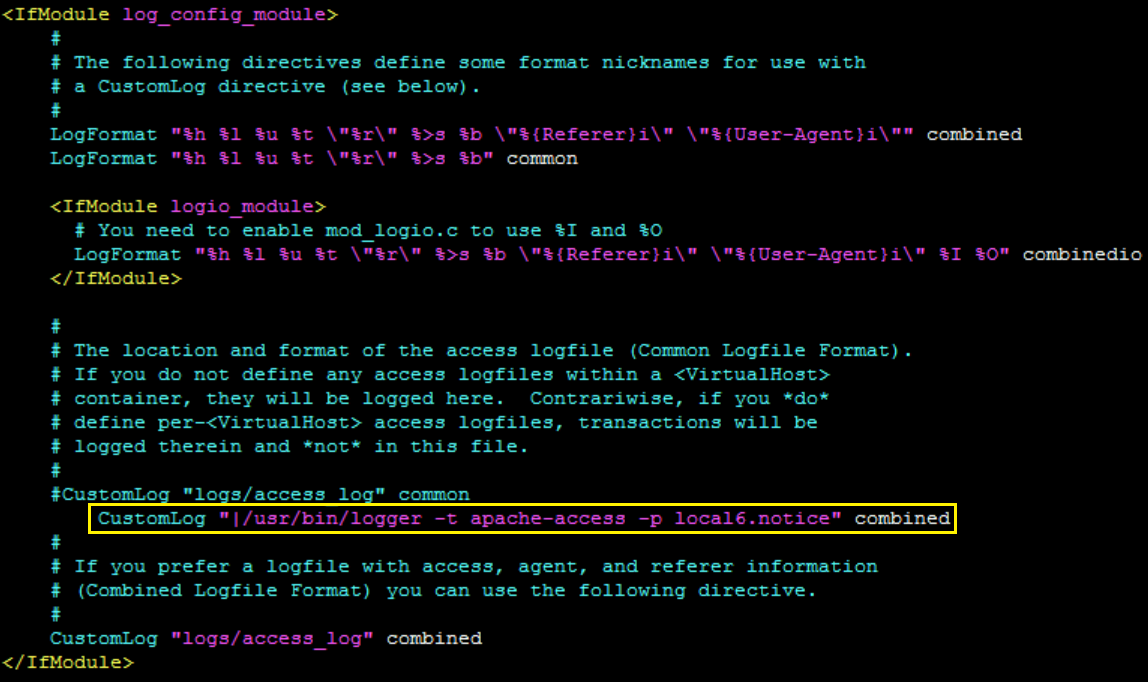
Edit the httpd.conf file by adding the following line within <IfModule log_config_module>:
CustomLog "|/usr/bin/logger -t apache-access -p local6.notice" combined
-
CustomLog. The Apache access log command.
-
|/usr/bin/logger. Pipes the output of “Apache Access Logs” as syslog messages.
-
-t. Tags the log messages with "apache-access" (this is useful for Log Source Virtualization).
-
-p. The priority defined for Apache access logs in format: <facility.severity>
Priority <facility.severity> is used in this guide as an example. You can use different configurations based on your environment.
-
local6. The facility code used in this example.
-
notice. The severity level used in this example.
-
combined. The Apache default log format (“LogFormat”) template to be used for the access log.
Example of expected output:
-
-
Save the configuration and restart the Apache service to apply changes:
sudo systemctl restart httpd.serviceExample of expected output:

-
Re-confirm the Apache service is Active:
sudo systemctl status httpd.service
Forward Apache Web Server Access Logs
After you have configured Apache web server, you need to forward its access logs through the syslog service to your LogRhythm Collector or System Monitor Agent.
-
Confirm the rsyslog service is installed:
sudo rpm -qa | grep rsyslogExample of expected output:

-
Confirm rsyslog service is Active:
systemctl status rsyslog.serviceExample of expected results:

-
Edit rsyslog configuration file:
sudo vim /etc/rsyslog.conf
Your default location might be different based on your Linux distro or syslog server.
-
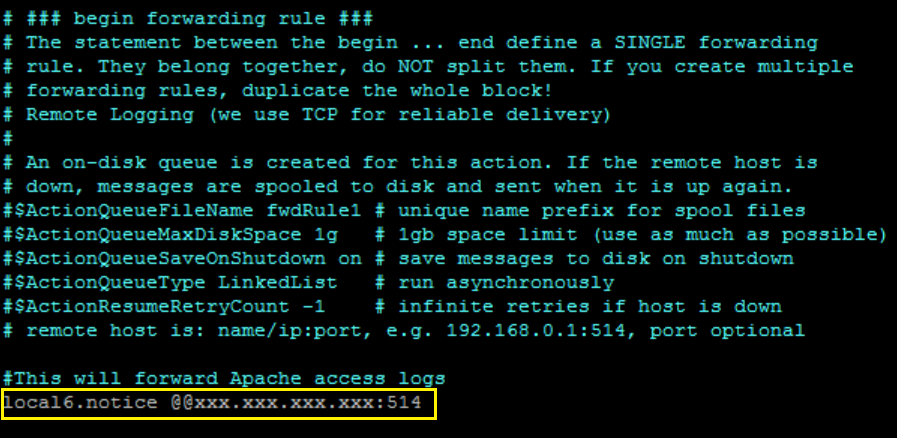
Edit the rsyslog configuration file by adding the following after the last line of the file:
local6.notice @@xxx.xxx.xxx.xxx:514
-
xxx.xxx.xxx.xxx. The IP address of the LogRhythm Collector or System Monitor Agent that will receive the syslog stream.
-
@@. Forwards syslog messages via TCP protocol.
To forward syslog messages via UDP protocol, enter @ instead of @@.
Example of expected output:
-
-
Save the configuration and restart rsyslog service to apply changes:
sudo systemctl restart rsyslog.serviceExample of expected output:

-
Re-confirm rsyslog service is Active:
systemctl status rsyslog.service
Configure LogRhythm
Only Global Admins or Restricted Admins with elevated View and Manage privileges can take these actions.
Confirm Syslog Server is Enabled
-
In the Client Console on the main toolbar, click Deployment Manager.
-
Click the System Monitors tab.
-
Double-click the System Monitor Agent that collects the information.
The System Monitor Agent Properties dialog box appears. -
Click the Syslog and Flow Settings tab.
-
Click the Enable Syslog Server check box.
-
Click OK.
Restart the LogRhythm System Monitor Service
-
On the System Monitor Agent host, right click the Windows Start menu, and then click Run.
The Run dialog box appears. -
In the Open field, enter services.msc, and then click OK.
The Services console appears. -
Right click LogRhythm System Monitor Service, and then click Restart.
Verify the System Monitor Agent is Connected
After restarting the LogRhythm System Monitor Service, you need to verify that the Agent is listening for the TCP/UDP connection on default port 514.
-
On the System Monitor Agent host, right click the Windows Start menu, and then click Command Prompt.
The Command Prompt dialog box appears. -
Execute the following command:
netstat -ano | findstr :514Example of expected output:

Ensure that the firewall on the Agent machine is allowing the incoming connection over TCP/UDP on port 514.
-
(Optional) To verify the rsyslog service is forwarding Apache access logs as syslog messages, you can generate some HTTP traffic at Apache Web Server (e.g., using curl tool), and then execute the following command again:
netstat -ano | findstr :514The connection status should change from LISTENING to ESTABLISHED as shown in the example output below:

Configure LogRhythm to Collect Logs
Resolve Log Source Hosts
-
On the main toolbar, click Deployment Manager.
-
Click the Log Sources tab.
-
In the New Log Sources grid, select the Action check box of the Syslog - Apache Access Log log source.
-
Right-click the selection, click Actions, and then click Resolve Log Source Hosts.
The Resolve Known Hosts Complete dialog box appears. -
Click OK.
Confirm Log Source Acceptance Properties
-
On the main toolbar, click Deployment Manager.
-
Click the Log Sources tab.
-
In the New Log Sources grid, select the Action check box of the Syslog - Apache Access Log log source.
-
Right-click the selection, and then click Properties.
The Log Source Acceptance Properties dialog box appears. -
Confirm the Device IP Address matches the IP address of the Apache web server.
-
(Optional) Change the Log Source Name, if desired.
-
To the right of the Log Source Type field, click the ... selector.
The Log Source Type Selector dialog box appears. -
In the Text Filter field, enter Syslog - Apache Access Log, and then click Apply.
-
In the Log Source Type section, click System : Syslog - Apache Access Log, and then click OK.
The Log Source Acceptance Properties dialog box appears. -
Click the field under MPE Policy, and then click LogRhythm Default.
-
Click OK.
Accept the New Log Source
-
On the main toolbar, click Deployment Manager.
-
Click the Log Sources tab.
-
In the New Log Sources grid, select the Action check box of the Syslog - Apache Access Log log source.
-
Right-click the selection, click Actions, click Accept, and then click Defaults.
The Accept Successful dialog box appears. -
Click OK.
The Syslog - Apache Access Log log source moves from the New Log Sources list to the existing list in at the bottom of the screen.
Tail the Log Source
-
On the main toolbar, click Deployment Manager.
-
Click the Log Sources tab.
-
In the grid below the New Log Sources grid, select the Action check box of the Syslog - Apache Access Log log source.
-
Right-click the selection, click Actions, and then click Tail Log Source(s).
Verify the Agent is Receiving Apache Access Logs
-
To verify the Agent is receiving Apache access logs, generate HTTP requests on the Apache web server using the Linux command line utility:
curl xxx.xxx.xxx.xxx
-
-
xxx.xxx.xxx.xxx. The IP address of the Apache Web Server IP/hostname.
-
Example of expected output:
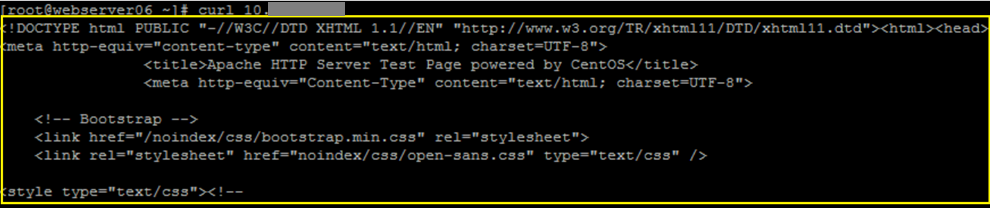
Within seconds, the Apache access logs will appear with LR Tail in the Aggregate Log/Event List.
If you do not to see some type of Apache access logs, then you need to create a GLPR rule to get that specific type of the log indexed. Once indexed, the logs should be visible from Tail/Investigator/Search.
-
-
(Optional) Double click on a received log message to seethe raw log message and how it gets parsed.