(LRCloud Only) Initialize the Cisco AMP Beat Using Cloud to Cloud Collection
This document explains how to initialize the Cisco AMP Beat using the Web Console's cloud-to-cloud functionality. This feature is available only to LRCloud customers.
Prerequisites
Before initializing the Cisco AMP Beat, do the following:
- Make sure that the customer is an LRCloud customer and has their environment hosted.
- Check if the Open Collector has been installed in the customer's LRCloud environment on a separate instance. If not, an Open Collector instance must be requested via a support case.
- Ensure that the Open Collector log source has been accepted.
- Check if you have the required keys: Cisco Client ID and API Key.
Apply the Log Source Virtualization Template
- Log in to the Client Console in Cameyo.
- Click Deployment Manager from the toolbar.
- Click the Log Sources tab.
- Double-click the required Open Collector Log Source (such as, {instance}-opencollector.c.e3-hub-753dd405.internal Open Collector).
The Log Message Source Properties window appears. - Click the Log Source Virtualization tab.
- If not checked, select the Enable Virtualization check box.
- Click Create Virtual Log Sources.
The Create Virtual Log Sources dialog box appears. - In the Virtual Log Sources menu, check the Action check box corresponding to "Syslog - Open Collector - Cisco AMP" and "Syslog - Open Collector - CiscoAMPBeat Heartbeat" log source types.
- Click Save.
The Virtual Log Source(s) created prompt appears. - Click Ok.
- Click Apply.
- Click Ok.
The new Log Sources will appear in the grid as children of your parent log source. - Click the System Monitors tab.
- Select the Action check box corresponding to the (customerid)-dpawc agent.
- Right-click the selection, click Actions and then click Service Restart.
Initialize the Beat
- Log in to the Web Console as a Restricted Administrator User.
- On the top navigation bar, click the Administration icon and select Cloud Log Collection.
- At the top of the Cloud Log Collection page, click New Log Source.
The New cloud log collection dialog box appears. - Select the Azure Event Hub - Open Collector tile.
The Add CiscoAMP Beat Log Source window appears.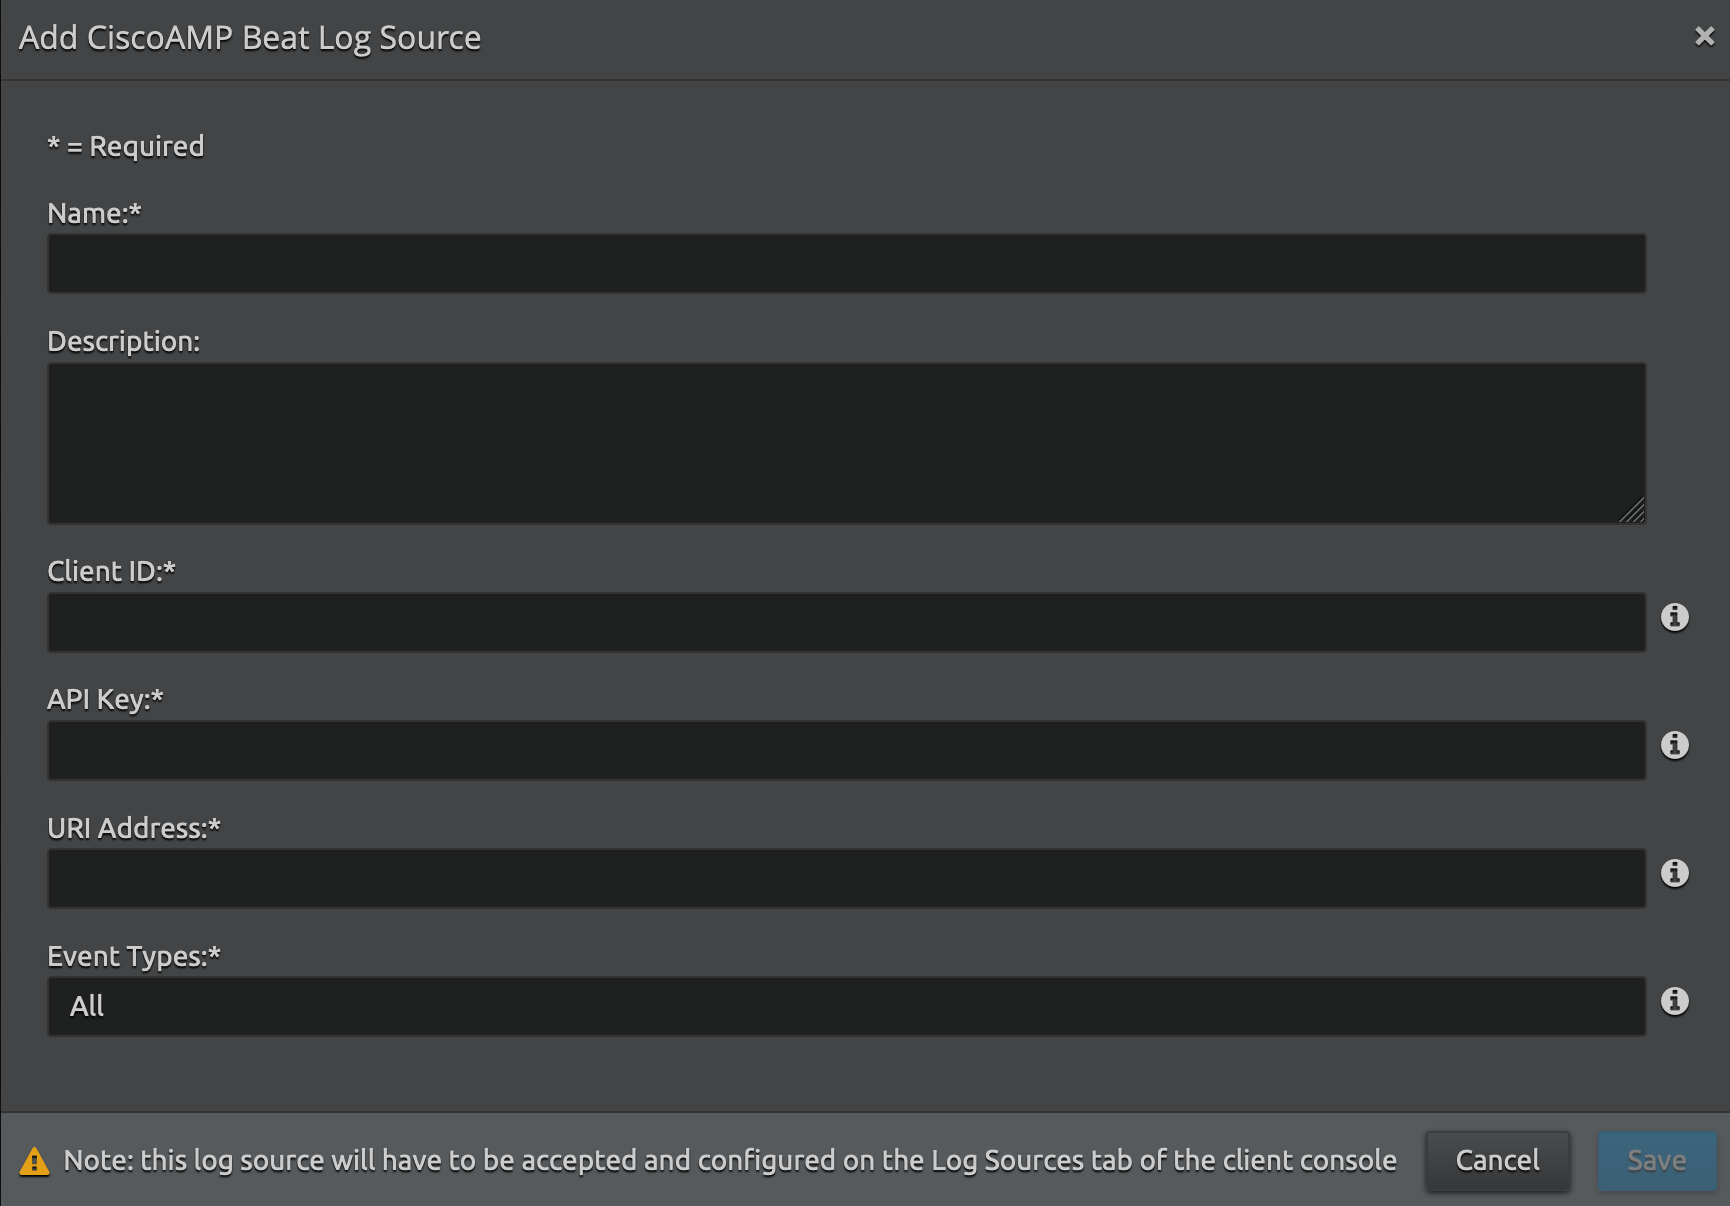
Enter the following details:
Setting
Default Value
Description
Name Not Applicable Enter the name for this log source. Description (Optional) Not Applicable Enter a description for this log source. Client ID Not Applicable Enter the Cisco AMP EndPoint Client ID (for example, ab1234c123de123a45678a). API Key Not Applicable Enter the Cisco AMP EndPoint API Key (for example, ab1234ab-12ab-12ab-ab12-123456abcdef). URI Address Not Applicable
Enter the Cisco AMP EndPoint URI address for the preferred region. API is location based and varies depending on where your AMP instance resides. Currently, three regions exist:
Region
Address
U.S. api.amp.cisco.com Asia, Pacific, Japan, and China api.apjc.amp.cisco.com Europe api.eu.amp.cisco.com Event Types All List the Event log file types that the Open Collector should collect. To collect from all Event Log Types, use the value "ALL". Otherwise, specify each value separated by a comma (,) without spaces. For example: 554696715,1091567628,553648130.
For more information on specific Event type IDs, see https://api-docs.amp.cisco.com/api_actions/details?
Click Save.
- Log in to the Client Console in Cameyo.
- Click Deployment Manager from the toolbar.
- Click the System Monitors tab.
- Select the Action check box corresponding to the dpwac agent.
- Right-click the selection, click Actions and then click Service Restart.
A new log source is created with the provided information based on the virtualized log source that was already created. Collection should start automatically in few minutes.
The Open Collector hosts the log sources. It is recommended to create a new host entity and move the log source to the new host which is done in the log source properties screen and not from the log source grid.
Default Config Values for CiscoAMPBeat
Setting | Field Name | Default Value |
|---|---|---|
| 1 | HeartbeatInterval | 60s |
| 2 | HeartbeatDisabled | false |
| 3 | Period | 4s |
| 4 | limit | 250 |
| 5 | numbackdaysDataAuditLogs | 7 |
| 6 | numbackdaysData | 7 |
| 7 | version | v1 |
| 8 | throttlingIntervalSecs | 60 seconds |