If you have already accepted the Open Collector's syslog feed as the Open Collector - Syslog type, logs will be normalized properly. However, the sub-rule will be generic.
To customize sub-rules, you can create your own log source type (for example, Open Collector - Syslog - WinLogBeat), clone the Catch-All base rule to your new log source type, and then add sub-rules based on the sample logs coming in.
For more information on base rules and sub-rules, see the Message Processing Engine Rule Builder topic in the LogRhythm SIEM Help.
After your pipeline is installed and running, log into the SIEM as an Administrator and complete the following procedures.
Create a New Log Source Type
-
On the main toolbar, click Deployment Manager.
-
On the Tools menu, click Knowledge, and then click Log Source Type Manager.
The Log Source Type Manager appears. -
In the top-left corner, click the green plus to create a new log source type.
-
Complete the Name and Abbreviation fields.
-
Select a Log Format from the list. In most cases, the format will be syslog.
-
(Optional) Complete the Brief Description and Additional Details fields.
-
Click OK.
The new log source type appears at the bottom of the grid. -
Click Close.
Create a New MPE Rule
-
On the Tools menu, click Knowledge, and then click MPE Rule Builder.
The Rule Builder window appears. -
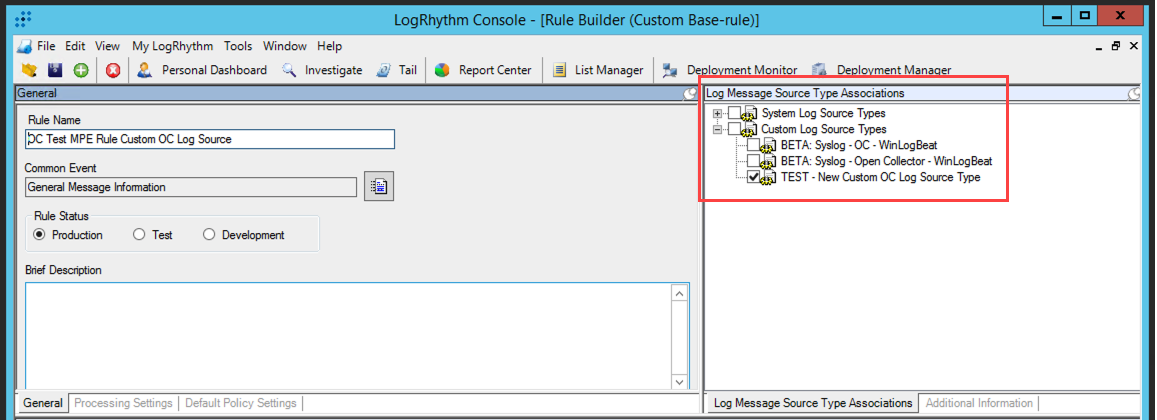
In the Log Message Source Type Associations section on the right, expand Custom Log Source Types.
The new log source type you added appears in this section.
-
Select the check box for the new log source type.
-
In the General section on the left, enter a rule name.
When naming a rule, follow these accepted best practices:
-
When the matching log message contains a vendor message ID, such as an event ID in Windows Event Logs, include the ID in the name of the rule. This makes searching for the rule easier and also makes the rule more descriptive of the log that it matches.
-
If the rule matches a log from a logging system that generates logs for a wide variety of services, such as the Windows Application Event Log, include the service that generated the log message in the rule name.
-
Use rule names that contain a brief description of the action described by the log. For example: EVID 528 : Failed Authentication : Bad Username or Password
-
-
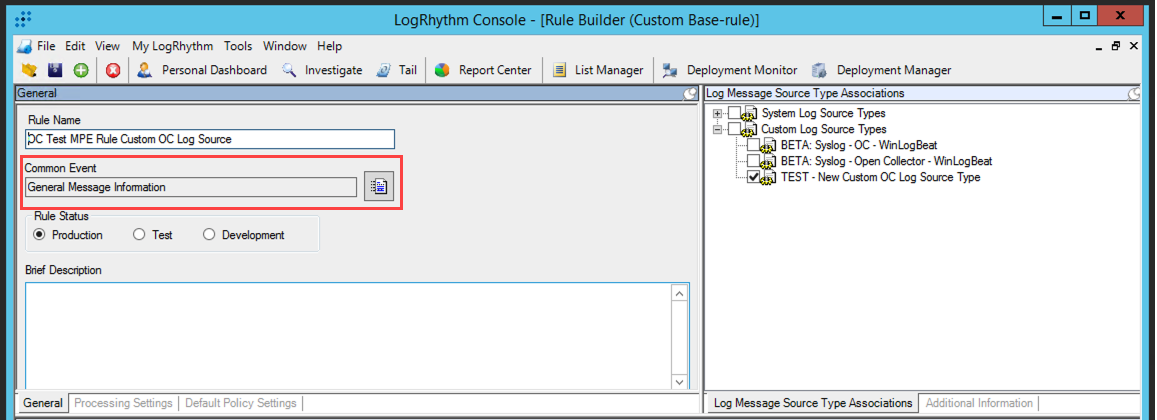
To associate the rule with a Common Event, click the icon to the right of the Common Event field.
-
Use the filters to select the Common Event you want, and then click OK.
-
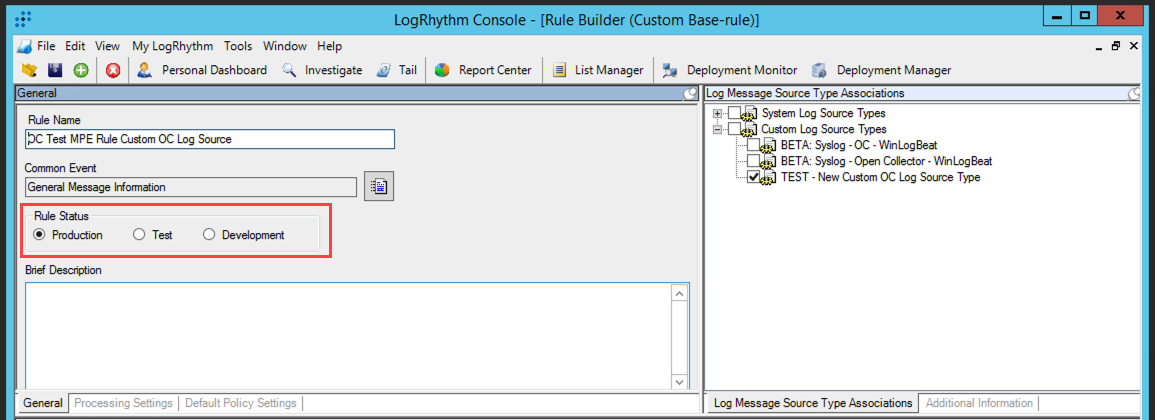
In the General section on the left, select Production in the Rule Status Field. Rules must be set to production for the log source type to be available in the Client Console.
-
In the Base-rule Regular Expression section, enter the following regex: .*?

-
In the upper-left corner of the Rule Builder, click the black save icon, and then click the yellow folder to open the Rule Library.
-
In the menu on the left, search for the log message source type you created, and then click it to see the associate MPE Rule you created.
-
After you verify it is there, you can close the Rule Browser.
Create a New Log Processing Policy
-
On the main SIEM toolbar, click Deployment Manager.
-
Click the Log Processing Policies tab.
-
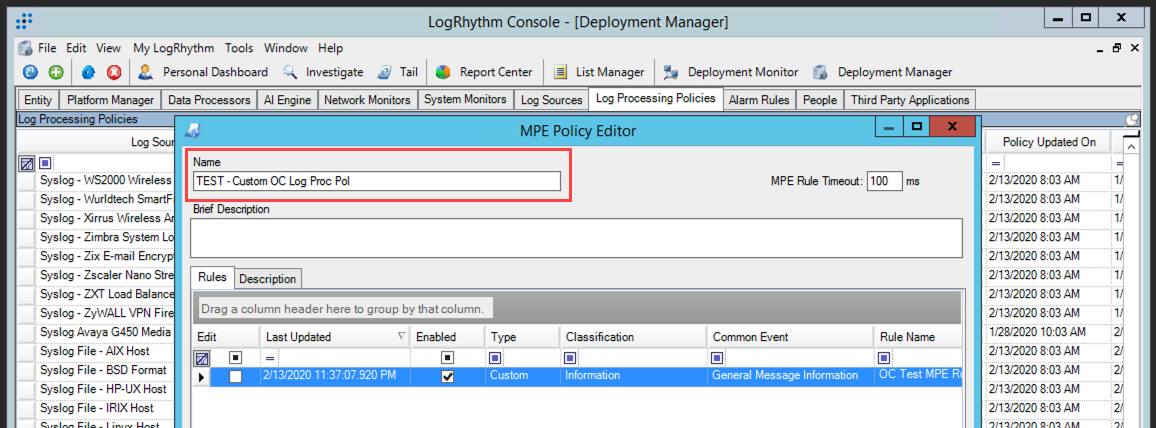
In the top-left corner, click the green plus to create a new log processing policy.
The Log Source Type Selector appears. -
Use the filters to find the log source type you created in step 3 of Create a New Log Source Type. Select it, and then click OK.
-
Enter a name for the new MPE policy.
-
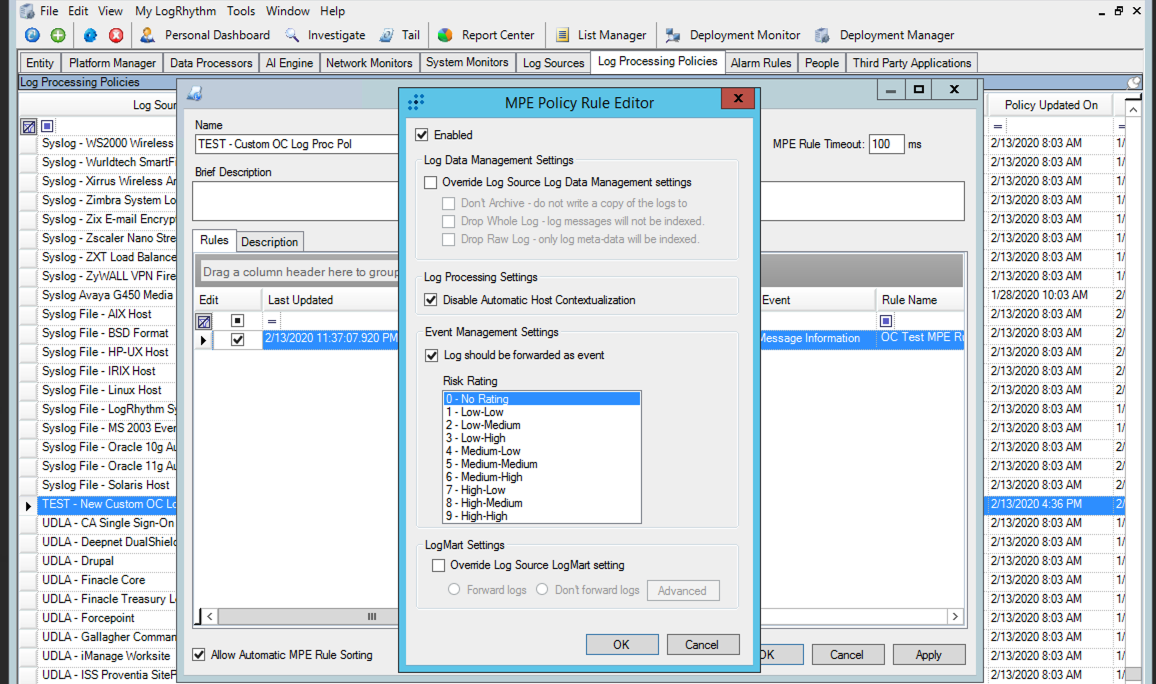
In the grid, select the Edit check box for the rule you want, right-click the rule, and then select Properties.
-
Select the Enabled check box but leave the rest of the default settings.
-
To complete the policy creation, click OK, and then click OK again.
-
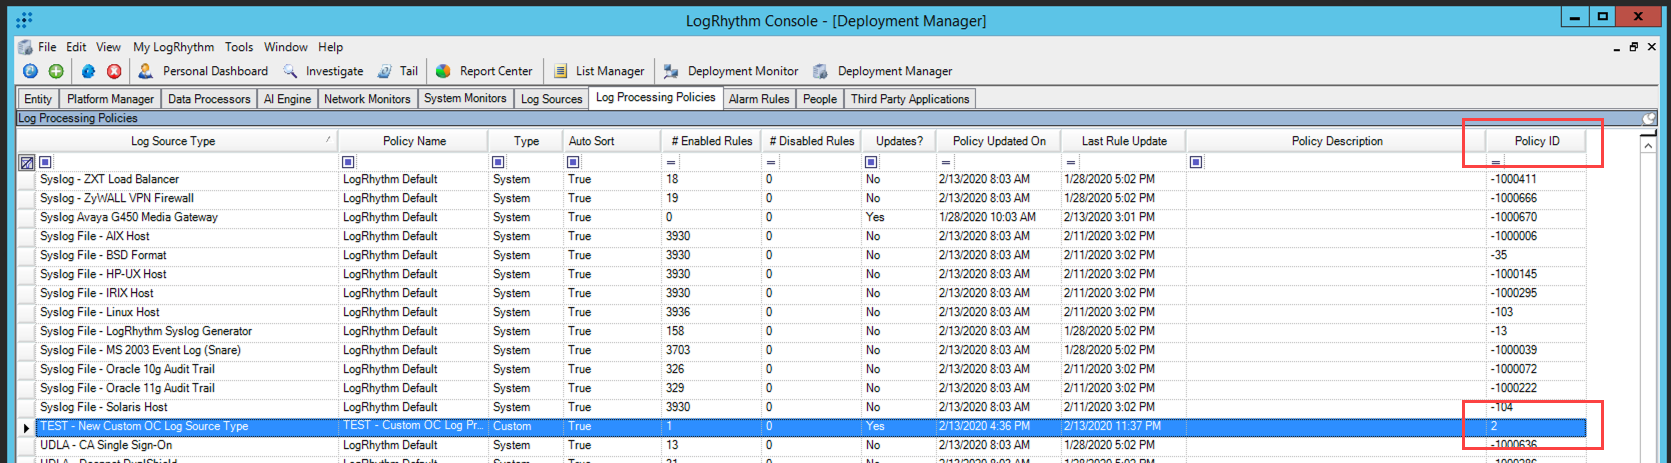
In the Log Processing Policies grid, use the filters to find the policy you created.
-
Find the Policy ID column (by default, it is the last column on the right), and take note of the value there.
You need this value to create the Log Source Virtualization Template.
Configure the Log Source Virtualization Template
-
In the Client Console, click Deployment Manager on the main toolbar.
-
On the Tools menu, click Administration, and then click Log Source Virtualization Template Manager.
If you do not see the Open Collector template with an Id of -1 in the Log Source Virtualization Template Manager, you must manually sync your system with your LogRhythm KB before proceeding.
-
In the Log Source Virtualization Template Manager, right-click on the Open Collector template, then click Clone.
The Log Source Virtualization Template Properties dialog box appears. -
In the Name field at the top of the window, enter a name for your template (for example, Open Collector Custom).
-
Click OK.
-
At the bottom of the Log Source Type Virtualization Template Manager, click Virtual Log Source Manager.

The Virtual Log Source Manager dialog box appears. -
In upper-left corner of the Virtual Log Source Manager window, click the green plus to create a new custom virtual source.
The Virtual Log Source Properties dialog box appears. -
Enter your Virtual Log Source Name and Identifier Regex, and select the Log Message Source Type for your new virtual source.
You must have already created a custom log source and policy for your custom beat input.
-
After you select the Log Message Source Type, click the Log Processing Message Engine (MPE) Policy drop down menu and select logrhythm default.
-
Click Save, and then click OK.
-
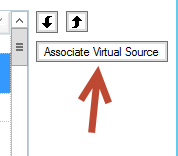
In the Log Source Virtualization Template Manager, double-click your new Open Collector virtualization template.
The Log Source Virtualization Template Properties dialog box appears. -
On the right side of the dialog box, click Associate Virtual Source.
-
In the Virtual Log Source Manager, scroll to the bottom and find your newly created virtual source. Click the Action box to enable that virtual source in this custom template.
-
Click Associate.
The window will automatically close. -
In the Log Source Virtualization Template Properties dialog box, scroll to the bottom of the Virtual Log Sources and verify your new virtual source appears.
-
Click OK.
-
You should now have an Open Collector Custom virtualization template where the number listed in the # of Virtual Sources column is greater than the Open Collector system template.
-
Click Close.
-
In the Deployment Manager, click the Log Sources tab, and find your base Open Collector log source.
-
Select the log source by clicking the checkbox, and then right-click Properties.
-
Click on the Log Source Virtualization tab, and then click Create Virtual Log Sources.
-
In the Create Virtual Log Sources window, make sure the Log Source Virtualization Template drop down menu contains your new Open Collector Custom virtualization template.
-
Click Save, and then click OK.
-
This should now create an additional log source for your newly created custom virtual source.