Collect Account Information from the GCP Console
The following information is required to configure Google for Beats:
-
Project ID
-
Credential file for a particular GCP account
-
Topic Name
-
Subscription Name (also referred to as Subscription ID)
Create a Role For a Project
-
Open the GCP Console: https://console.cloud.google.com.
-
On the left-side menu, click IAM & Admin, and then click Roles.
-
In the center pane, click Create Role.
-
Enter the basic information requested for the role.
-
Click Add Permissions and select the following permissions:
-
pubsub.subscriptions.consume
-
pubsub.subscriptions.get
-
pubsub.subscriptions.create
-
pubsub.topics.attachSubscription
If you have set subscription.create: false in pubsubbeat.yml file (the default value for subscription.create is true) and you are using an existing subscription, you can add the following permissions:
-
pubsub.subscriptions.consume
-
pubsub.subscriptions.get
-
pubsub.subscriptions.update
-
-
Click Add, and then Create.
Generate a Credential File
-
Open the GCP Console: https://console.cloud.google.com.
-
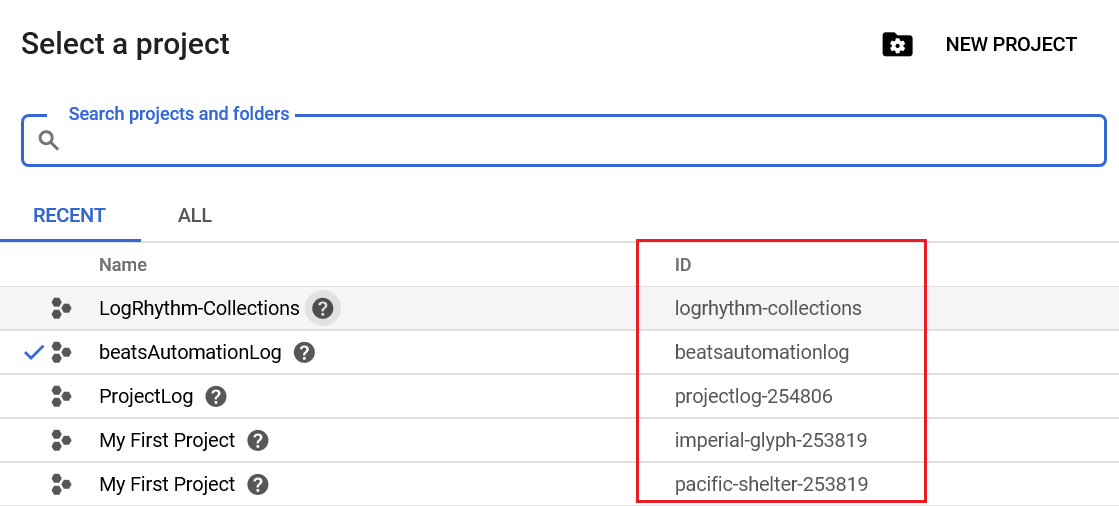
On the top menu bar, select the project to collect logs from.

To create a project, see the instructions provided by Google here: https://cloud.google.com/resource-manager/docs/creating-managing-projects
The Select a project dialog box appears.
-
Make a note of the Project ID.
-
From the left-side menu, click APIs & Services, and then click Credentials.
-
In the center pane, click Create credentials, and then click Service account key.
-
In the Service account field, click New service account.
-
In the Service account name field, type a name.
-
In the Role field, click Custom, select the role you created, and then click Continue.
-
Ensure that the default key type is JSON.
-
Click Create.
A JSON file that contains your credentials downloads to your computer. -
Save the file in a place where you can easily access it.
Regarding the four secrets needed to configure the PubSub beat (ClientId, ClientEmail, PrivateKey, PrivateKeyId):
-
The collector moves into an ERROR state for a wrong ClientEmail and PrivateKey.
-
The collector does not move into an ERROR state for a wrong ClientId and PrivateKeyId, although it does not collect any logs.
-
Configure a Topic and Subscription
For further information on this topic, see the official Google Cloud Pub/Sub documentation: https://cloud.google.com/pubsub/docs/admin
-
In the GCP console, select the project in which you want to create a topic.
-
Expand the main menu on the left and scroll to the Big Data section.
-
Click Pub/Sub, and then click Topics.
-
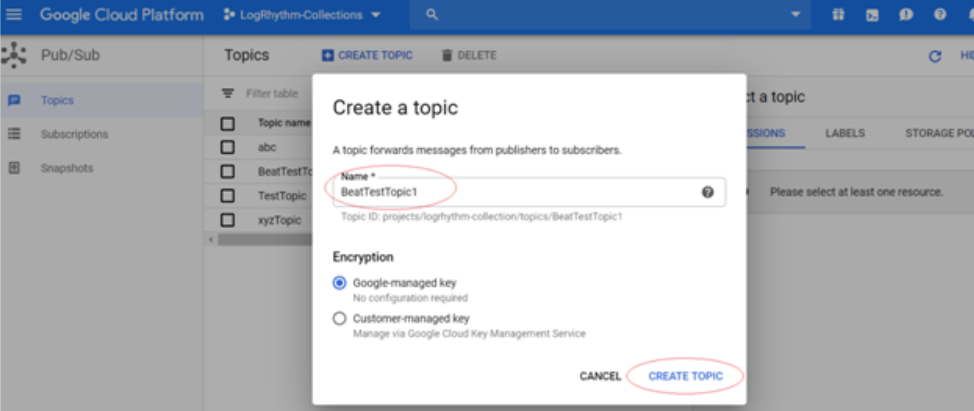
On the top of the center pane, click Create Topic.
If you already have a topic configured, you can skip these steps. Make a note of the Topic ID you want to use.
-
In the Topic ID field, type a unique name.
Make a note of this Topic ID. -
Click Create Topic.
-
In the topics grid view, click the three-dot (...) menu to the right of the topic to which you want to add a subscription.
If you already have a subscription configured, you can skip these steps. Make a note of the Subscription ID you want to use.
-
Click Create subscription.
-
In the Subscription ID field, type a unique name.
-
Make a note of this Subscription ID.
-
Configure the subscription with the default settings, and then click Create.
Alternatively, you can skip creating a subscription and instead create the subscription when you configure and start the PubSub beat.
After you configure and run the beat, a subscription is automatically created under the Topic ID you provided in the beat configuration step.
To create a subscription automatically through beats, you must have subscription.create: true # (the default option) in the pubsubbeat.yml along with the following permissions to the assigned role in GSuite admin:
-
pubsub.subscriptions.consume
-
pubsub.subscriptions.get
-
pubsub.subscriptions.create
-
pubsub.topics.attachSubscription
For more details regarding role, refer to Create a Role For a Project above.
-
Configure and Export Logs for Multiple Projects in One Topic
Configuring logs for multiple services from multiple projects in a single topic enables you to subscribe to only one topic in the PubSub beat and pull logs for multiple projects in beats through one topic.
-
Create a new project for logging.
For information on creating projects, see the official Google documentation: https://cloud.google.com/resource-manager/docs/creating-managing-projects
-
Create a topic in the newly created project following the steps previously described.
-
Go to the project from where you want to send your logs to the beat.
-
From the project, on the left-side menu, scroll to the Operations section.
-
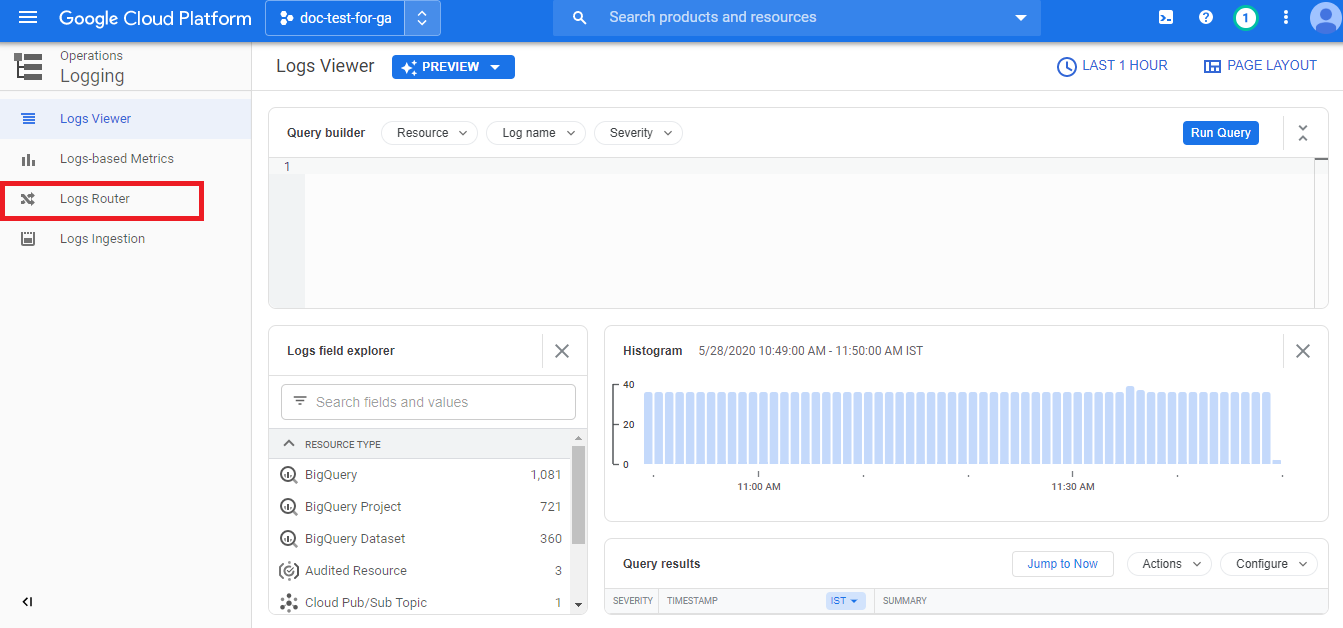
Click Logging, and then click Logs Router.
-
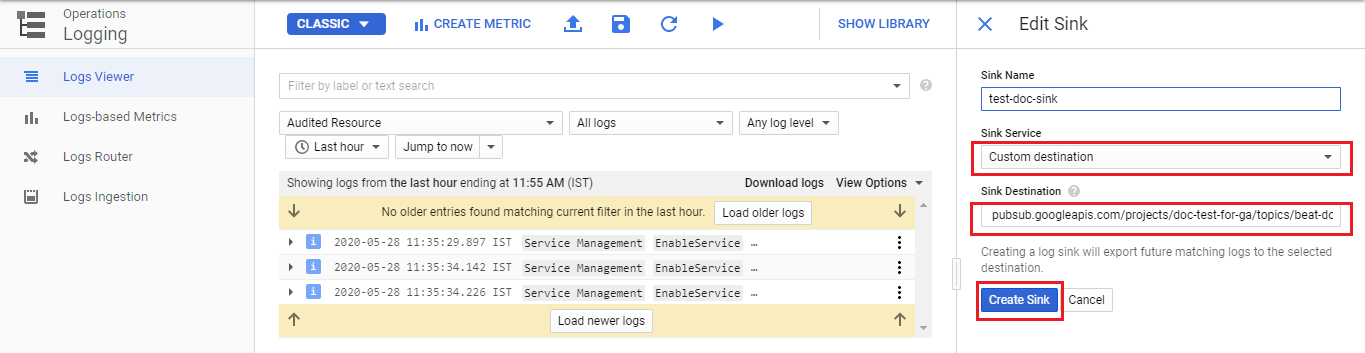
On the top of the center pane, click Create Sink.
-
In the Edit Sink pane on the right, in the Sink Service field, select Custom destination.
-
In the Sink Destination field, replace the pre-filled string with your Project ID and Topic ID created in steps 1 and 2. This will take the format: pubsub.googleapis.com/projects/<projectid>/topics/<topicid>
-
Click Create sink.
-
Grant "Pub/Sub Publisher" permissions to the account (Sink's Writer Identity) in the Topic configured in "project A" (the first project created).
To get the sink's writer identity (an email address) from the new sink, follow these steps:-
In the Google Cloud console, click Log Router of "Project B" (the second project created).
-
Select Menu and then select View sink details.
The writer's identity appears in the Sink details panel. -
If the Writer Identity field contains an email address, proceed to the next step.
If the value is None, you don't need to configure destination permissions for the sink. -
Go to "Project A" and grant "Pub/Sub Publisher" permissions to the account (writer's identity) in the topic configured in "Project A".
Under the same project, subscription IDs cannot be the same, even for different topic IDs.
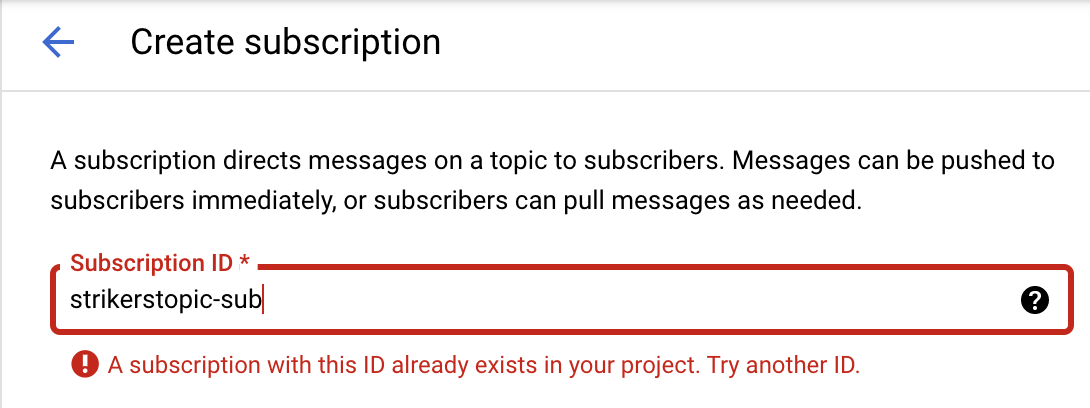
For different projects, you can create subscriptions for already existing IDs.
-
Export Logs with the Log Viewer
-
In the GCP console, from the left-side menu, scroll to the Operations section.
-
Click Logging, and then click Logs Router.
-
In the center pane, select an existing GCP project.
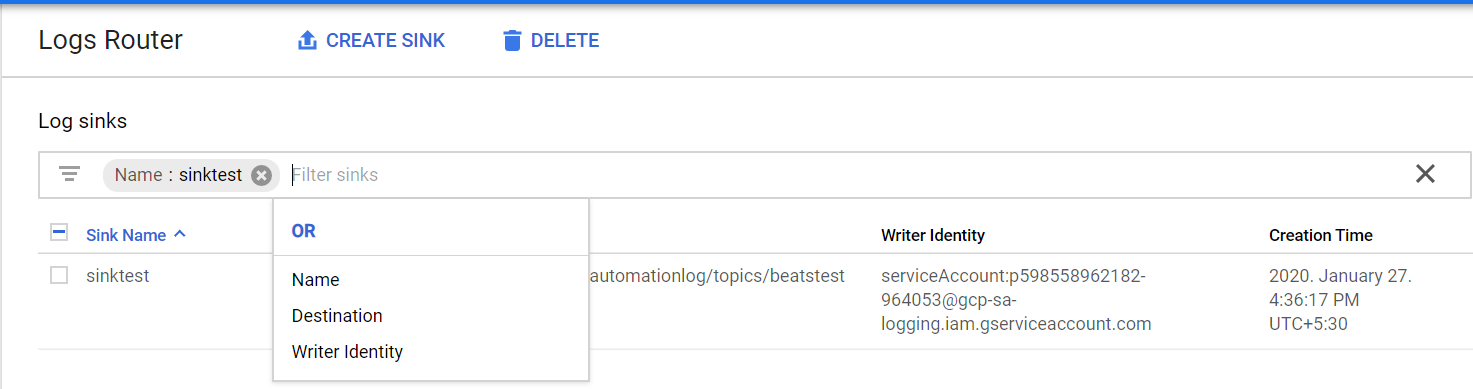
The following screenshot shows an example of the Logs Router page, where several log sinks have already been configured:

If you have not yet configured any log sinks, the message "No log sinks are configured" appears.
Logs Router User Interface
The Logs Router interface contains a table summary of exports. Each table row contains information corresponding to some of the sink properties described in Logs Exports:
-
Sink Name. The sink's identifier in the current project.
-
Destination. The location where the exported log entries are written.
-
Writer Identity. The service account that logging uses to write log entries to the destination. This service account must have permission to write to the export destination.
-
Creation Time. The timestamp of the sink when it was created.
Each row has a menu on the right with the following options:
-
Edit Sink. Opens an Edit Sink pane where you can change the sink's parameters.
-
Delete Sink. Allows you to delete the sink and stop the logs export.
-
View Filter. Displays the sink's query. Click Edit to change the sink's properties or query.
The search-query box above the table allows you to query your sinks by text search, or by Sink Name, Destination, or Writer Identity. For example, the following shows a search on Destination: bigquery with options to concatenate other sink properties using the argument OR (AND is the default):
Create a Log Sink at the Organization Level and the Project Level
Instead of creating a log sink on each and every service, you can create a log sink at the organization and project level. This enables you to automatically redirect logs from all resources in that project to a desired destination.
For more information, see https://cloud.google.com/logging/docs/export/aggregated_sinks.