The first step in setting up the Microsoft Graph API beat is to create an application registration on Azure Active Directory.
Create an Application Registration
-
Log in to the Azure console at https://portal.azure.com/.
-
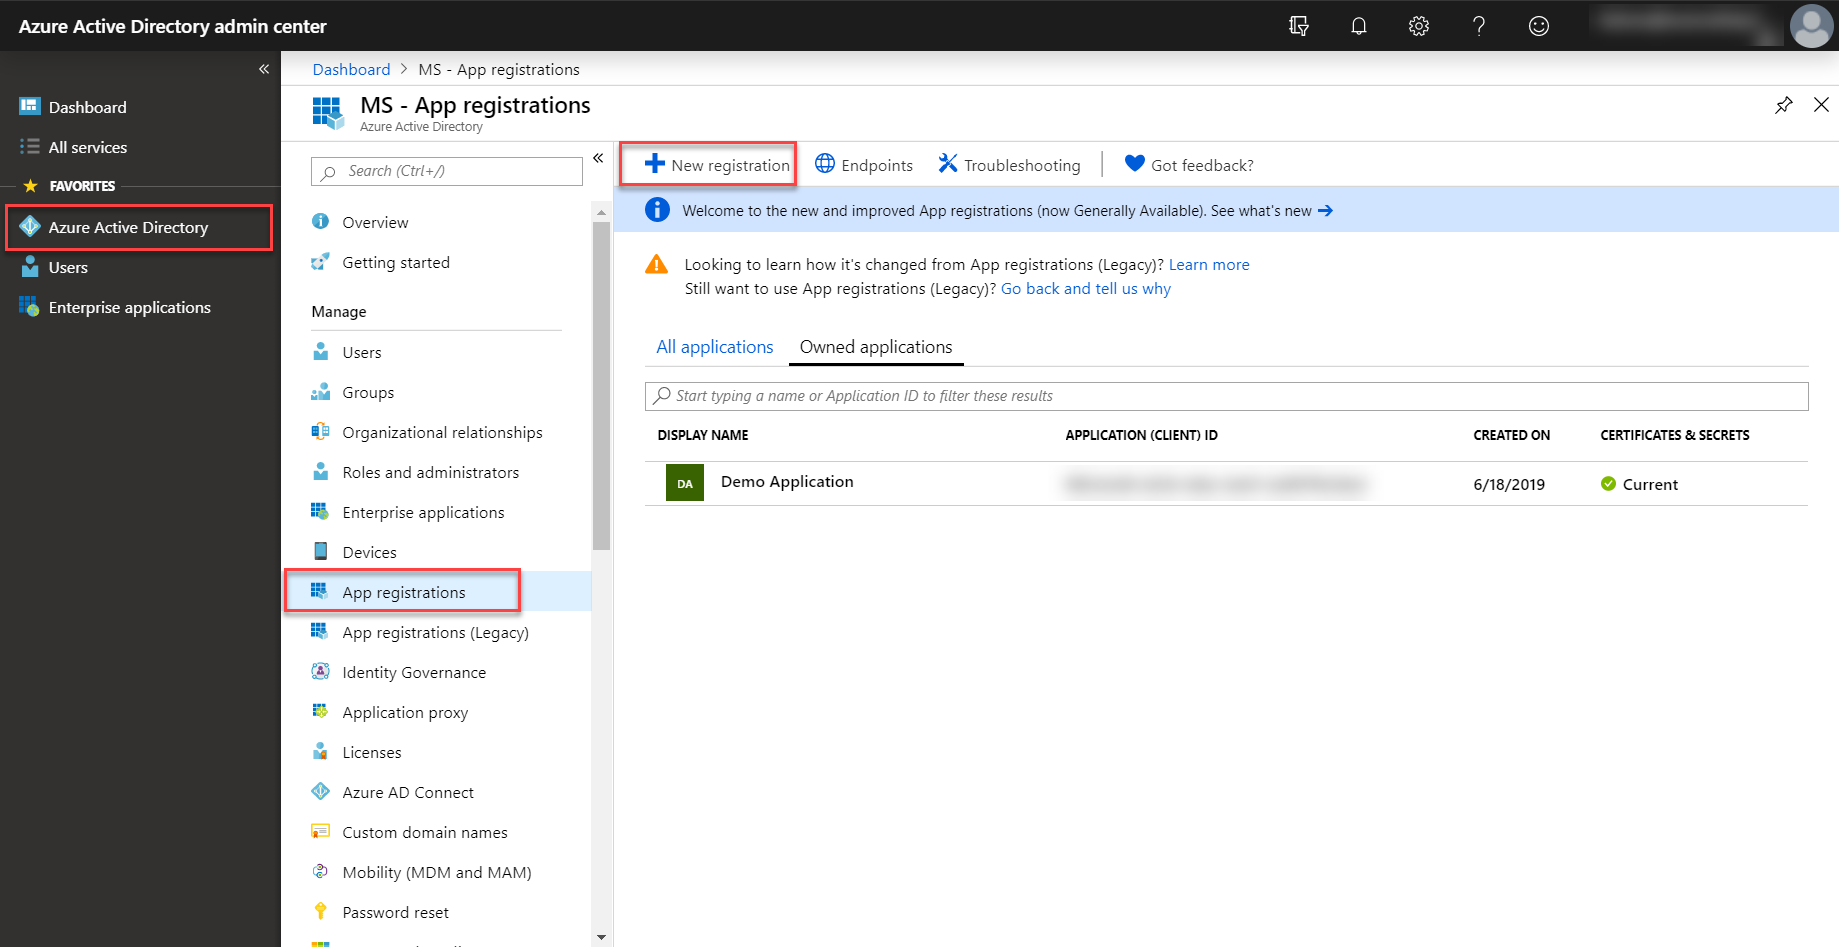
Click Azure Active Directory.
-
In the left pane, click App registrations, and then click New registration.
The Register an application page window appears.
-
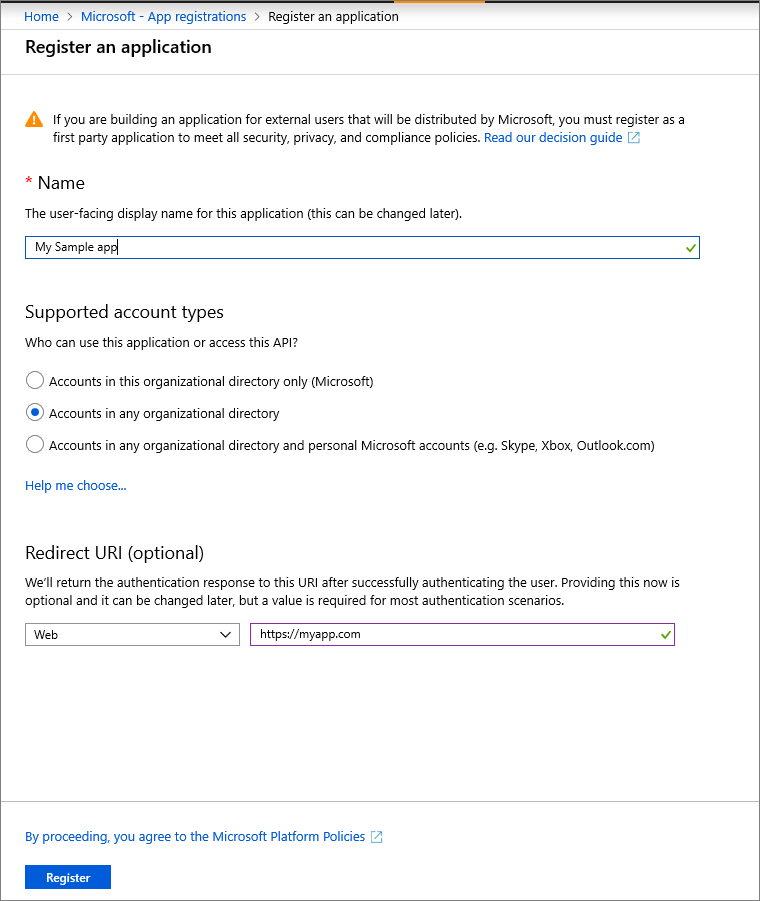
Enter the application's registration information:
-
In the Name section, enter a meaningful application name that will be displayed to users.
-
For Supported account types, click the Accounts in any organizational directory option.
-
Set the Redirect URI to http://localhost.
-
Click on Register to create the application.
-
-
On the app Overview page, copy the Application (client) ID and Directory (tenant) ID for later use.

Add Endpoint Access
Once the application is created, access must be given to three different endpoints in order to get data. The appropriate permissions to the application are needed in order to configure these endpoints. The following section details how to configure and add permissions to the three required endpoints.
Directory Audits
This endpoint allows you to get the list of audit logs generated by Azure Active Directory. This includes audit logs generated by various services within Azure AD, including user, app, device, and group Management, privileged identity management (PIM), access reviews, terms of use, identity protection, and password management (self-service and admin password reset), and self-service group management.
The API URL for the directory audits endpoint is graph.microsoft.com/v1.0/auditLogs/directoryAudits.
Sign Ins
This endpoint allows you to retrieve the Azure AD user sign-ins for a tenant. Sign-ins that are interactive in nature (where a username/password is passed as part of the auth token) and successful federated sign-ins are currently included in the sign-in logs.
The API URL for the signs ins endpoint is graph.microsoft.com/v1.0/auditLogs/signIns.
Security Alerts
This endpoint allows you to retrieve the list of potential security issues within a customer's tenant that Microsoft or partner security solutions have identified. Alerts are used to unify and streamline security issue management across all integrated solutions.
The API URL for the security alerts endpoint V1 is graph.microsoft.com/v1.0/security/alerts.
The API URL for the security alerts endpoint V2 is graph.microsoft.com/v1.0/security/alerts_v2.
O365 Message Tracking
Starting with Open Collector version 2026.05, released in April 2026, O365 Message Tracking logs can now be collected using the Microsoft Graph API Beat.
The API URL for O365 Message Tracking is graph.microsoft.com/beta/admin/exchange/tracing/messageTraces.
Add Permissions
To add permissions for the three endpoints outlined above, from the Azure Active Directory portal:
-
Select the application whose logs are to be accessed (generally, the application registered earlier on this page).
-
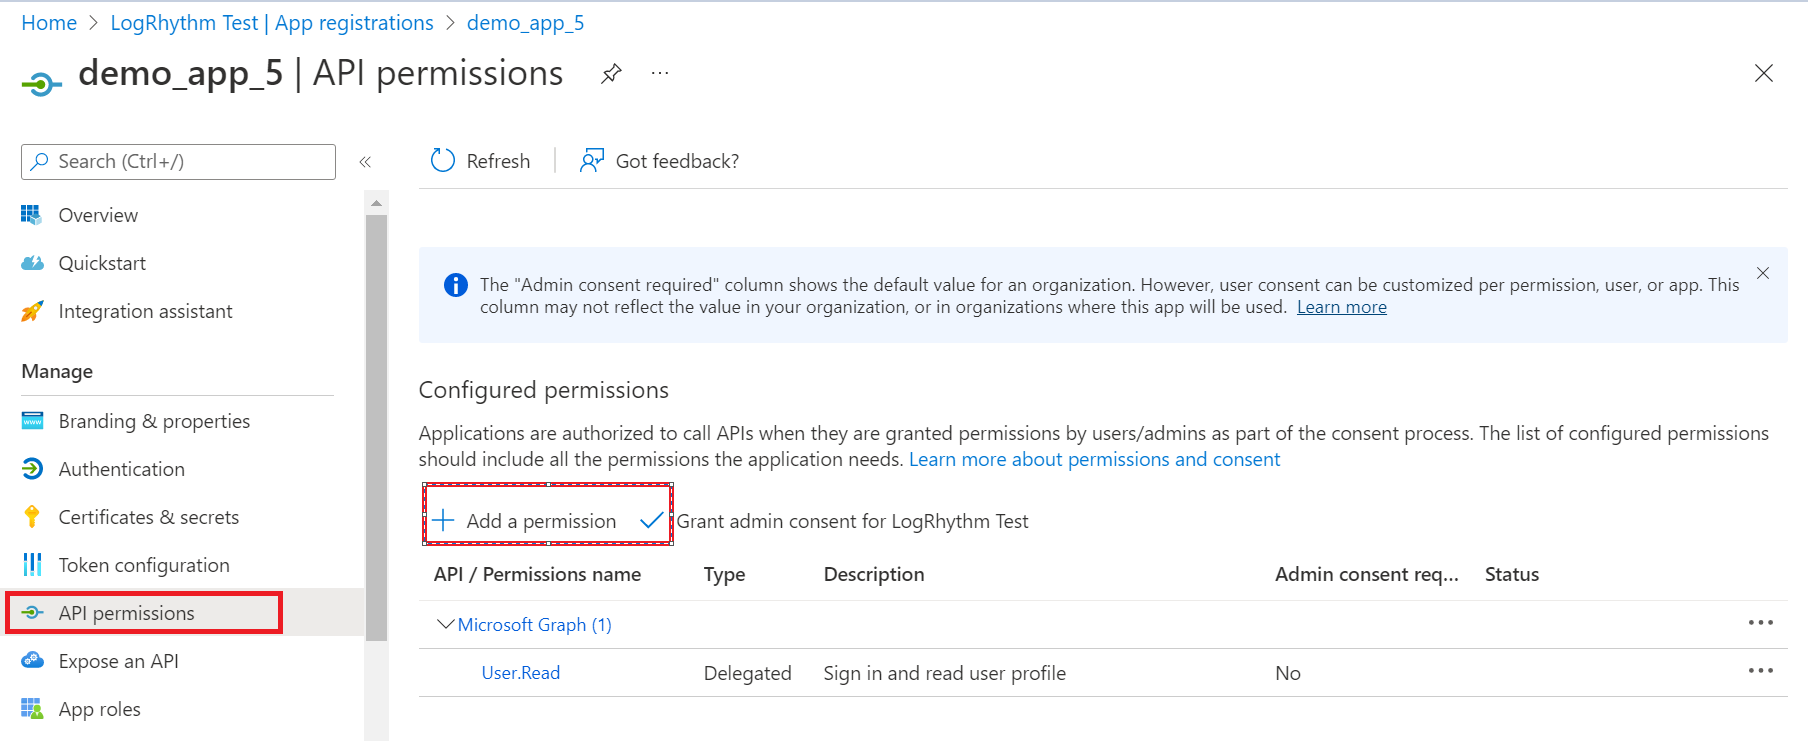
Click API Permissions, and then click Add a Permission.
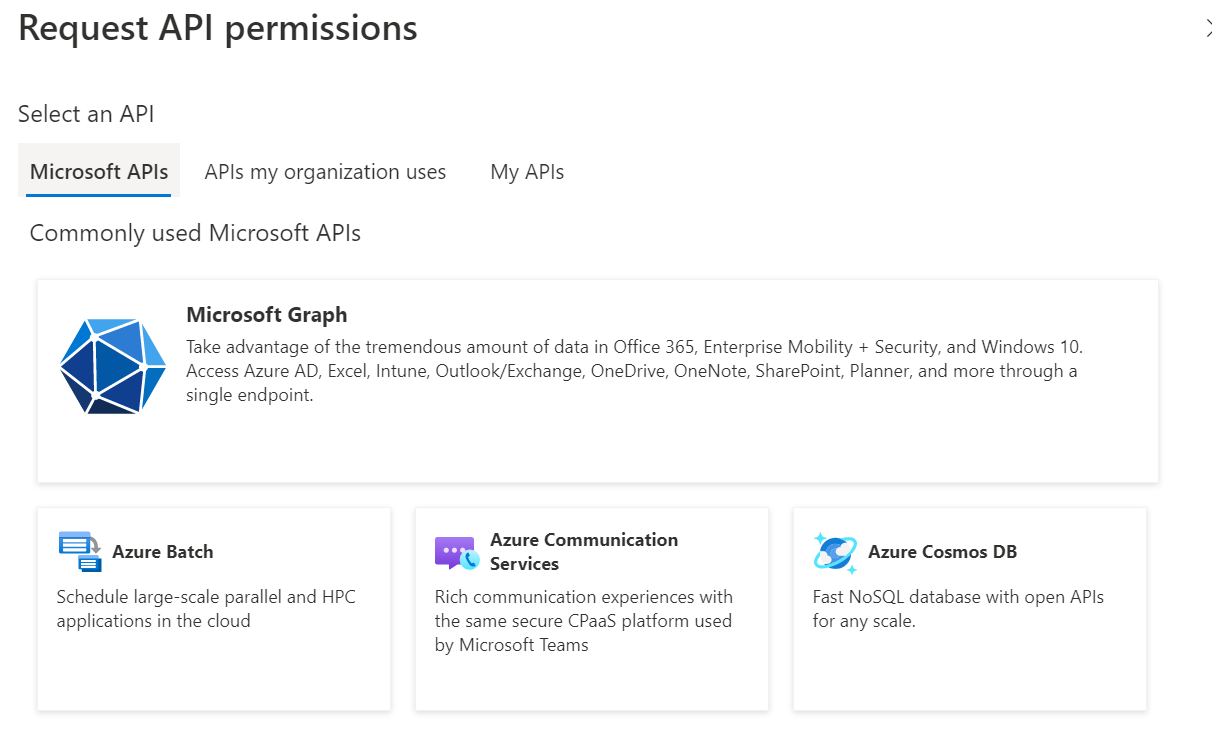
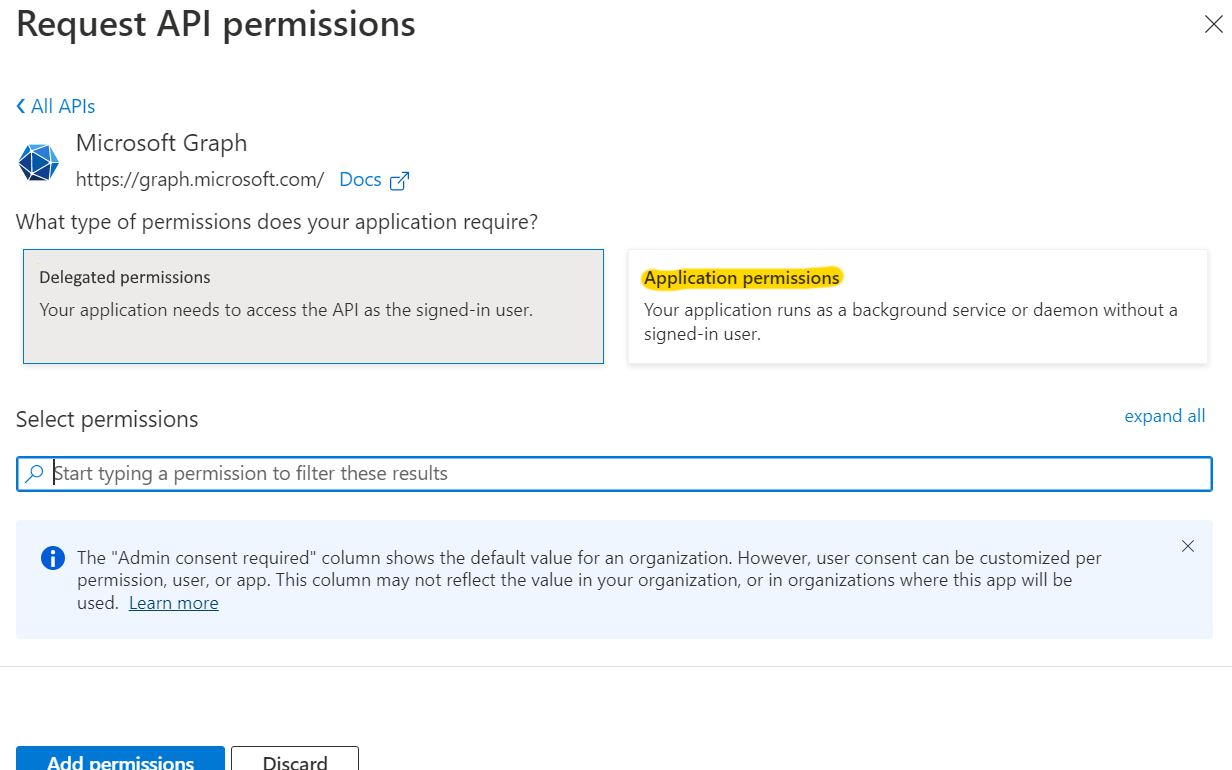
The Request API permissions window appears.
-
Click on Microsoft Graph.
-
Click on Application Permissions.
-
The following permissions need to be granted for the three endpoints to function properly:
Endpoint
Permissions Needed
Directory Audits
AuditLog.Read.All
Directory.Read.All
Sign Ins
AuditLog.Read.All
Directory.Read.All
Security Alerts
SecurityEvents.Read.All
SecurityEvents.ReadWrite.All
Security Alert_V2
SecurityAlert.Read.All
SecurityAlert.ReadWrite.All
O365 Message Tracking
Delegated: ExchangeMessageTrace.Read.All
Application: ExchangeMessageTrace.Read.All
In order to collect O365 Message Tracking logs, you must have a M365 E3 or M365 E5 license.
-
In the Select permissions search bar, enter the six permissions shown above one by one, and check the box for each to include it.

-
Click the Add permissions button after selecting all required permissions.
-
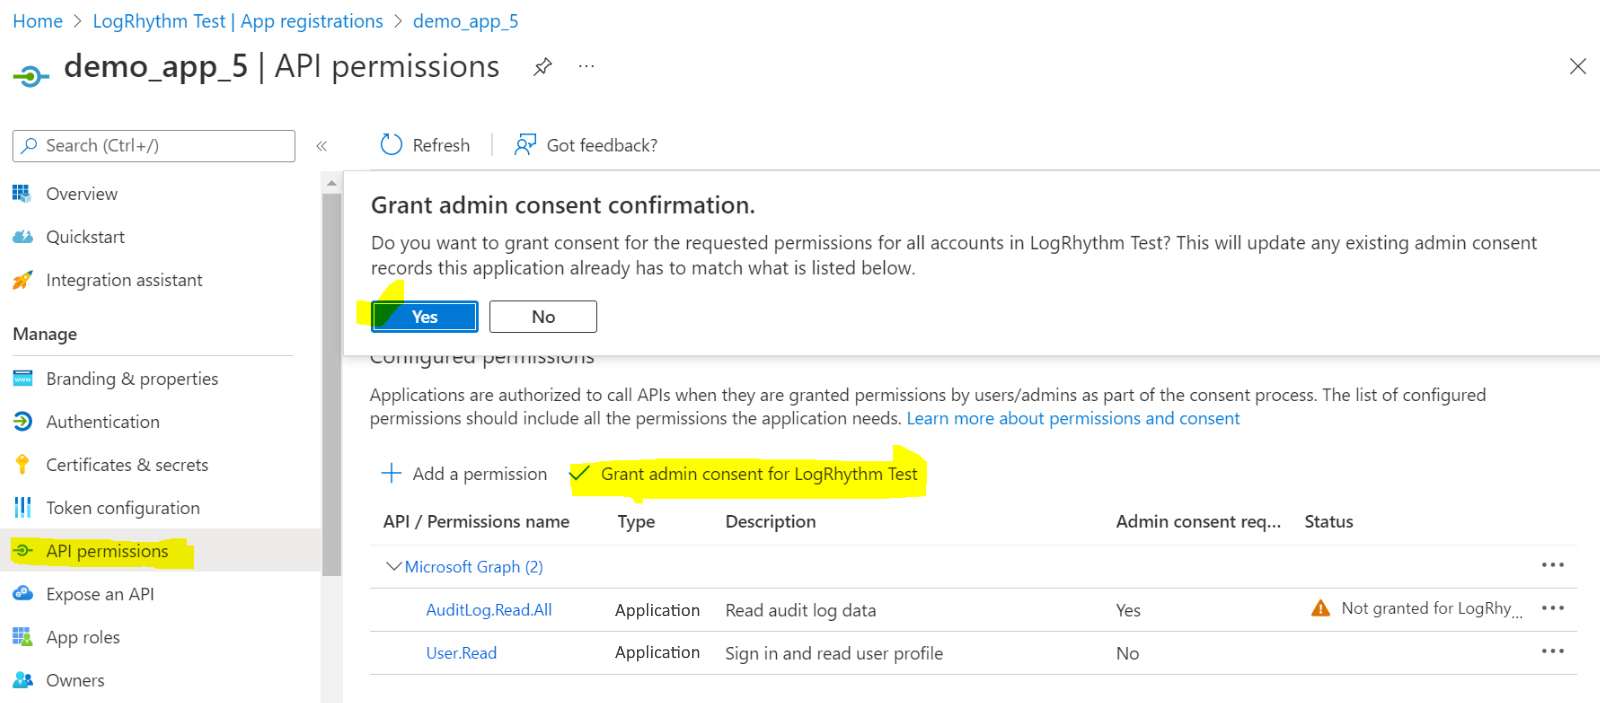
On the API permissions page, click Grant Admin Consent for <tenant>.
-
Click the Yes button on the consent confirmation.
The required permissions are now added for the endpoints.
Create the Client ID and Client Secret
The final step in configuring the Graph API is creating a Client ID and Client Secret. To create these items, from the Azure Portal:
-
Select the application created above.
-
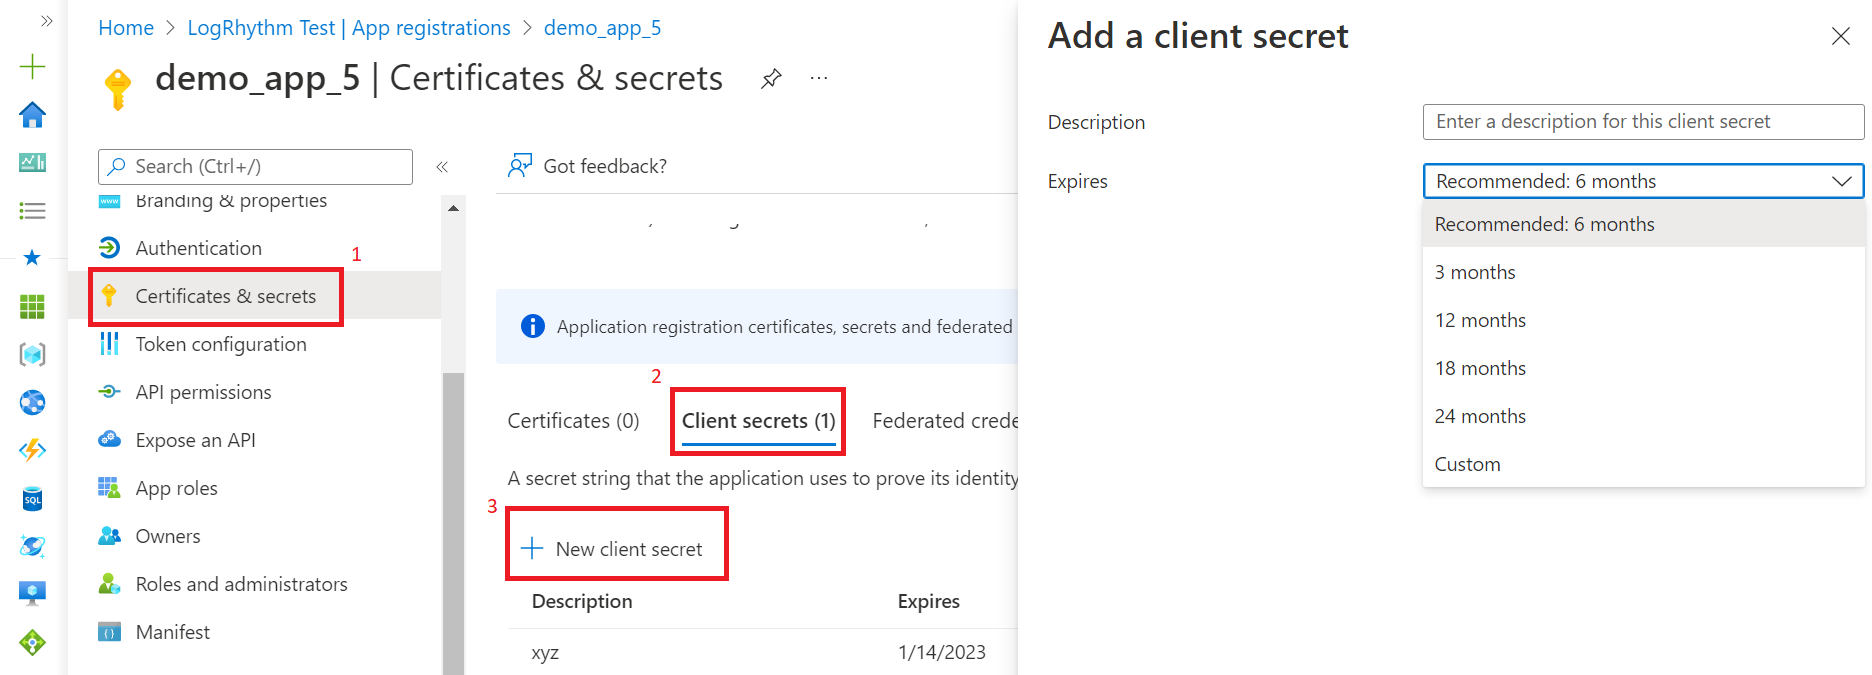
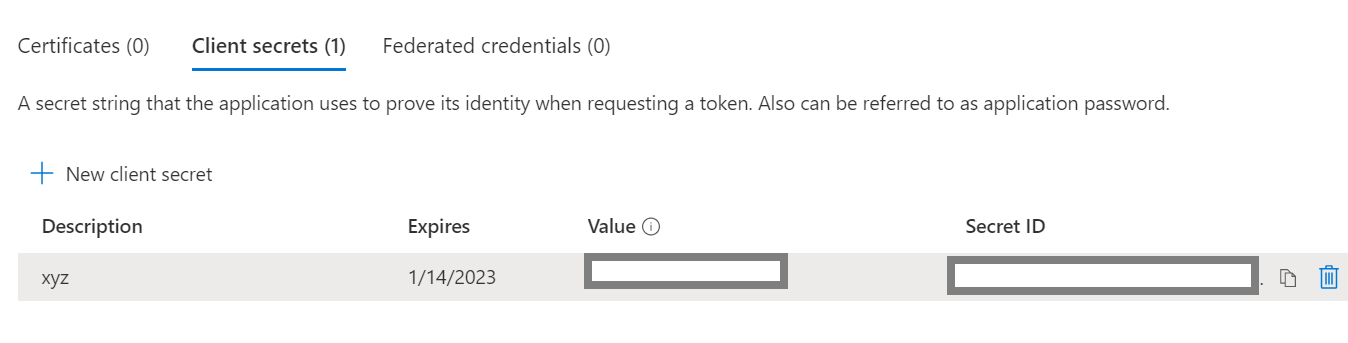
Click Certificates and Secrets, and then Client Secrets.
-
Click New client secret.
The Add a client secret window appears.
-
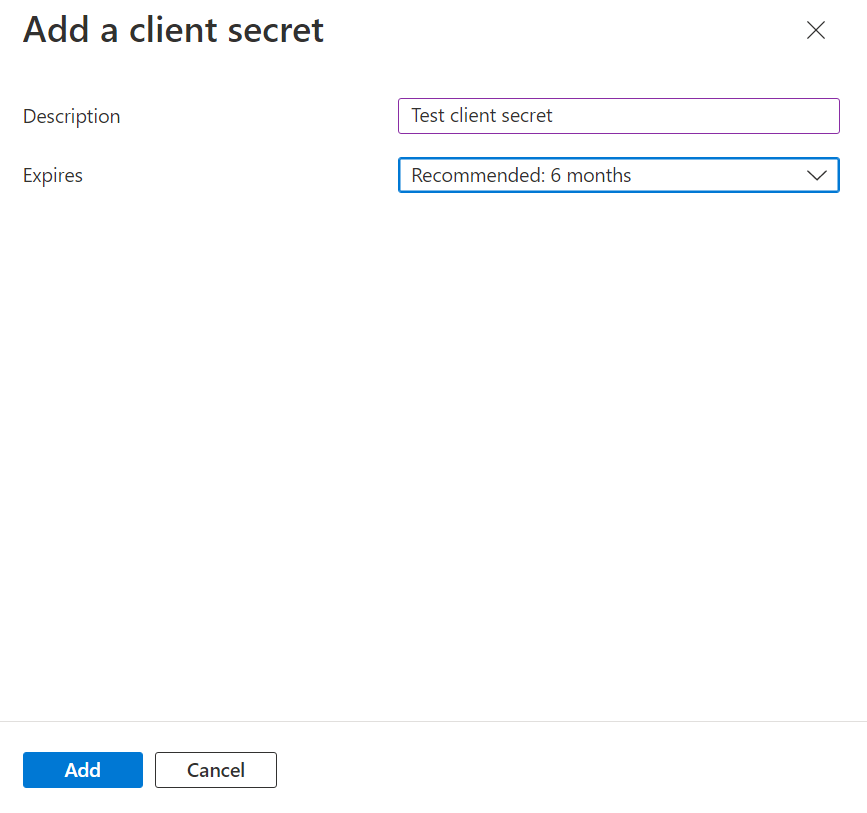
Enter a Description for this client secret.
-
Select the desired expiry period from the Expires drop-list.
-
Click Add.
-
Copy the Value and Secret ID fields, which will be used to initialize the beat.
Provision a Service Principal
This step is only required for users collecting Office 365 Message Tracking (Message Trace) logs.
Follow the Microsoft instructions to Provision a Service Principal, ensuring to use AppID 8bd644d1-64a1-4d4b-ae52-2e0cbf64e373, to collect Message Tracking logs using the Graph API Beat.