Collect Salesforce Security Logs
Salesforce Security is a part of the Salesforce ecommerce, which has an API for Security Logs. This requires a Basic Token to be generated every five minutes in order to generate a new bearer token. This request will pull down and append to a flat file without re-ingesting older data.
Objective
Our objective is to get the security logs from the Salesforce system into a flat file so that those logs can be processed in the SIEM along with its dedicated log source type (LST) and base rules in order to achieve the parsing capabilities for the logs.
Prerequisites
The following scripts/files to pull the Salesforce Security logs, saved to the machine which will be collecting logs:
The credentials file must be configured with the Salesforce API credentials for the basic and bearer token.
Powershell version of 7 or above.
Implementation
Step 1: Run Script
The following steps outline the process to execute the script required to collect Salesforce Security logs.
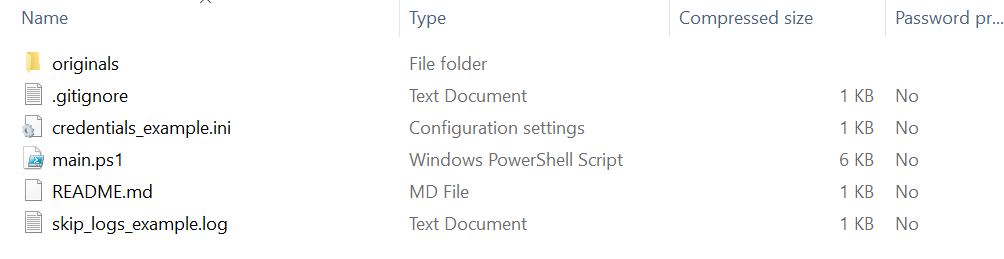
The scripts shown in step 2’s screenshot can be found in the links listed as Prerequisites above. Save the scripts found there into the script folder as shown below.
To execute the required scripts:
Open the script folder in your machine as shown below:
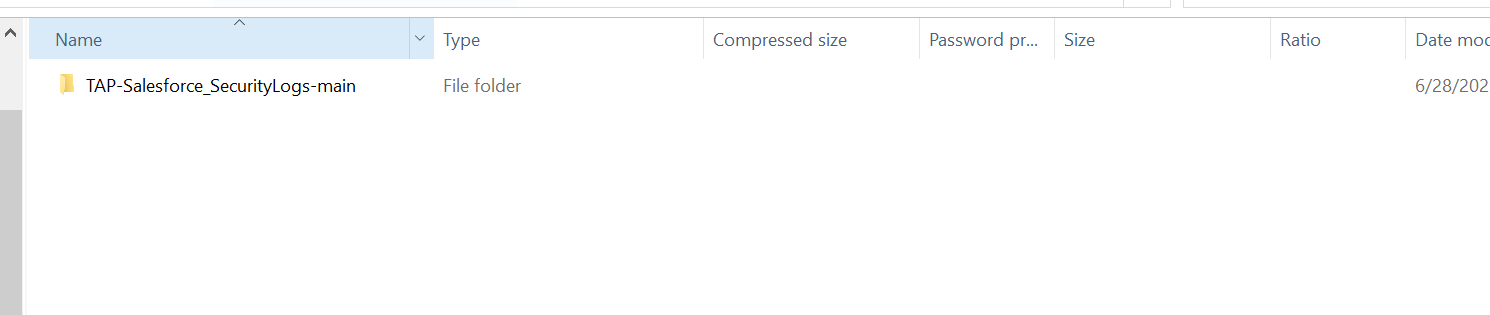
In the folder TAP-Salesforce_SecurityLogs, you can see the main.ps1 script for the PowerShell:
As a reminder, PowerShell version 7 or above is required to execute this script.
Execute the PowerShell script using the following command:
CODE.\main.ps1
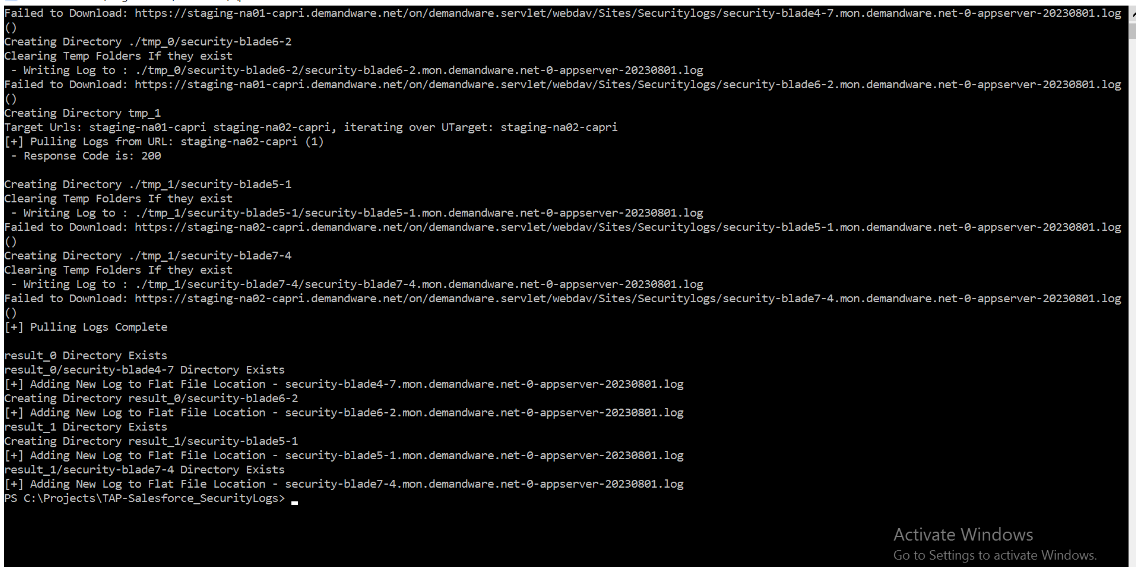
Once the command has executed and completes its operation, data is pulled from the Salesforce system as shown below:
Verify that the collected Salesforce Security logs are now present, saved as a flat file, in the same folder where the script has been stored, as shown below:

Step 2: Configure the Log Source Type
The next step is to configure the settings for the flat file log source type, i.e. Flat File - Salesforce Security Logs, in order to send the data from the flat file to the SIEM.
Open the LogRhythm console and go to the Deployment Manager, and then to System Monitors.
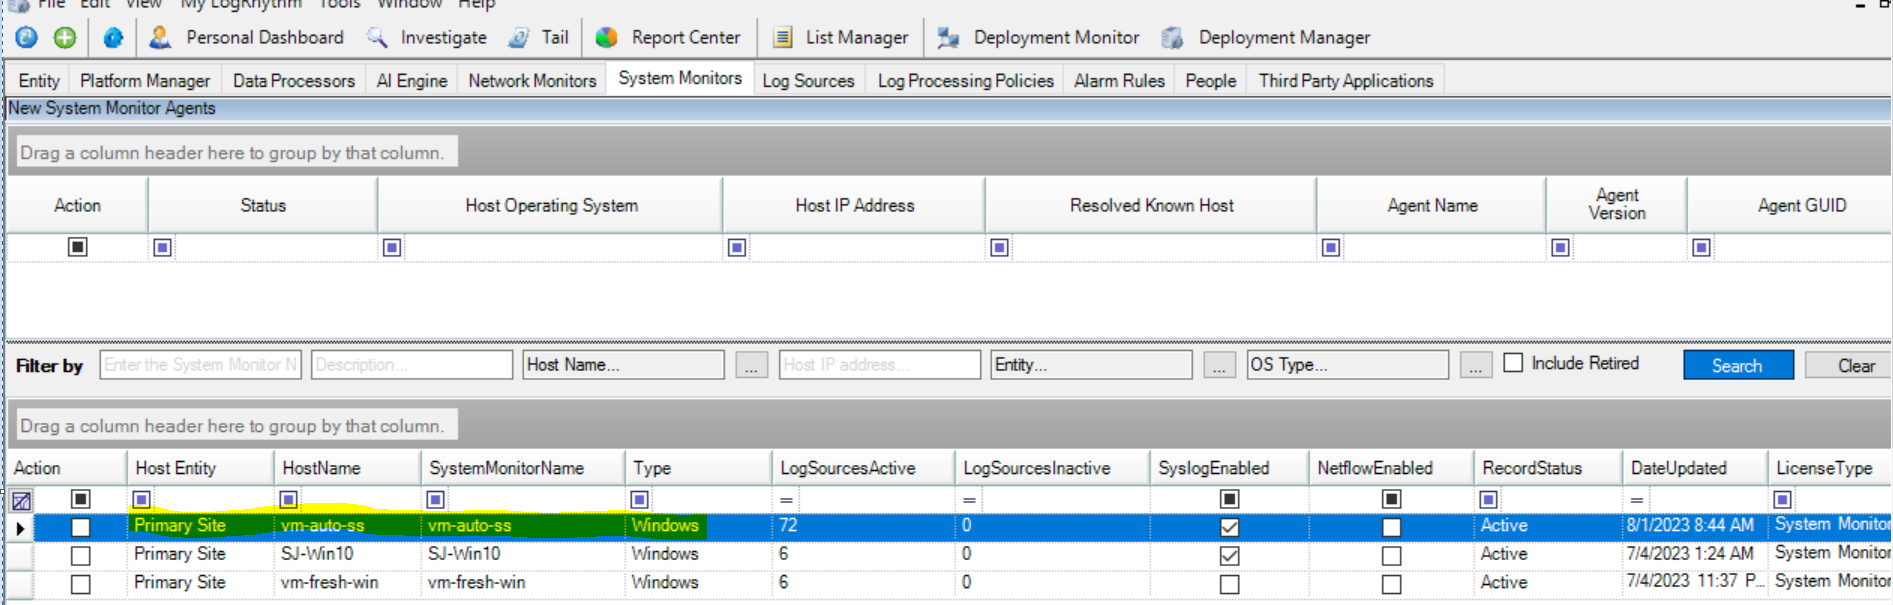
Select and double-click on the desired System Monitor agent for which to configure the Salesforce Security log source type.
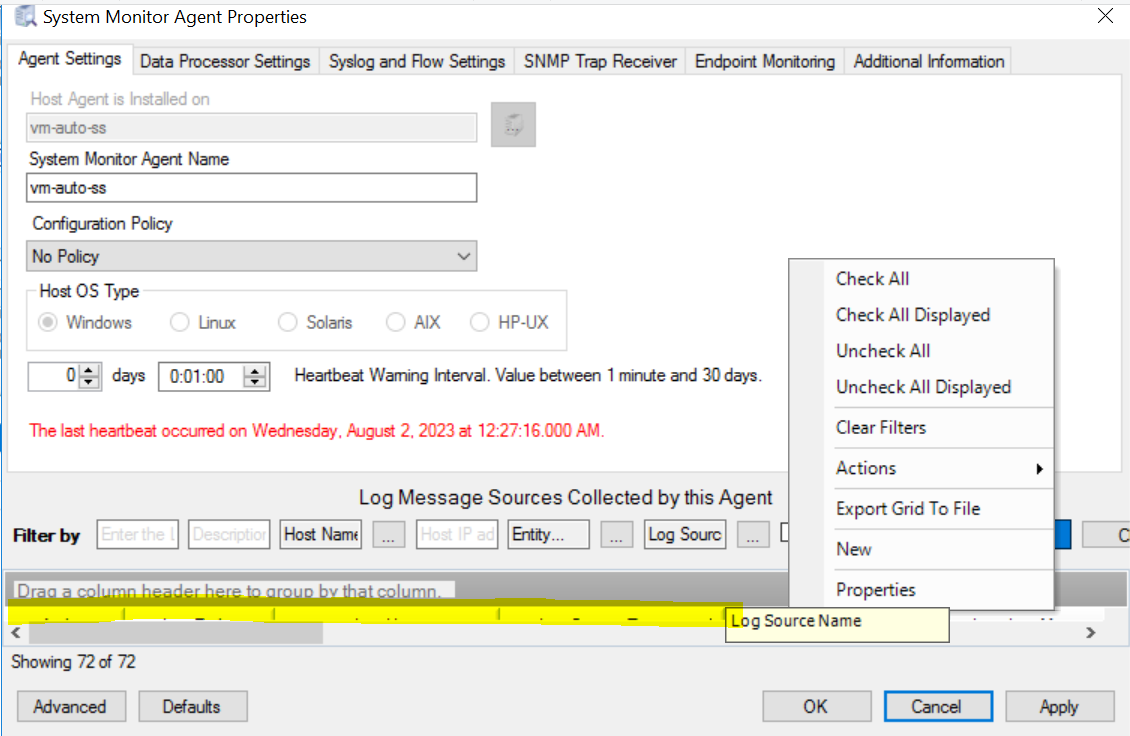
The System Monitor Agent Properties window opens.Right-click in the highlighted area shown in the screenshot below, and then click on New.
The Log Message Source Properties window opens.
In the Log Message Source Type drop-down, select Flat File - Salesforce Security Logs.
In the Log Message Processing Engine (MPE) Policy drop-down, select LogRhythm Default.
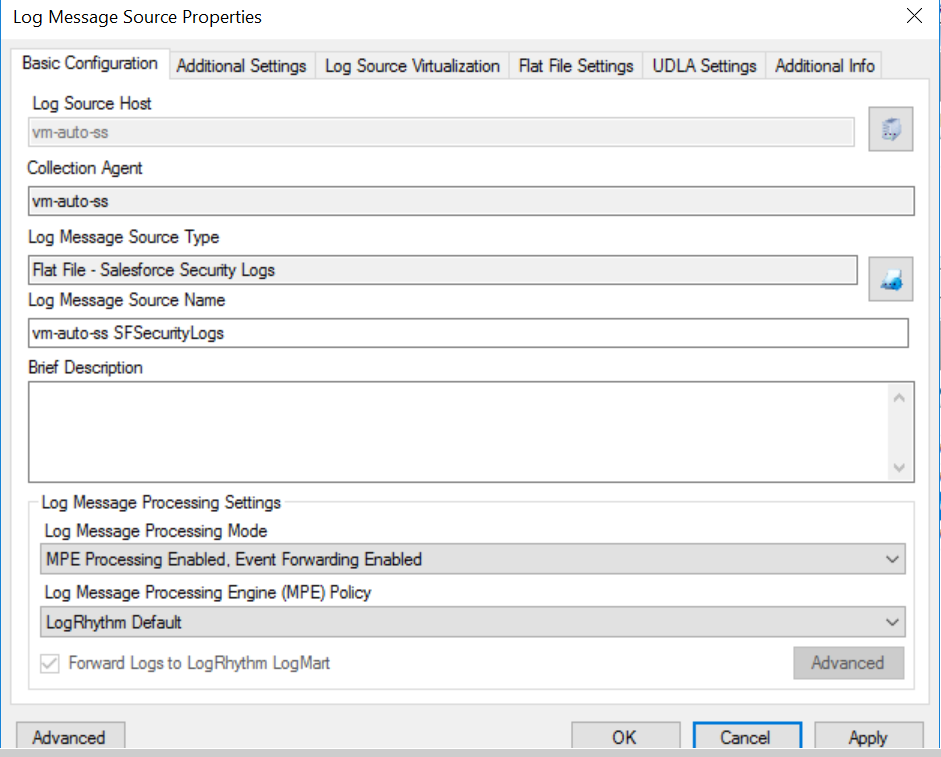
Click Apply.
Click the Flat File Settings tab at the top of the window.
Enter the file path containing the Salesforce Security logs obtained in Step 1.
In the Date Parsing Format field, select Flat File - LogRhythm System Monitor Log File (<d>/<M>/<yy>\s<h>:<m>:<s>).
Check the Is Directory box.
Set the Recursion Depth to 3.
In the Inclusions field, type *.log, and in the Exclusions field, type error_logs.log.
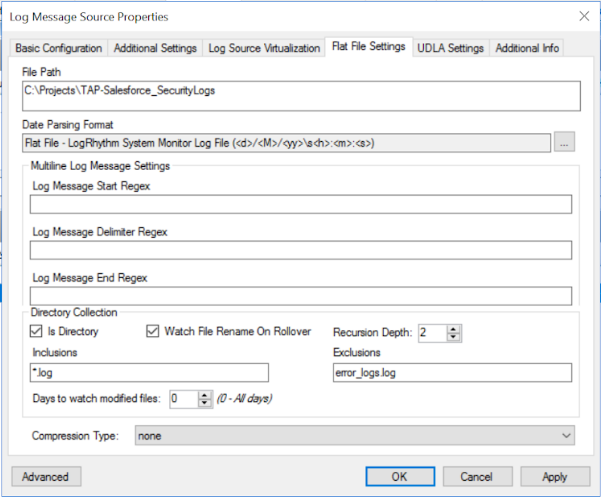
Click Apply.
Click the Additional Settings tab.
Check Start collection from the beginning of the log.
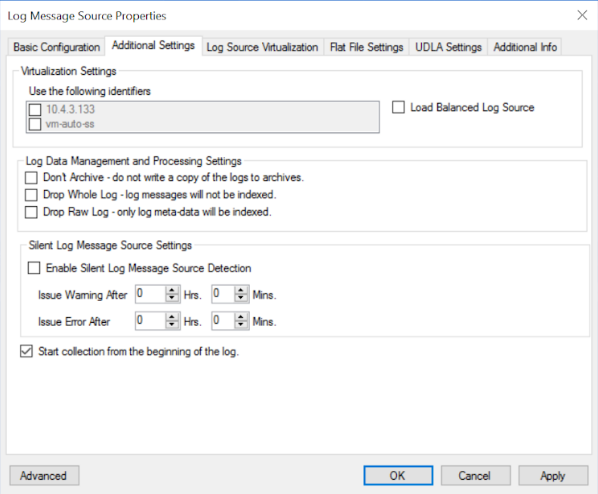
Click Apply, and then click OK.
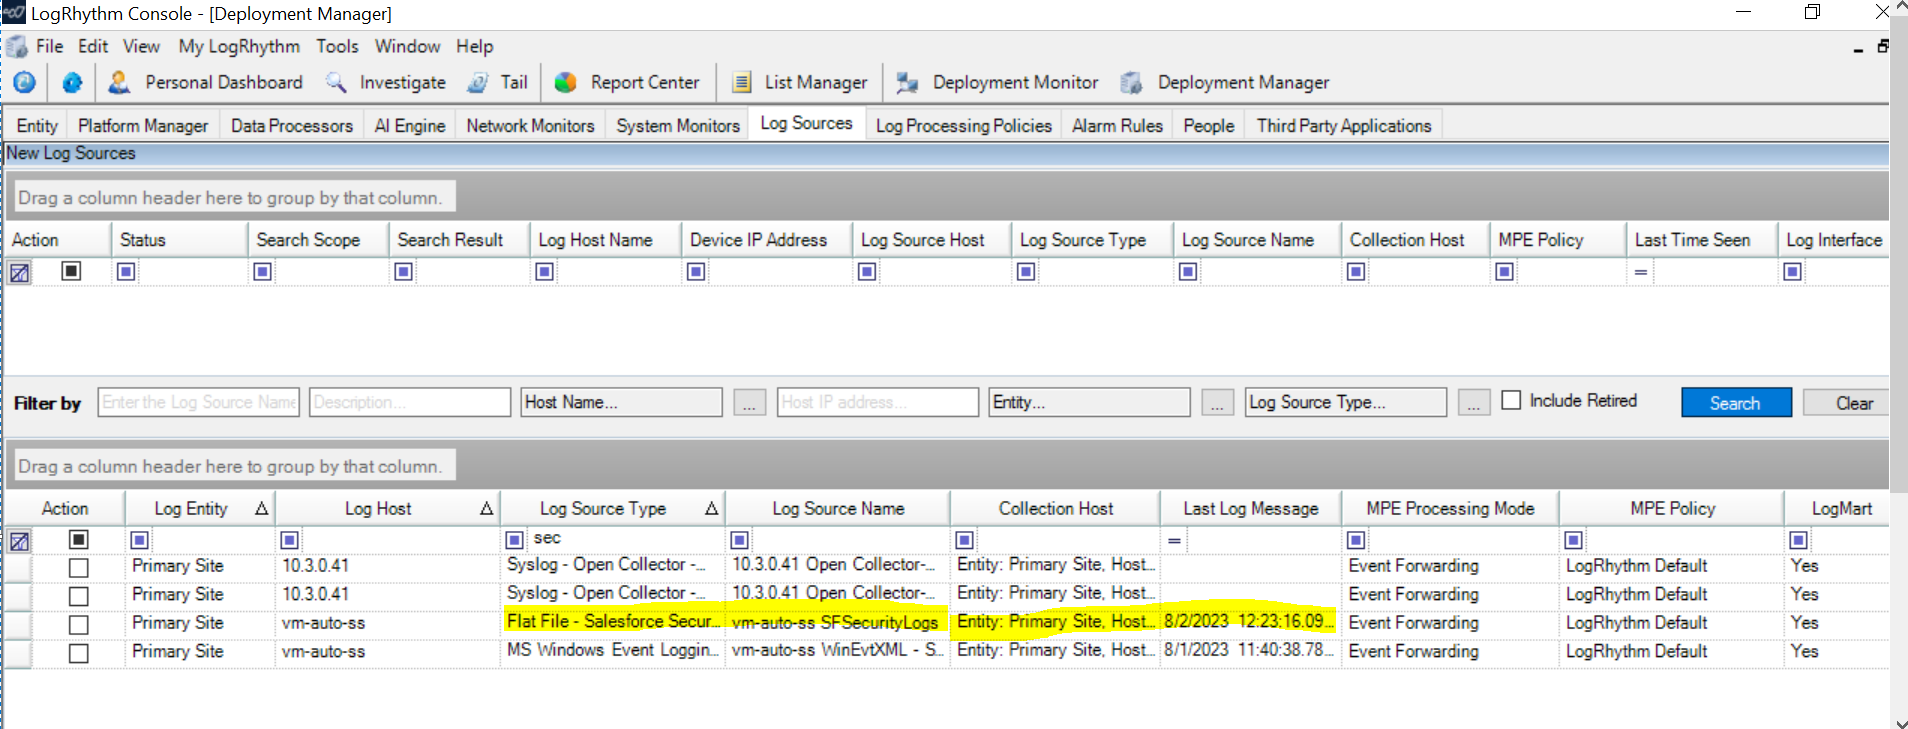
Navigate to the log source to verify the newly configured log source type for the flat file:
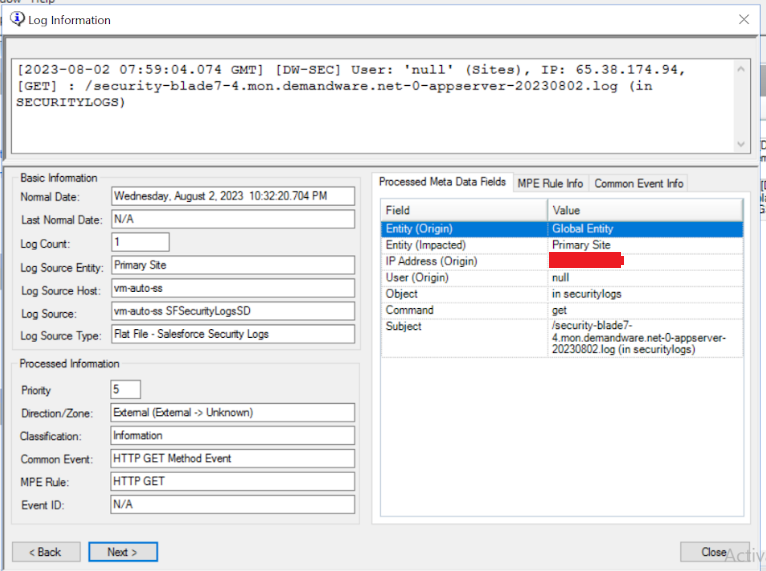
In the Log Information window, you can verify that logs are coming in to the log source type and are processed to parse the metadata, as shown below: