NIC Teaming/Bonding Configuration
LogRhythm supports Network Interface Card (NIC) Teaming/Bonding on both Windows- and Linux-based appliances. This guide is intended for system engineers and implementation technicians installing LogRhythm appliances in an environment where NIC Teaming/Bonding is required.
Prerequisites
NIC teaming is designed to increase the network throughput and add network layer redundancy to LogRhythm High-Performance Appliances. Many different NIC teaming modes are supported on LogRhythm appliances. Teaming is strongly recommended over using a multi-NIC solution with multiple IPs.
Determine the optimal NIC Teaming mode for your environment.
Configure Out-Of-Band access to the LogRhythm Appliances or plan for local console access.
If LogRhythm HA is to be used on the host, record the MAC address the HA license is tied to, as this MAC address must be present on an active interface (can be the TEAM) for SIOS Lifekeeper to function.
NIC Teaming Modes
LogRhythm Appliances support several different NIC Teaming modes based on the operating system of the appliance. Selecting a Teaming mode will be highly dependent on your specific switching environment and needs. Consult your network engineer if you are unsure which mode applies to you.
Windows Name | *NIX Name | Redundancy | Description |
|---|---|---|---|
Switch Independent - No Standby - Dynamic | balance-rr | Active/Active | Transmits packets in sequential order from the first available slave through the last. This mode provides load balancing and fault tolerance without switch configuration and the ports do not need to be connected to the same switch. (Most Common) |
Switch Independent - Standby Selected - Dynamic | active-backup | Active/Passive | Only one NIC is active, slave/backup interface becomes active if primary fails. Ports do not need to be connected to the same switch. |
Switch Independent - No Standby - Address Hash | balance-xor | Active/Active | Transmit based on the selected hash policy (typically address) which will split communication between the NICs based on the source MAC address. Ports do not need to be connected to the same switch. |
None | broadcast | Active/Active* | Transmits each packet from all ports, resulting in a high rate of duplicate packets, which is not recommended. |
LACP | 802.3ad | Active/Active | 802.3ad Link Aggregation Control Protocol, both sides must be configured to match. This setup requires switch configuration. |
Static Teaming | None | Active/Active | Uses protocol-free same-switch teaming, and requires all ports in the team to be connected to the same switch. |
Configuration Steps for Windows Server 2016/2019/2022
Before the LogRhythm Appliance can be configured for NIC teaming, ensure out-of-band access has been configured and is available. If connected via RDP, your session will be terminated and non-recoverable when configuring NIC teaming on the NIC through which you are connected.
Open Server Manager and select Local Server.
You will see NIC Teaming listed just above the list of NICs in the server.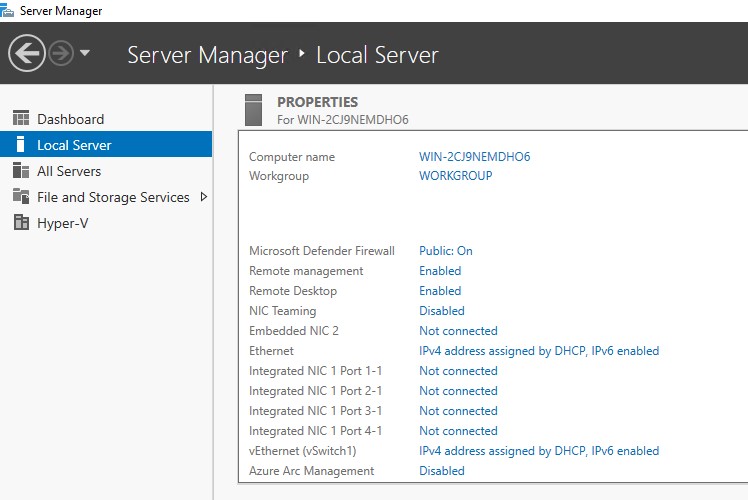
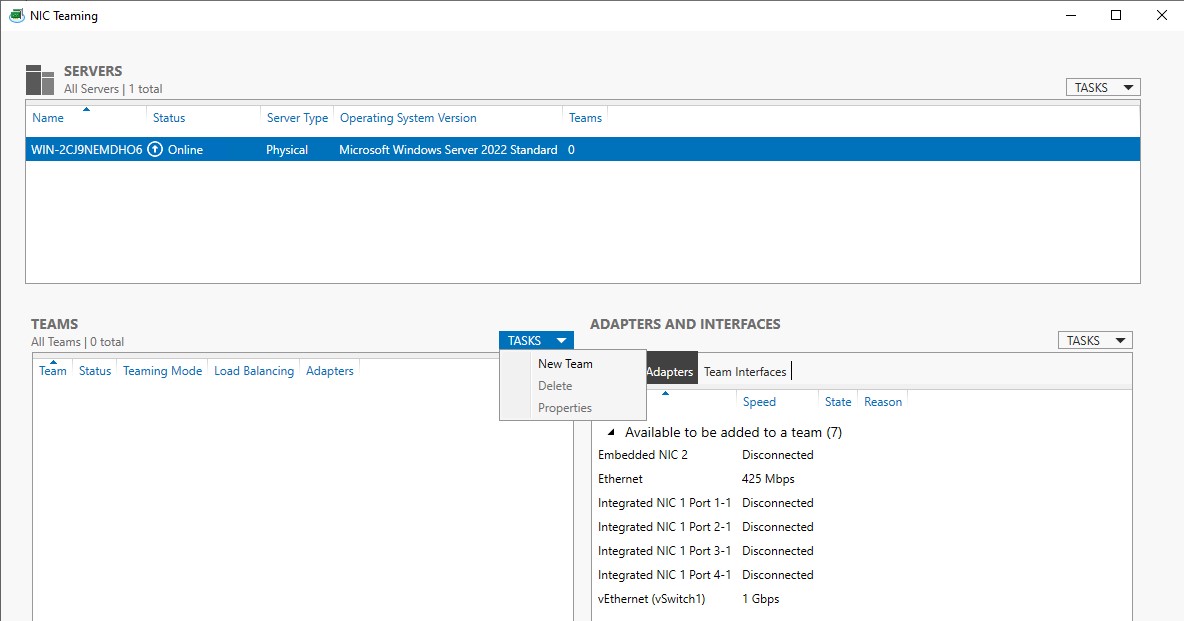
On the NIC Teaming screen, in the left box with the empty list of TEAMs, select Task > New Team.
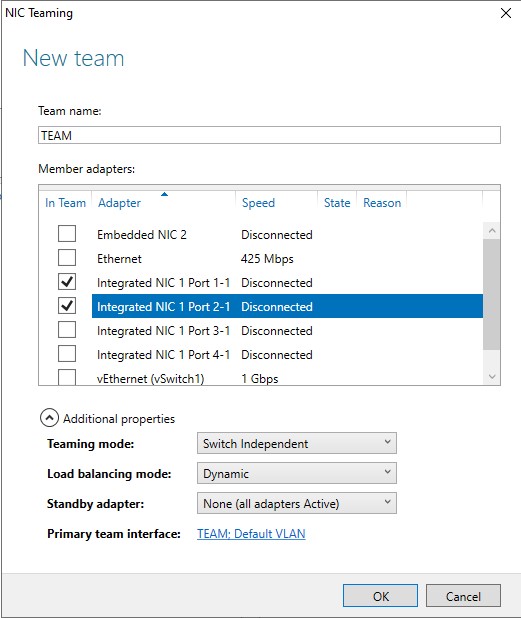
Fill in the NIC Teaming configuration for your server, including the name, member adapters to be part of your team, and select the Teaming Mode.
You can now configure your TEAM interface with IP addressing as you would a normal NIC.
XM8600 appliances with Teaming used for the vSwitch connected to the virtual DX will need to create a new vSwitch from command line after creating the team.
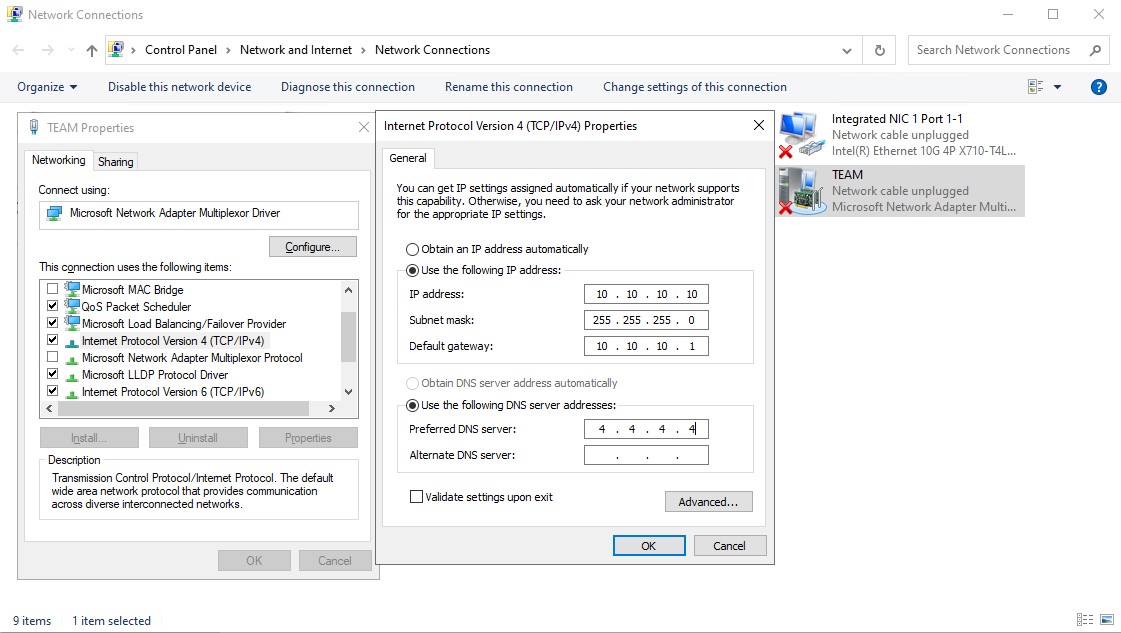
Access the NIC configuration via Control Panel > Network and Internet > Network Connections.
You should see the TEAM interface created in the previous step listed here.Right-click to open Properties, and you can configure the IP from there.
(Optional.) If your appliance is an XM8600 and you wish to configure the virtual DX7600 vSwitch to use the team, you will need to do so from Powershell with admin rights. These commands will create a new vSwitch connected to the Team we created previously called “TEAM”, then switch the DX VM to the new adapter.
CODENew-VMSwitch -Name vSwitchTeam -NetAdapterName "TEAM" -AllowNetLbfoTeams $true -AllowManagementOS $true Get-VM "LogRhythmDX" | Get-VMNetworkAdapter | Connect-VMNetworkAdapter -SwitchName "vSwitchTeam"
Configuration Steps for CentOS 7 or Rocky 9
Before the LogRhythm Appliance can be configured for NIC teaming, ensure out-of-band access has been configured and is available. If connected via SSH, your session will be terminated and non-recoverable when configuring NIC teaming on the NIC through which you are connected.
There are multiple different methods for configuring NIC teaming in CentOS 7 and Rocky 9. The process described here uses the GUI utility NMTUI, which is included with the LogRhythm ISO image.
From the console CLI, login with the LogRhythm account and password.
Record the names of the interfaces you wish to add to the team.
In the example below, the interfaces would be “eno12399” and “eno12409.”CODEip link show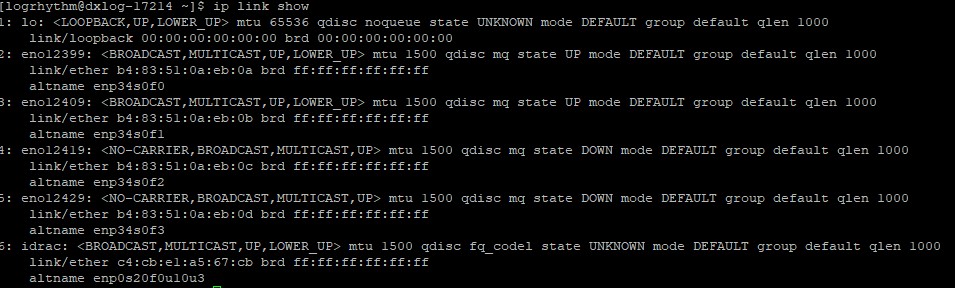
Launch the NMTUI utility to configure the NIC team.
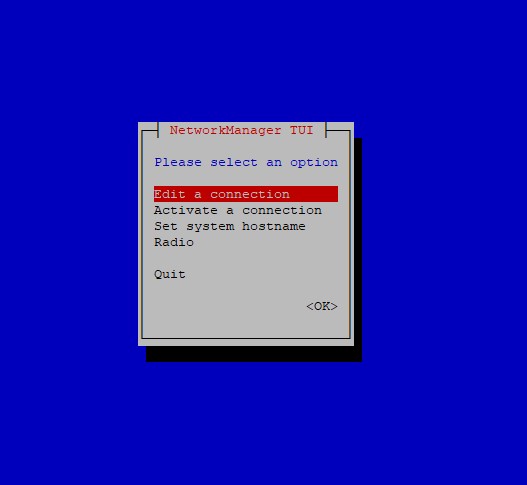
CODEsudo nmtuiSelect Edit a connection in the first menu screen.
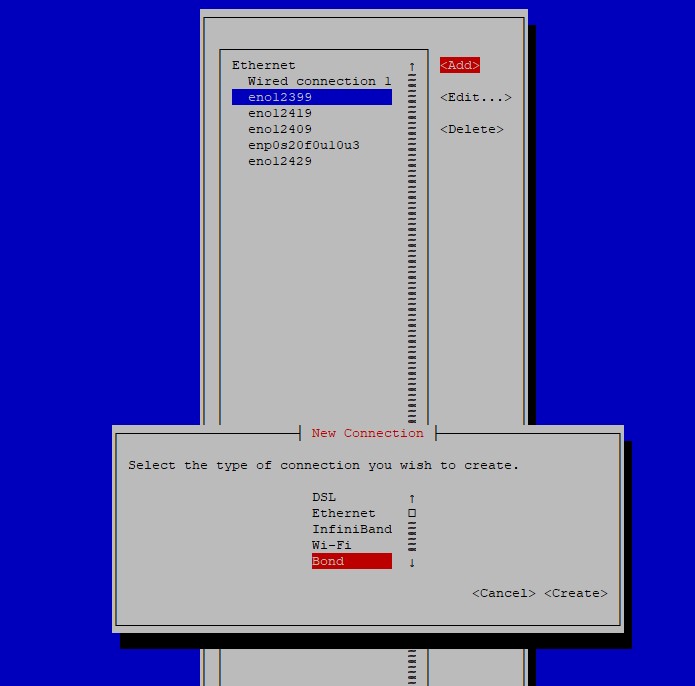
Select <Add> from the menu, and select Bond as the connection type.
You can optionally set the profile and device names, or leave them as the default.
Navigate to the <Add> button to the right of the box for Slaves.
On this page, enter the name of the devices you want to add as slaves in the bond, and repeat this step for each slave interface. The “Device” will match the name of the interfaces previously recorded in step 2.
In the example below, the Devices would be “eno12399” and “eno12409.”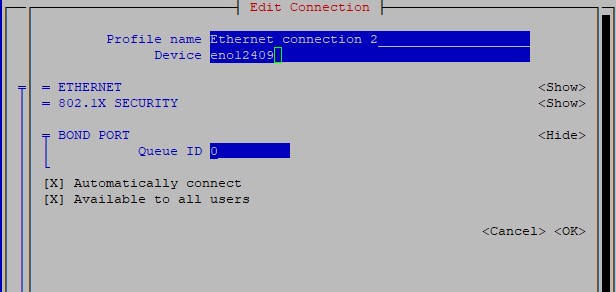
Select the BOND Mode and configure the IPv4 Addresses.
The final configuration should look similar to the example below.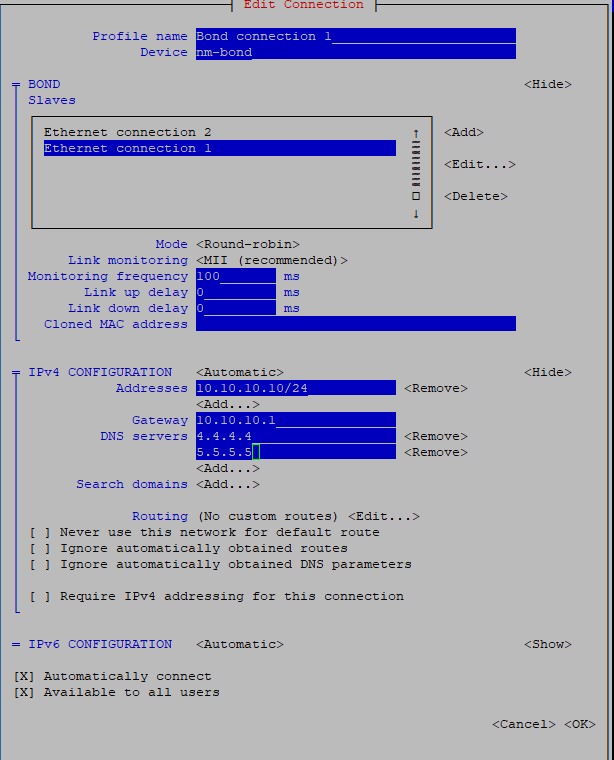
Select <OK>.
The list of Ethernet interfaces displays again.Navigate down to select <Back>, to return to the first landing menu.
To exit NMTUI, select Quit.
The BOND configuration is applied immediately.