Gen6 Storage Array Configuration
This guide provides the installation steps required for configuration of your LogRhythm Storage Array (LR-SA).
Audience
This guide is intended for systems engineers and other implementation specialists within LogRhythm Professional Services, who are LogRhythm Partners, or who are LogRhythm customers under the guidance of LogRhythm Professional Services.
Do not attempt to complete the steps in this guide without assistance from LogRhythm Support.
Prerequisites
The LogRhythm Storage Array is designed to increase the storage capacity of a LogRhythm High-Performance Appliance. The following configuration steps require taking the system offline to install new hardware.
- Before adding the LogRhythm Storage Array device to an XM, back up the LogRhythm Appliance. A minimum backup should include the SQL Server system databases (master, msdb, and model), the LogRhythmEMDB database, and all archived log files.
- If an antivirus scanner has been installed on the LogRhythm appliance you may need to disable it and update the exclusions to include the new data locations after its installed.
- Shut down the LogRhythm appliance. Be sure that the appliance and any attached devices are powered off.
Hardware Overview
Mounting rails, hardware, a RAID controller, and two SAS cables (2 meters in length) are included with each storage appliance.
Storage Array | Drive Specifications | Intended Use | RAID Controller and SAS Cables |
|---|---|---|---|
SAAR6120 | 12 x 12 TB 7,200 RPM SAS 3.5-inch | XM and DP appliances | PERC H965e RAID Controller with 8 GB Cache |
Configuration Overview
There is one supported RAID configuration for the LogRhythm Storage Array:
- Single-volume storage for archiving: 12-drive RAID 6 array
The following table lists the possible LR-SA configurations based on the LogRhythm High-Performance Appliance to which the storage array will be attached.
LogRhythm Appliance | Archive LR-SA | Maximum LR-SA |
|---|---|---|
LR-XM2600 Series | 1 | 1 |
LR-XM4600 Series | 1 | 1 |
LR-XM6600 Series | 1 | 1 |
LR-XM8600 Series | 1 | 1 |
LR-DP7600 Series | 1 | 1 |
Unpack and Rack the Storage Array
Unpack the array and identify each item, noted below. Keep all shipping materials in case they are needed later.
- Storage enclosure containing 12 x 3.5" drives
- Rail kit
- PERC H965e RAID Controller
- 2m SAS cables (x2)
- Bezel
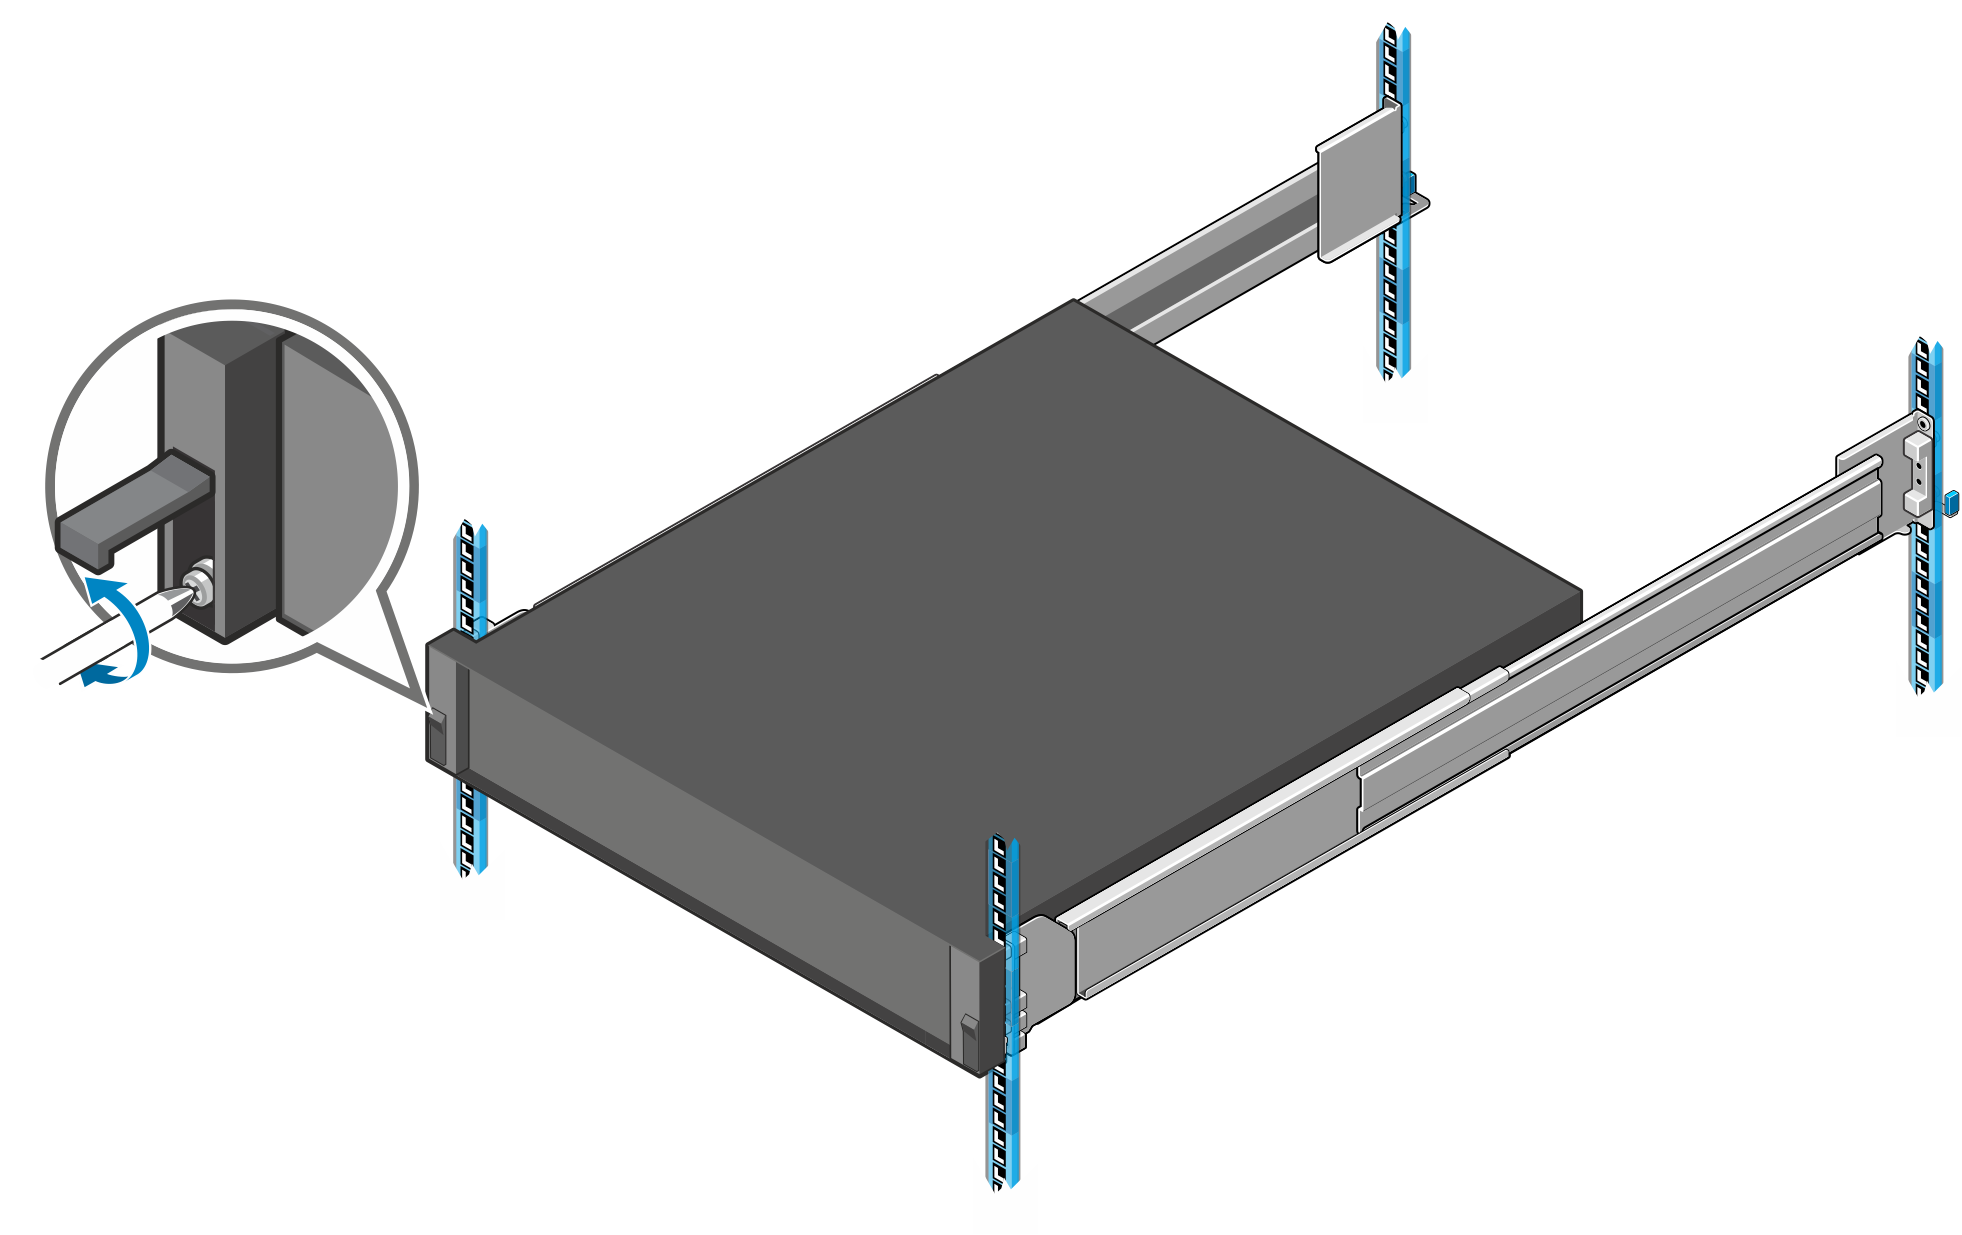
The storage array ships with a rack mount chassis and rails for mounting in a high-density server rack. Install the rails in a rack that meets the specifications of American National Standards Institute (ANSI)/Electronic Industries Association (EIA) standard ANSI/EIA-310-D-92, the International Electrotechnical Commission (IEC) 297, and Deutsche Industrie Norm (DIN) 41494.
For details about installation, refer to the Rack Installation guide that is included with your storage array rail kit.
Install the RAID Controller
Before the LogRhythm Appliance can use the LogRhythm Storage Array, you must install the included RAID controller in the LogRhythm Appliance.
- Shut down the LogRhythm Appliance and unplug both power supplies.
- Remove the lid of the LogRhythm Appliance by turning the lock on the black handle to unlock and then lifting up on the black handle.
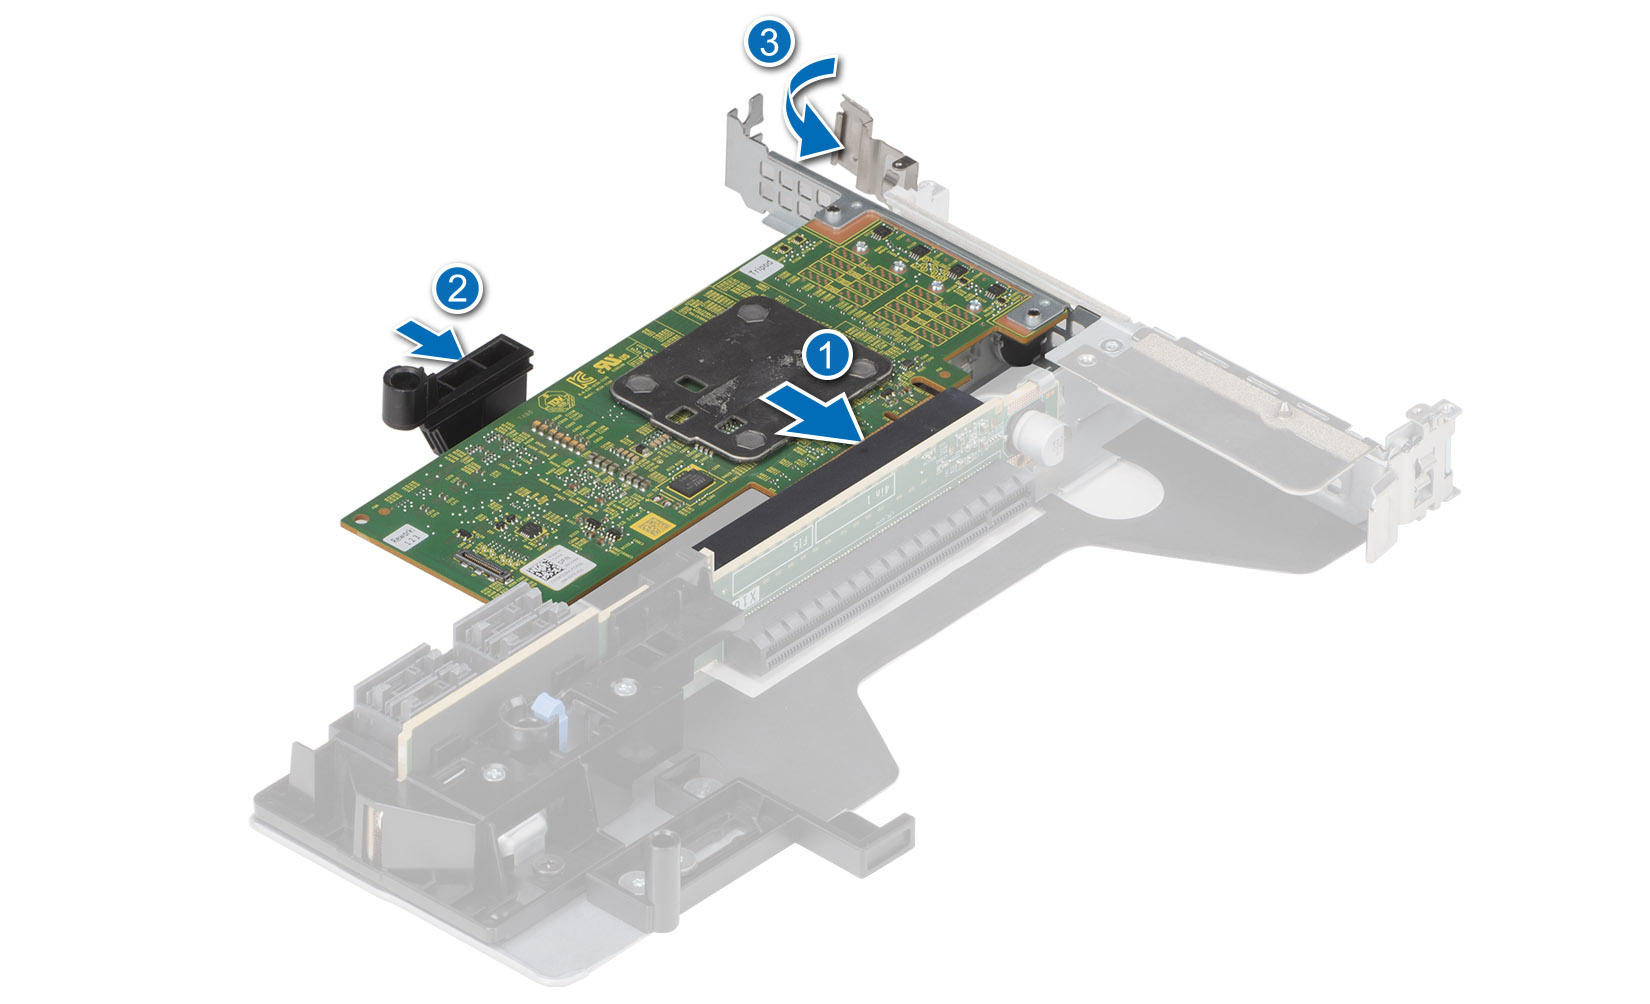
- Depending on the model, there are between one and six PCIe slots available in the LogRhythm Appliance, the slots are located in the rear of the appliance. Depending on the LogRhythm Appliance you may have either Half-Height or Full-Height PCI-E slots available. The PERC card is shipped with both Half and Full-Height brackets, you may need to swap the brackets by removing the 2xPhillips Head screws on the PERC card to match your slot height.
- Insert the RAID controller in one of the available slots, making sure it is fully seated and locked in place.
- Replace the lid of the LogRhythm Appliance.
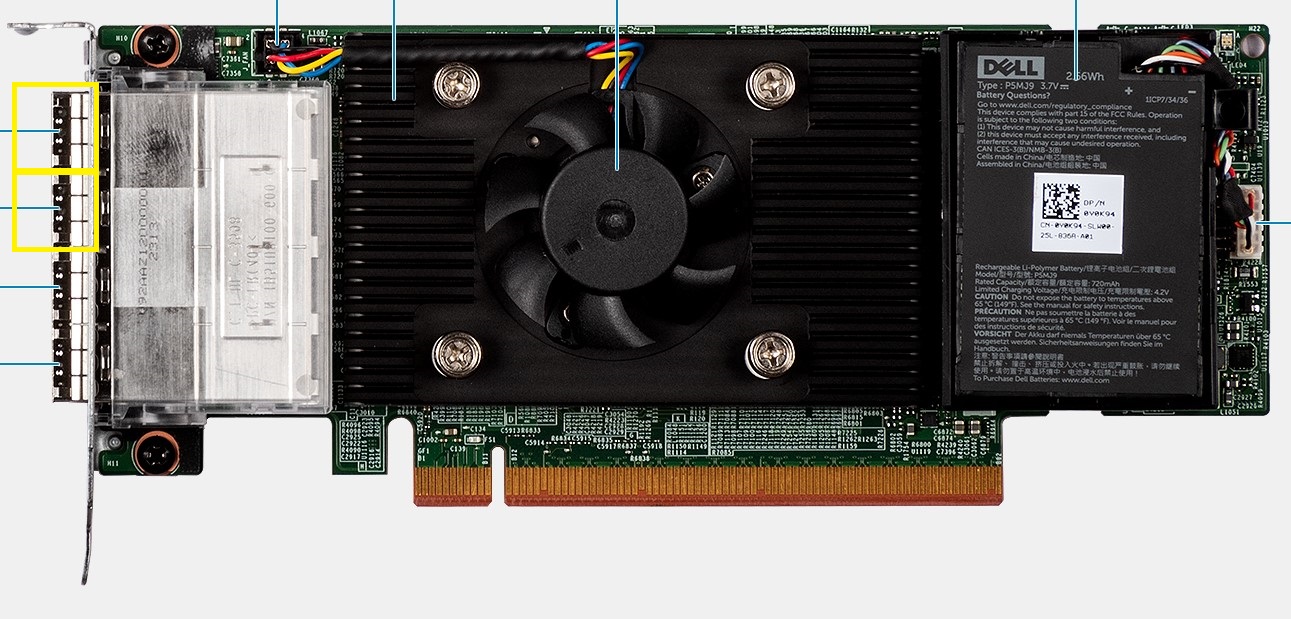
- The PERC H965e RAID Controller has 4 eSAS Ports, to install a single storage array you are only required to connect 2 ports, 1 port to each of the Enclosure Management Modules. Use the provided SAS cables to connect the ports 0 and 1 (closest to the top of the bracket on the RAID controller) to the first port on each of the Enclosure Management Modules (See YELLOW squares in diagrams Below).

- Connect the power cables for the storage array, and then reconnect the power cables for the LogRhythm Appliance.
- Power on the storage array.
- Power on the LogRhythm Appliance.
Configure the Array
Before the LogRhythm Appliance will recognize the LogRhythm Storage Array, the newly installed RAID controller must be set up. It can be set up through RAID Controller BIOS Configuration Utility, iDRAC, or Dell OpenManage. LogRhythm recommends using the Dell iDRAC GUI which can be accessed locally through the Dell iSM iDRAC GUI Launcher or via a remote web browser to the per-configured iDRAC IP.
Configure an Array for an XM or DP - Archives
For an XM or DP appliance, the array is configured as a single volume for maximum storage capacity. The 12 drives in the storage array will be configured as follows:
- Drives 0–11: RAID 6
Configure Drives with the iDRAC GUI
To configure the array using the iDRAC GUI, do the following:
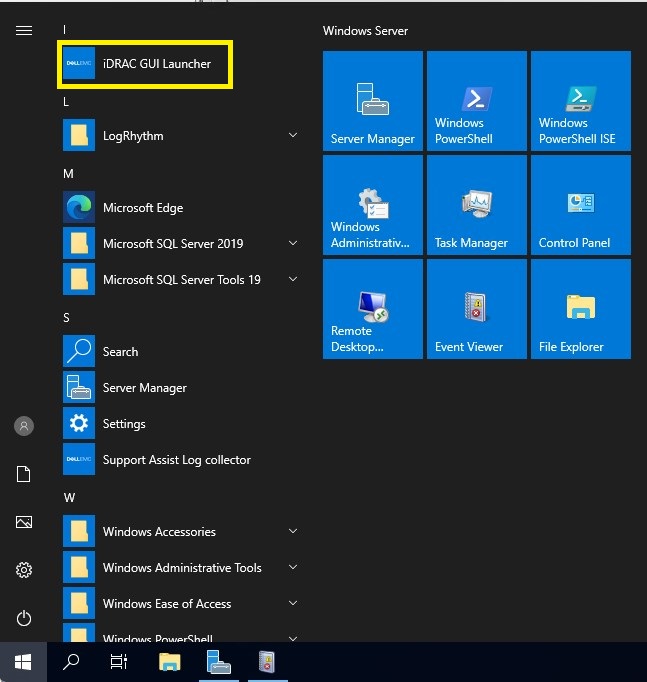
- If accessing the iDRAC from within the LogRhythm appliance you can access this through the Start Menu "iDRAC GUI Launcher". This will open a web browser to the web address of "https://idrac.local/restgui/start.html"
- Authenticate into the iDRAC Web GUI by entering the following
Username: root
Password: LogRhythm Default Password (obtain from support or professional services if you are unsure)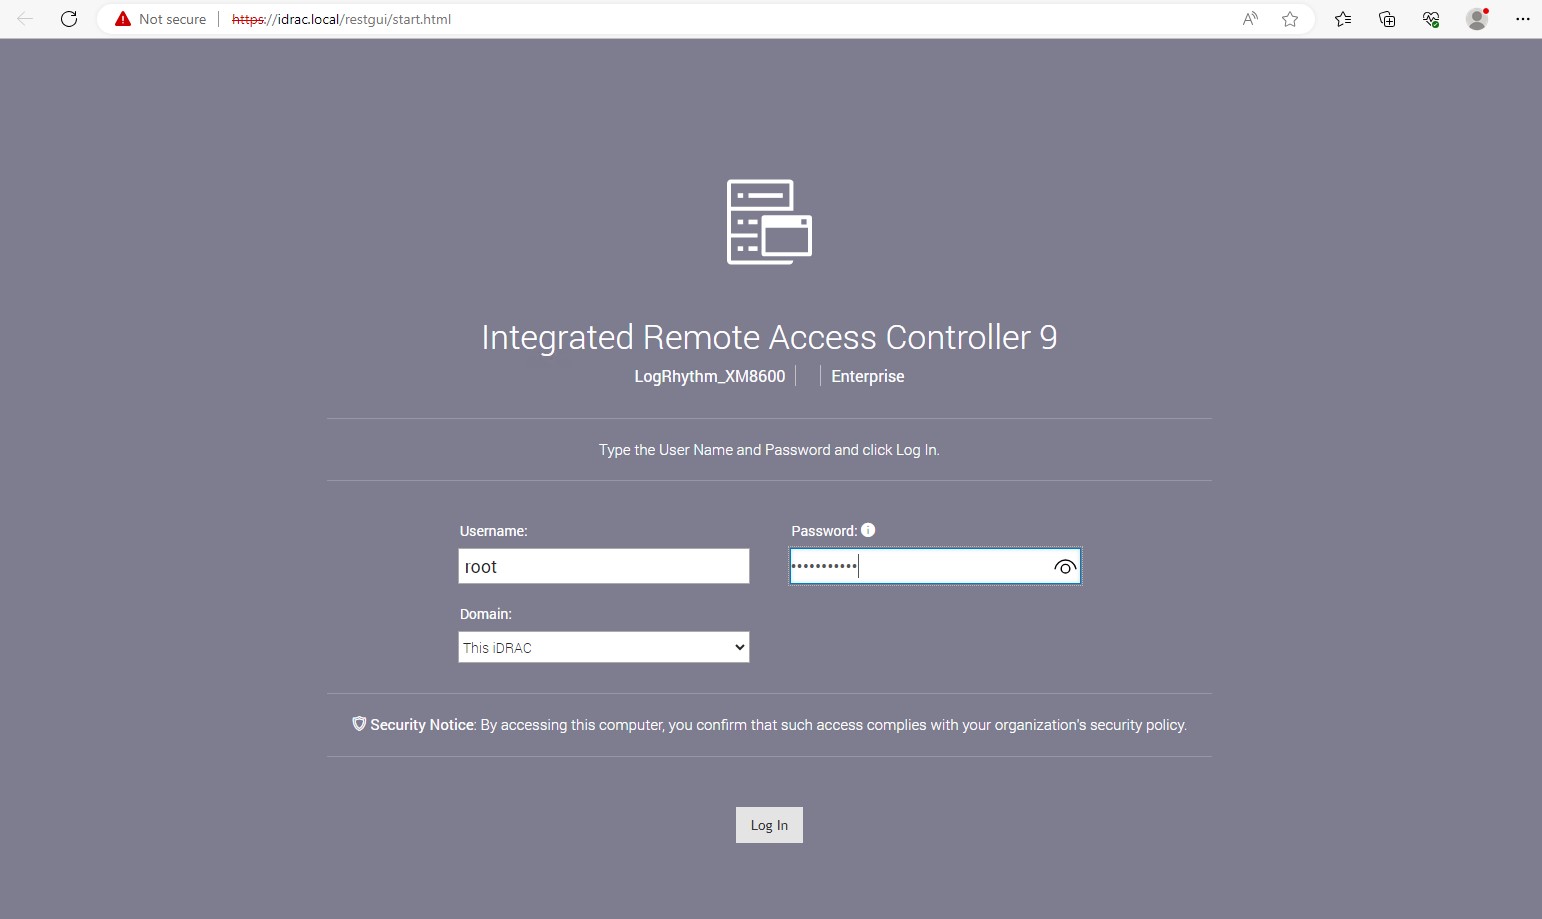
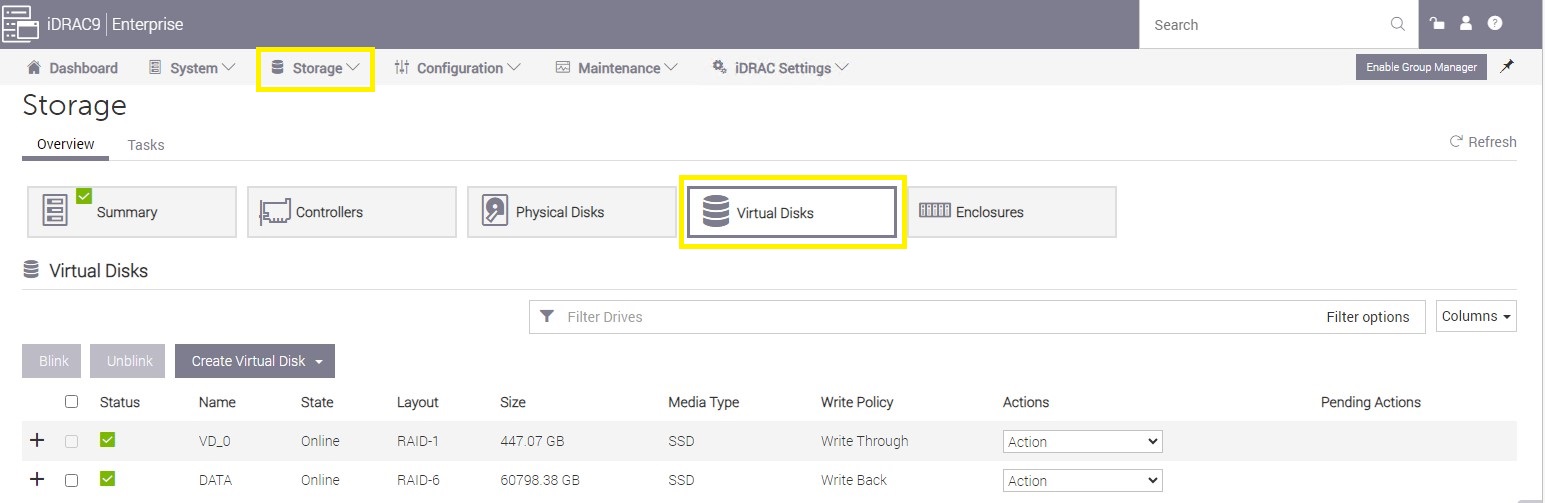
- To access the storage configuration select the "Storage" top level menu, then "Virtual Disks" to configure our Virtual Disk for the LogRhythm Storage Appliance (See YELLOW). Your existing Virtual Disk configuration will vary depending on which appliance you are installing the storage array on so the screenshots may vary
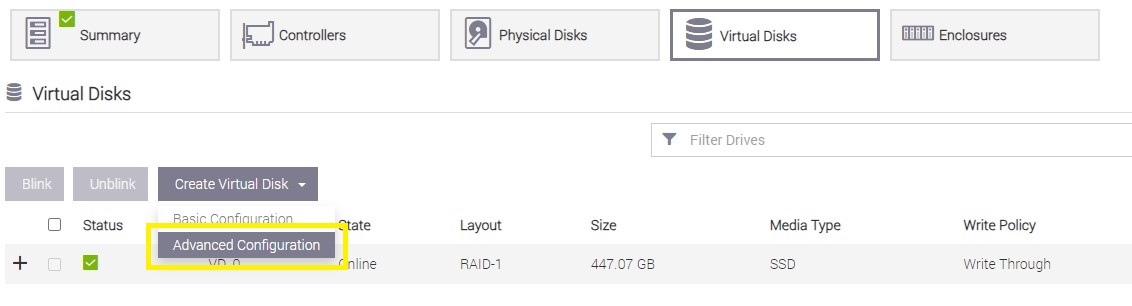
- Select the "Create Virtual Disk", button then select "Advanced Configuration"
- Select the Controller "PERC H965e Adapter" and you will be prompted to fill in the details for the virtual disk then click "Next"
Name: ARCHIVE
Controller: PERC H965e Adapter (note screenshot is incorrect at time of writing)
Layout: RAID-6
Media Type: HDD
Physical Disk Selection: New Group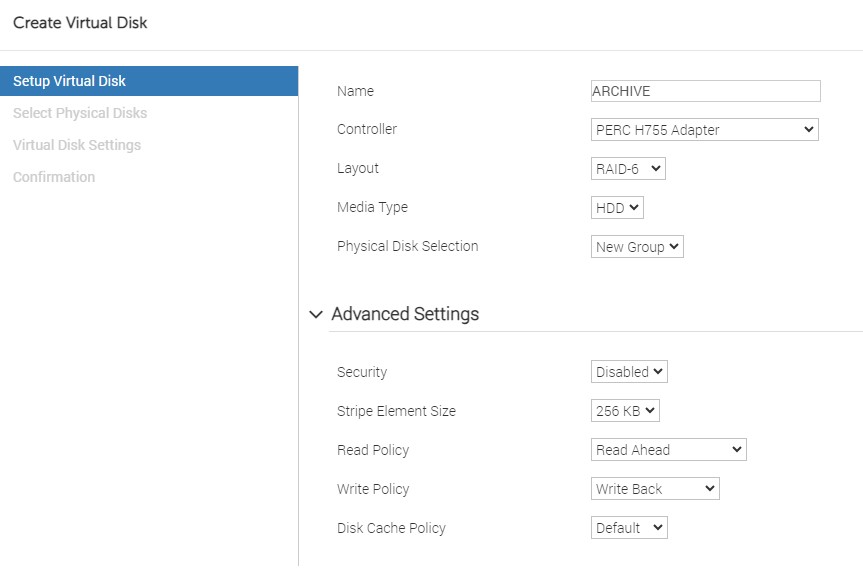
- Select all 12 the physical disks numbered 0 - 11 by checking the boxes on the left of each disk, you will need to scroll to the bottom to select them all, then click "Next", review the settings on the next page, then "Next" again.
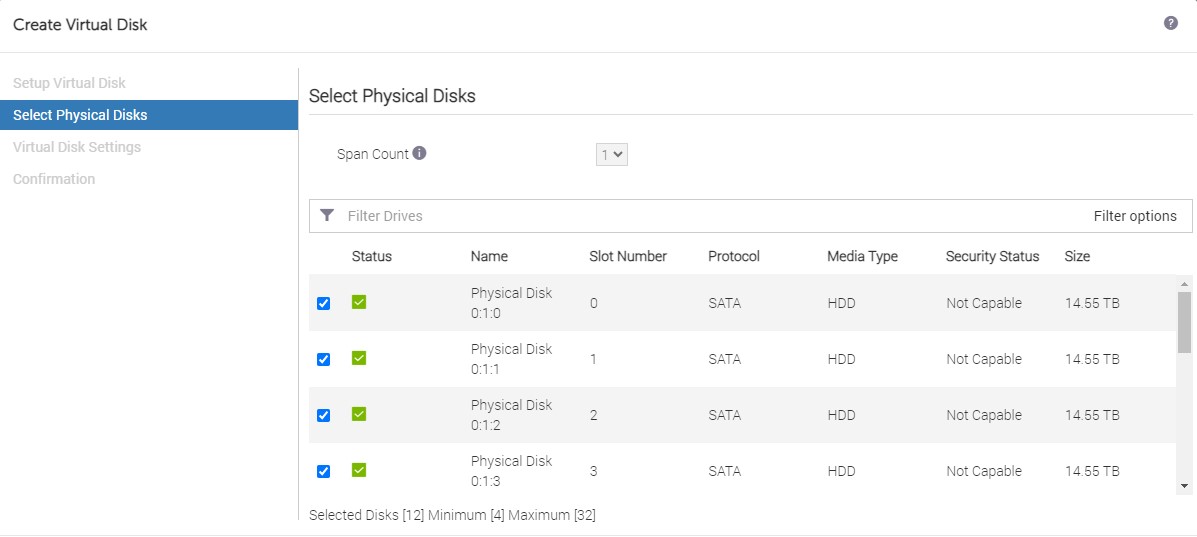
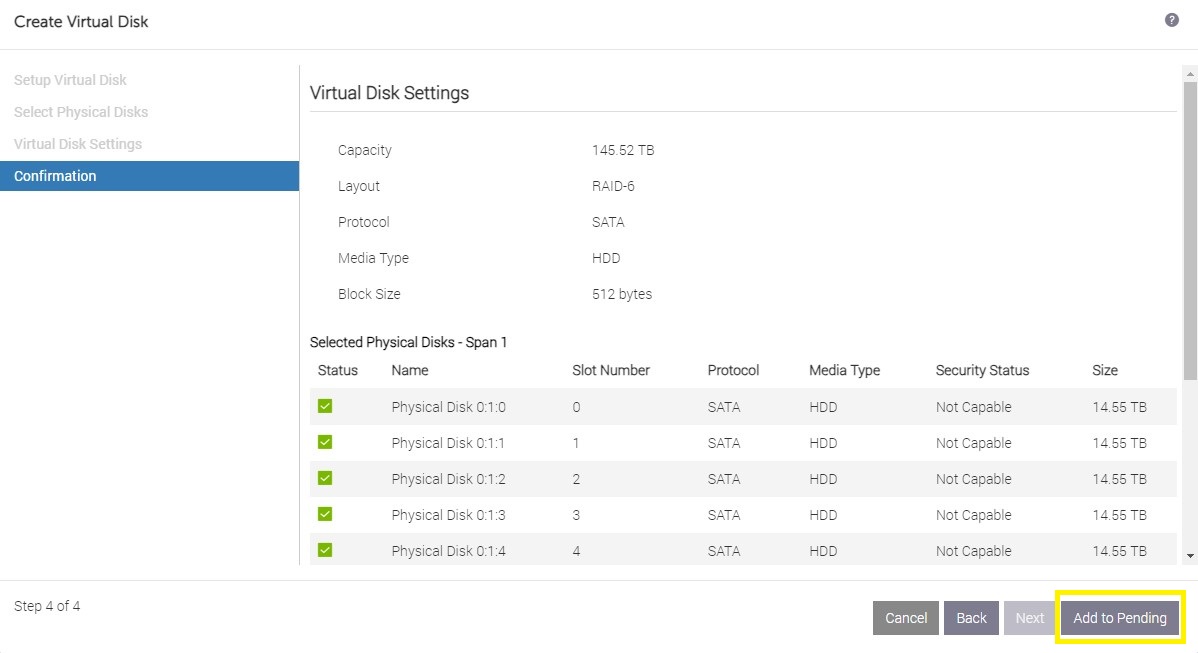
- On the final page of the wizard you will be presented with a Confirmation window. To complete the wizard you need to select "Add to Pending"
- You will be prompted with options for when you would like the iDRAC controller to complete the pending task you just created. Since creation of the virtual disk for archives does not have any impact on the production system we recommend selecting "Apply Now". This job will take approximately 5 minutes to complete. You can monitor it from the iDRAC Job Queue or just refresh the page until the Storage Status is Green/Healthy
Windows Disk Configuration for an XM or DP
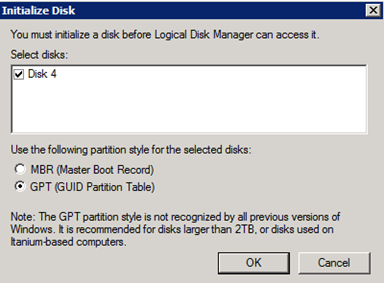
- Open the Windows Disk Management console through Server Manager, or type diskmgmt.msc in the search box.
- Initialize the disk as GPT, and then click OK.
- Right-click the new disk, and then click New Simple Volume.
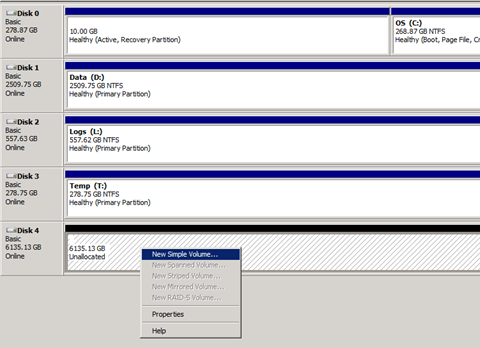
Choose a drive letter, provide a name, and then select the Perform a quick format check box.
R: is recommended for archive
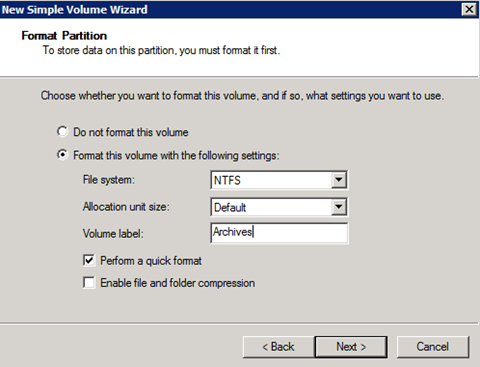
- Click Next.
LogRhythm Archive Configuration
- In the Client Console, open the Deployment Manager.
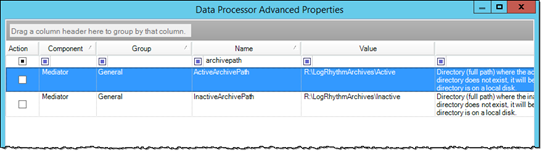
- Click the Data Processors tab, double-click the Data Processor on which you want to change the archive path, and then double-click Advanced.
- Change the ActiveArchivePath and InactiveArchivePath to the new drive.
- With the LogRhythm services stopped, copy the archives to the new location:
- Start > Run > cmd.exe
- Xcopy D:\LogRhythmArchives\*.* R:\LogRhythmArchives\ /s /h /e /o /k
- Start the LogRhythm services.