
Okta SAML Configuration
This page details the steps to configure a new SSO instance using the Okta SAML application.
Configure SSO in Okta
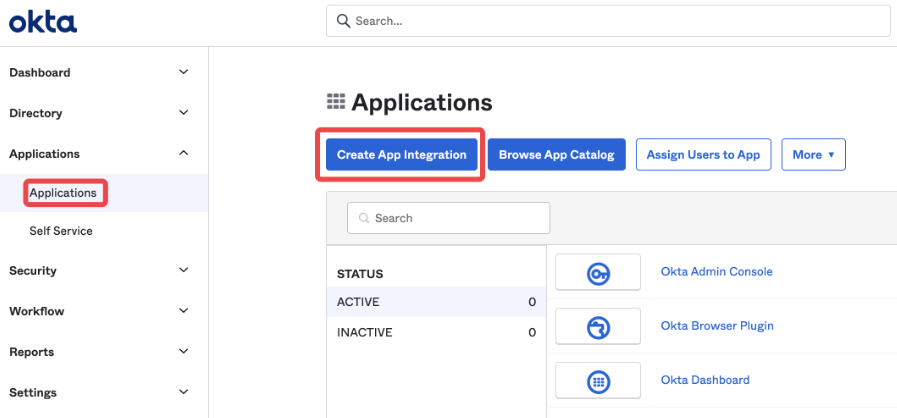
To create a new application and configure SSO for Okta SAML, from the Administration screen:
- Expand the Applications header, and then click Applications.
- Click Create App Integration.
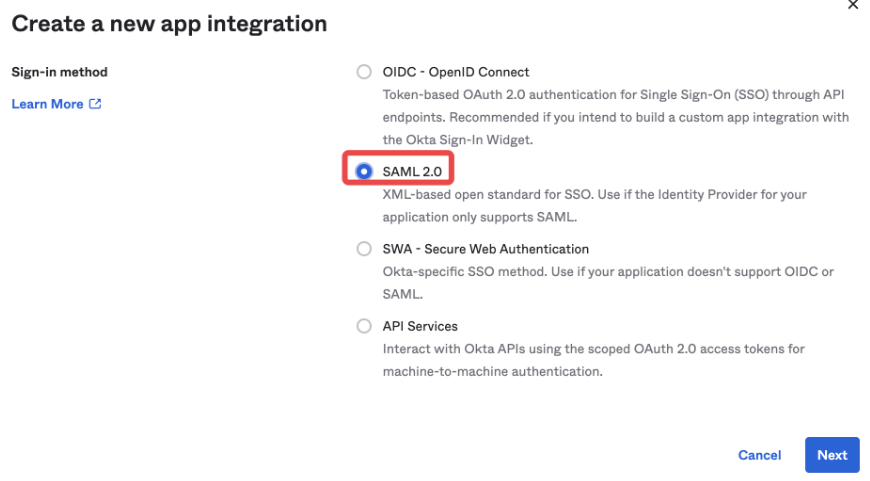
- Select SAML 2.0 as the sign-in method, and then click Next.
- Give the application a name (for example, "Axon").
Select Do not display application icon to users and Do not display application icon in the Okta Mobile app.
The Okta tile is not meant to launch Axon. However, a bookmark can be created later.
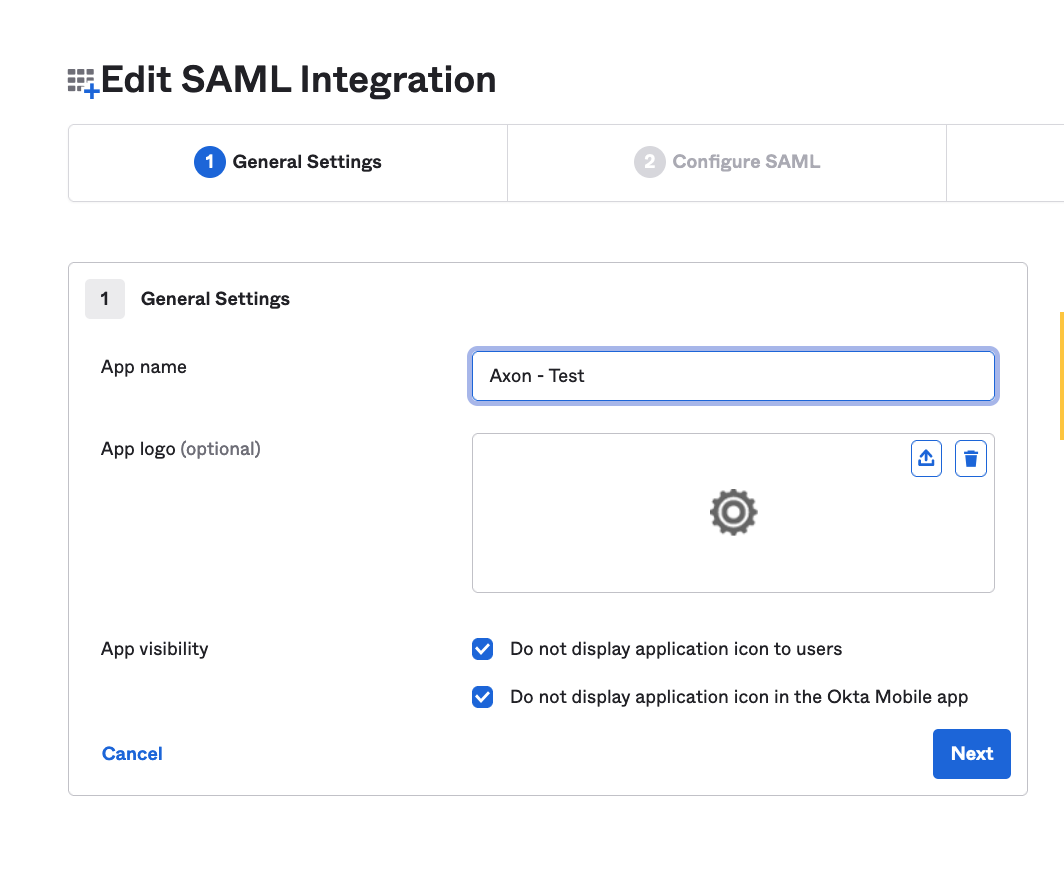
- Click Next.
Set the Single sign-on URL and Audience URI to the same URL in the following format:
https://idp.na01.prod.boreas.cloud/auth/realms/your-axon-tenant-name/broker/axon-alias/endpoint
Replace "your-axon-tenant-name" with the actual tenant name/ID, and replace "axon-alias" with the alias you will be using in the Axon SSO configuration (for example, "okta").
The "https://idp.na01.prod.boreas.cloud" part of the URL is dependent on the cluster to which your tenant belongs. The URL used above is only an example.
- Check the Use this for Recipient URL and Destination URL box.
- Add attribute statements for email, firstName, and lastName, as shown below.
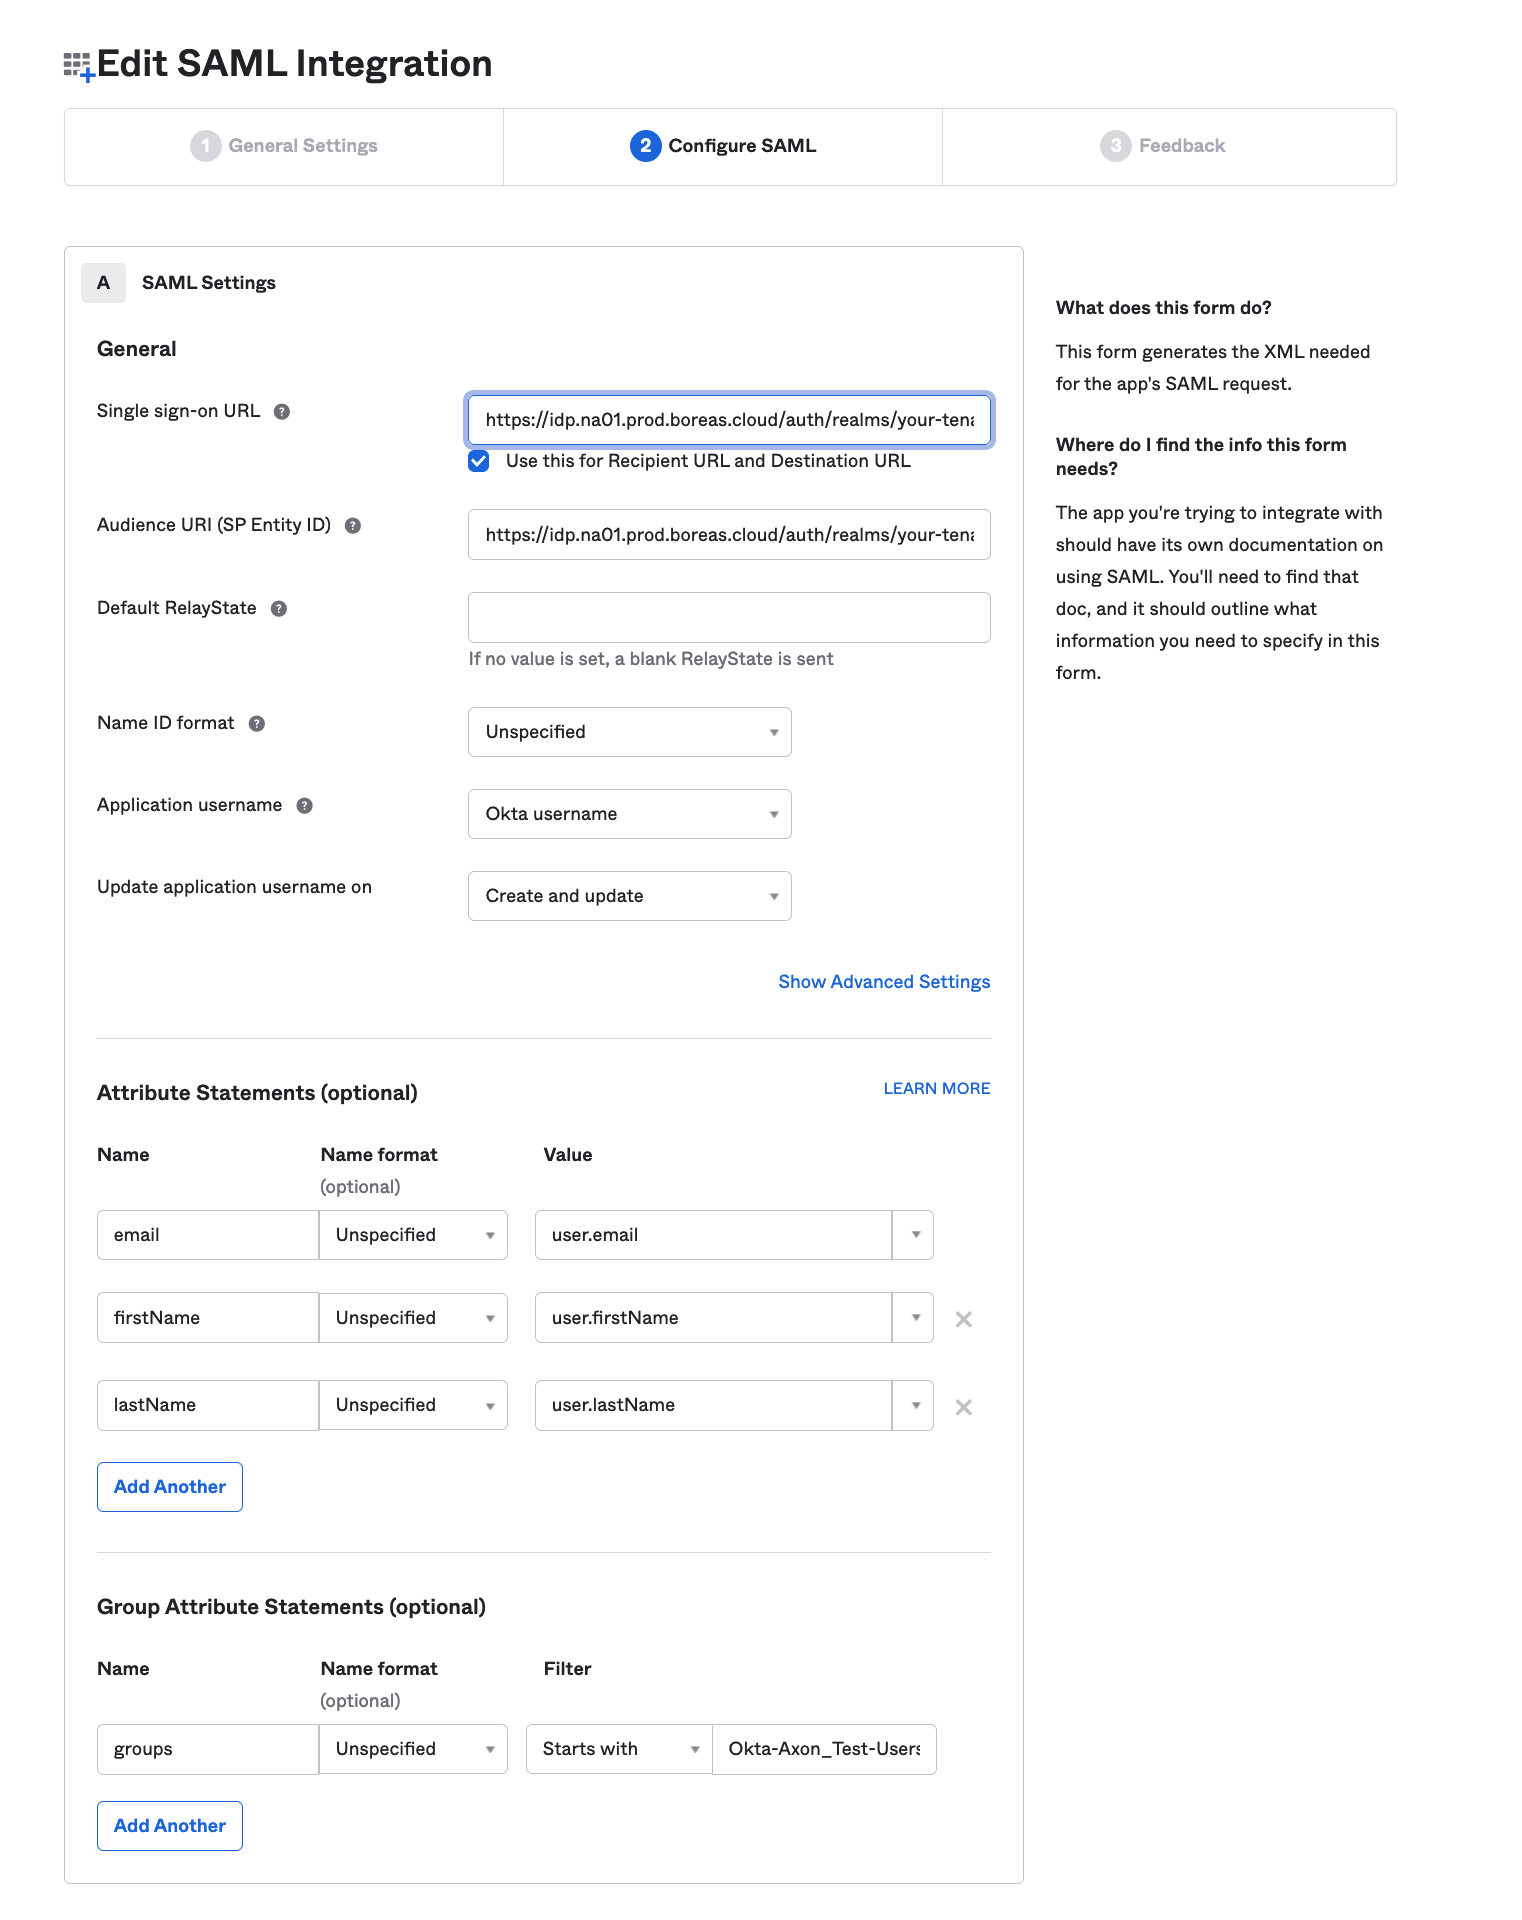
(Optional.) Add the Group Attribute Statements you've assigned to the Axon application.
This can be used to do automatic role mapping in Axon.Automatic role mapping is not yet available in Axon, but completing this step now will save time in the future.
- Click Next.
- Click Finish.
The application is added to the Applications list.
- Click on the Axon application, and then click Assignments.
- Click Assign and assign all of the people and/or groups who should have access to Axon.
Repeat this step until everyone has been assigned. - Click the Sign On tab, and then click View SAML setup instructions on the right.
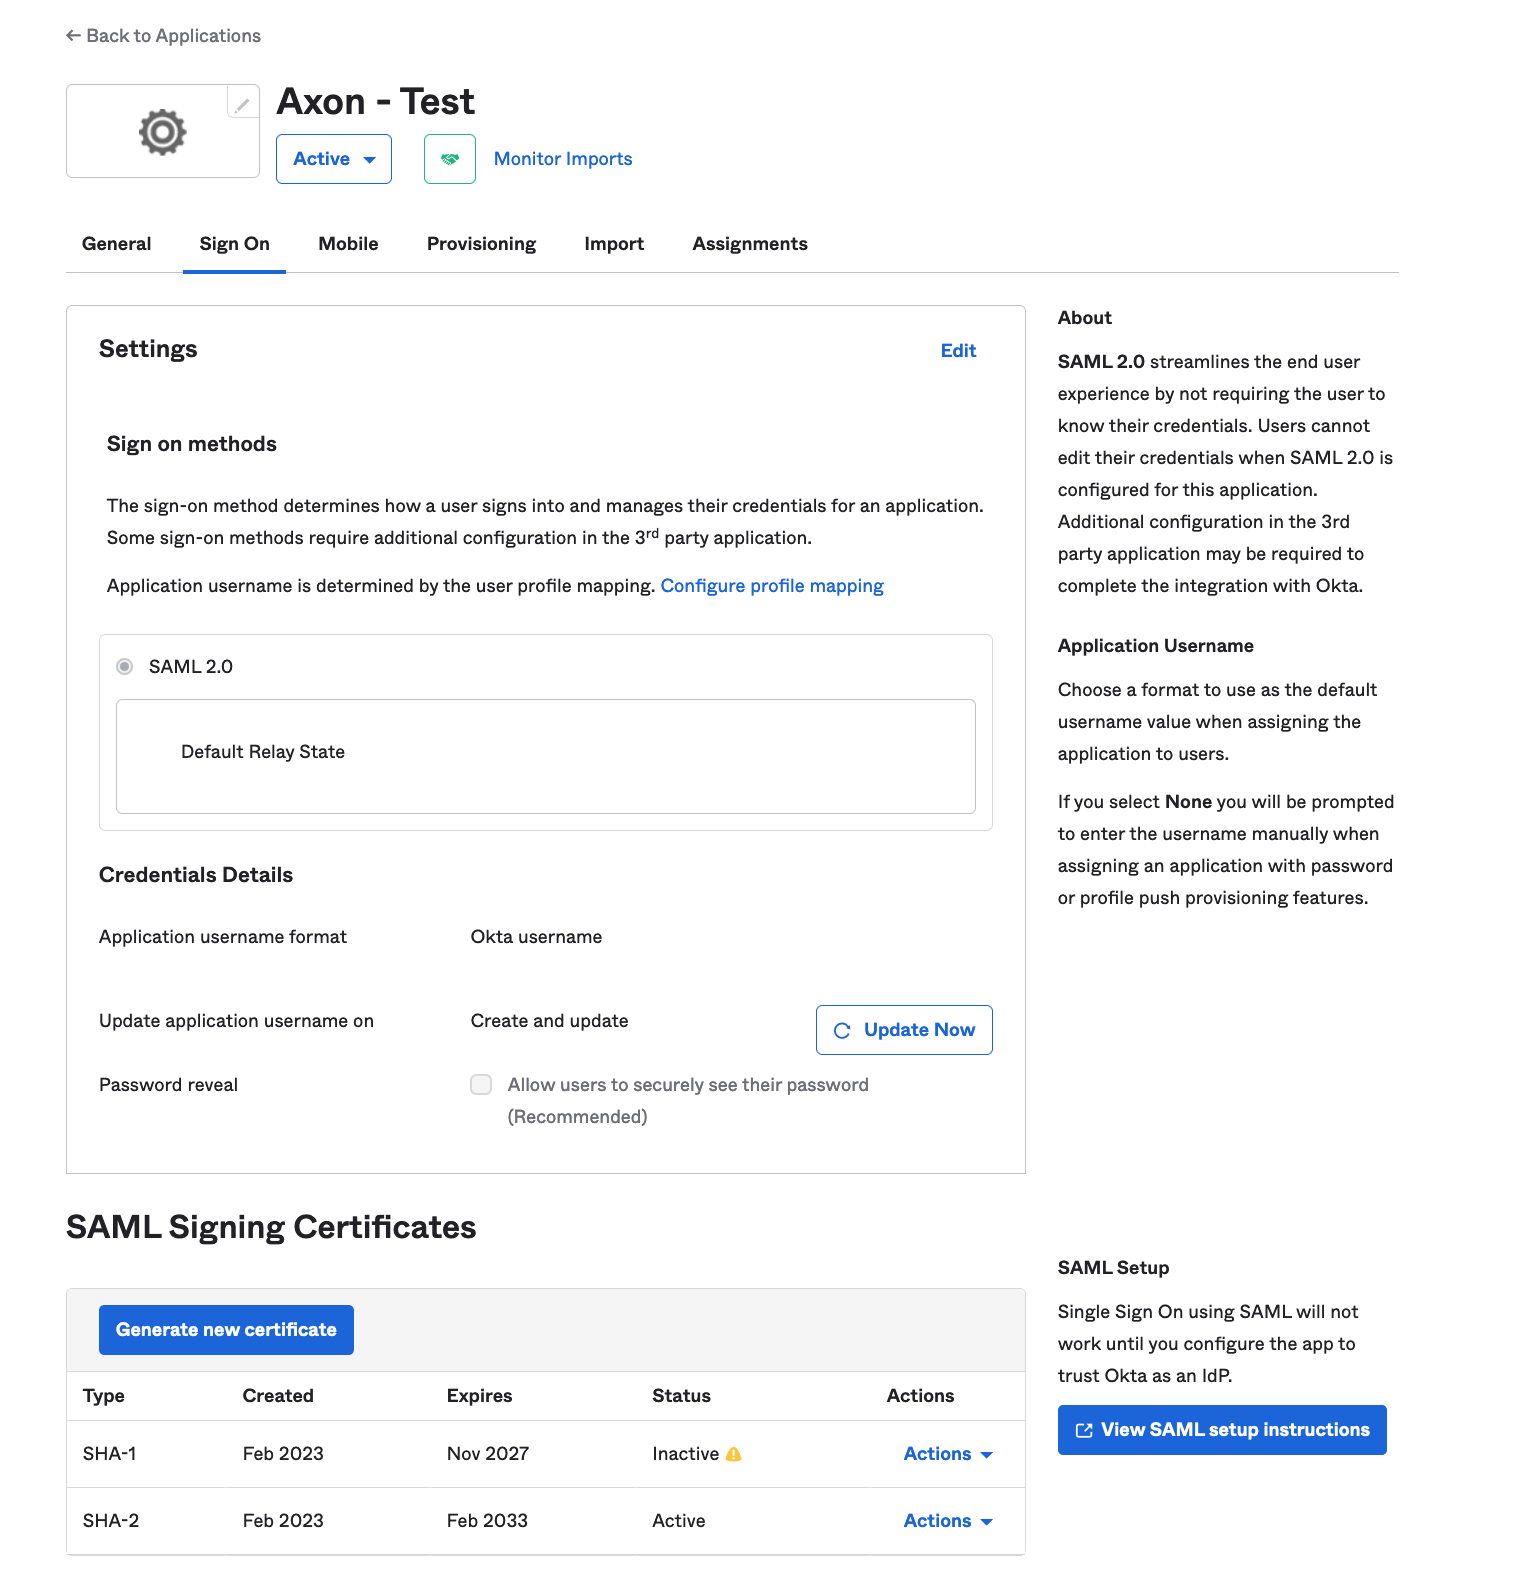
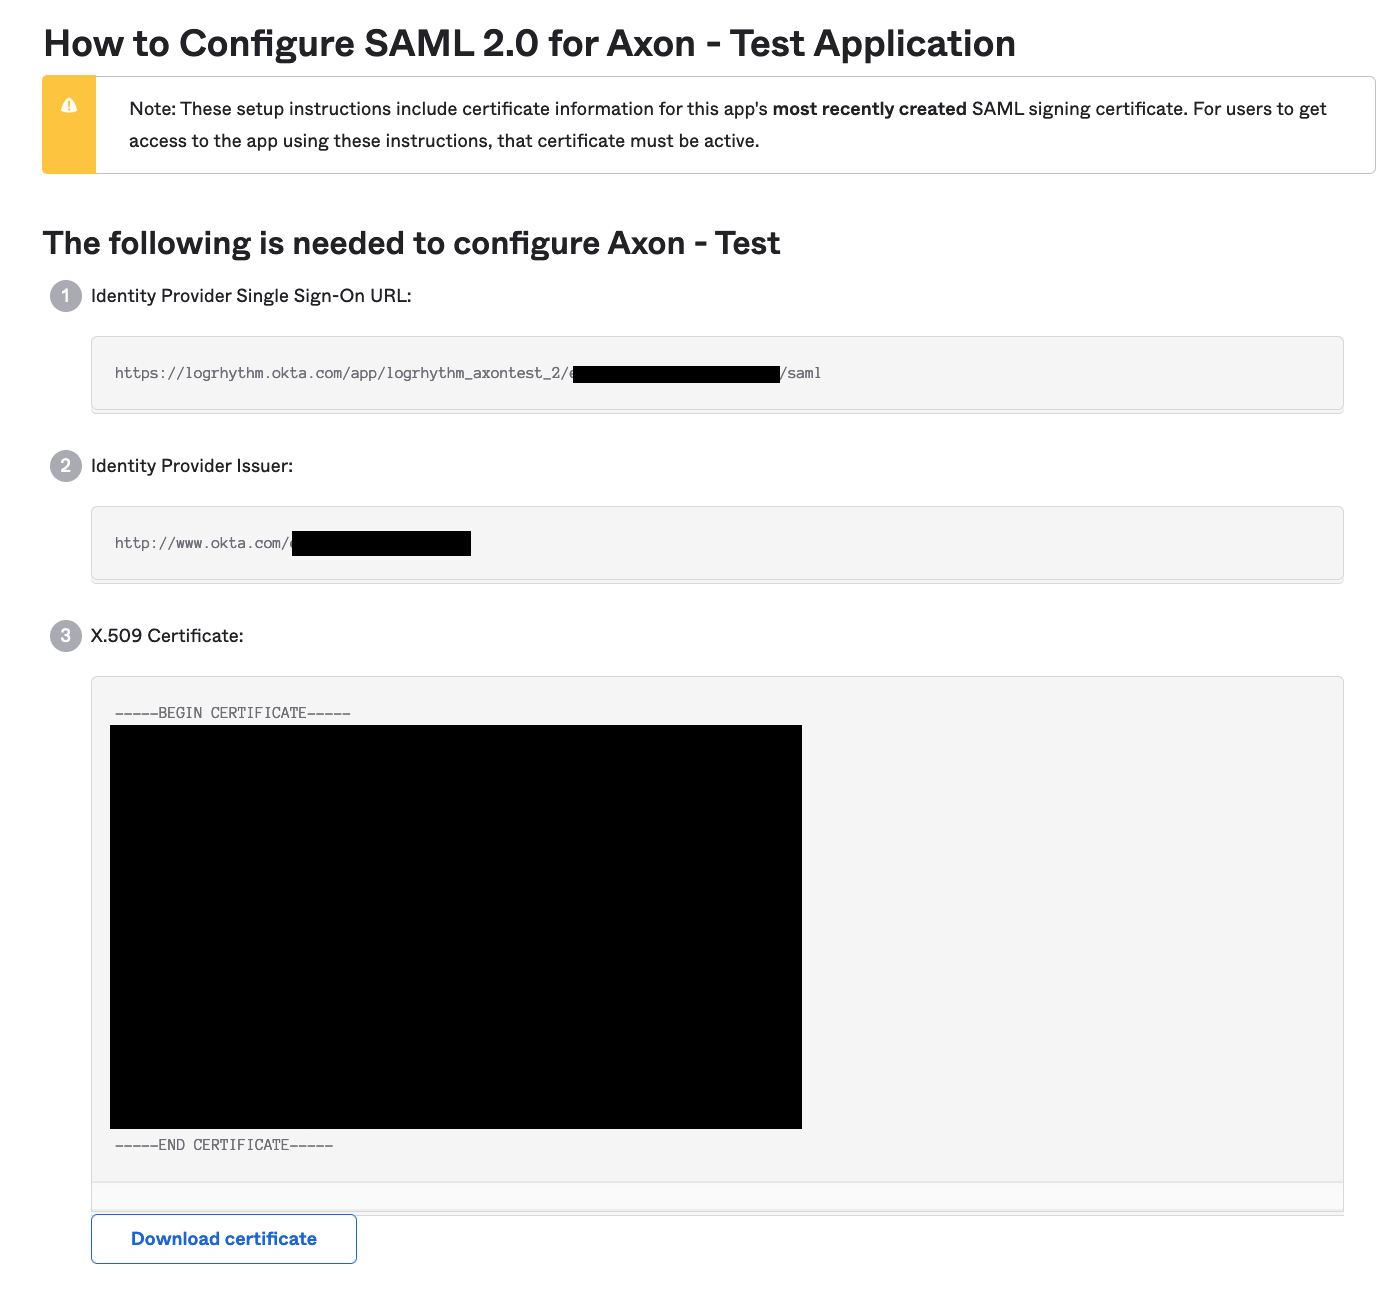
- Copy and paste all of the items on this page into a text document. They will be needed when configuring SSO within Axon.
Configure Okta SAML SSO in Axon
Once all of the steps above have been completed, you can configure the SSO settings for Okta SAML in Axon.
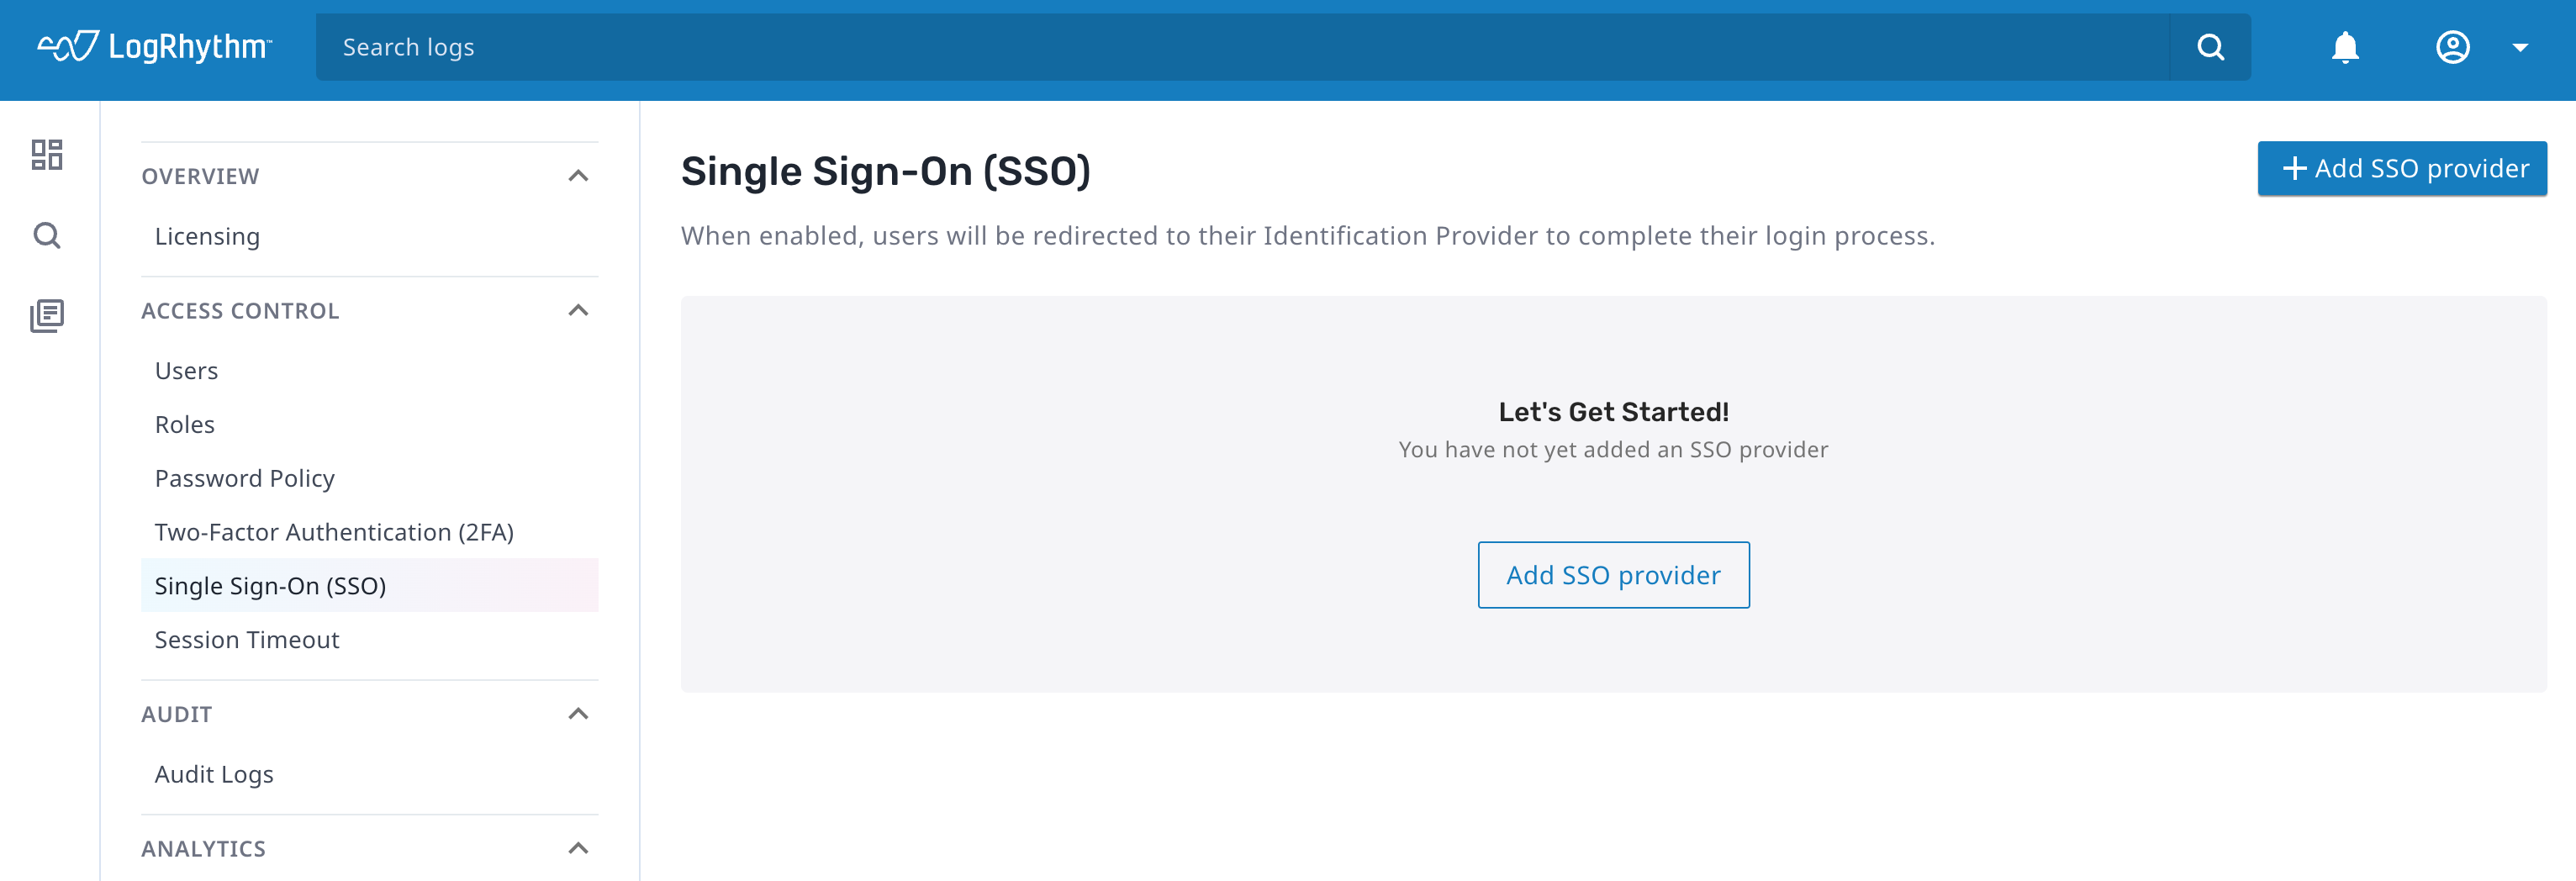
To configure single sign-on, from the Single Sign-On screen in Axon:
- Click Add SSO provider.
- Enter the Alias used in the previous section when configuring Okta.
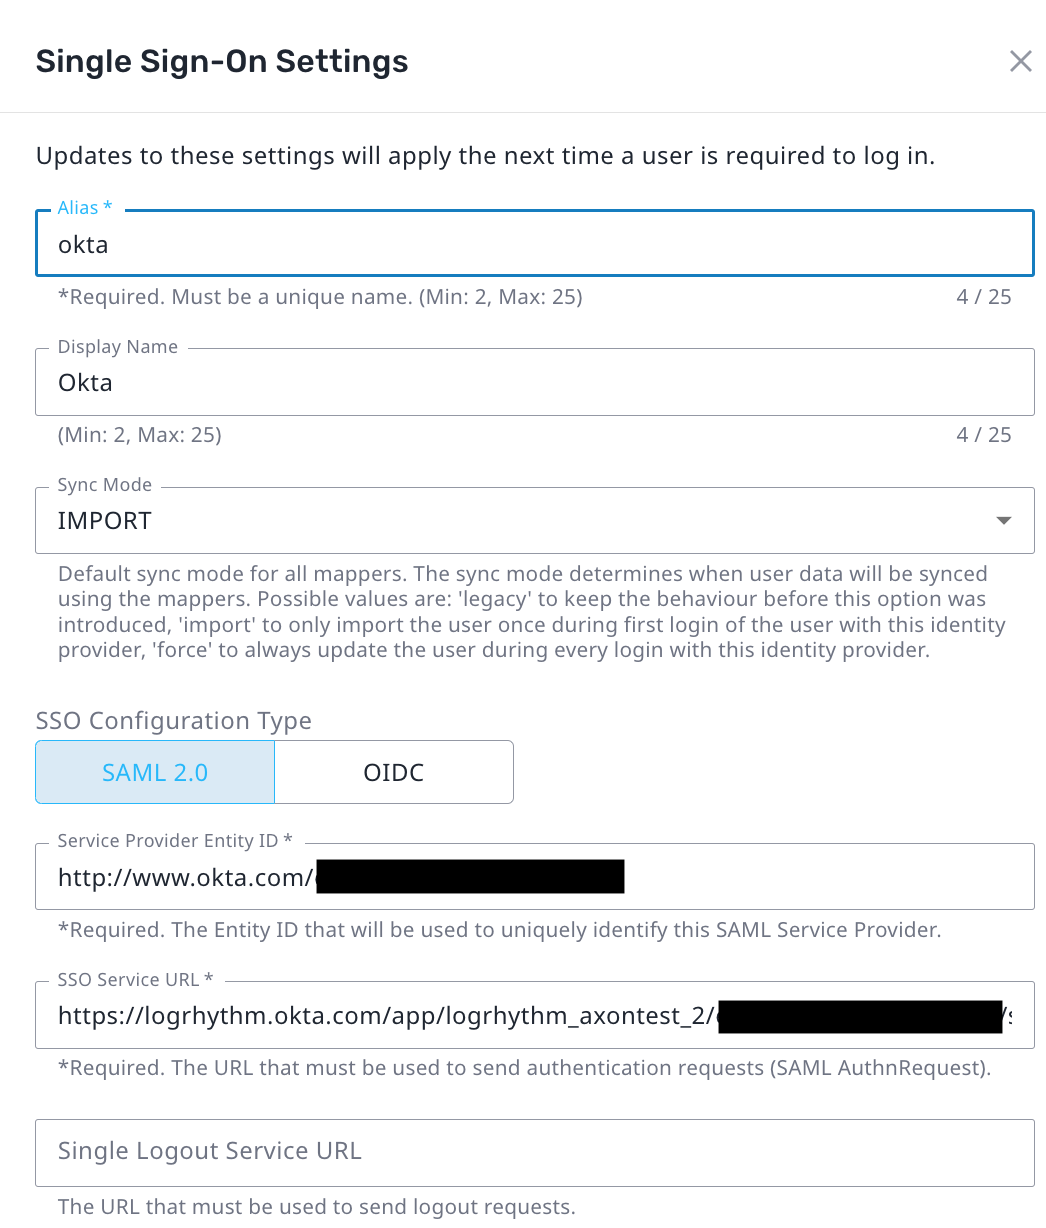
- Enter a Display Name to appear on the login screen.
- Ensure SAML 2.0 is selected.
- In the Service Provider Entity ID field, enter the Audience URL configured within Okta.
- In the SSO Service URL field, enter the value copied from the Identity Provider Single Sign-on URL field in the previous section.
Check the Validate Signature box, and then enter the X509 Certificate value obtained in the previous section into the Validating X509 Certificate box.
Only include the content between the BEGIN CERTIFICATE and END CERTIFICATE lines. Do not include the begin and end lines.

- Click Save and Enable.
- Log out from Axon, and then click Return to Login.
A button allowing for Okta SSO is available.