Configure Google WS
Google Workspace offers a wide range of developer products and tools that let you connect your service with Google Workspace or extend Google Workspace apps like Gmail, Drive, and Chat. Each Workspace app or integration has its own Google Cloud project where you configure APIs, set up authentication, and manage deployments.
Admin SDK lets administrators of enterprise domains view and manage resources like users, groups, etc. It also provides audit and usage reports of the domain.
This section details the steps required in order to set up a new Google Cloud Project to collect logs in Axon.
Prerequisites
- Google Workspace account login credentials.
Create a Google Cloud Project
- Navigate to https://console.cloud.google.com/ and log in to the Google Cloud Console.
- At the top-left, open the expandable menu and select IAM & Admin, and then select Create a Project.
- Enter a unique and descriptive Project Name.
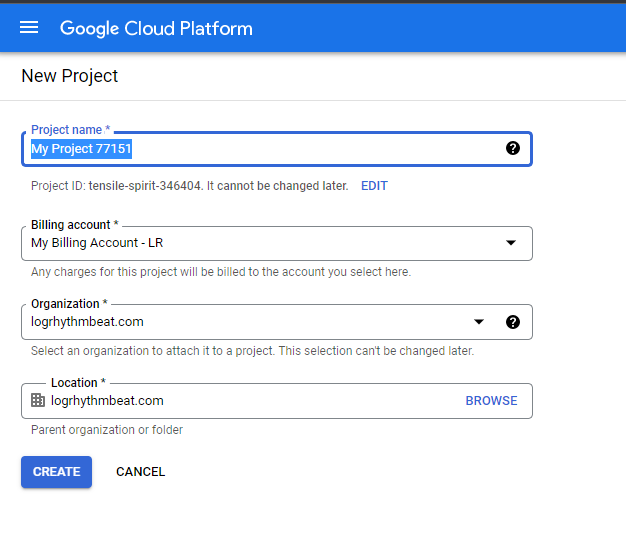
(Optional.) Click Edit to change the Project ID.
The Project ID can't be changed after the project is created, so choose an ID that meets your needs for the lifetime of the project.
- Select the Billing account and Organization based on your company policies.
In the Location field, click Browse to display the list of potential locations for the project.
- Click the desired location, and then click Select.
- Click Create.
The console navigates to the Dashboard page and your project is created within a few minutes.
Enable Google Workspace APIs
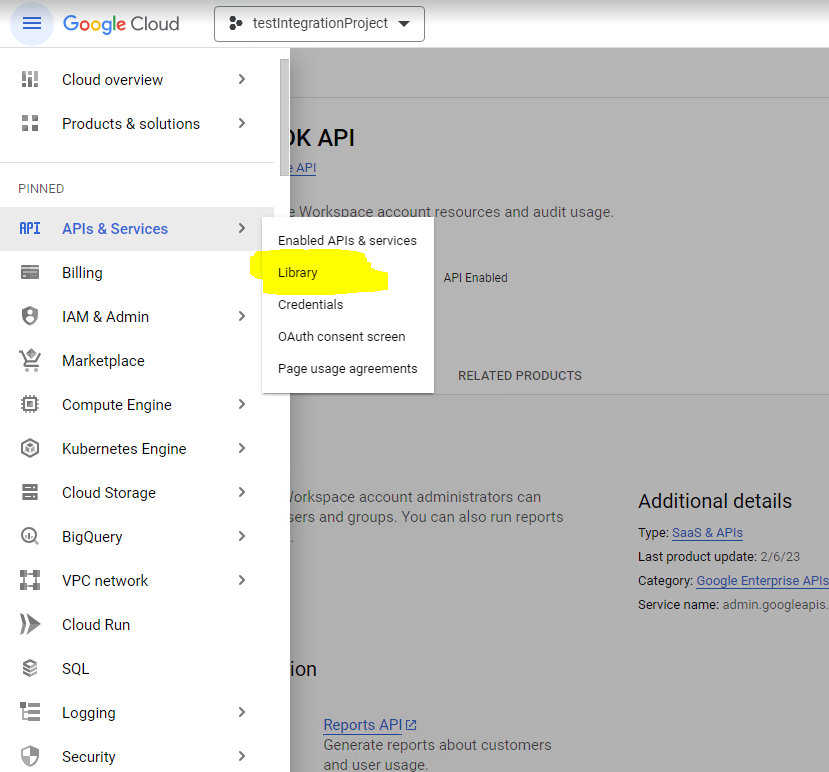
- From the Google Cloud Console Dashboard, open the expandable menu at the top-left and select APIs & Services, and then select Library.
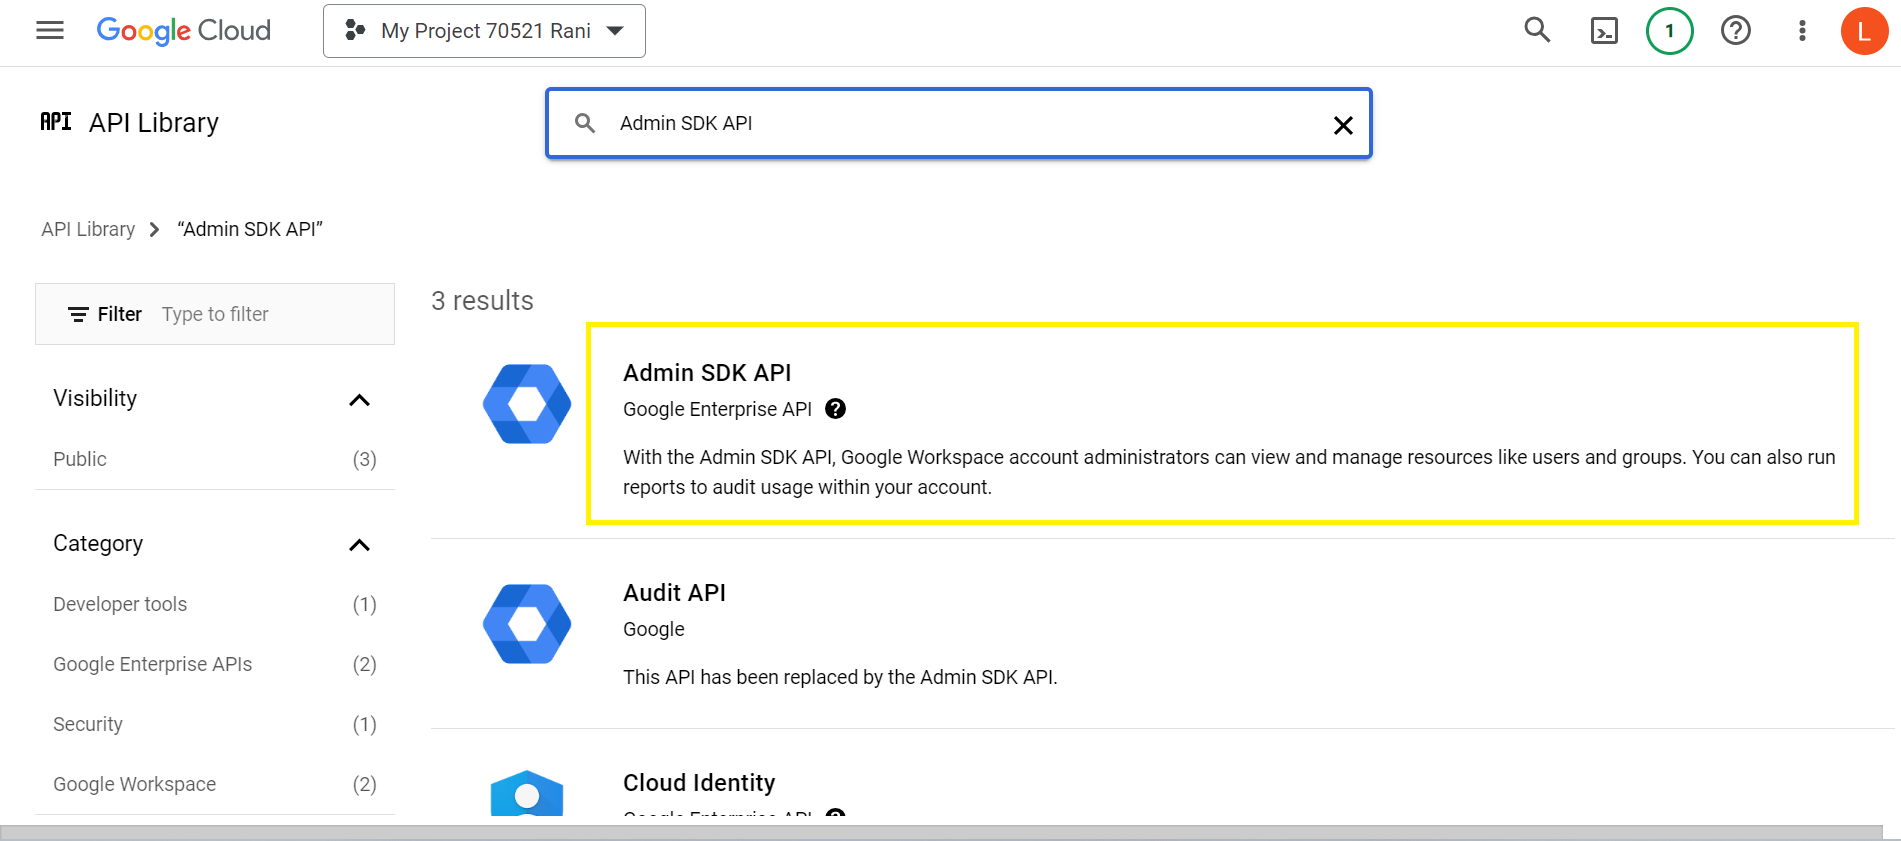
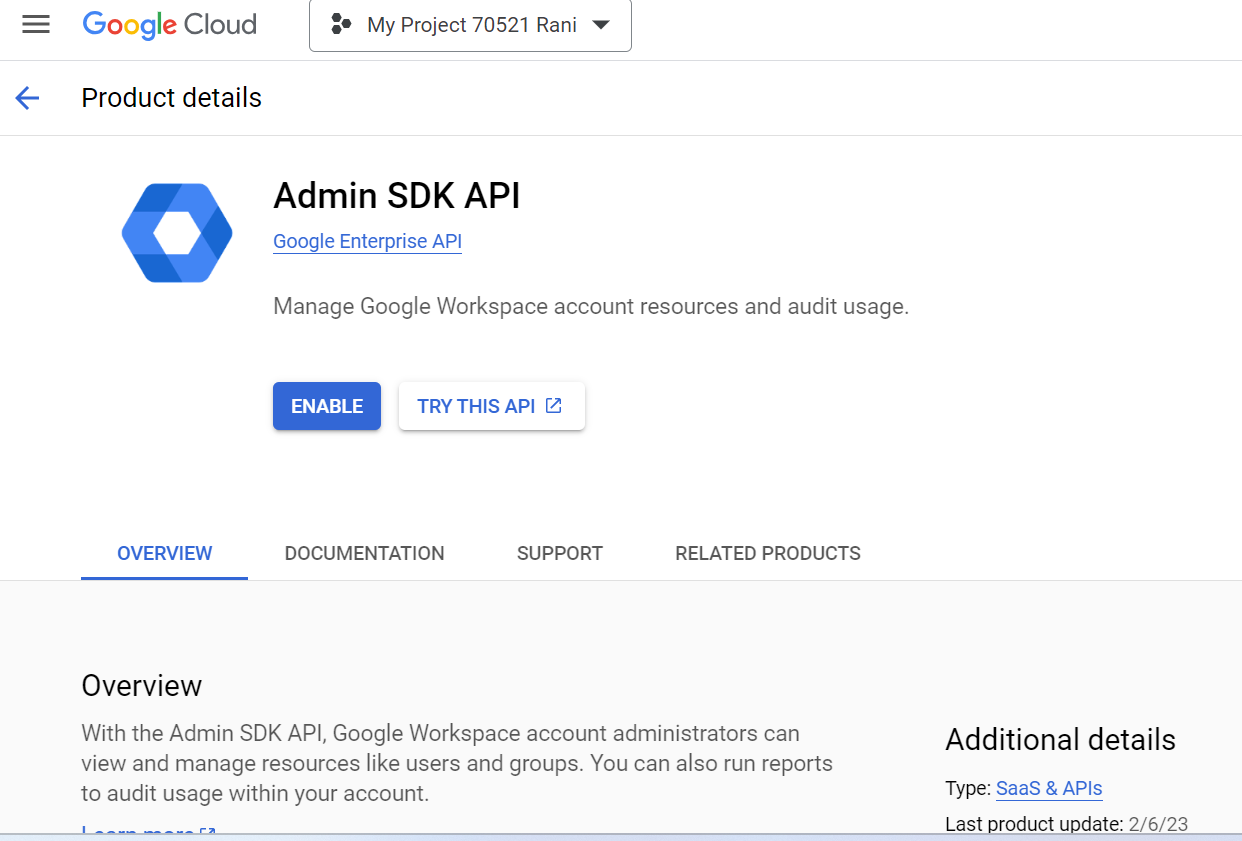
- In the search bar, enter Admin SDK API and press Enter.
- Click the Enable button to enable the API.
Create Access Credentials and Authenticate the Service Account
Create Service Account
- From the Google Cloud Console Dashboard, open the expandable menu on the left and then expand IAM & Admin, and then select Service Accounts.
- Select Create service account.
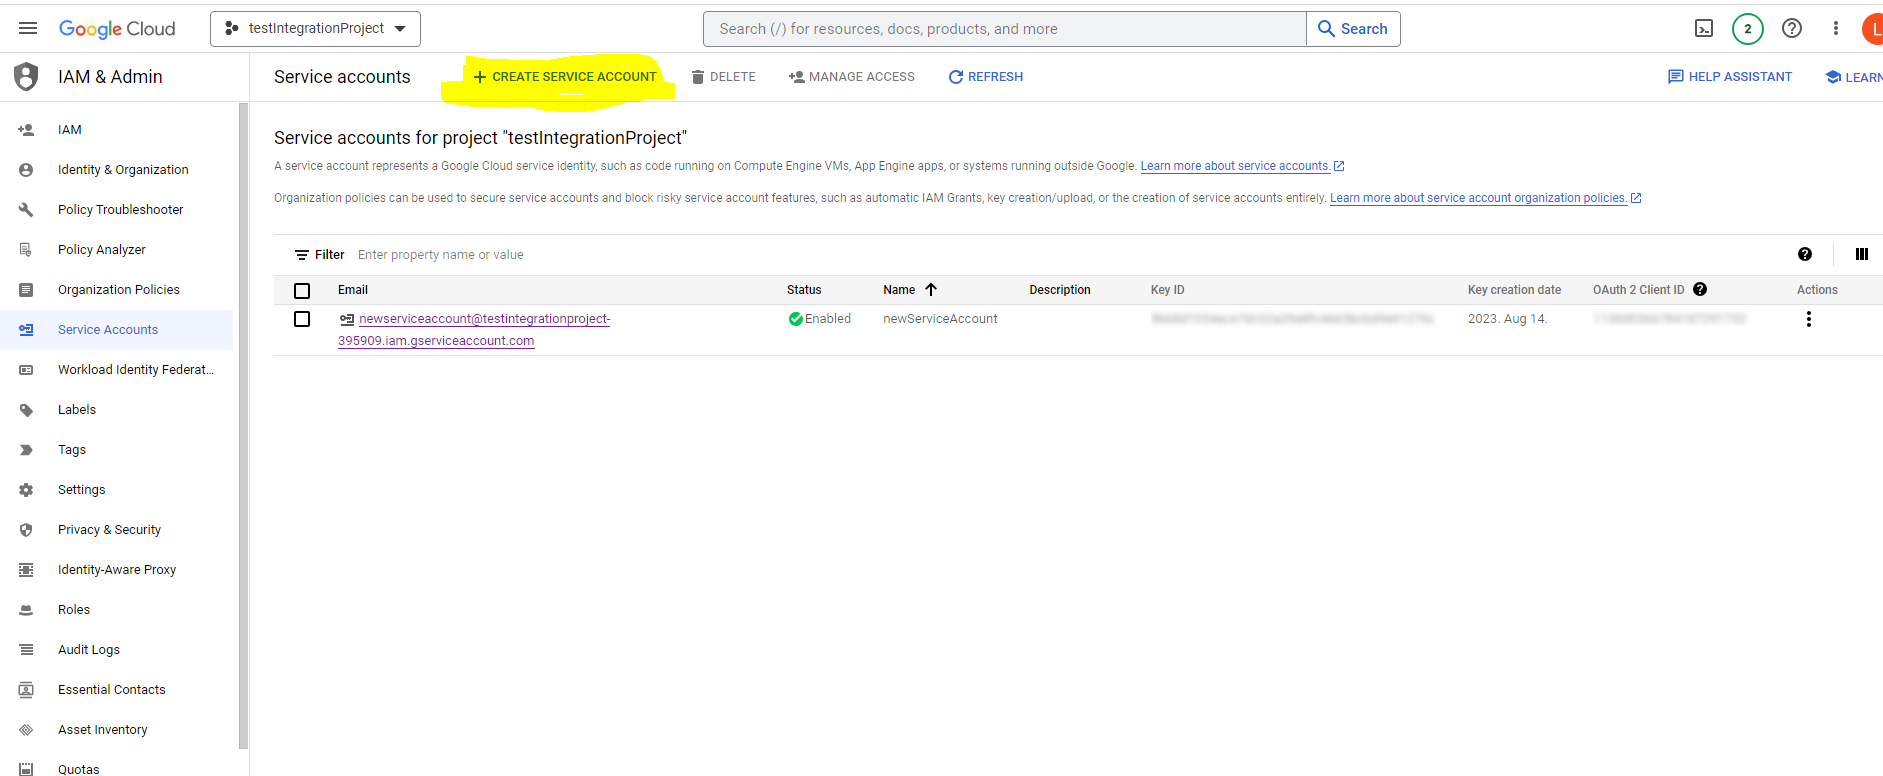
- Select the project created above.
Enter a Service account name to display in the Cloud Console.
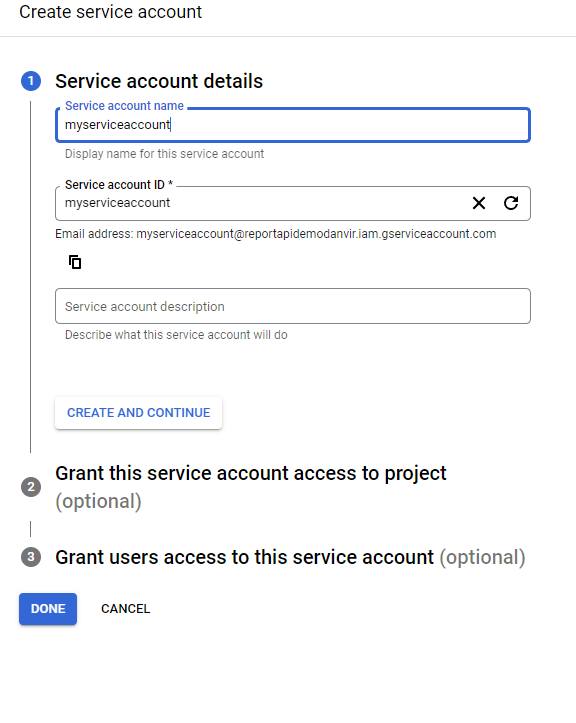
Google automatically generates a service account ID based on the name you select. You can optionally edit this ID, but it cannot be changed later.
- (Optional.) Enter a description for the service account.
Click Create and Continue.
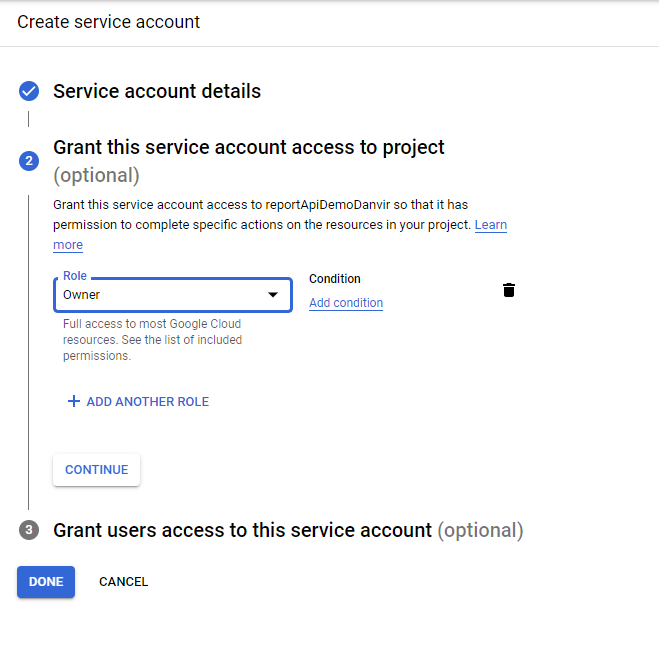
- Open the Role drop-list and select Owner.
- Click Continue.
- Enter your username into the Service account admins role field to grant admin access for the service account.
- Click Done.
Grant Domain-wide Authority to the Service Account
If you have a Google Workspace account, an administrator of the organization can authorize an application to access user data on behalf of users in the Google Workspace domain. For example, an application that uses the Google Calendar API to add events to the calendars of all the users in a Google Workspace domain would use a service account to access the Google Calendar API on behalf of users. Authorizing a service account to access data on behalf of users in a domain is sometimes referred to as "delegating domain-wide authority" to a service account.
- From the Google Workspace domain's Admin Console, open the expandable menu and then expand IAM & Admin, and then select Service Accounts.
- In the row for the service account created in the previous section, copy the OAuth 2 Client ID.

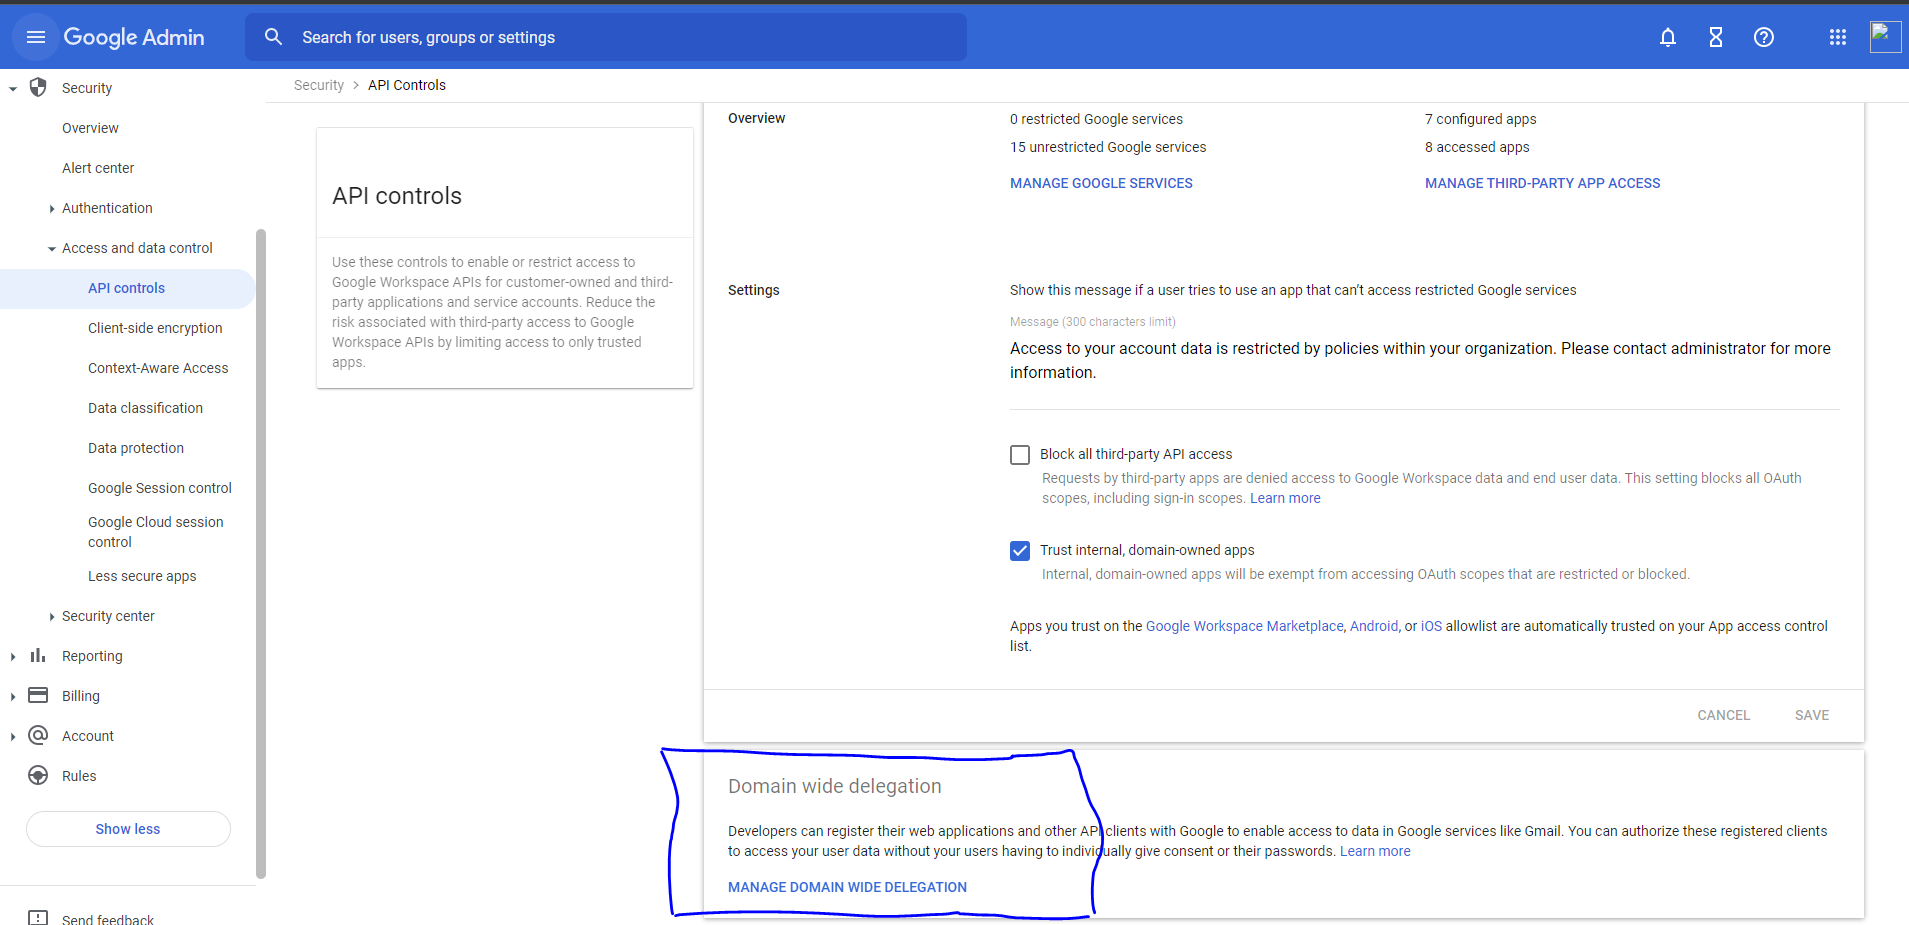
- Open the expandable menu and select Security, expand Access and data control, and then click API controls.
- In the Domain wide delegation pane, select Manage Domain Wide Delegation.
- Click Add new.
In the Client ID field, enter the service account's client ID.
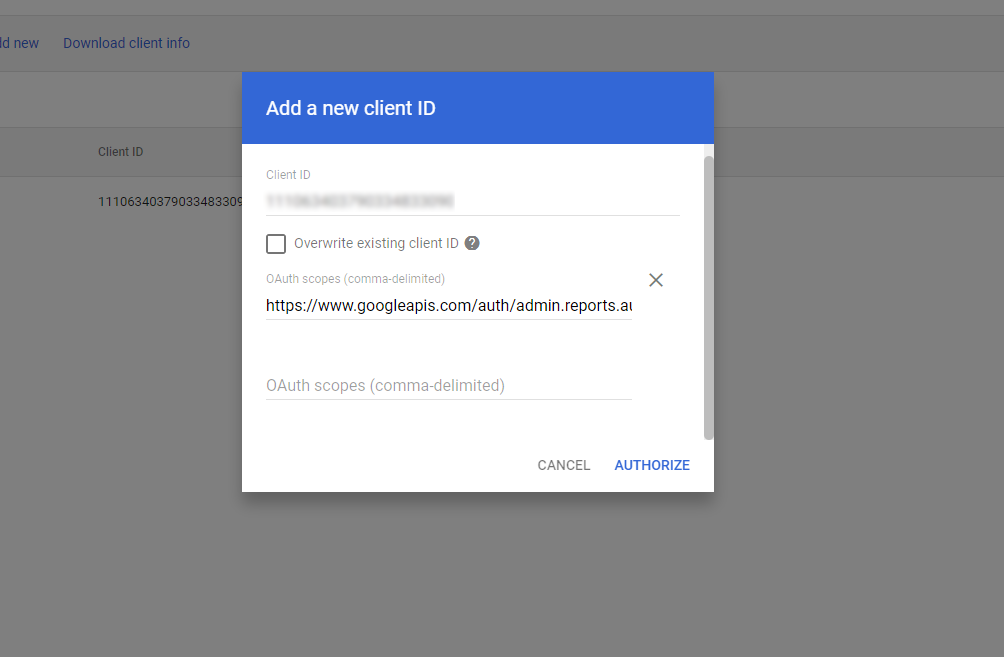
The service account client ID can be found on the Service accounts page.
In the OAuth scopes (comma-delimited) field, enter the following:
CODEhttps://www.googleapis.com/auth/admin.reports.audit.readonlyClick Authorize.
Create Credentials for a Service Account
- From the Google Cloud Console Dashboard, open the expandable menu at the top-left and select IAM & Admin, and then select Service Accounts.
- Select your service account.
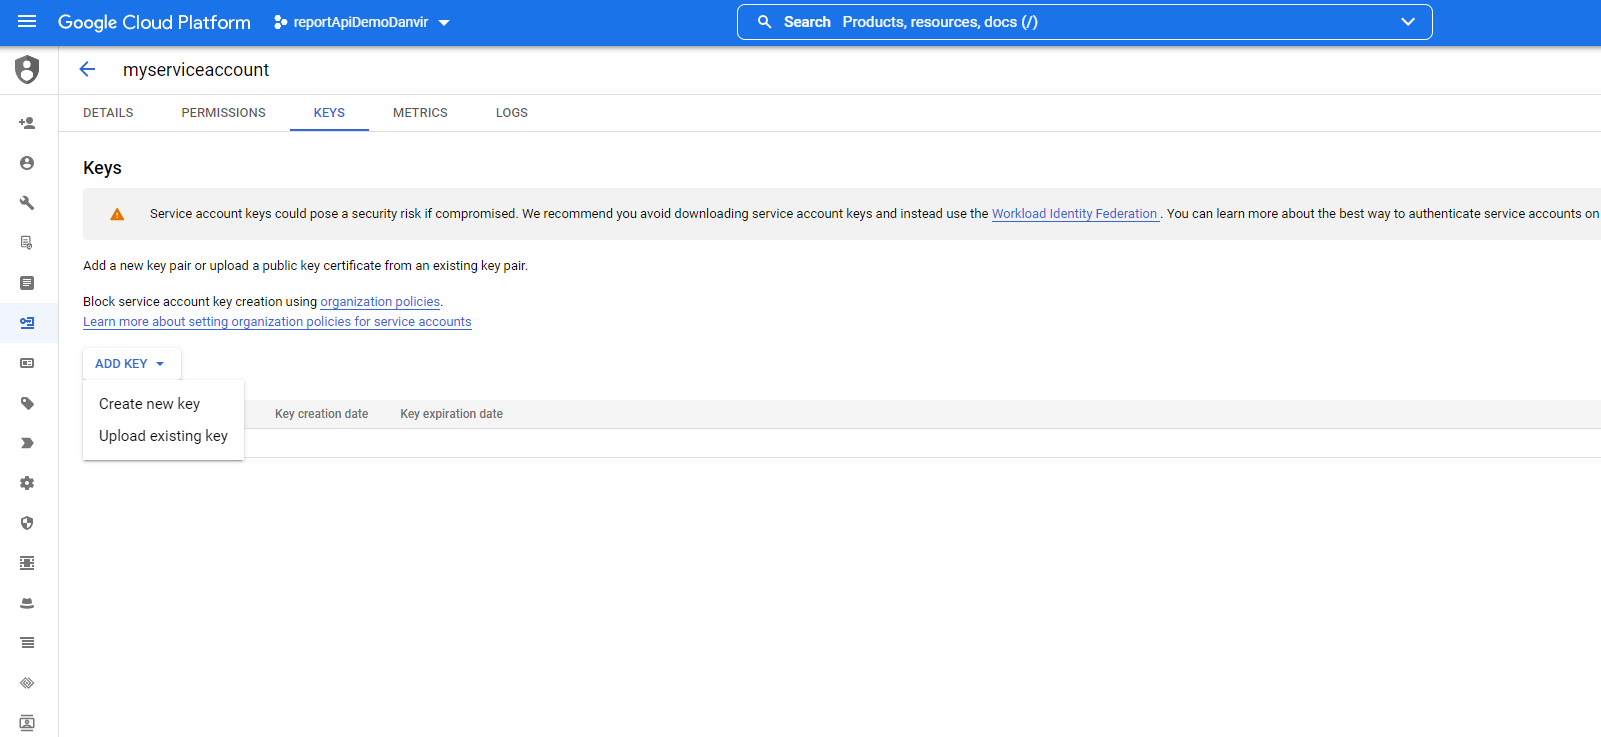
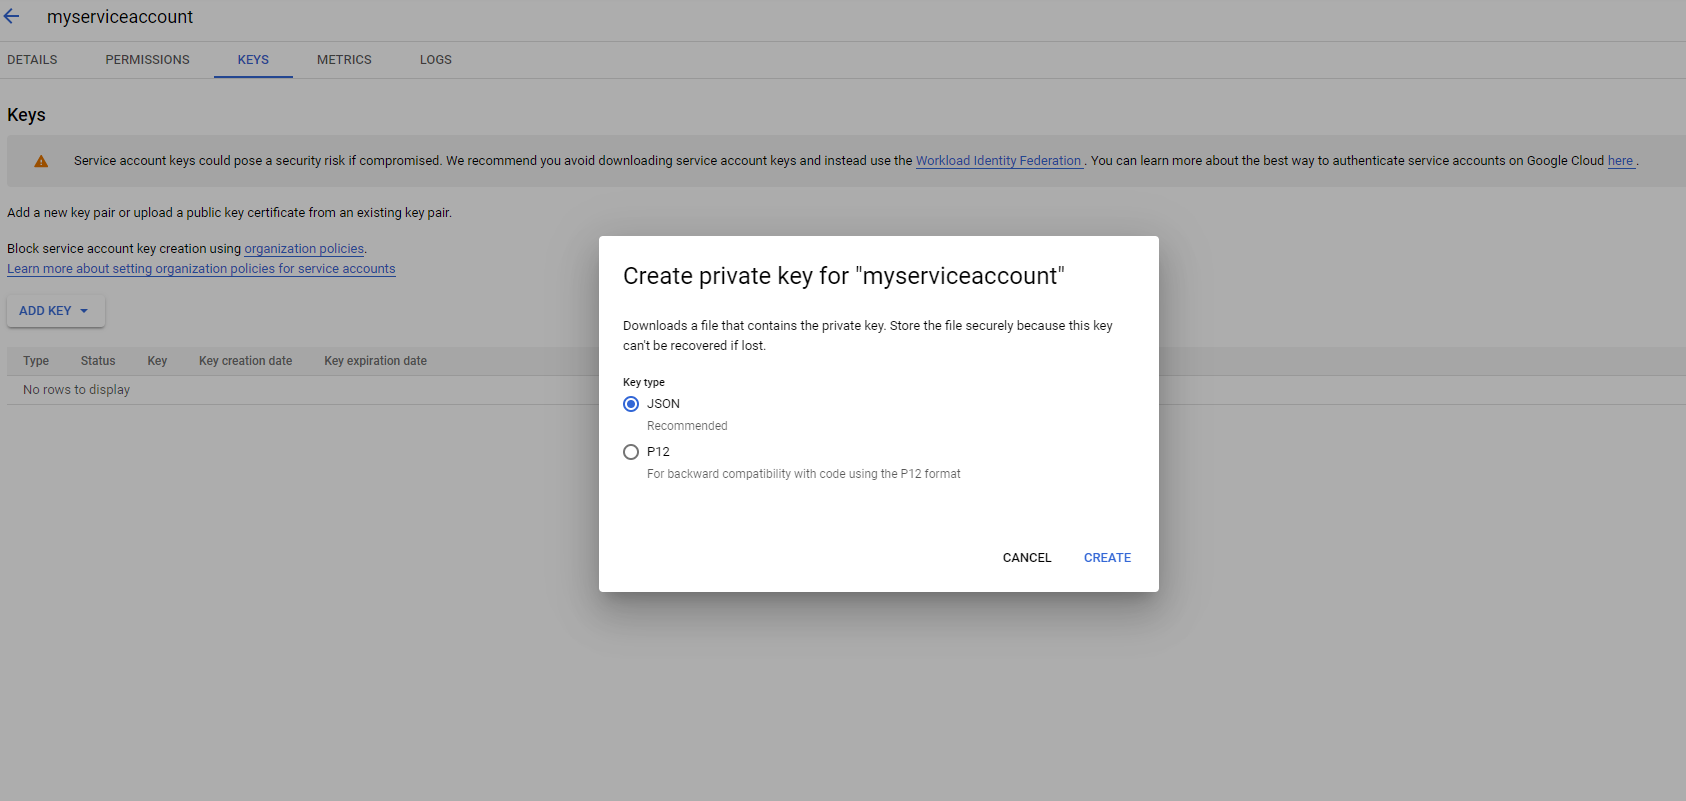
- Click Keys, and then Add keys, and then Create new key.
- Select JSON, and then click Create.
The service account credentials file is downloaded to your local machine. - Click Close.

