
Azure SAML Configuration
This page details the steps to configure a new SSO instance using the Azure SAML application.
Configure SSO in Azure
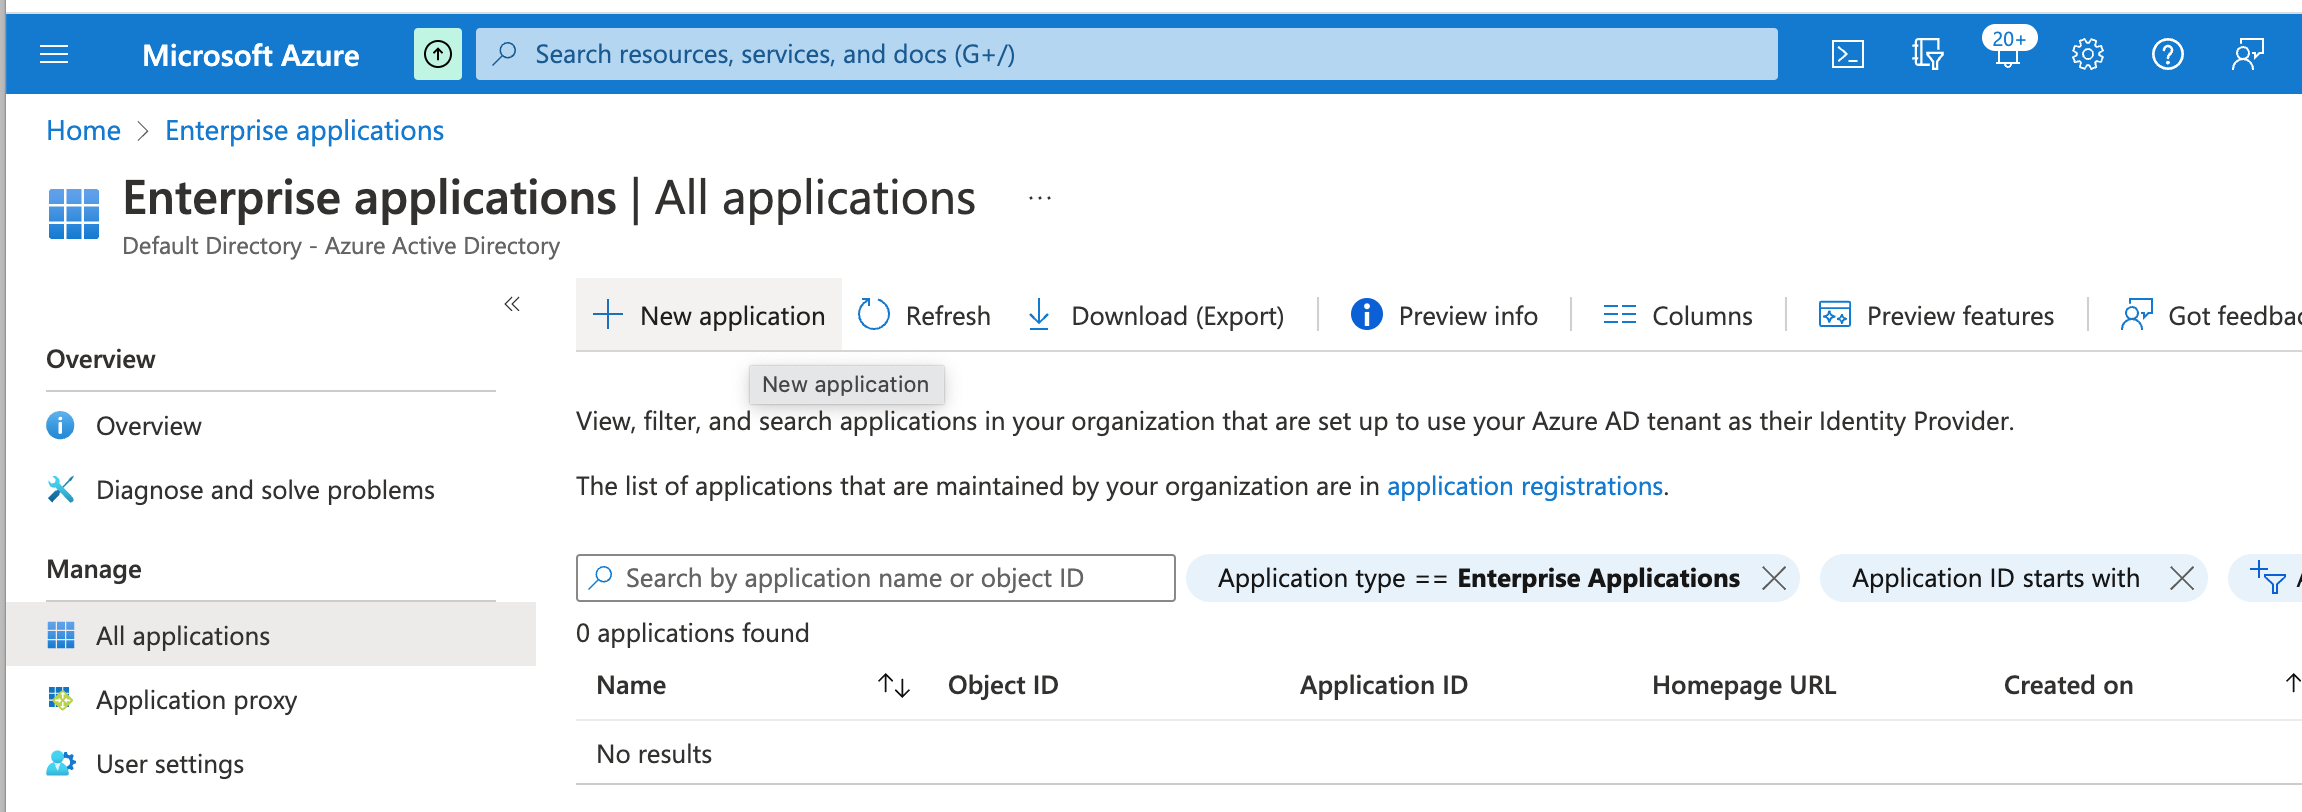
To create a new application and configure SSO for Azure SAML, from the Enterprise Applications screen:
- Click New application, and then Create your own application.
- Fill in the name of the application (e.g. "Axon") and then click Integrate any other application you don't find in the gallery to use use Azure AD for SAML authentication.
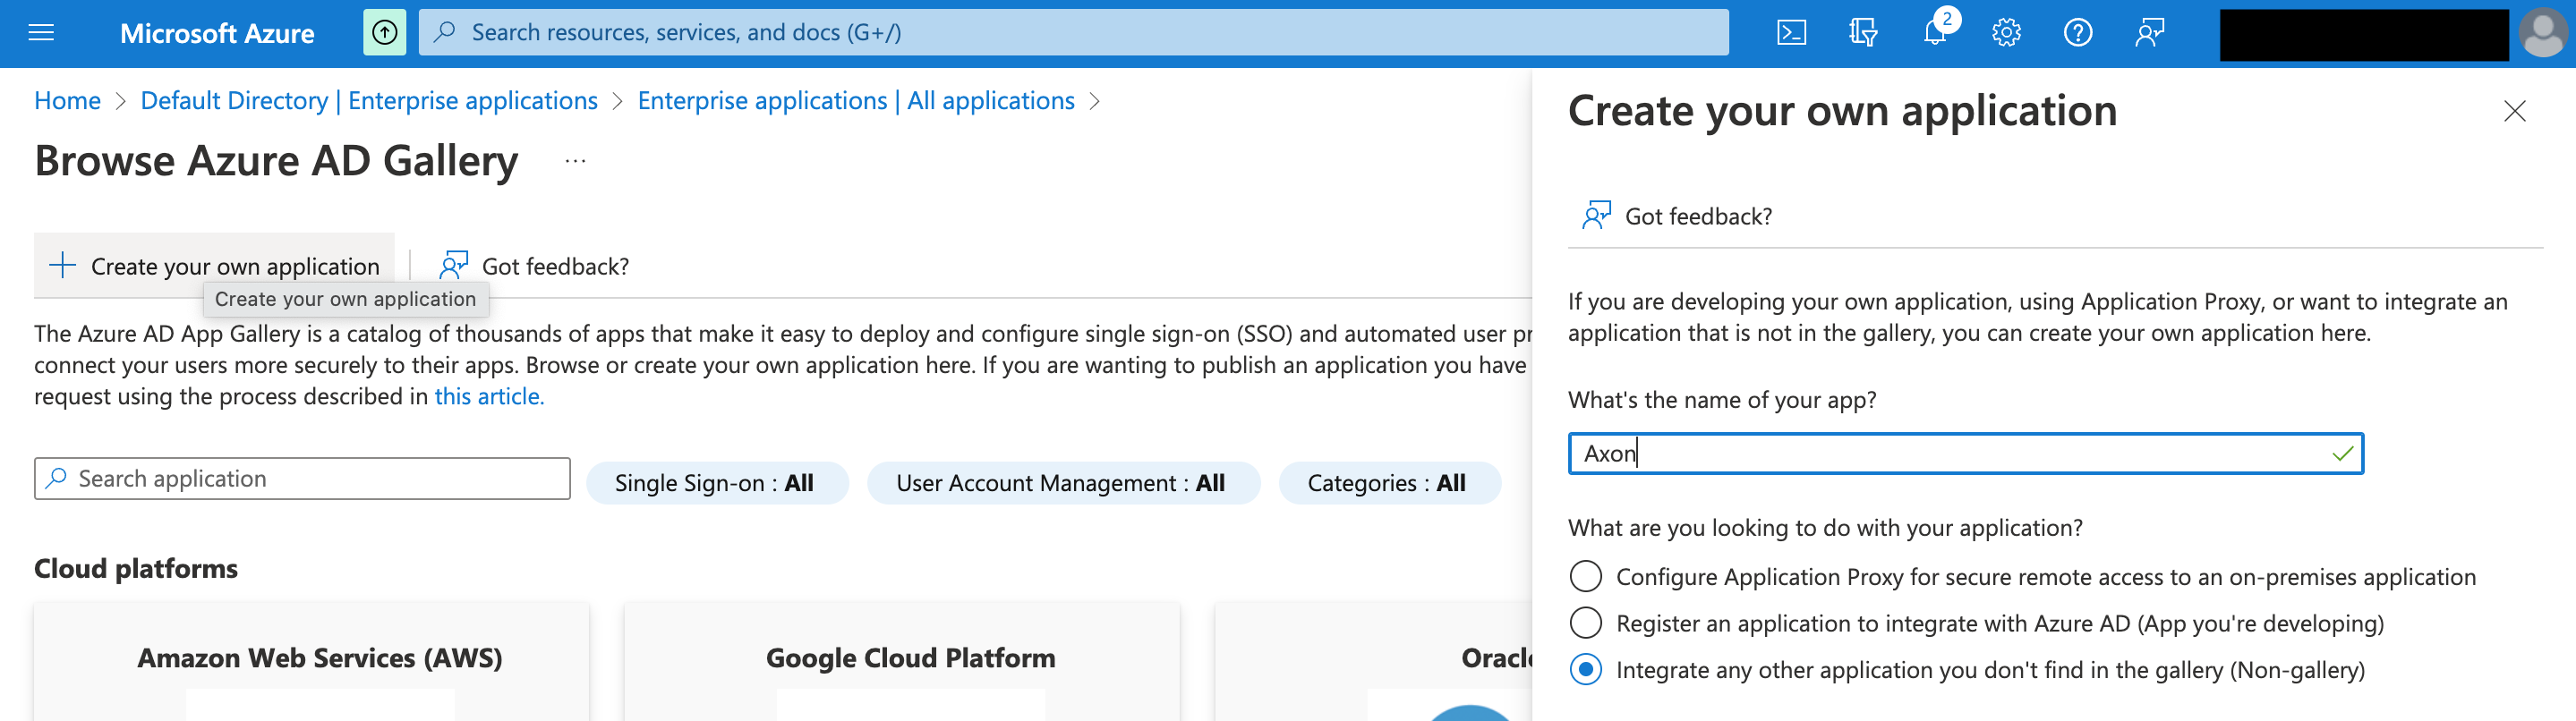
- Click Create.
The Enterprise application's overview page appears.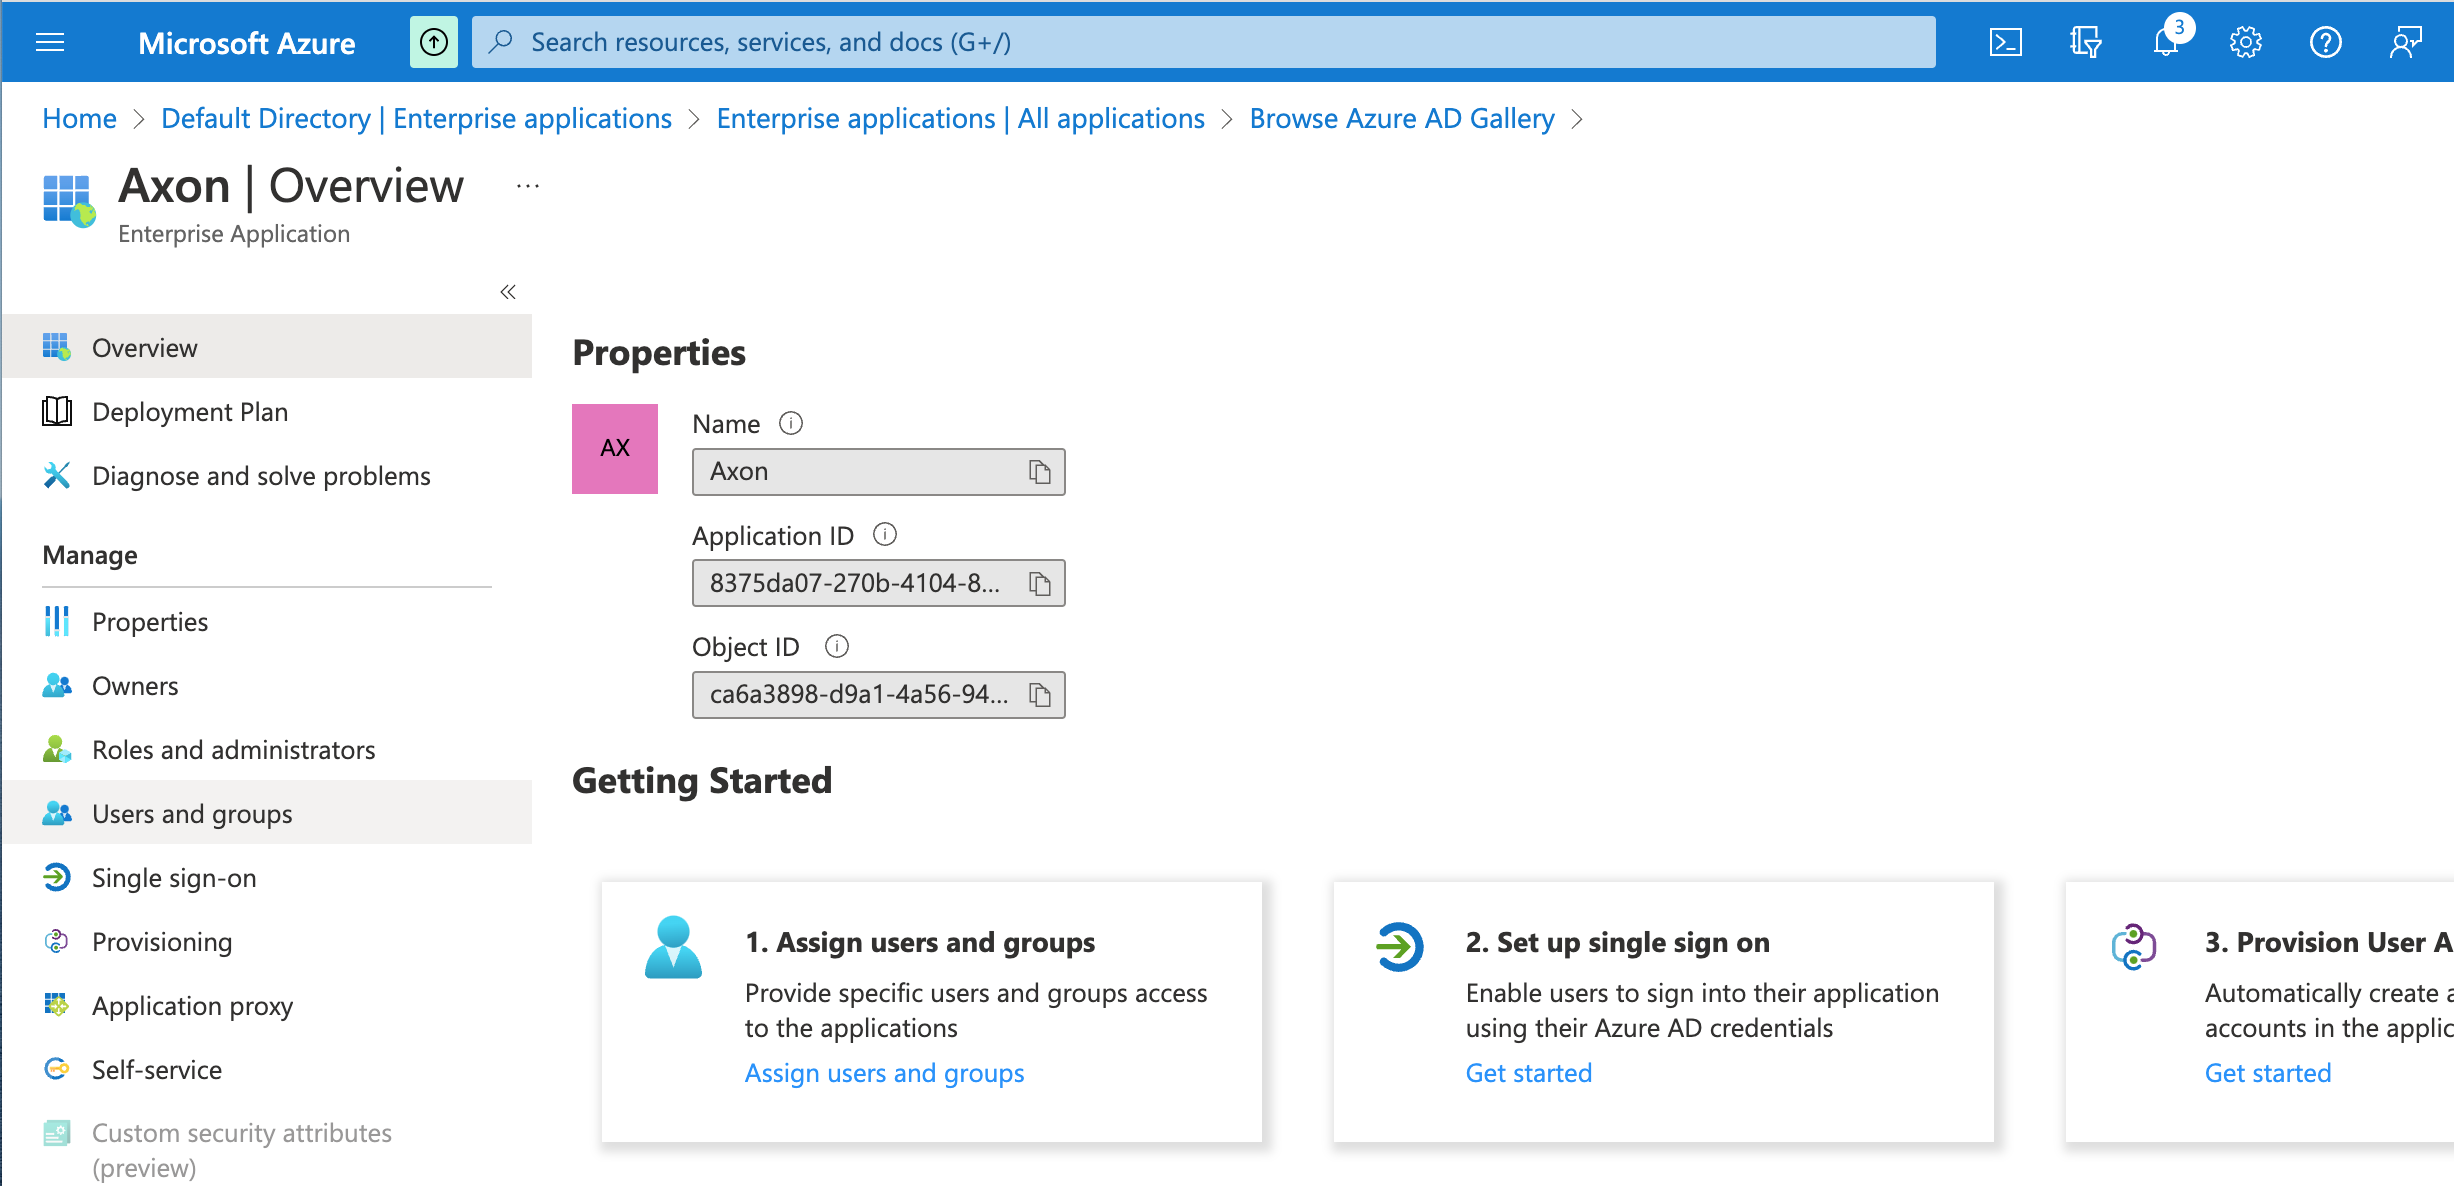
- Click Assign users and groups.
The Users and groups page appears.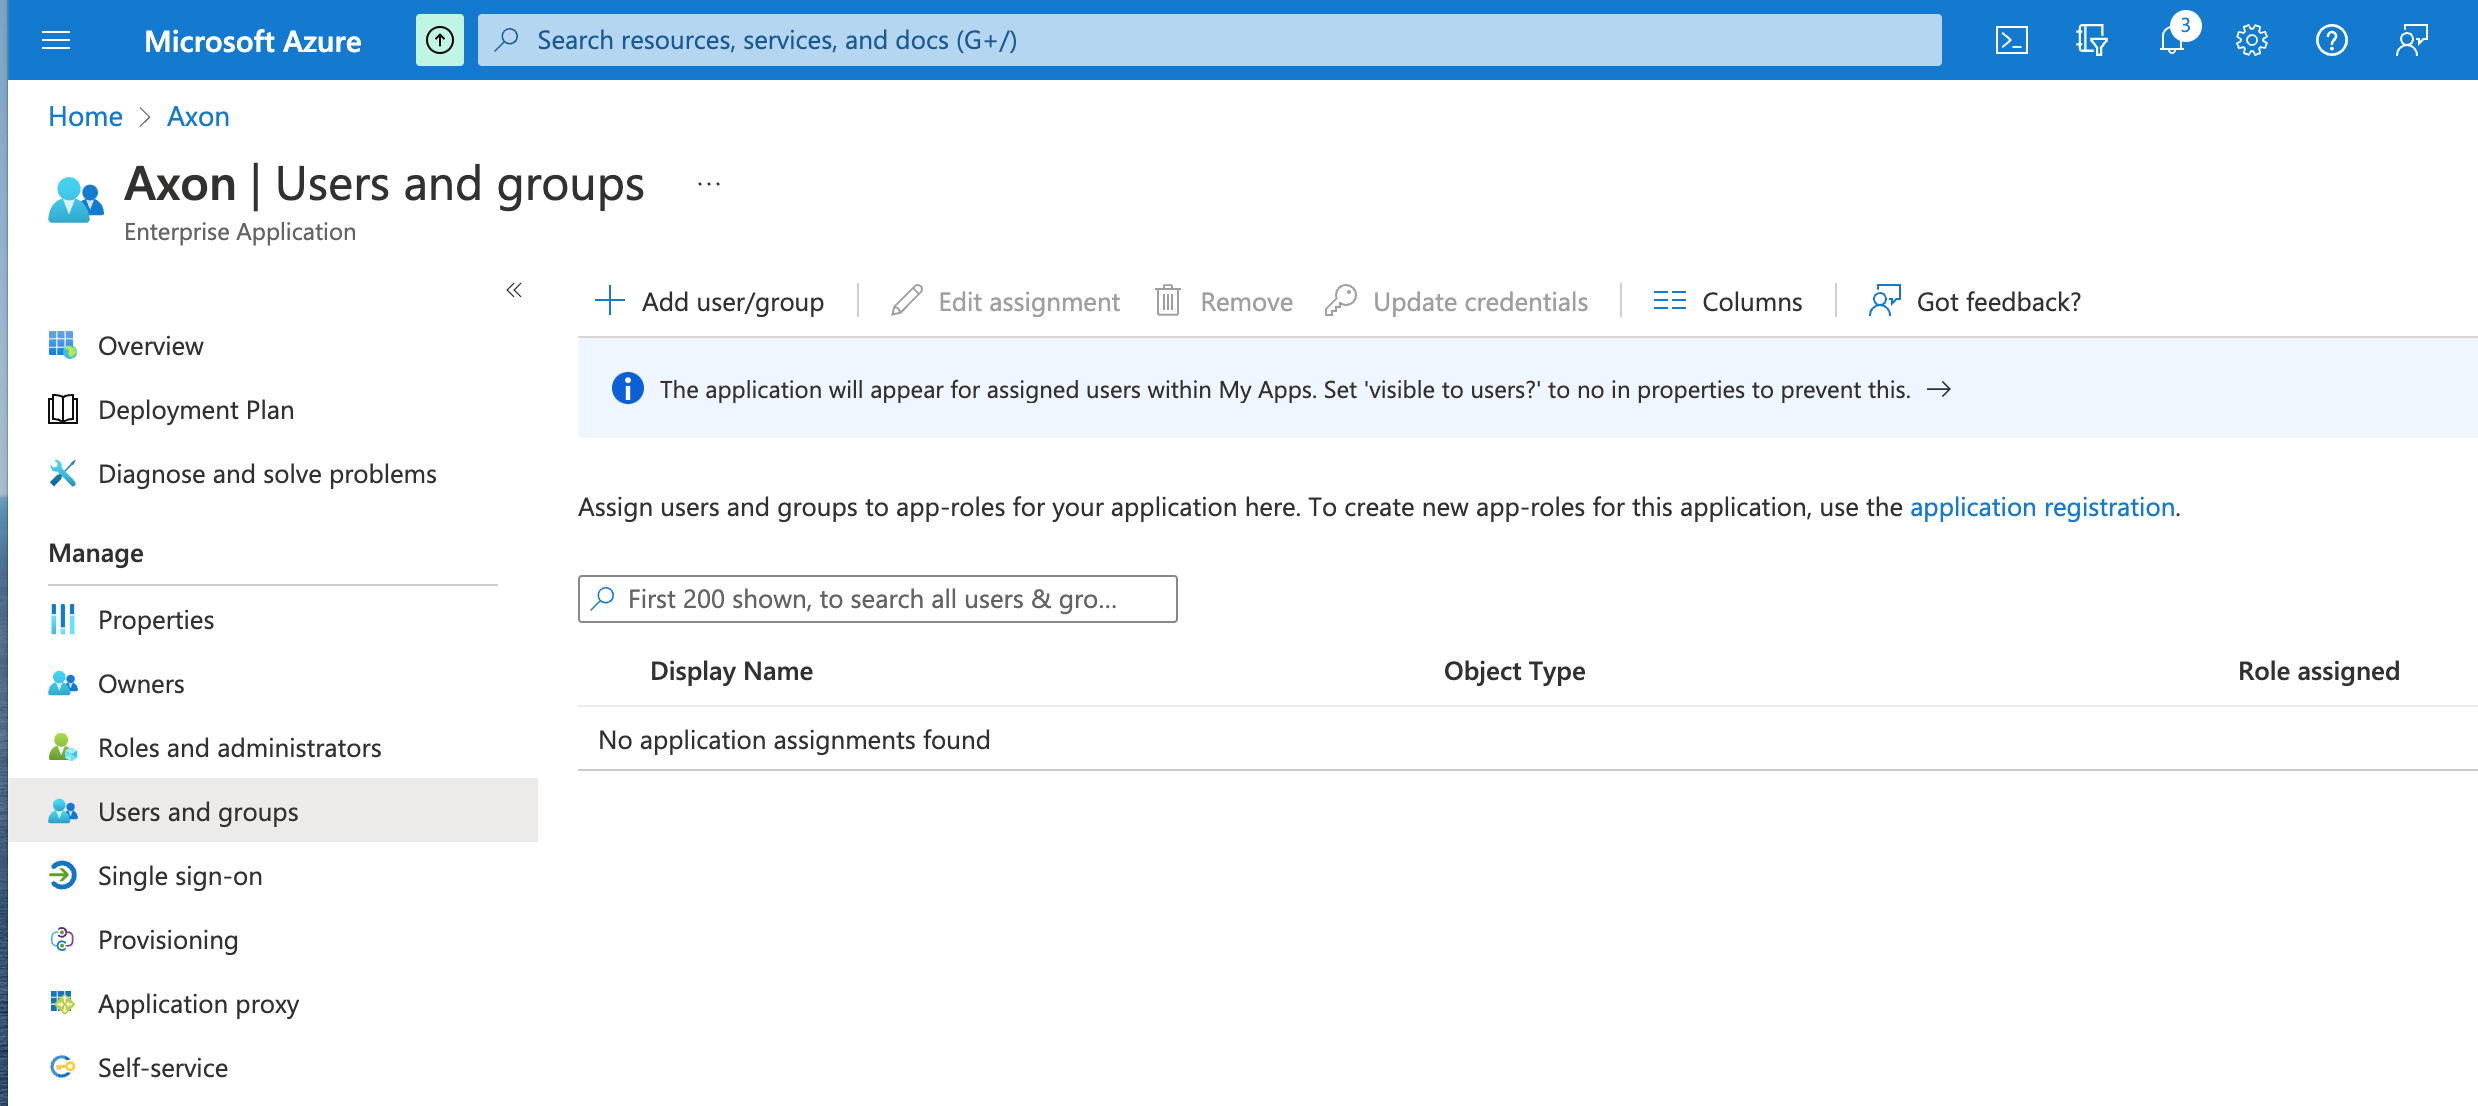
- Click the Add user/group button to assign any users or groups who should be able to access the application.
Repeat this step to continue adding users and groups as needed. - In the left-hand panel, click Single sign-on, and then click SAML.
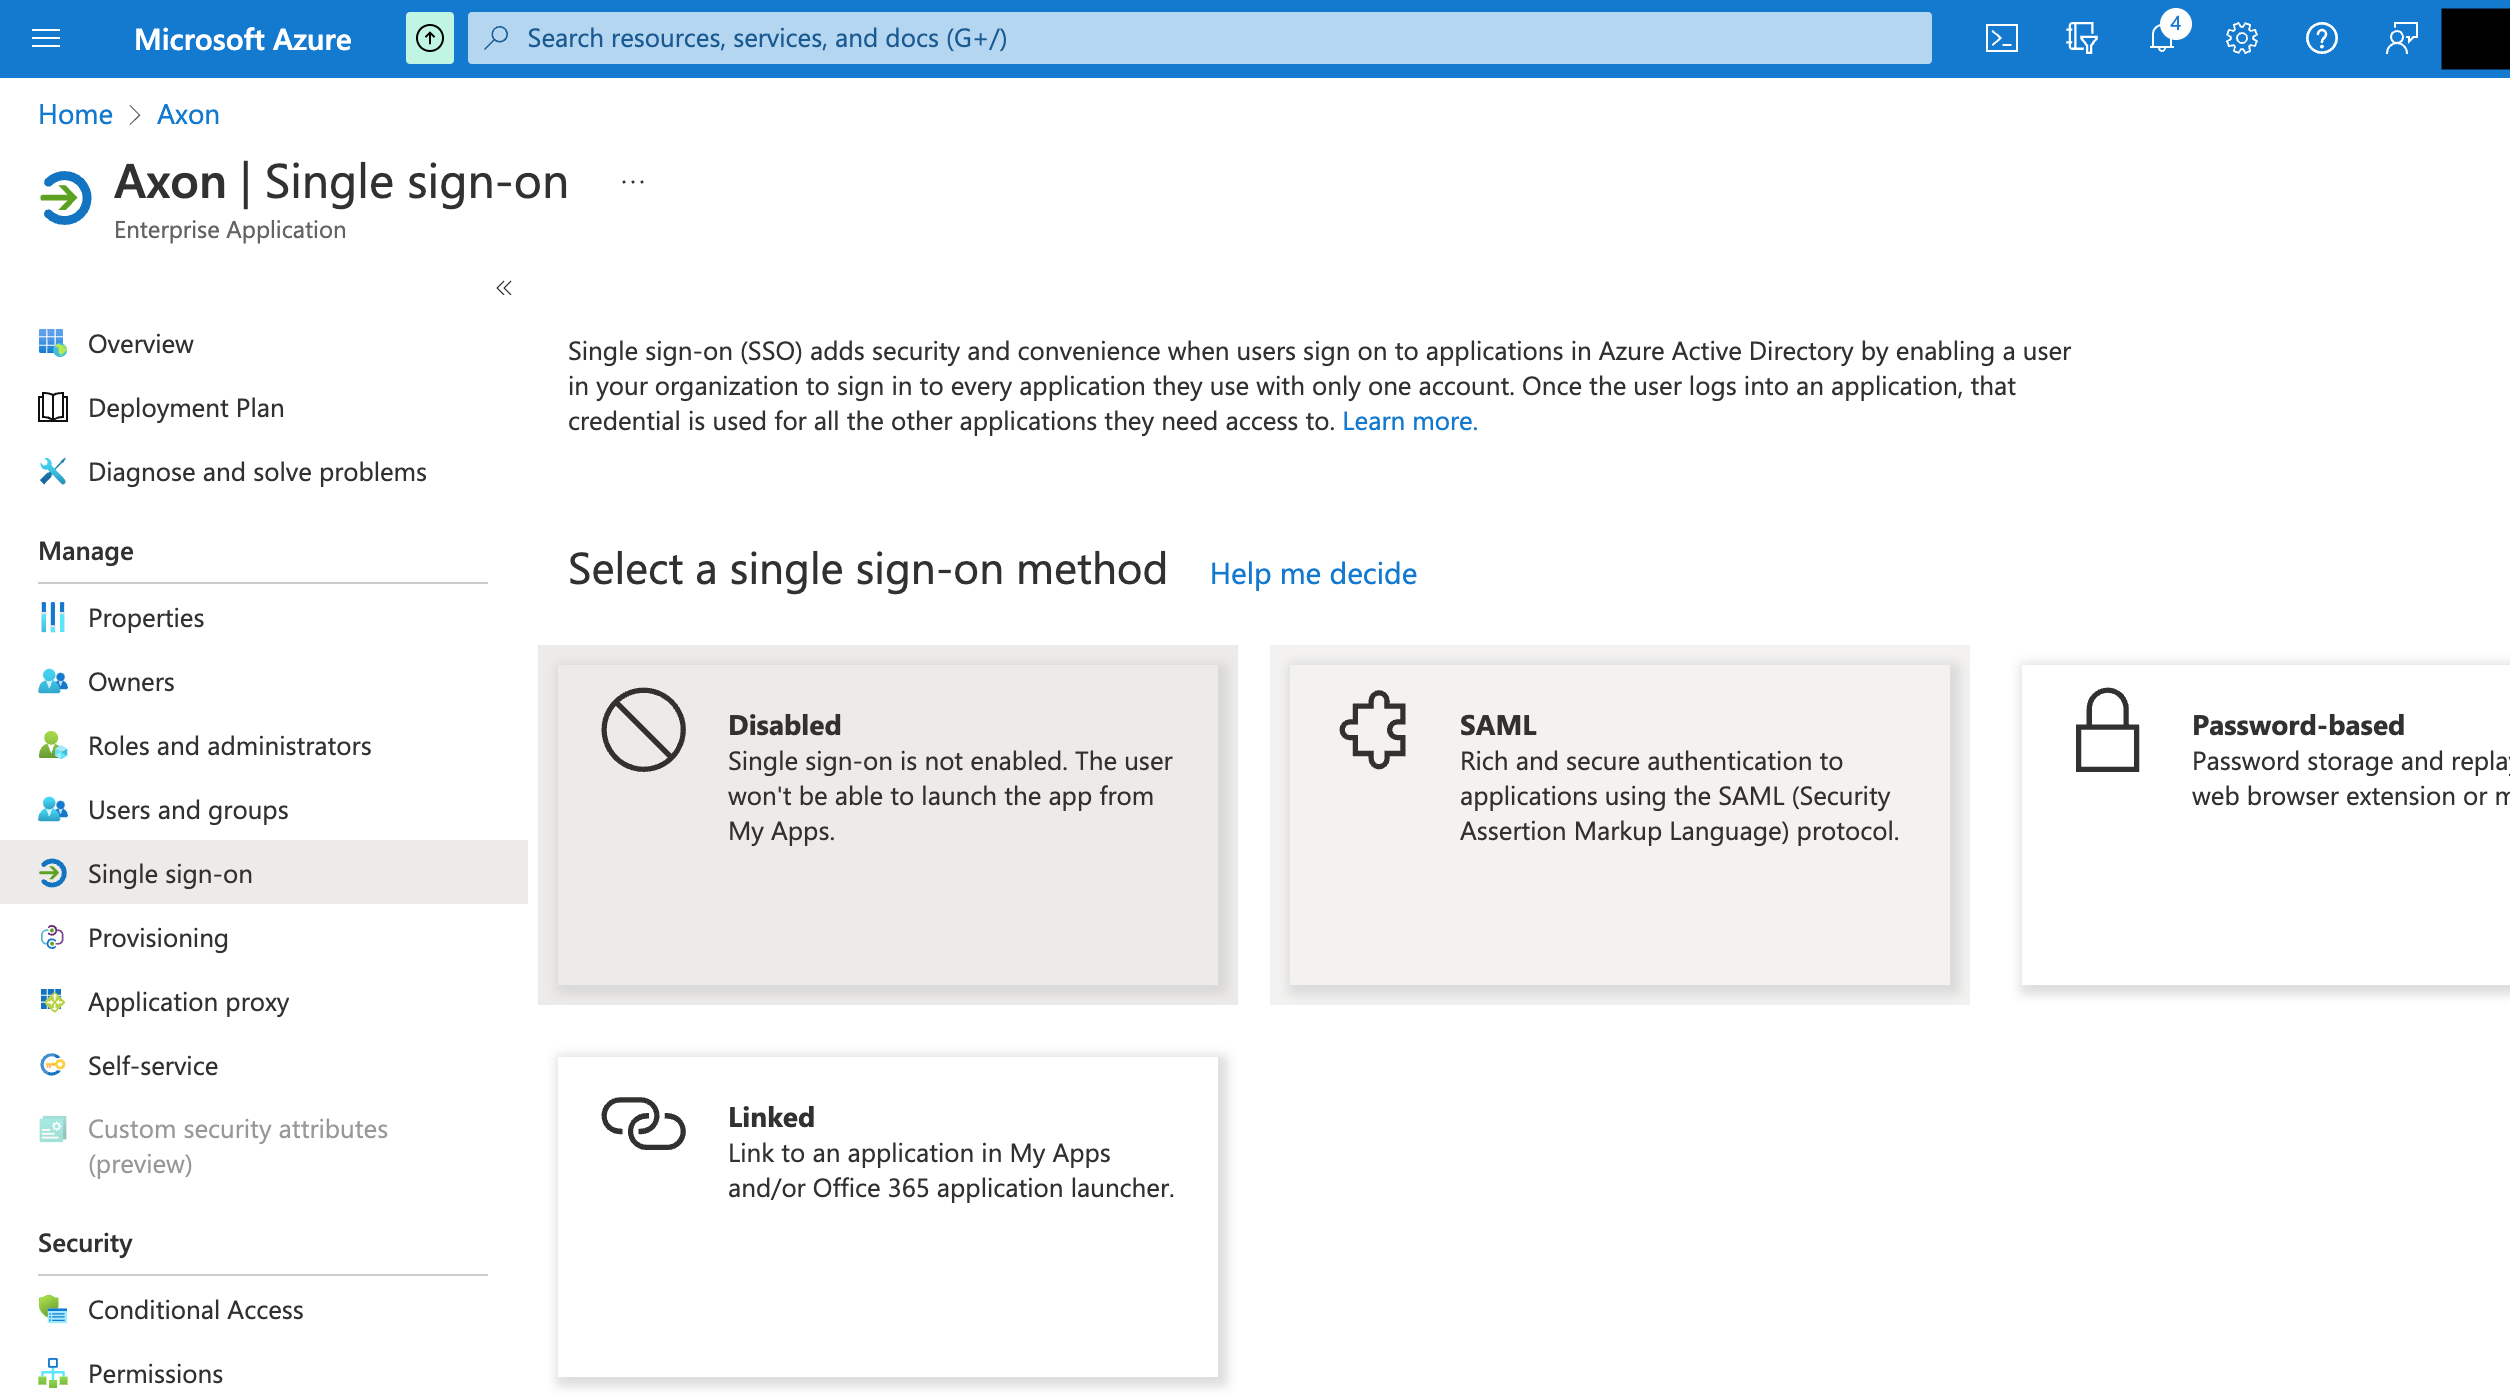
- In the Basic SAML Configuration box, click Edit.

Enter an Entity ID for the Axon application.
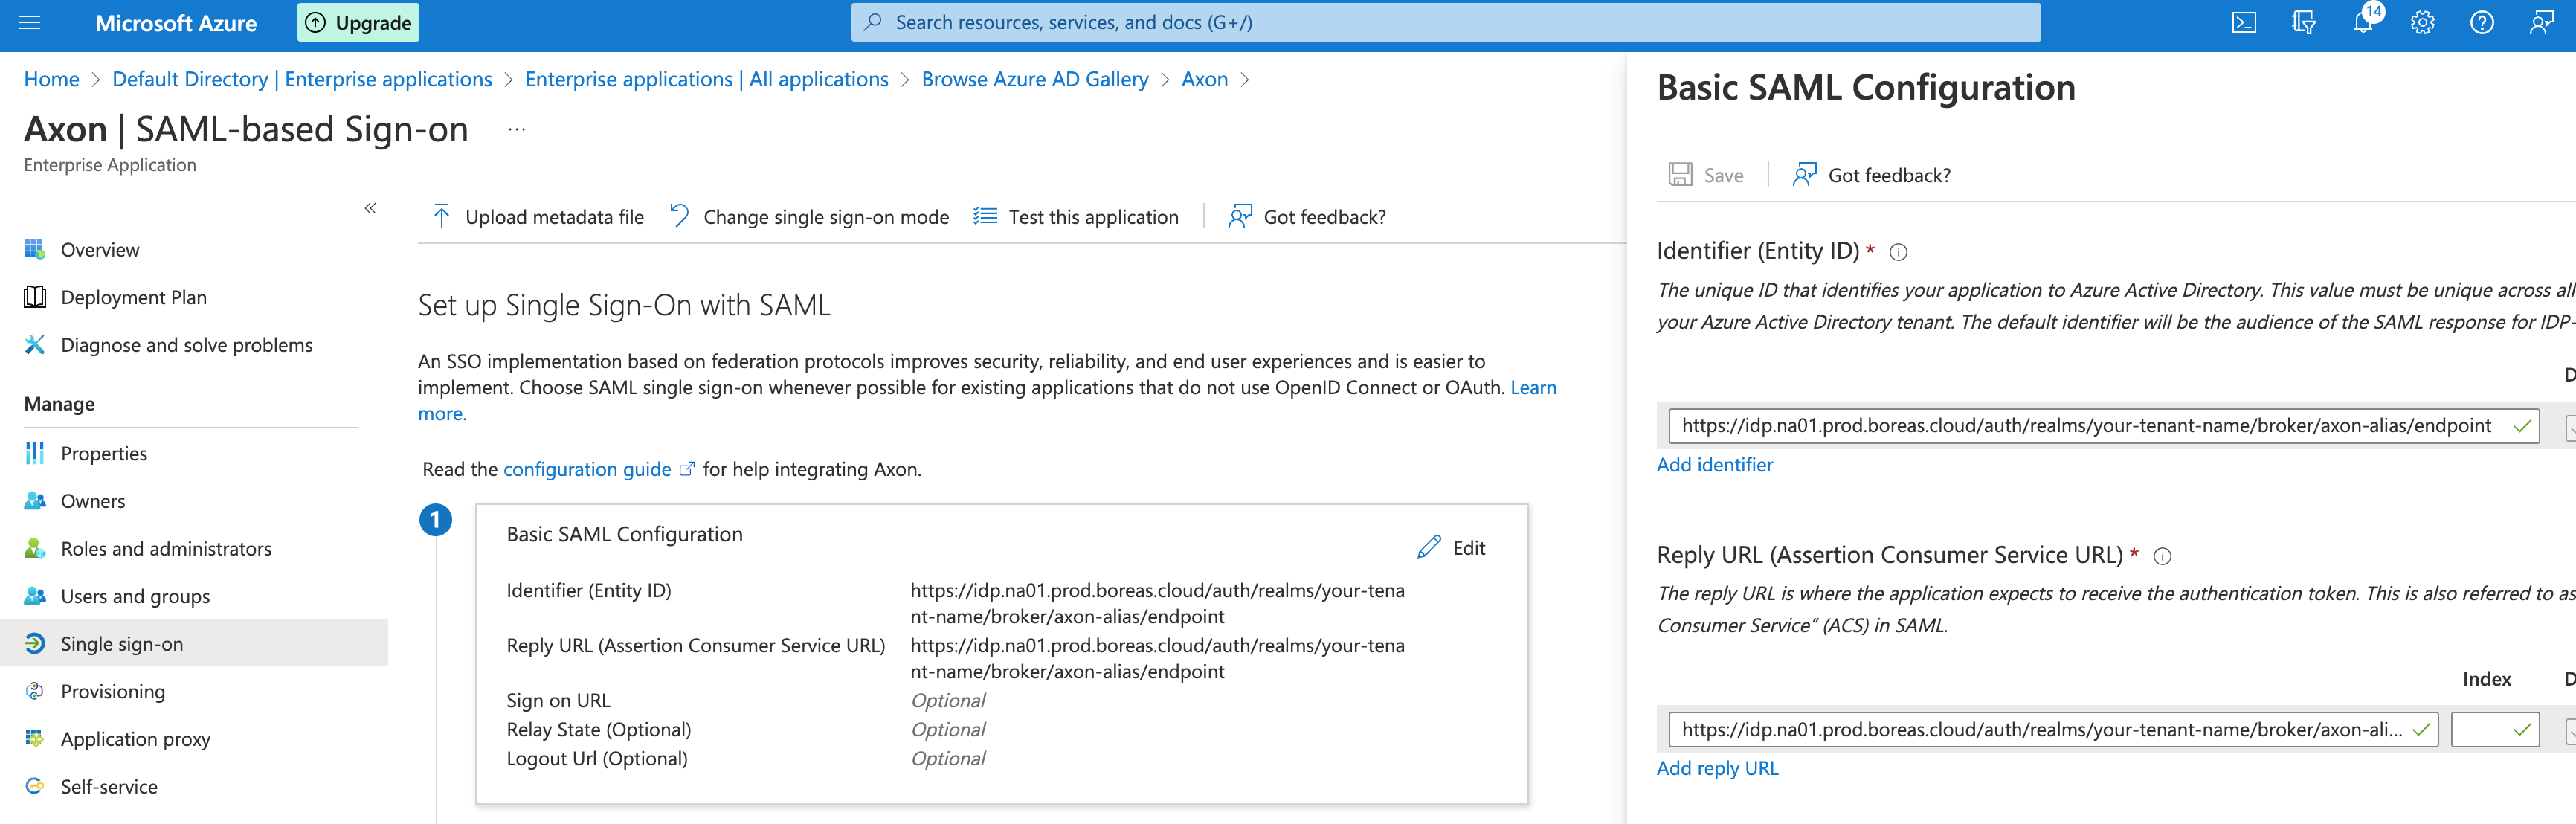
This can be any unique string, but it is recommended to use the Reply URL, in the following format:https://idp.na01.prod.boreas.cloud/auth/realms/your-axon-tenant-name/broker/axon-alias/endpoint
Replace "your-axon-tenant-name" with the actual tenant name/ID, and replace "axon-alias" with the alias you will be using in the Axon SSO configuration.
The "https://idp.na01.prod.boreas.cloud" part of the URL is dependent on the cluster to which your tenant belongs. The URL used above is only an example.
- Click Save.
- Click the Attributes & Claims box.
- In the Attributes & Claims window, click Add new claim and make claims for email, firstName, and lastName with no namespace, as shown below:
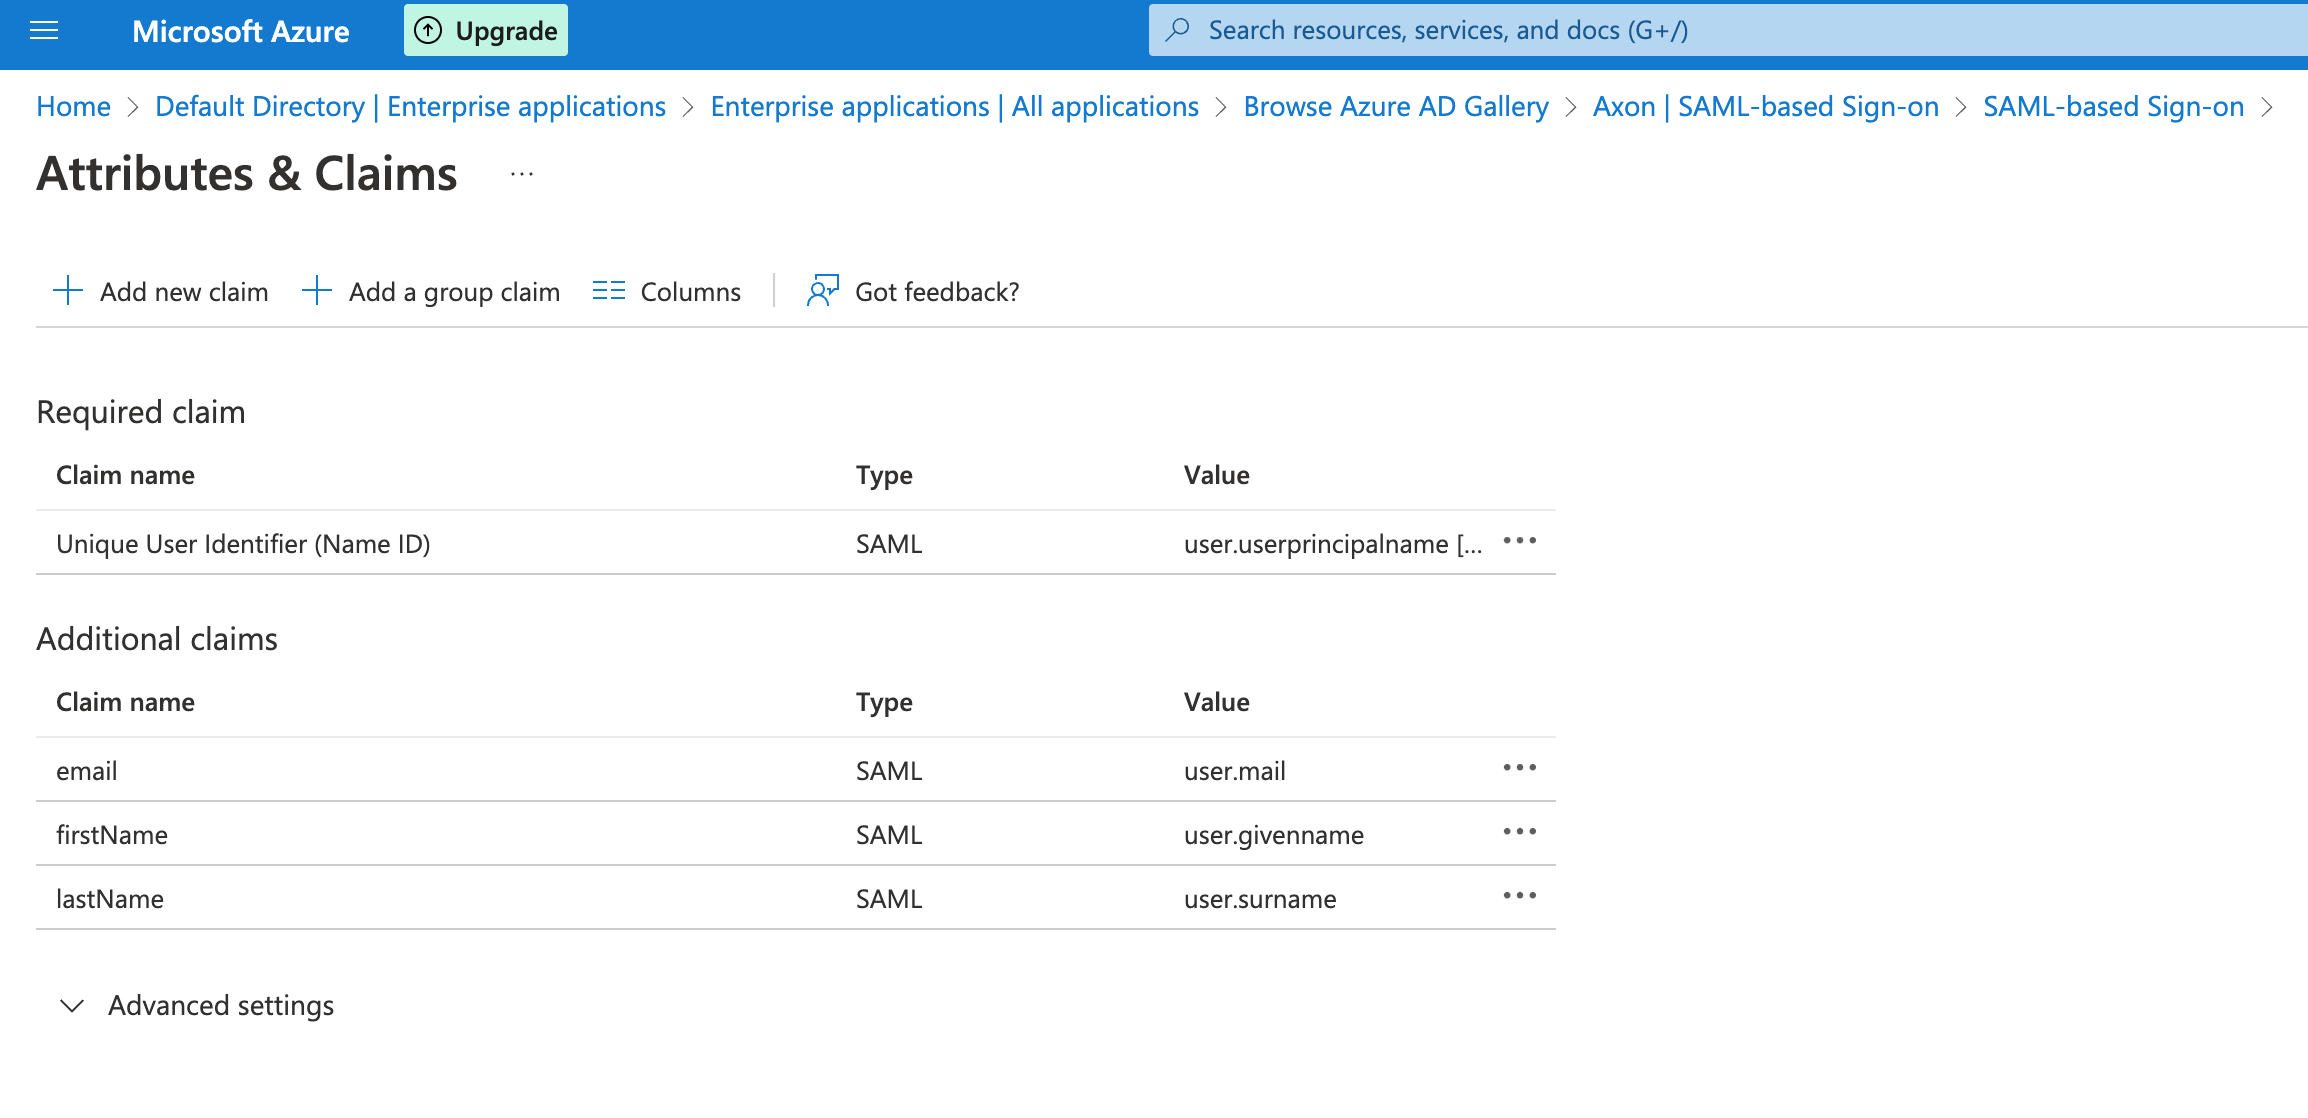
(Optional.) Click Add a group claim that can be used within Axon to automatically map roles.
Automatic role mapping is not yet available in Axon, but completing this step now will save time in the future.
Customize the name of the group claim to send groups with no namespace, as shown below:

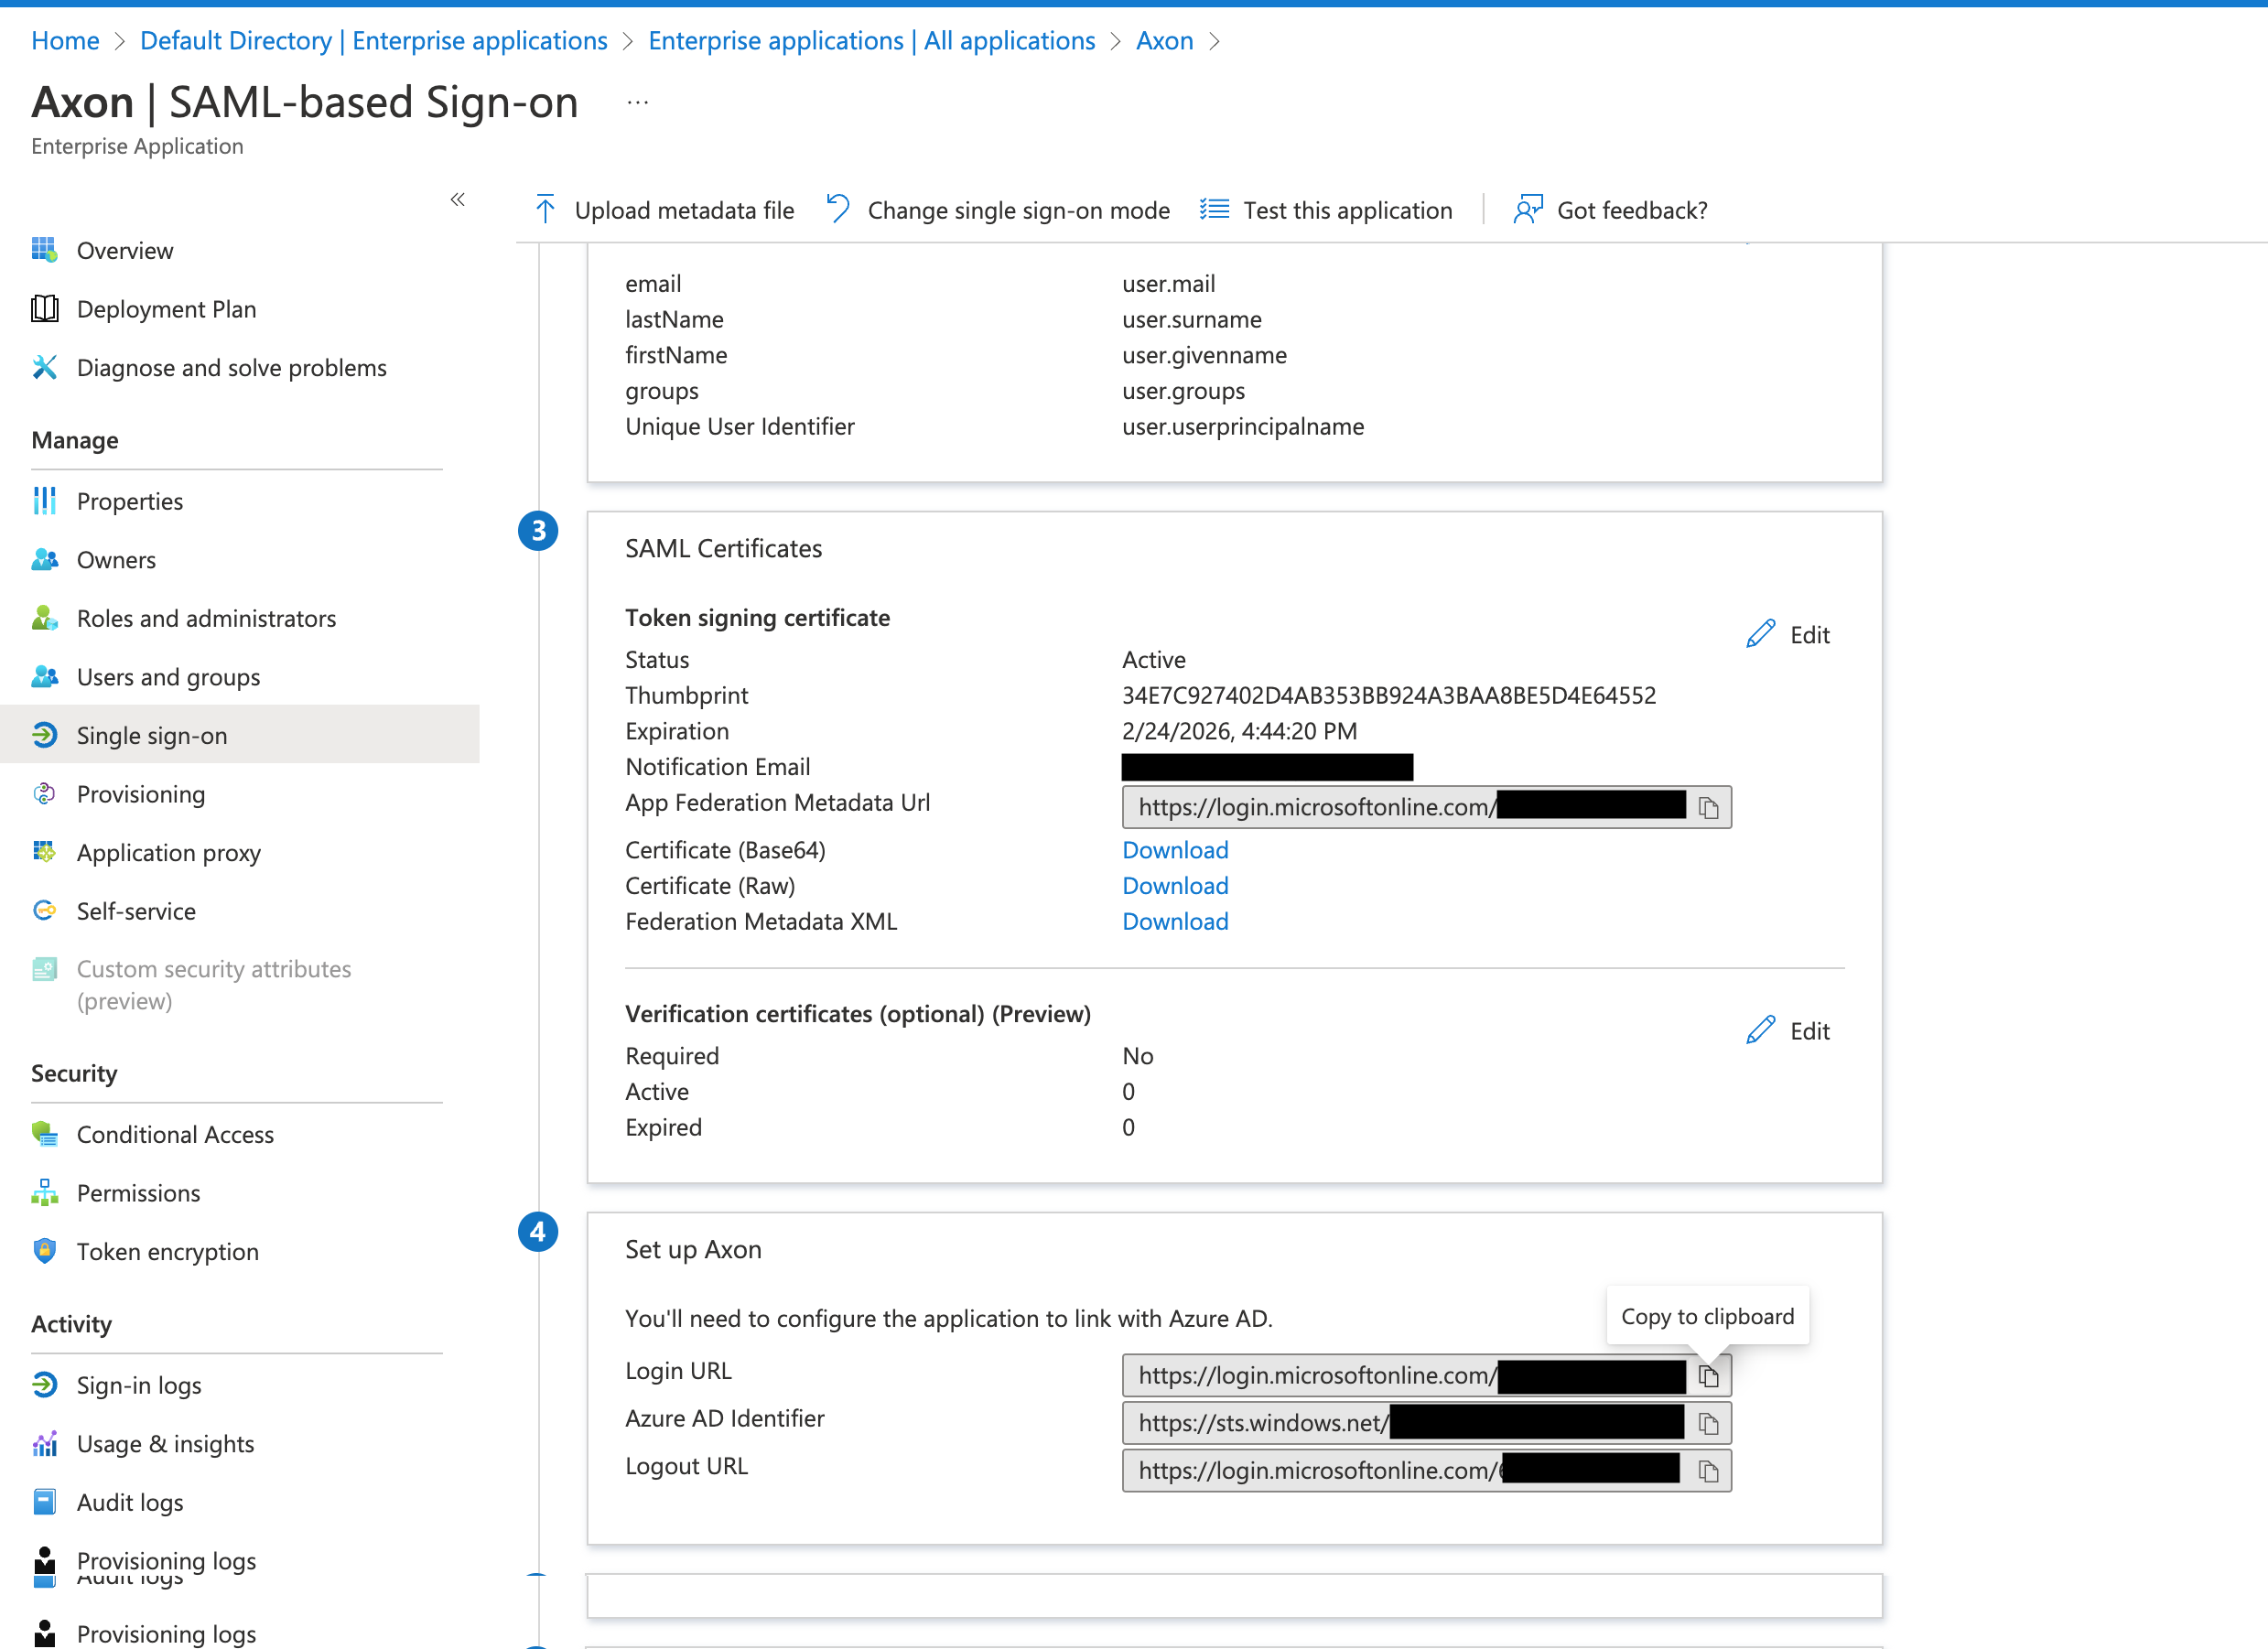
- In the left-hand panel, click Single sign-on and scroll down to retrieve information used to configure SSO within Axon.
Configure Azure SAML SSO in Axon
Once all of the steps above have been completed, you can configure the SSO settings for Azure SAML in Axon.
To configure single sign-on, from the Single Sign-On screen in Axon:
- Click Add SSO provider.
The Single Sign-On Settings window appears.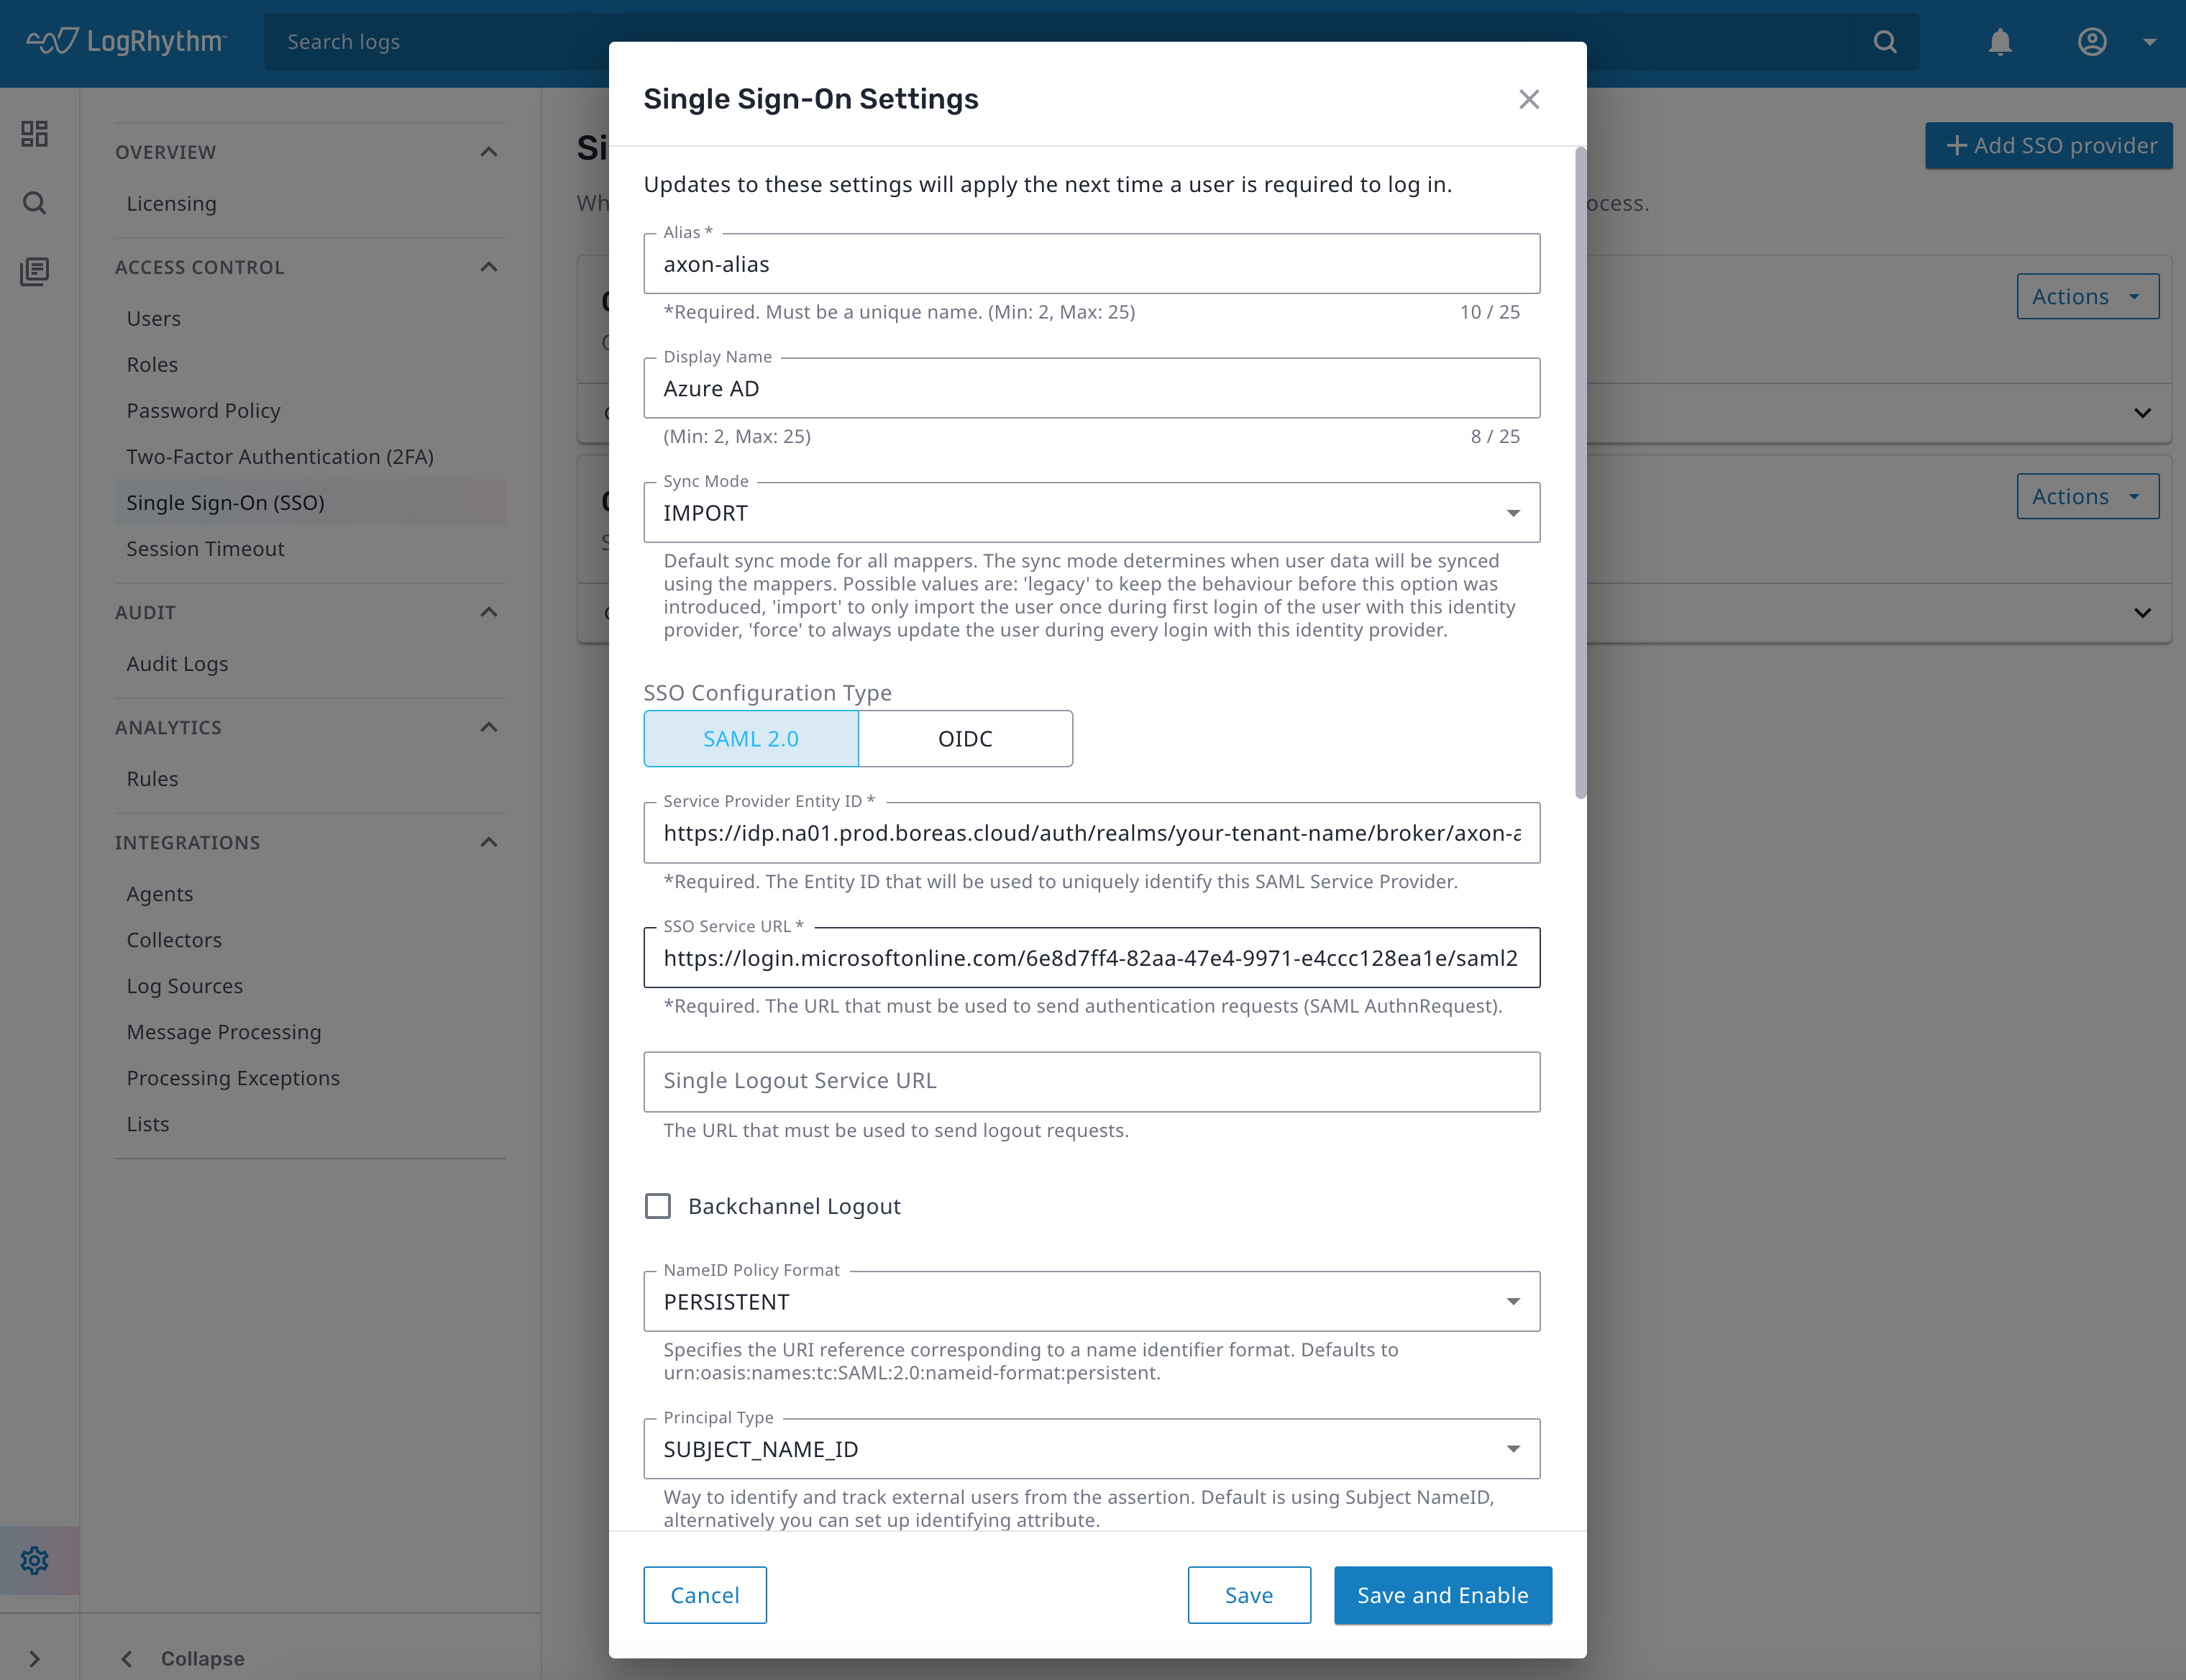
- Enter the Alias configured in Azure above.
- Enter a unique Display Name to use when displaying the IdP within Axon.
- Select SAML 2.0 as the SSO Configuration Type.
- Enter the Entity ID configured in Azure above.
- Copy the Login URL from step 9 in the previous section into the SSO Service URL field.
- Scroll down and select Allow Create, HTTP-POST Binding Response, and HTTP-POST Binding for AuthnRequest.
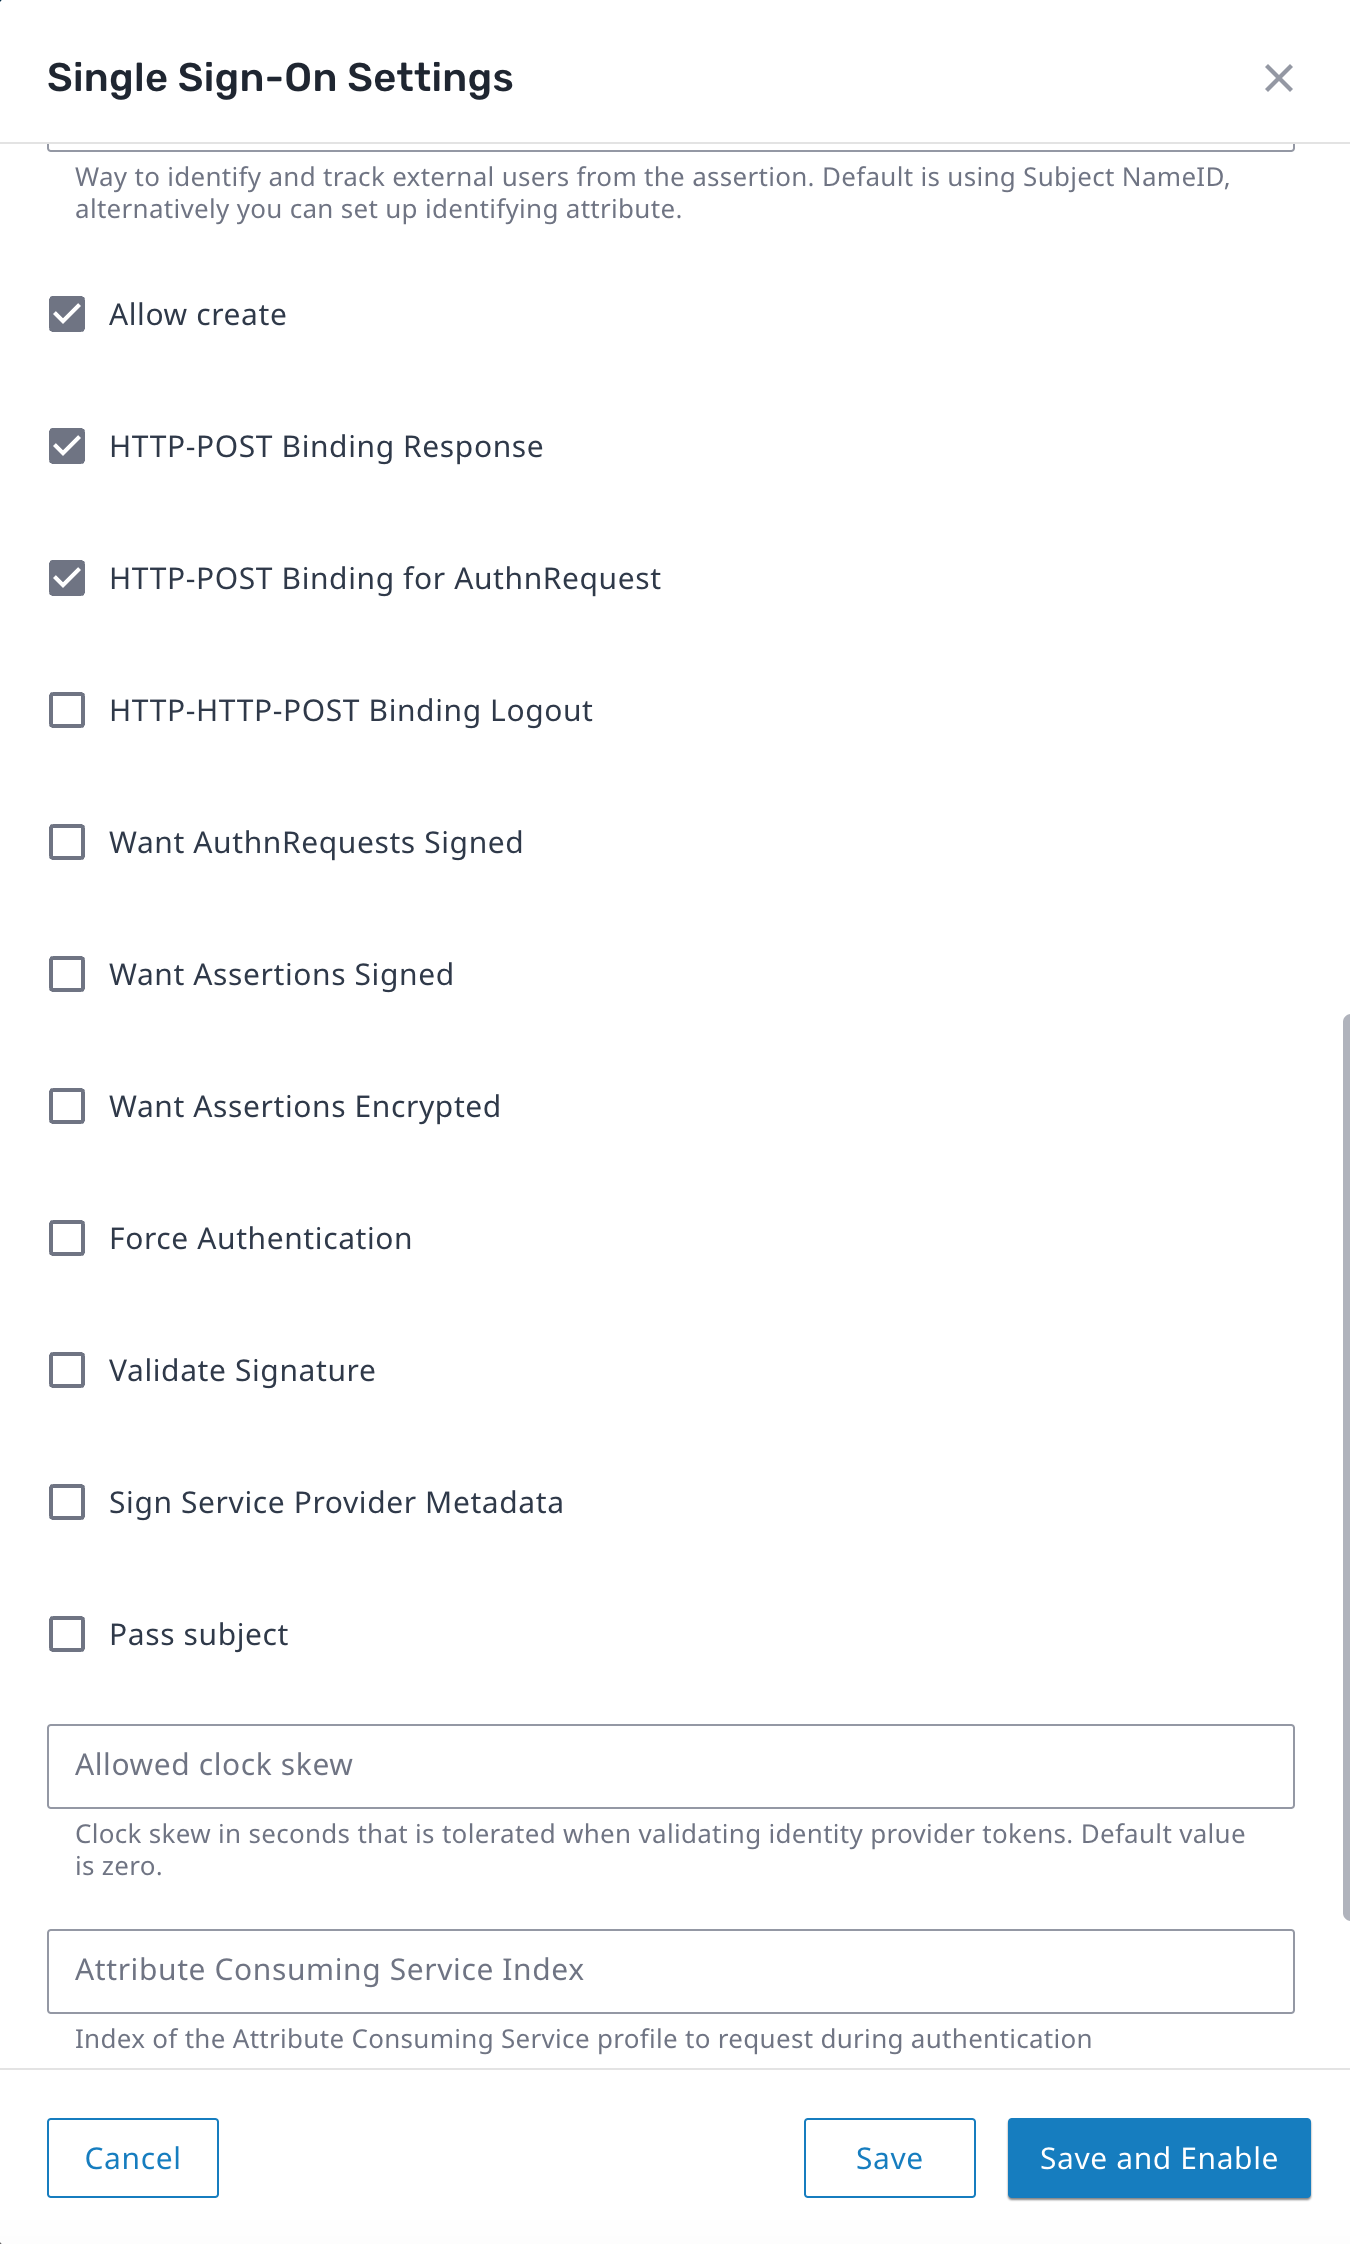
- Click Save and Enable.
- Log out from Axon, and then click Return to Login.
A button allowing for Azure SSO is available.