
Azure OIDC Configuration
This page details the steps to configure a new SSO instance using the Azure OIDC application.
Configure SSO in Azure
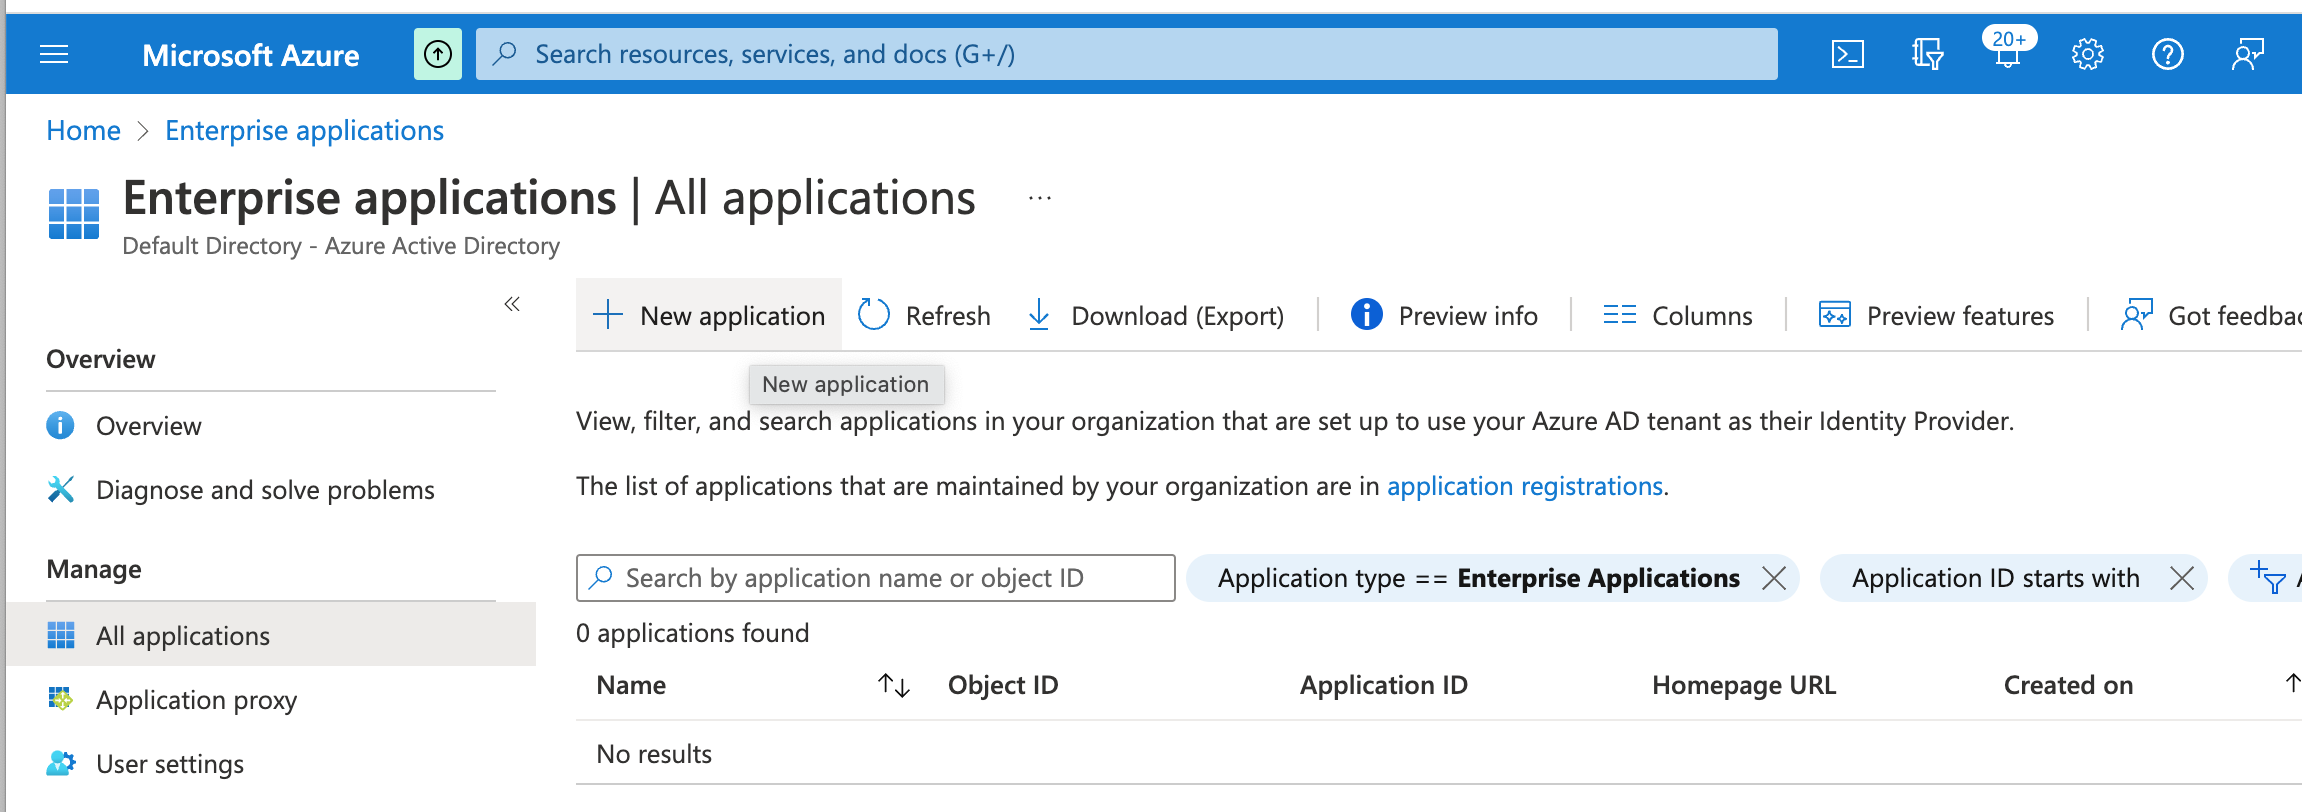
To create a new application and configure SSO for Azure OIDC, from the Enterprise Applications screen:
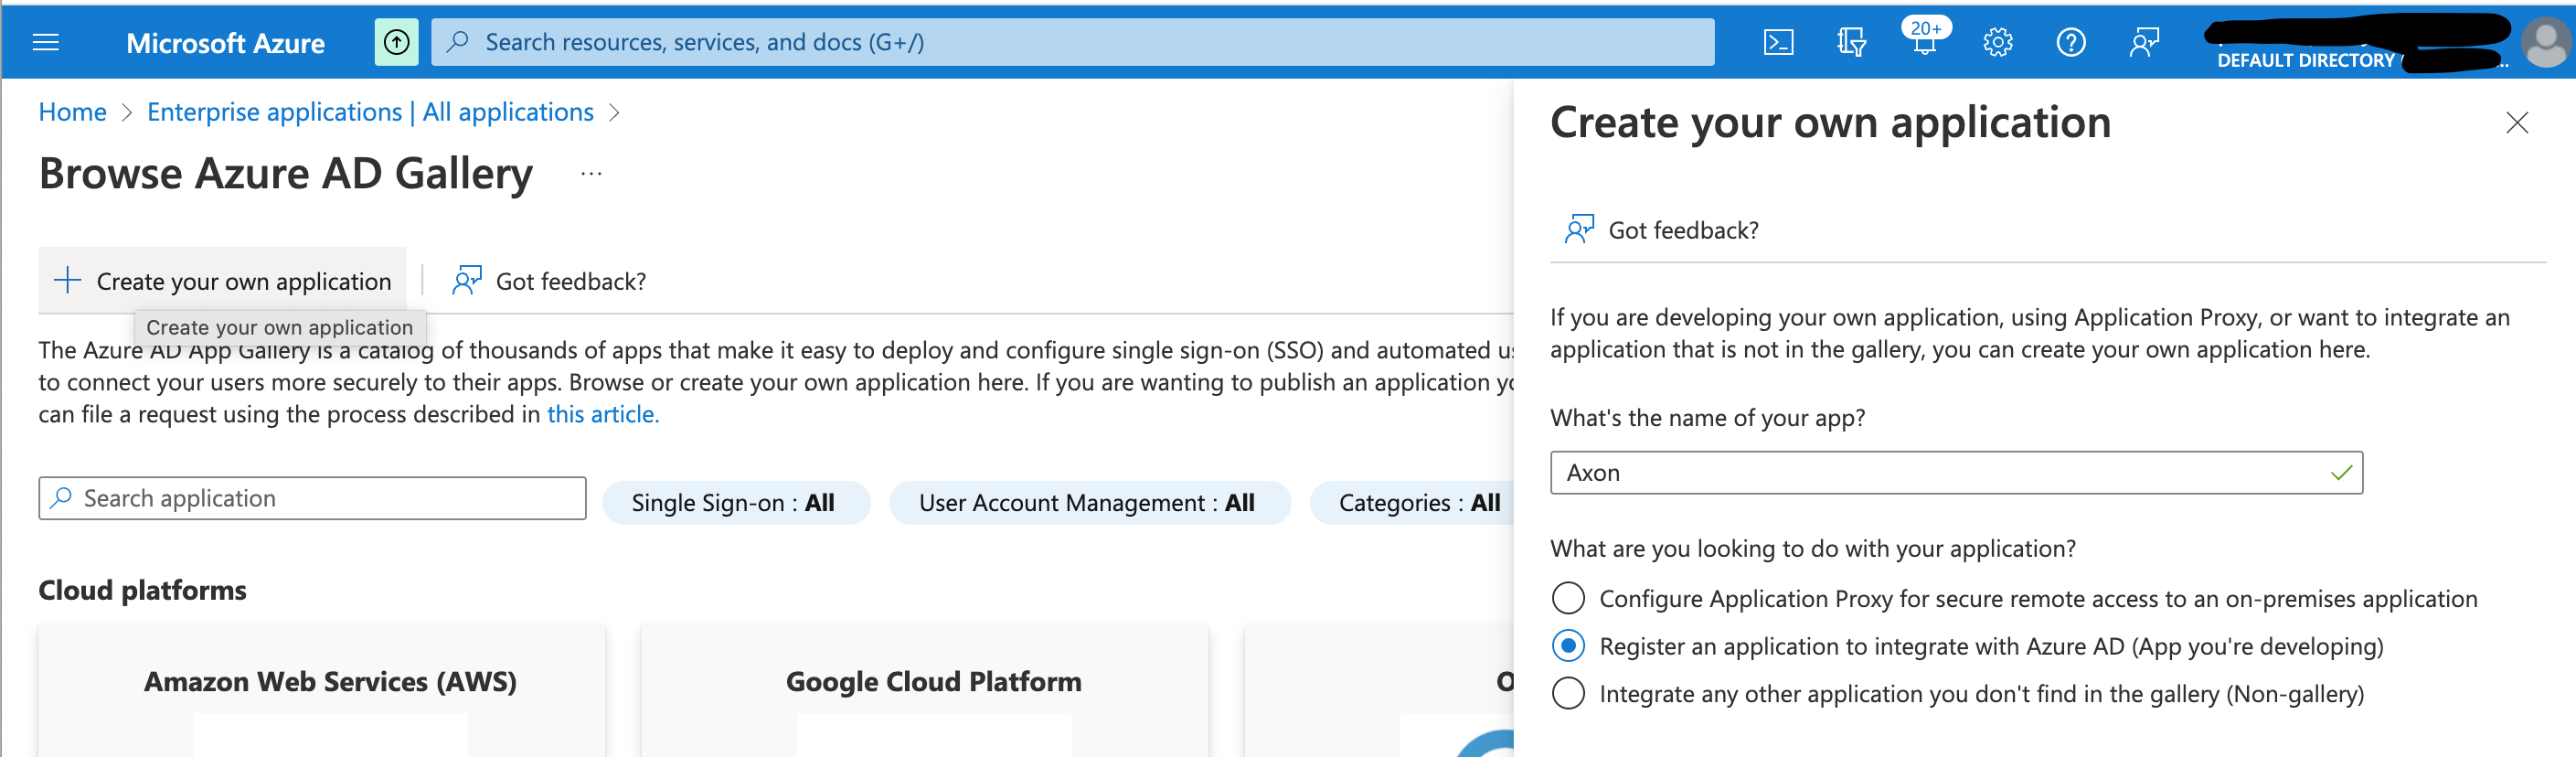
- Create a new Enterprise Application by clicking New application and then Create your own application.
- Fill in the name of the application (e.g. "Axon") and click Register an application to integrate with Azure AD to use use Azure AD for OIDC authentication.
- Enter a user-facing display name for this application in the Name field.
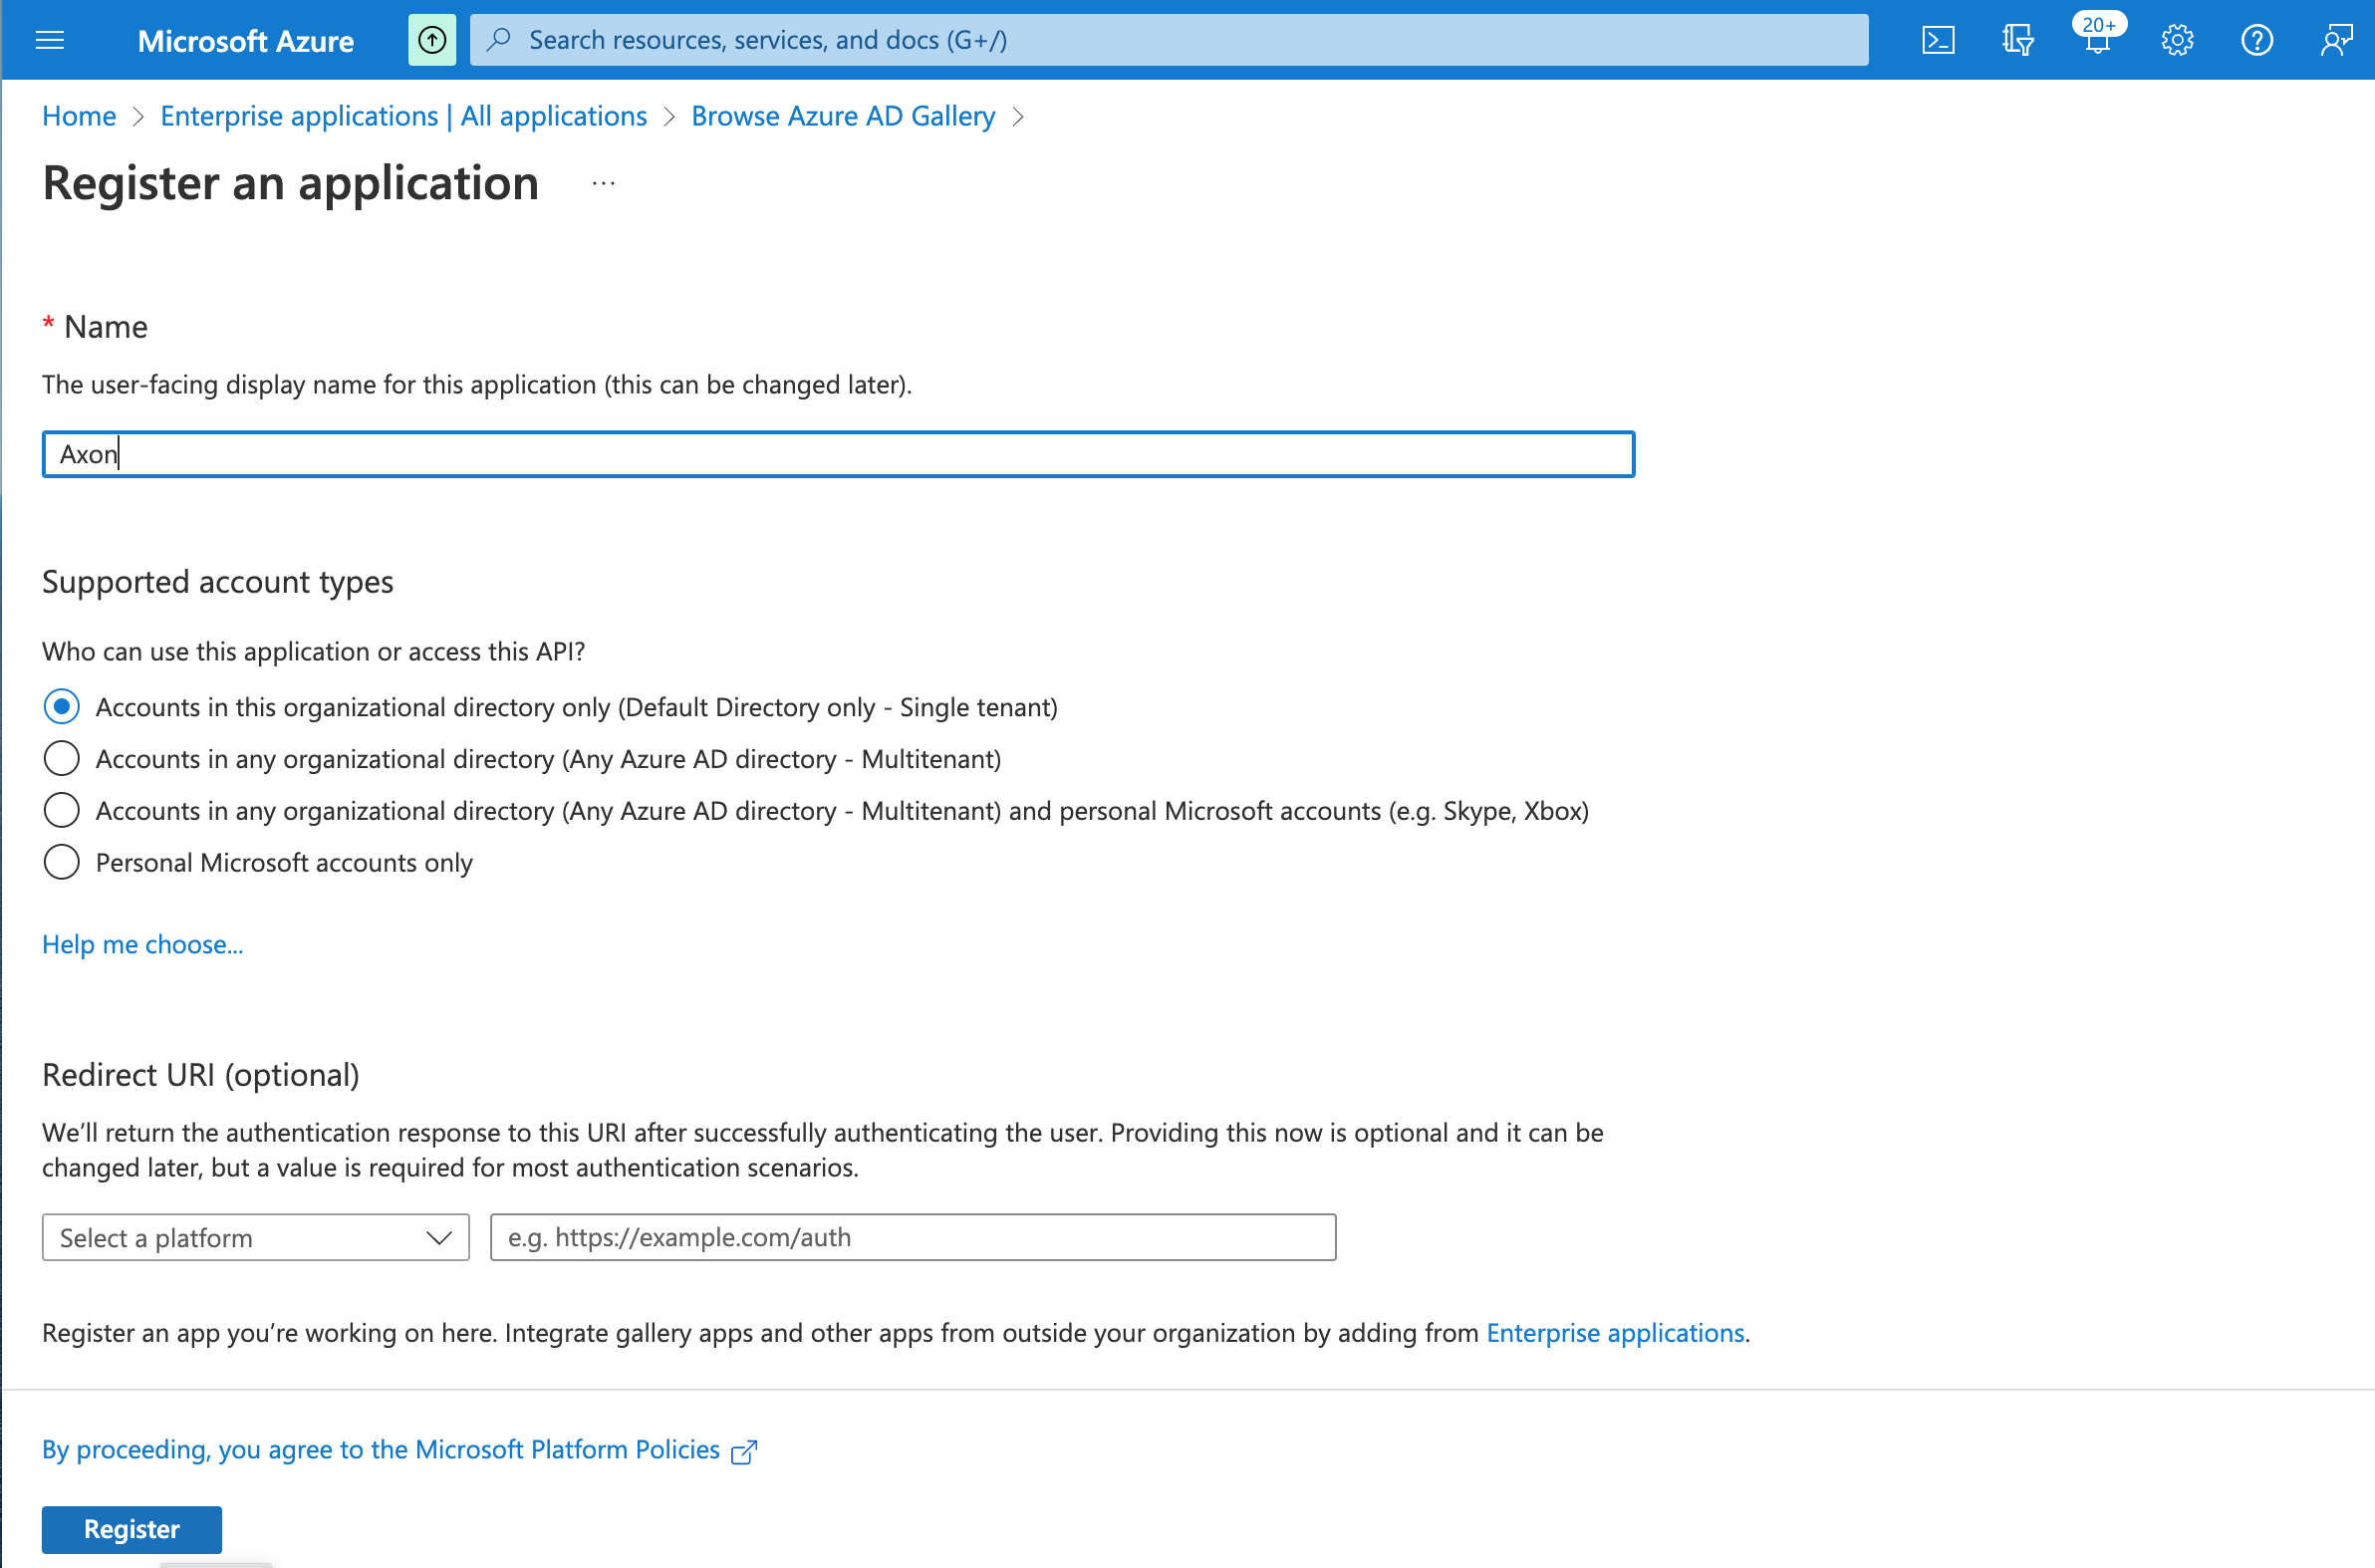
- Select the relevant Supported account types.
(Optional.) Open the Select a platform drop-list and choose a Redirect URI platform, and then enter the redirect URI in the field.
This can be left blank for now and filled in later.
- Click Register.
The application is successfully created. - Return to the Enterprise Applications screen and click Refresh.
The new Axon application appears in the list.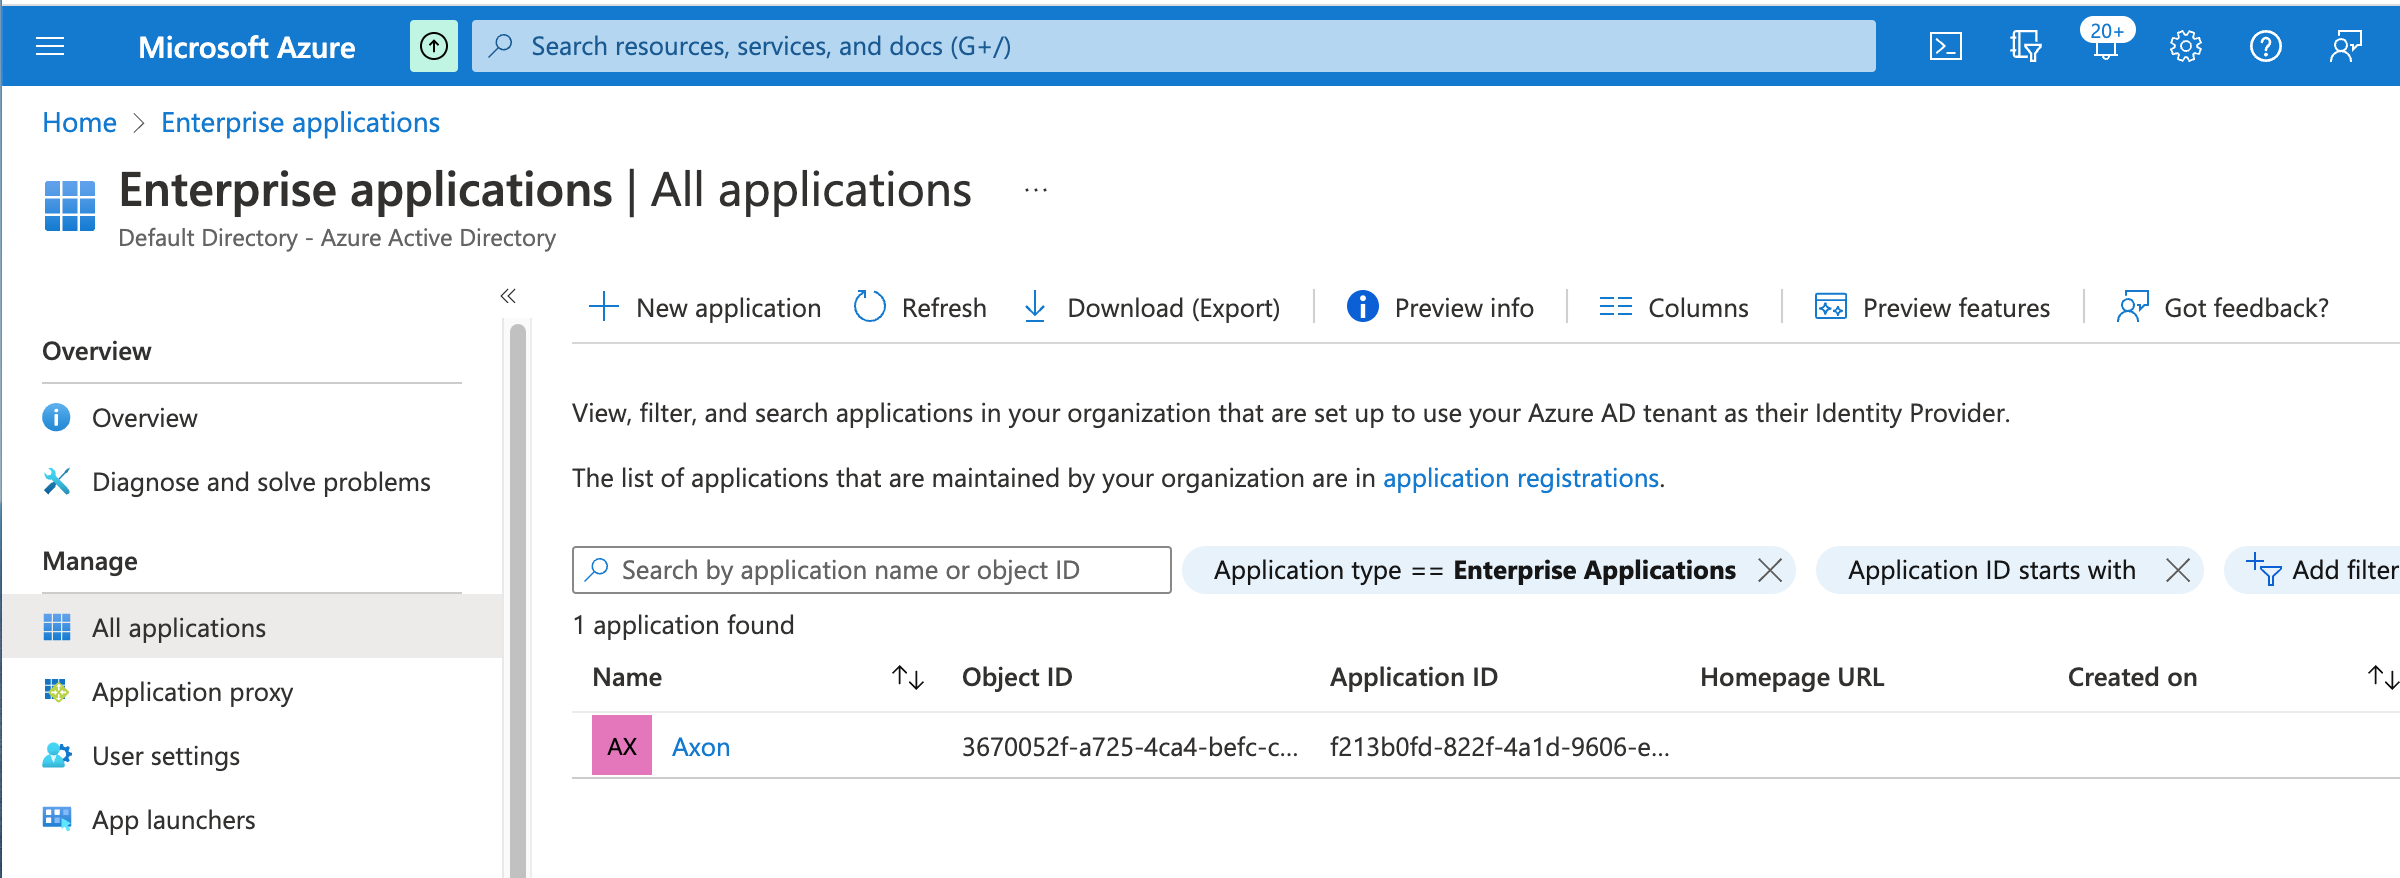
- Click the new Axon application.
The application overview page appears.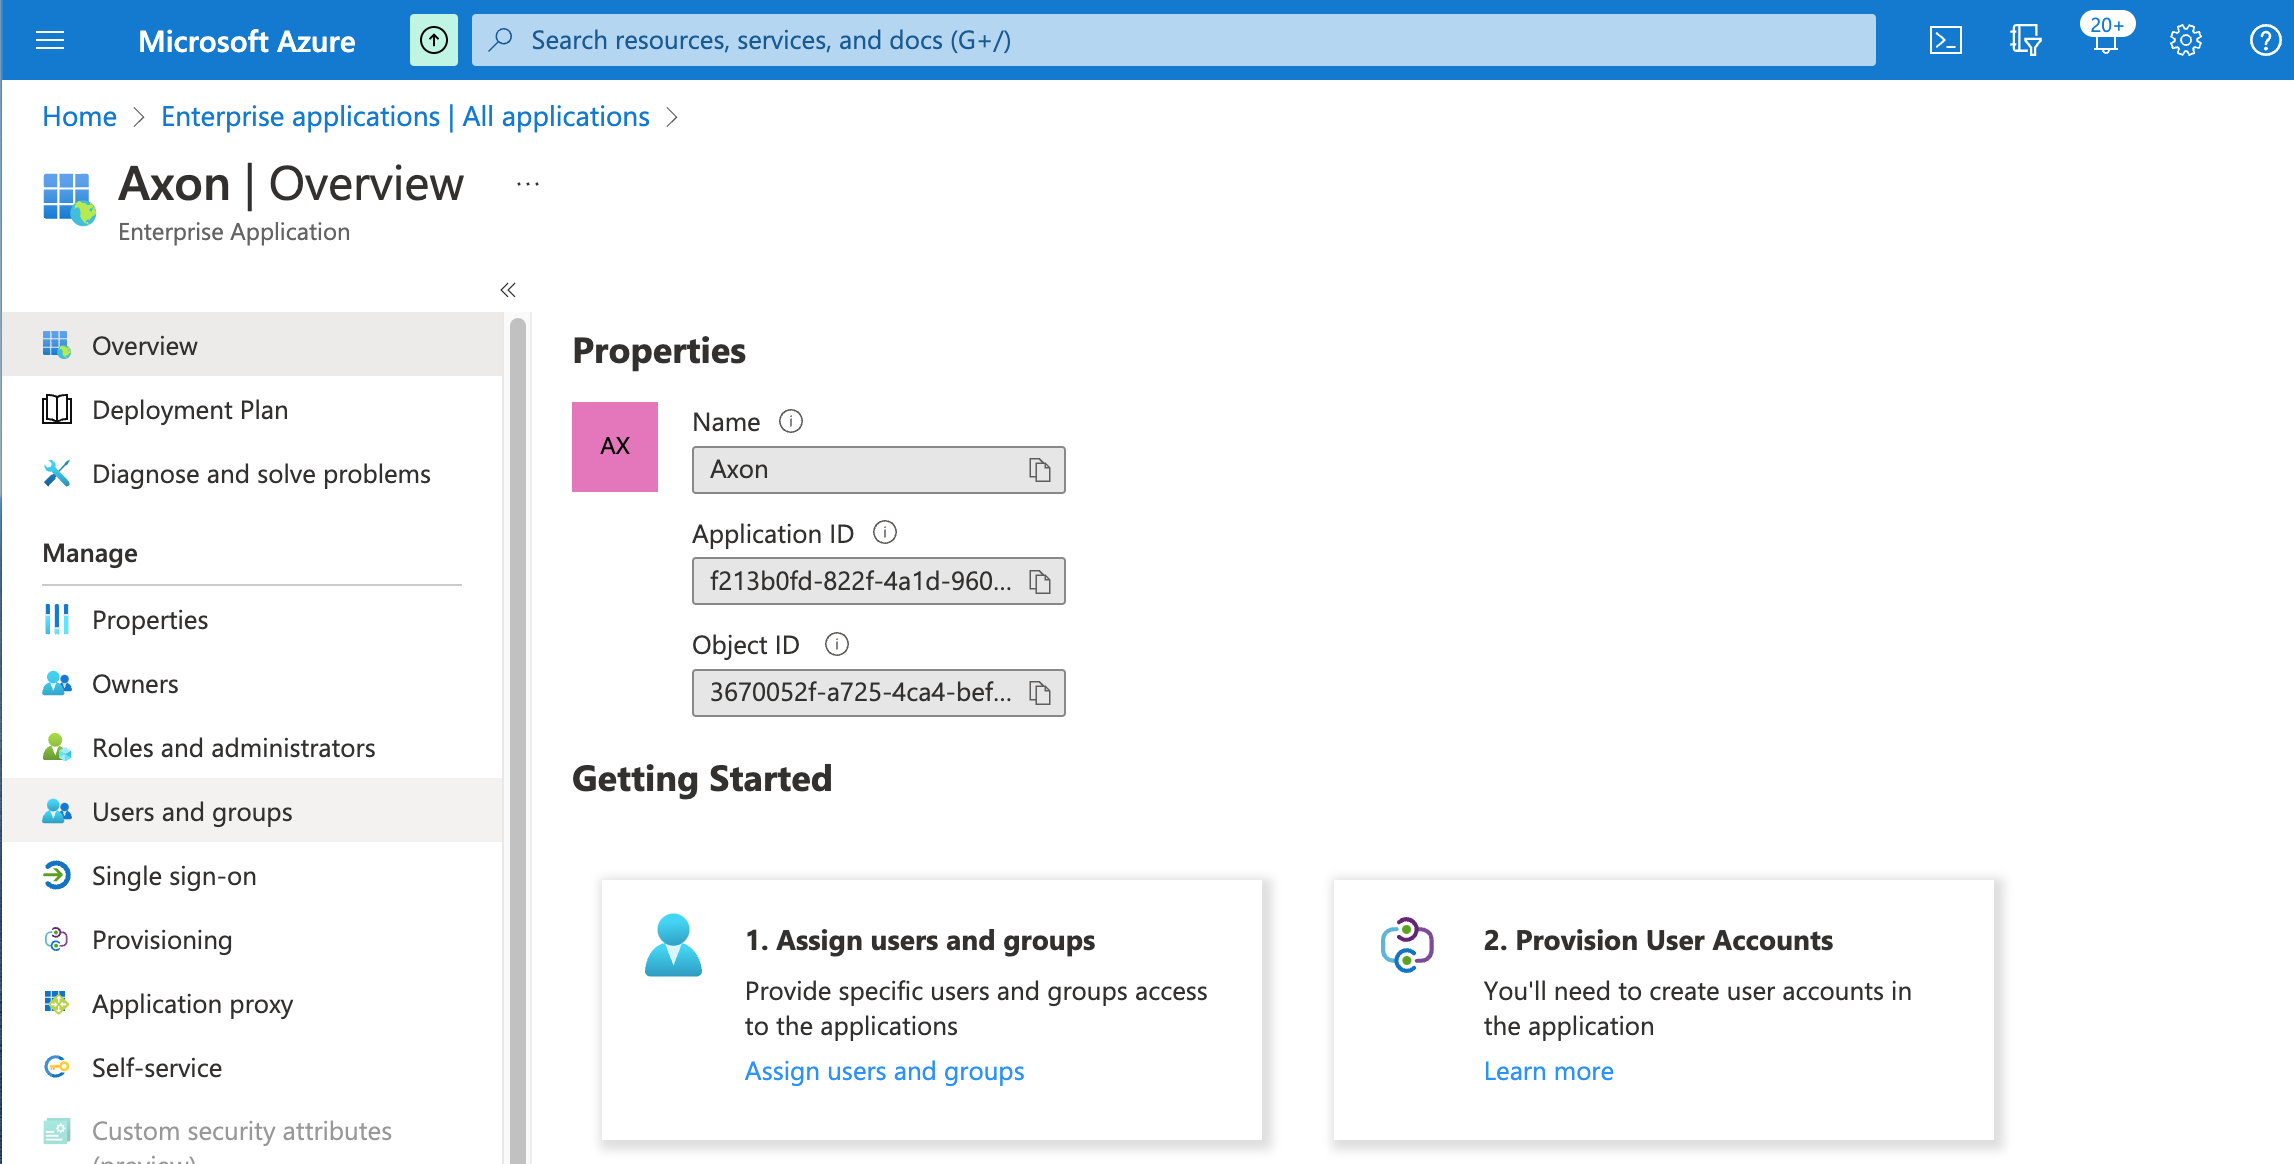
- Click Assign users and groups.
The Users and groups page appears.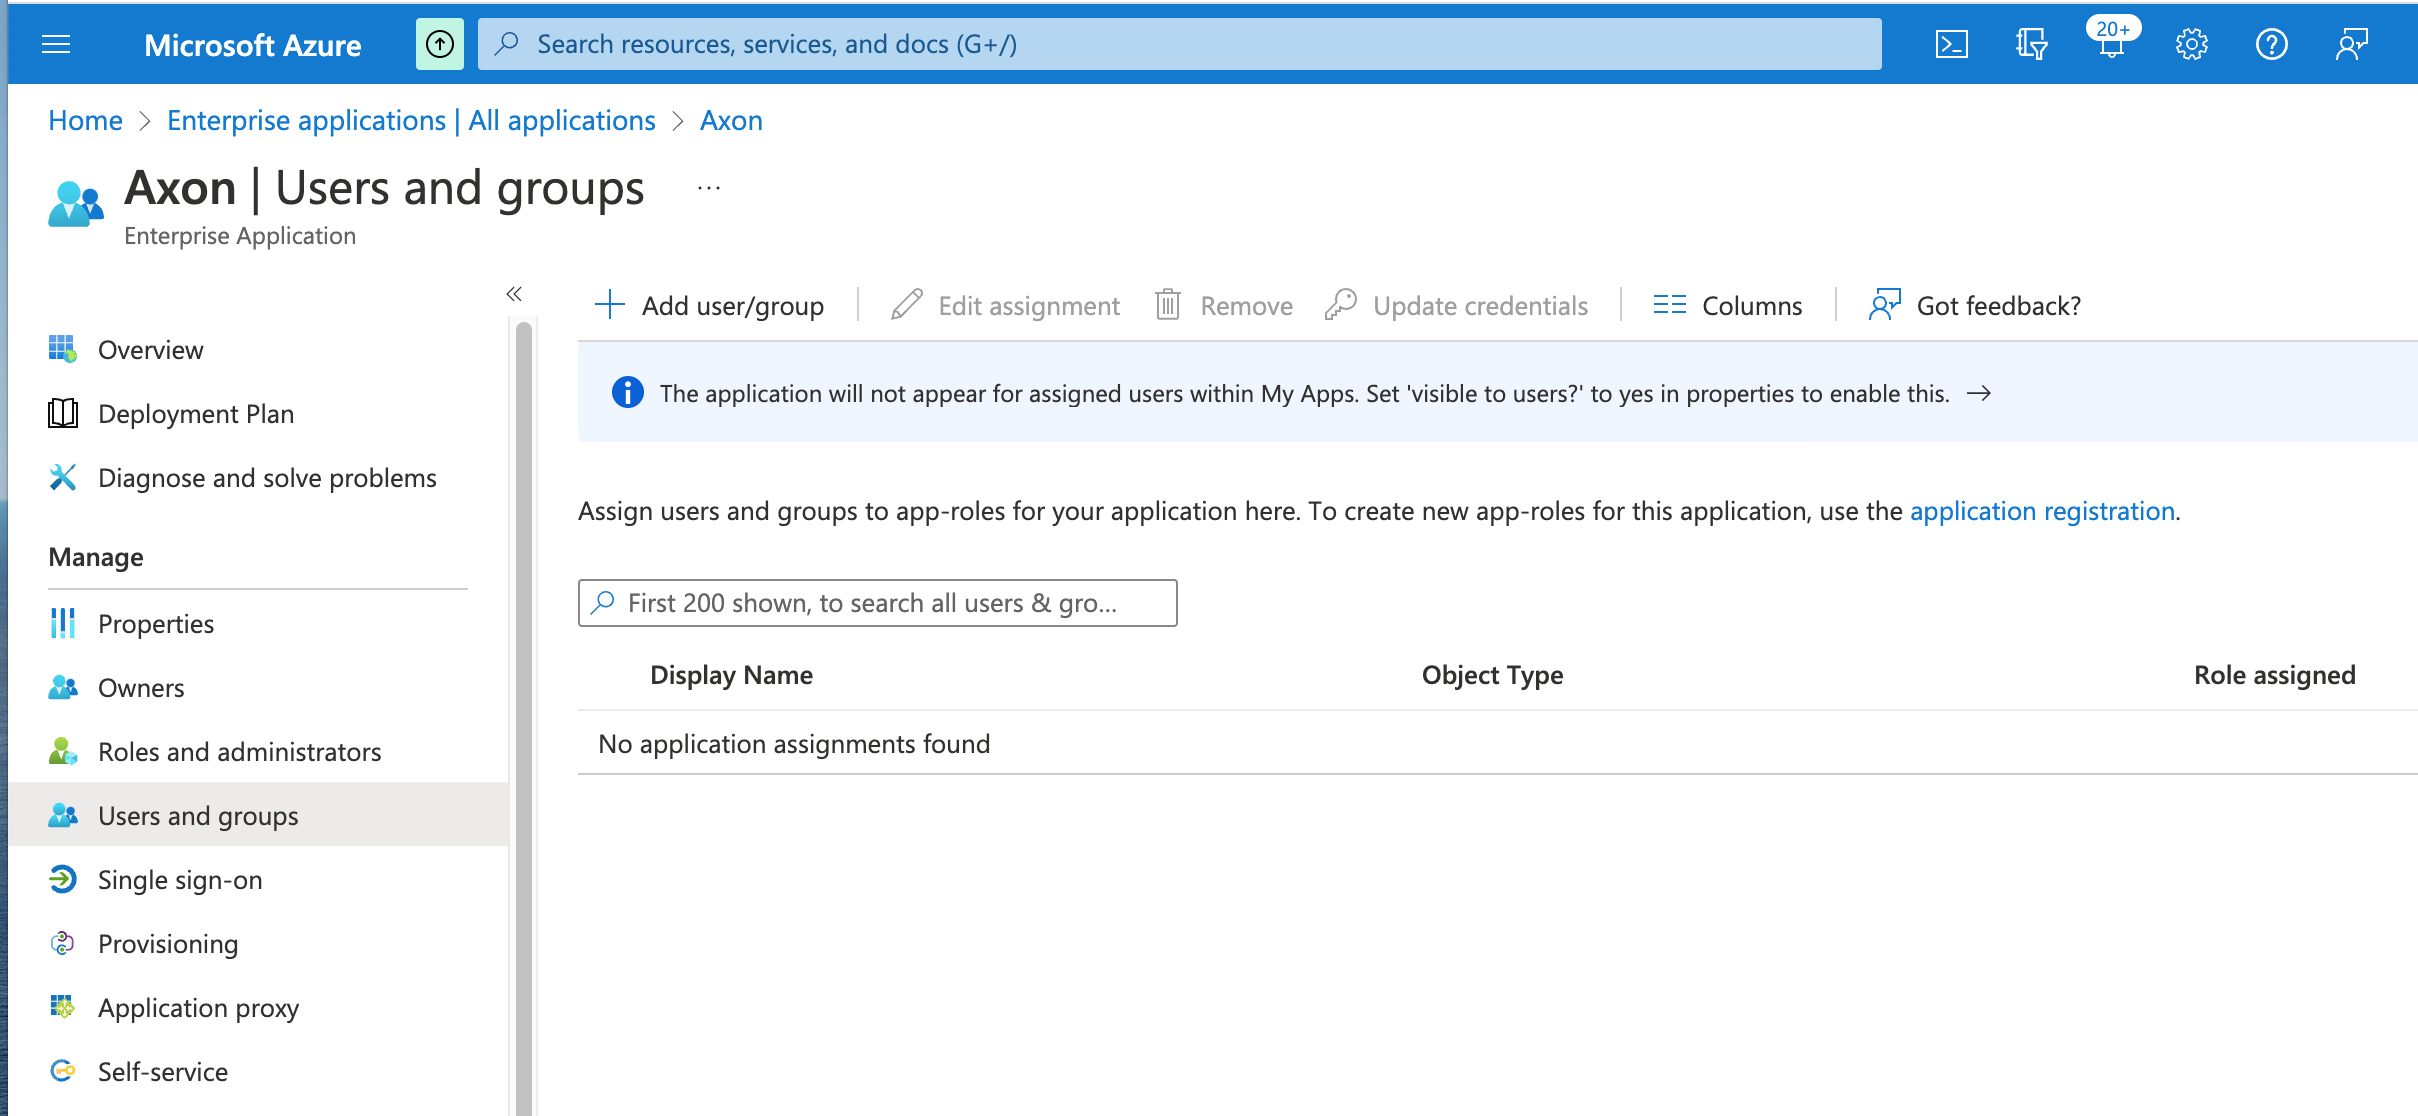
- Click the Add user/group button to assign any users or groups who should be able to access the application.
Repeat this step to continue adding users and groups as needed. - In the left-hand panel, click Single sign-on.
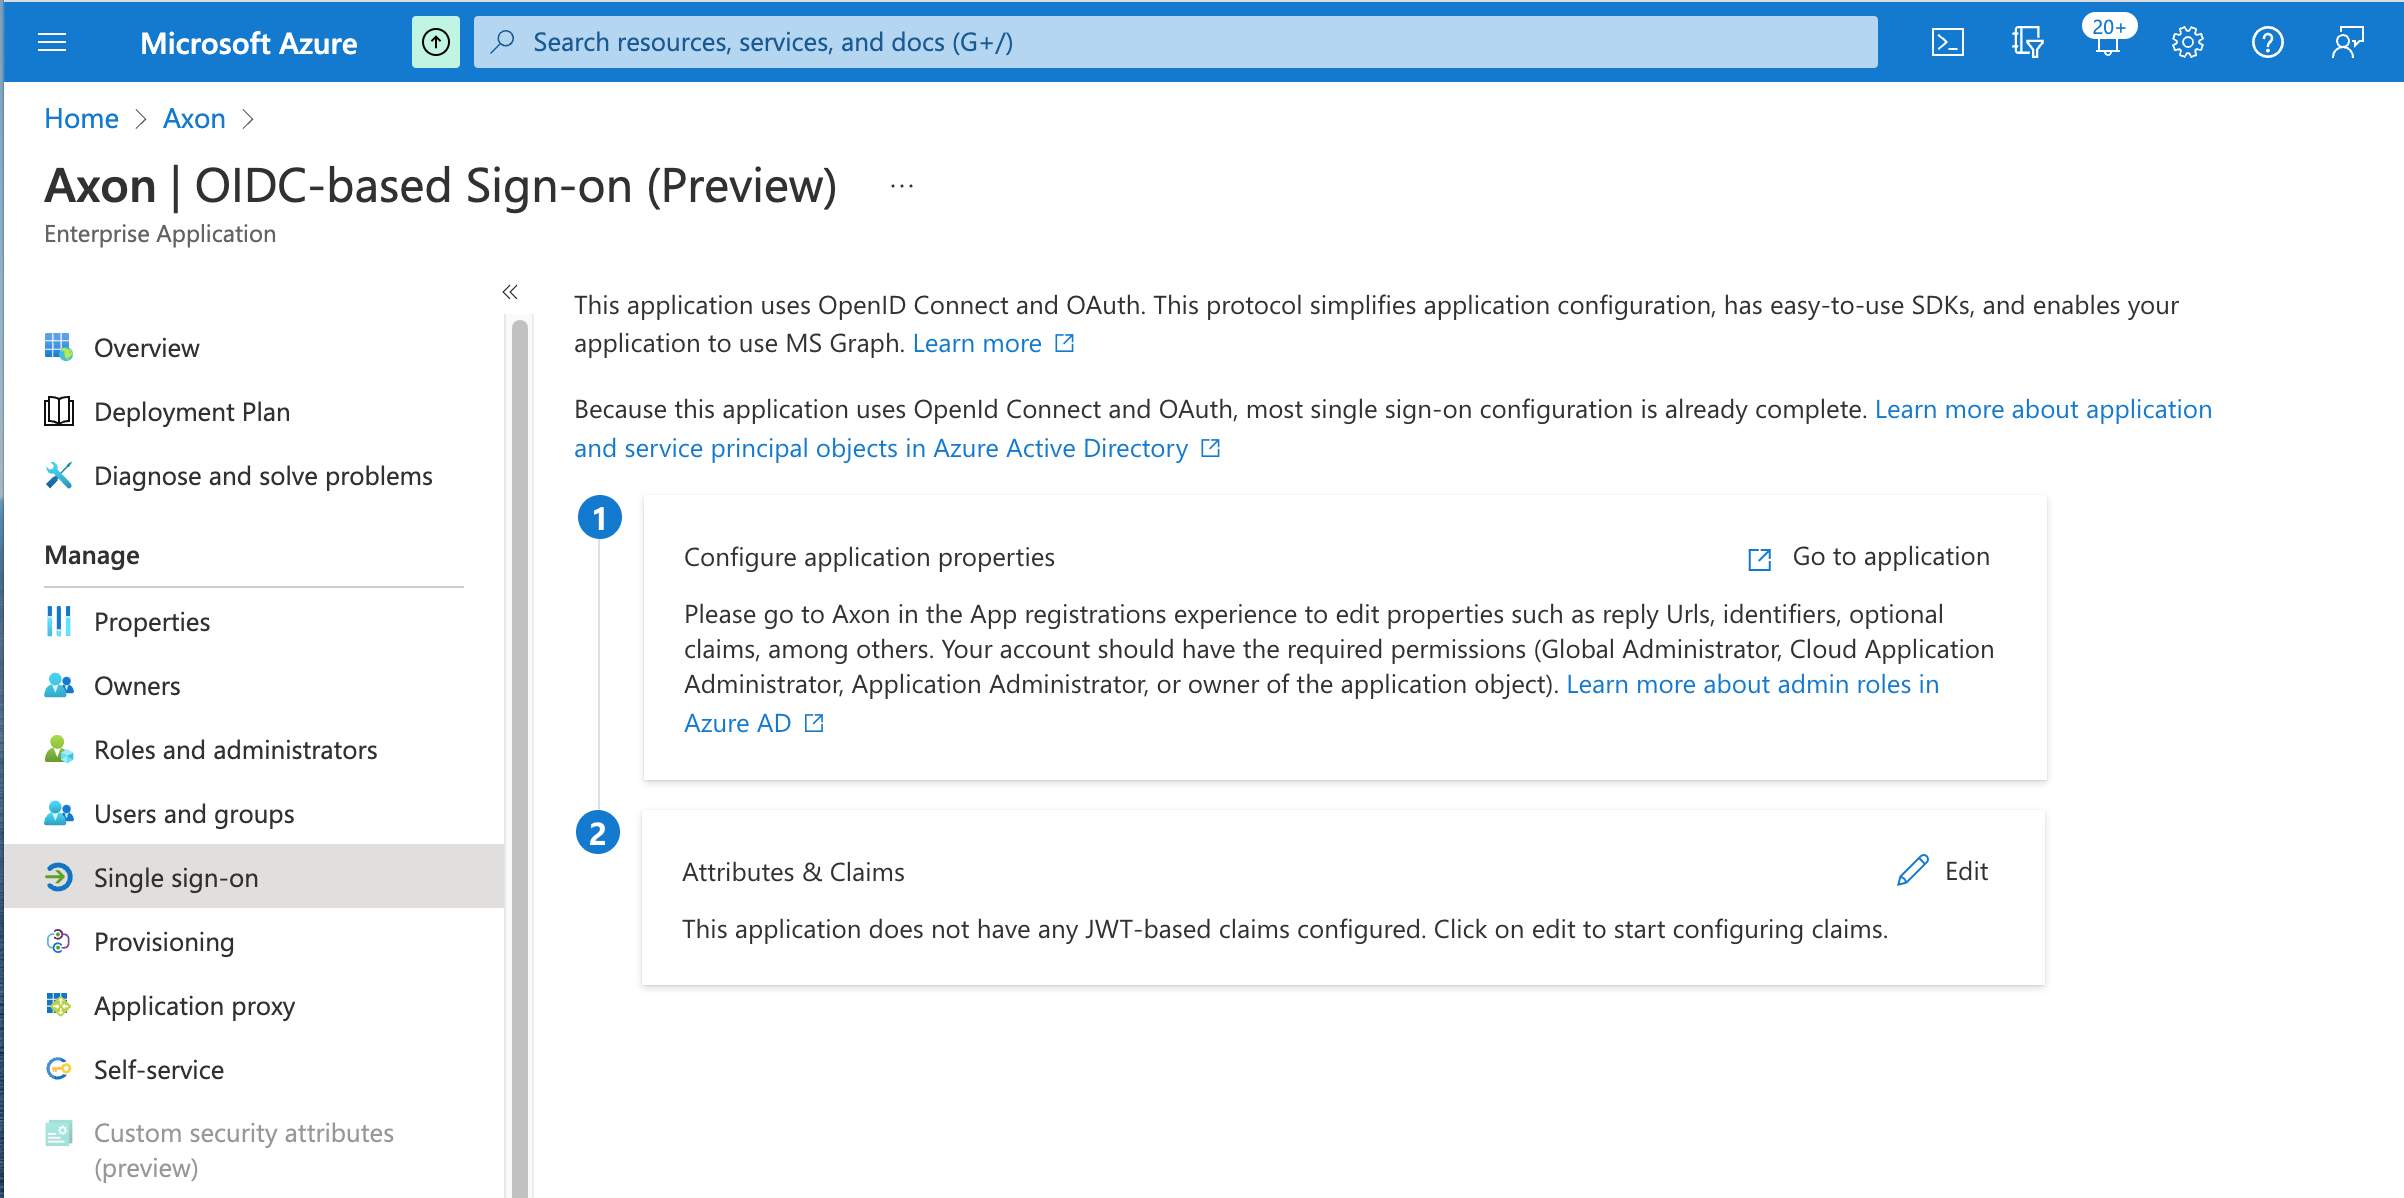
- In the Configure application properties box, click Go to application.
The App registrations overview page appears.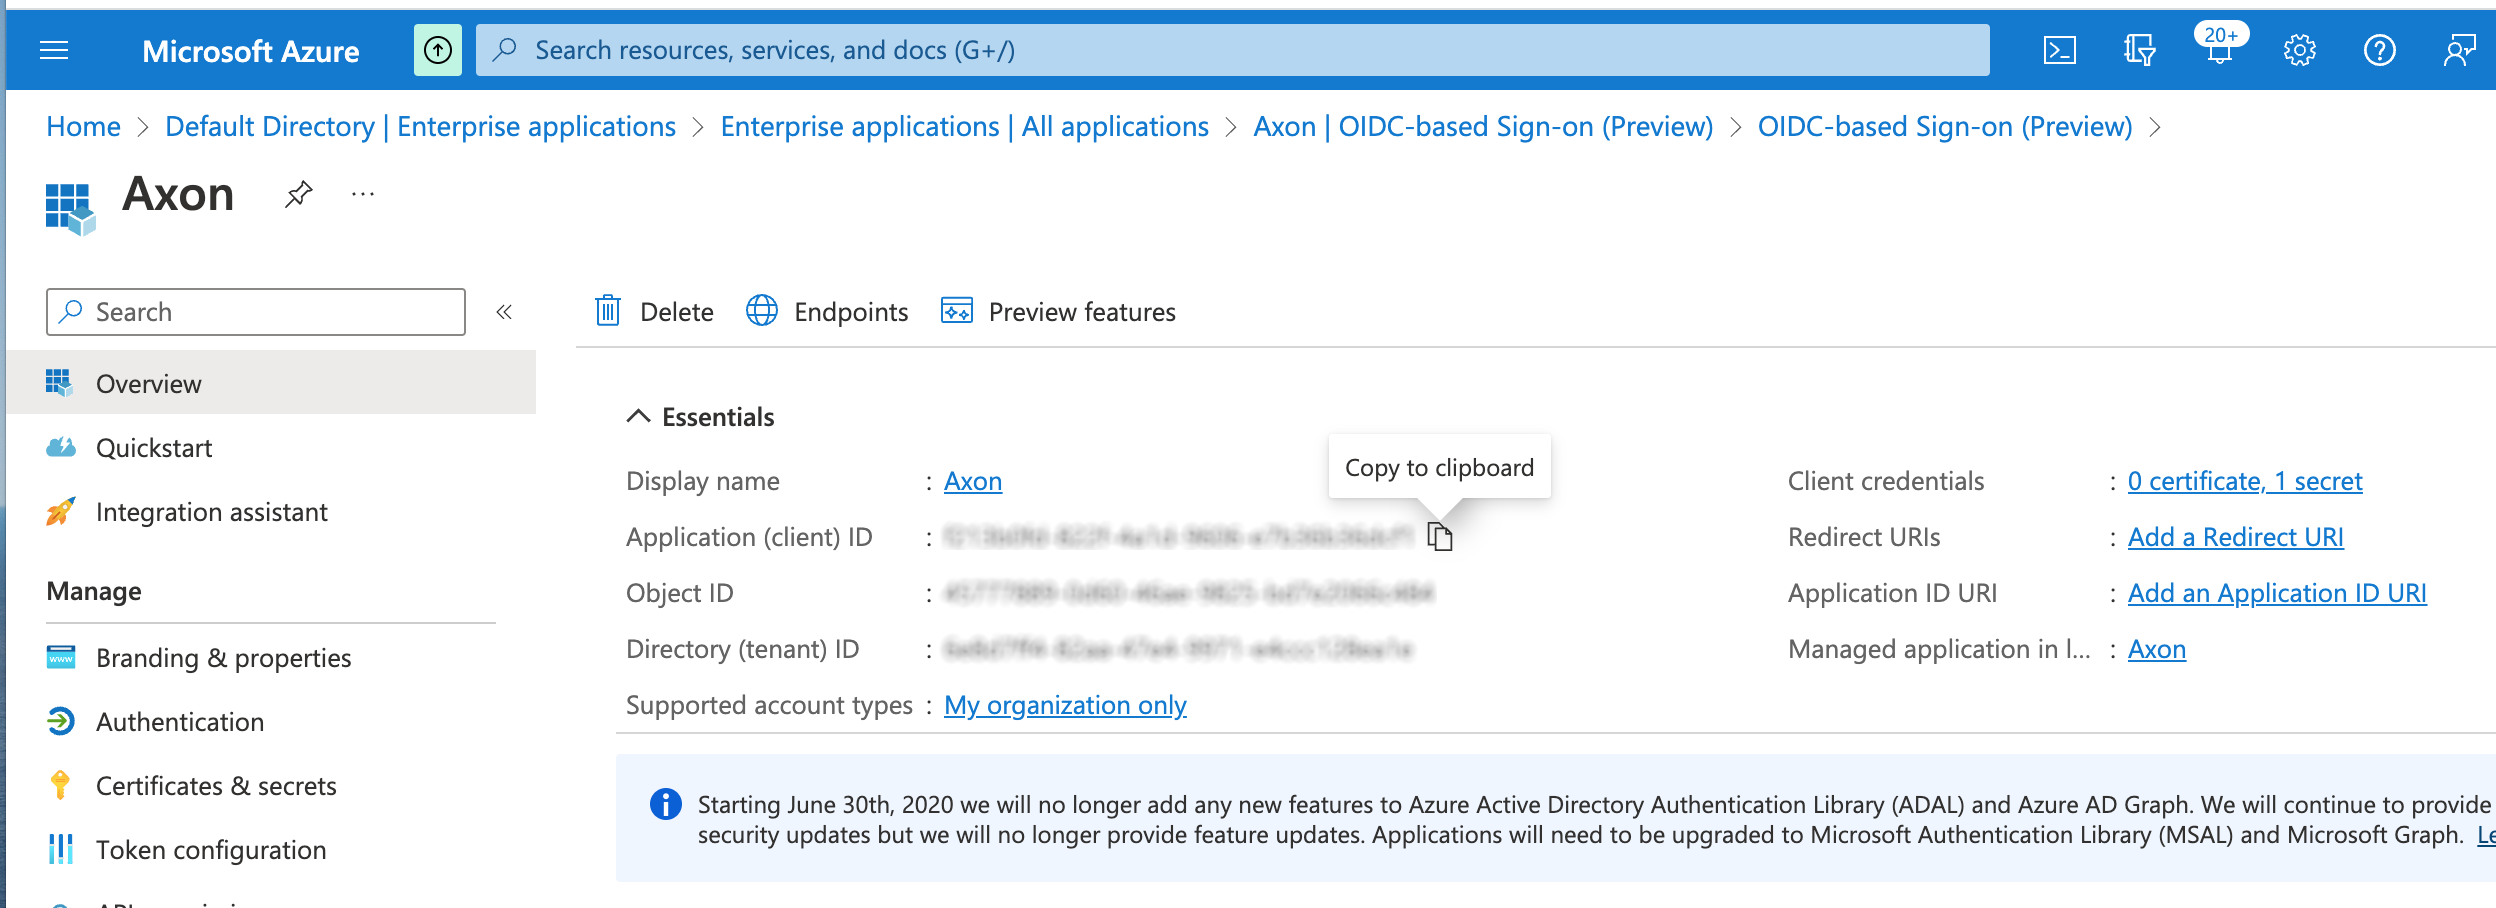
- Copy the Application (client) ID and save it in a text file. This ID is needed later when configuring this IdP in Axon.
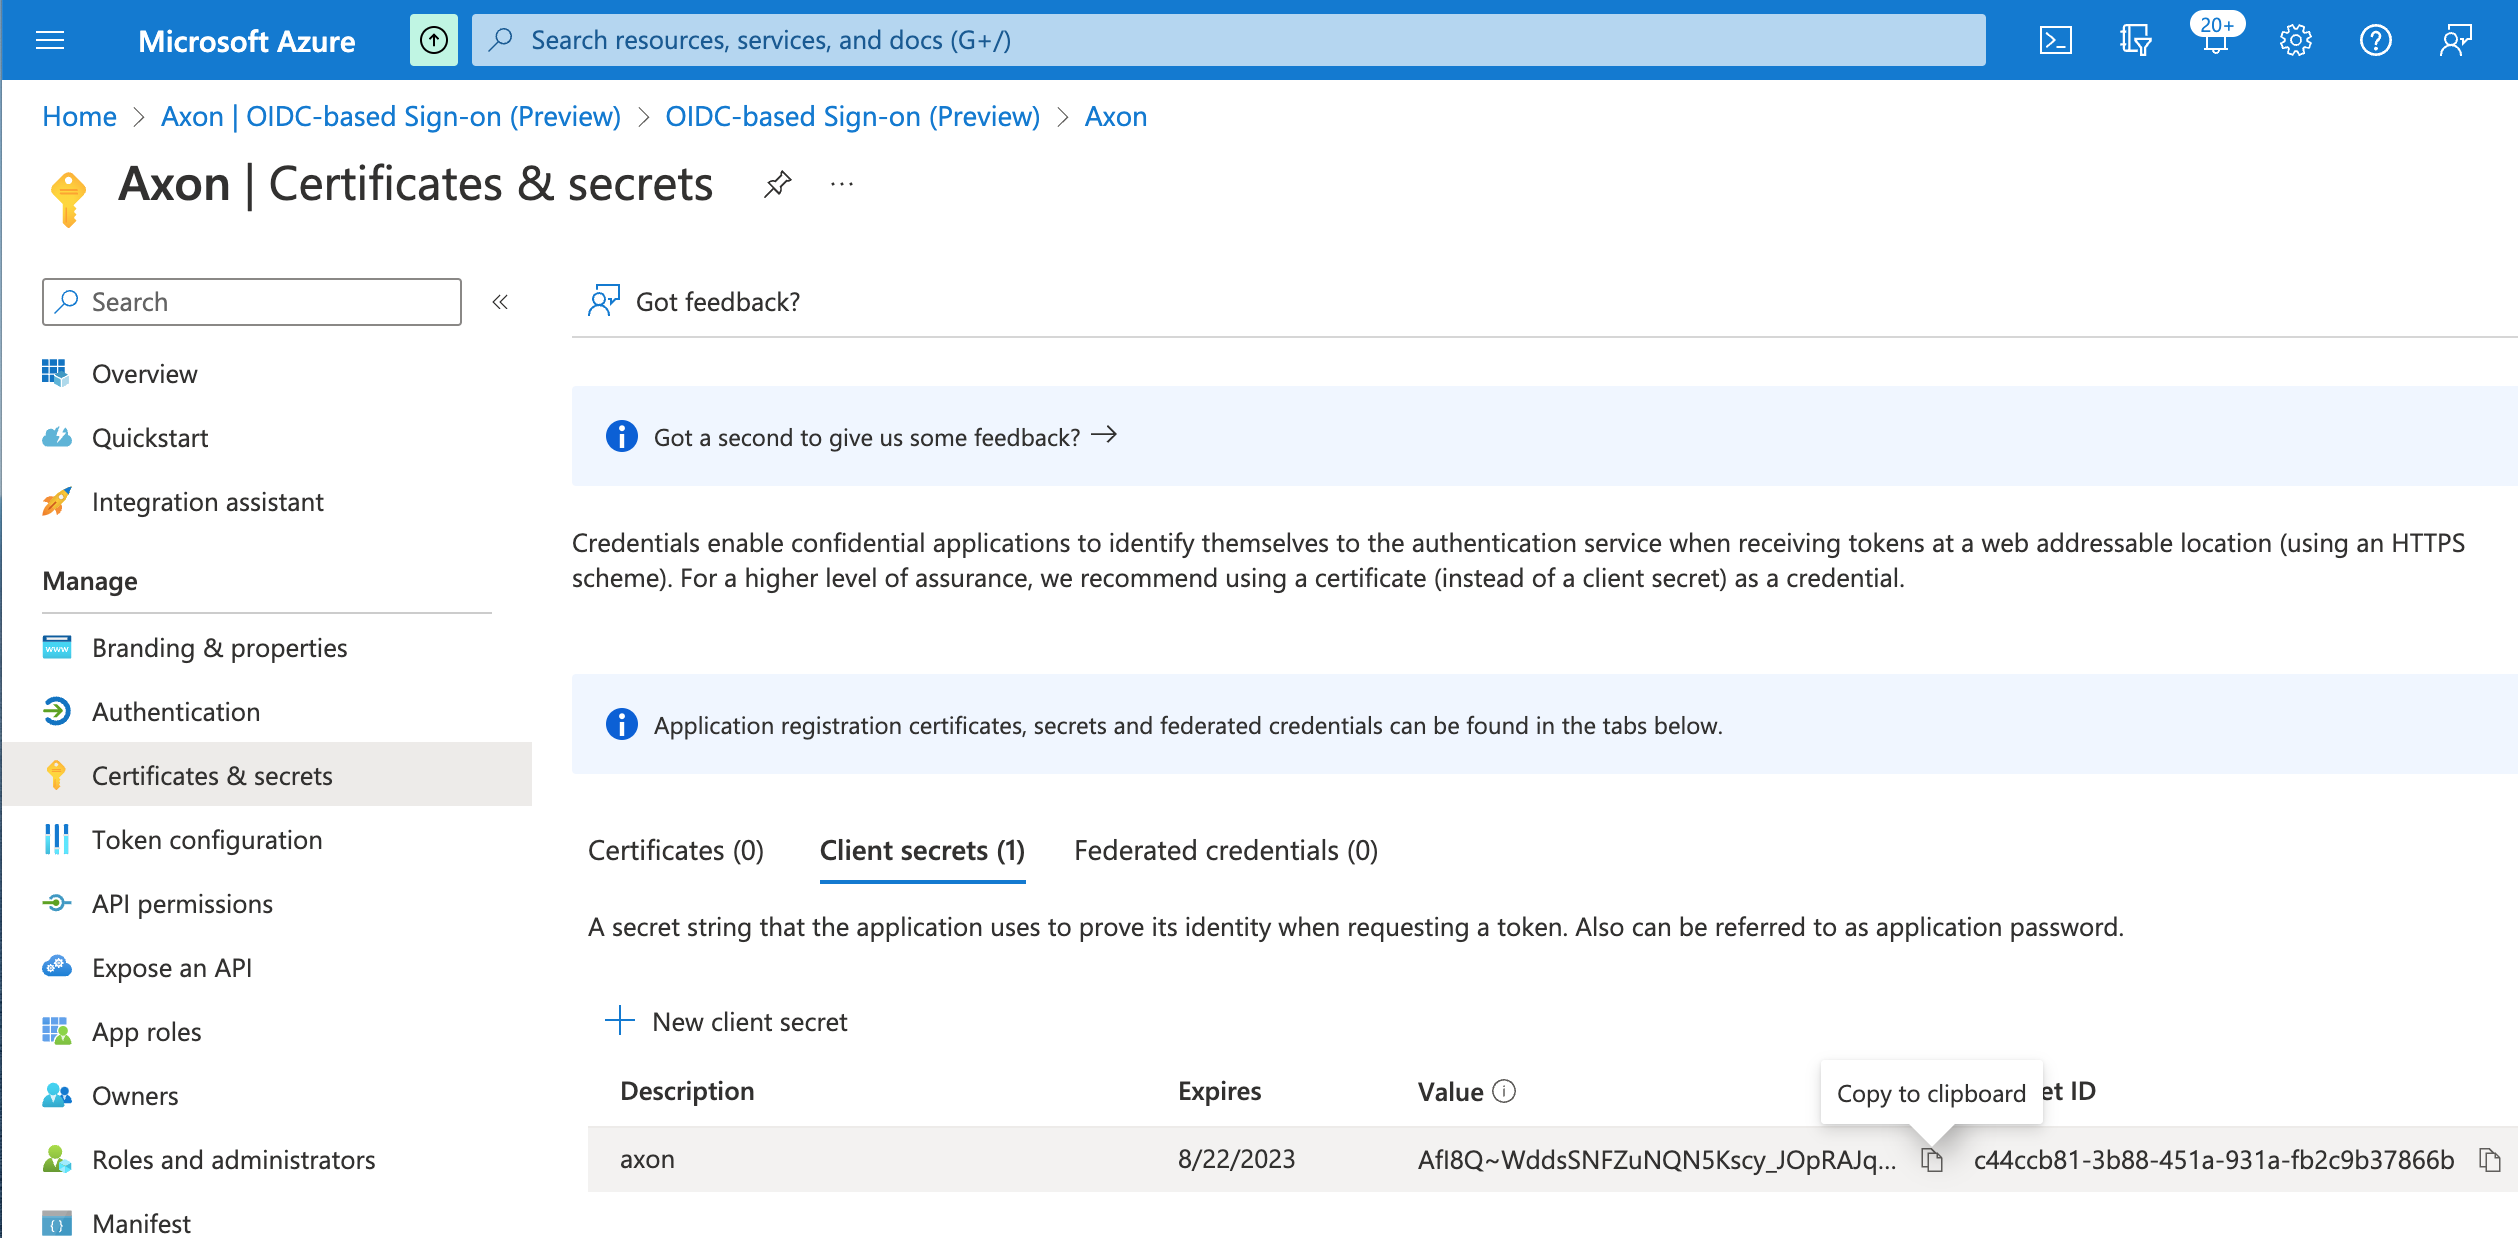
- In the left-hand panel, click Certificates & secrets.
- Click New client secret.

- Enter a unique Description for this client secret, and then select an expiration date from the drop-list.
- Click Add.
The client secret is added to the Certificates & secrets screen. - Copy the client secret Value into a text document. This value is needed later when configuring IdP in Axon.
- In the left-hand panel, click Authentication.
- Click Add a platform.
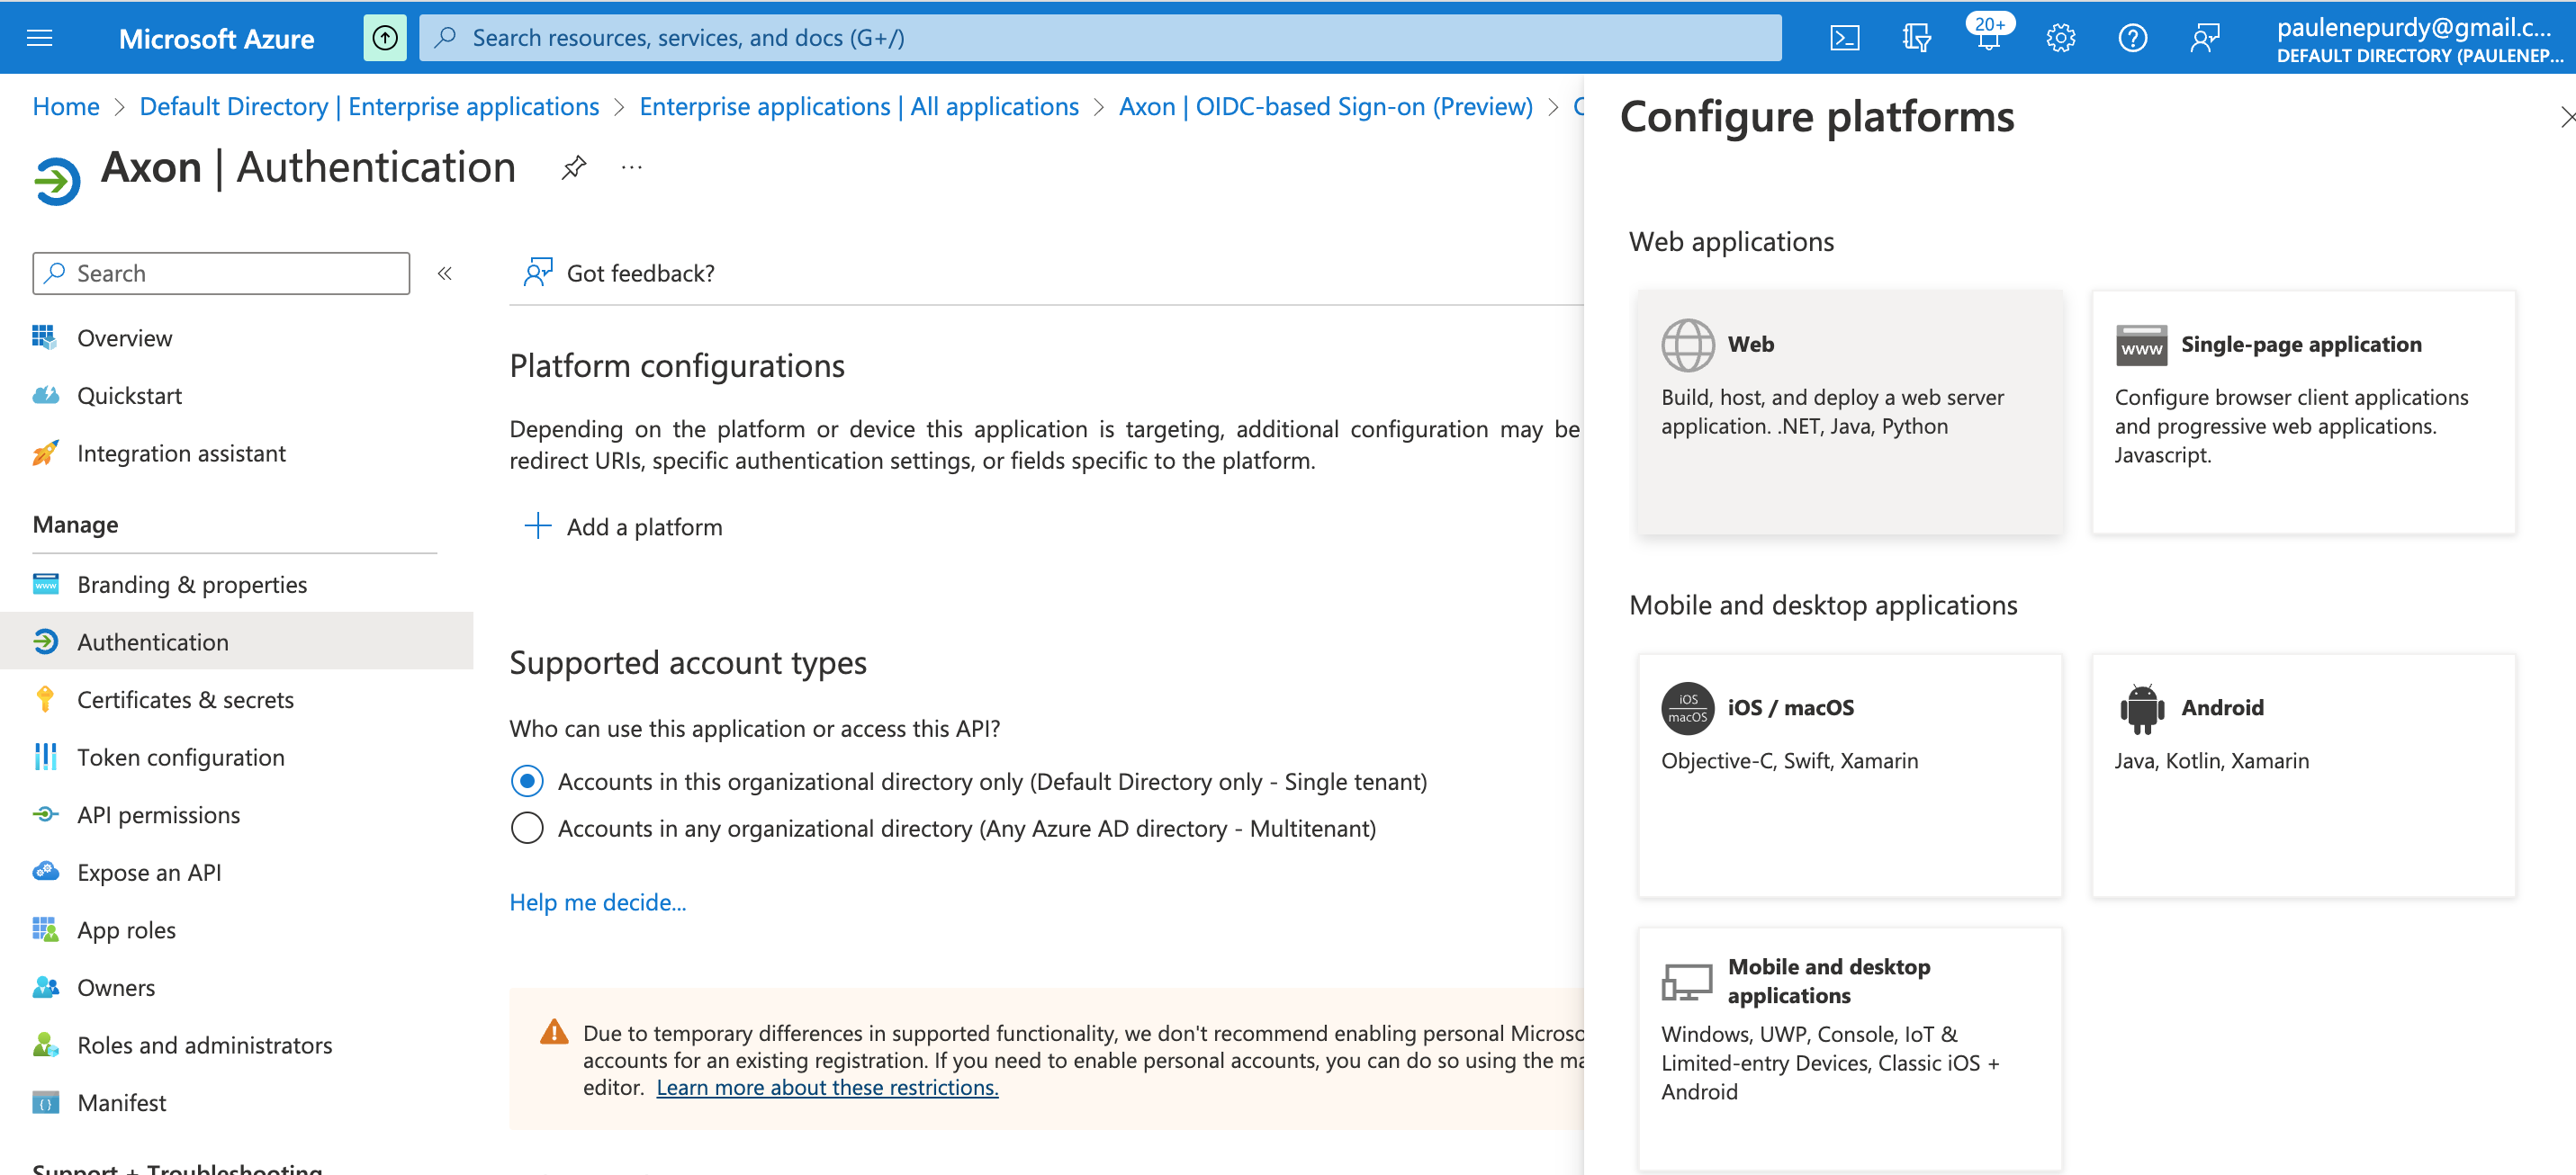
- Select Web.
Enter the Redirect URI in the following format:
https://idp.na01.prod.boreas.cloud/auth/realms/your-axon-tenant-name/broker/axon-alias/endpoint
The Redirect URI is the URI that is output by Axon when configuring this IdP. The "axon-alias" is the alias created within Axon.
The "https://idp.na01.prod.boreas.cloud" part of the URL is dependent on the cluster to which your tenant belongs. The URL used above is only an example.

- Click Configure.
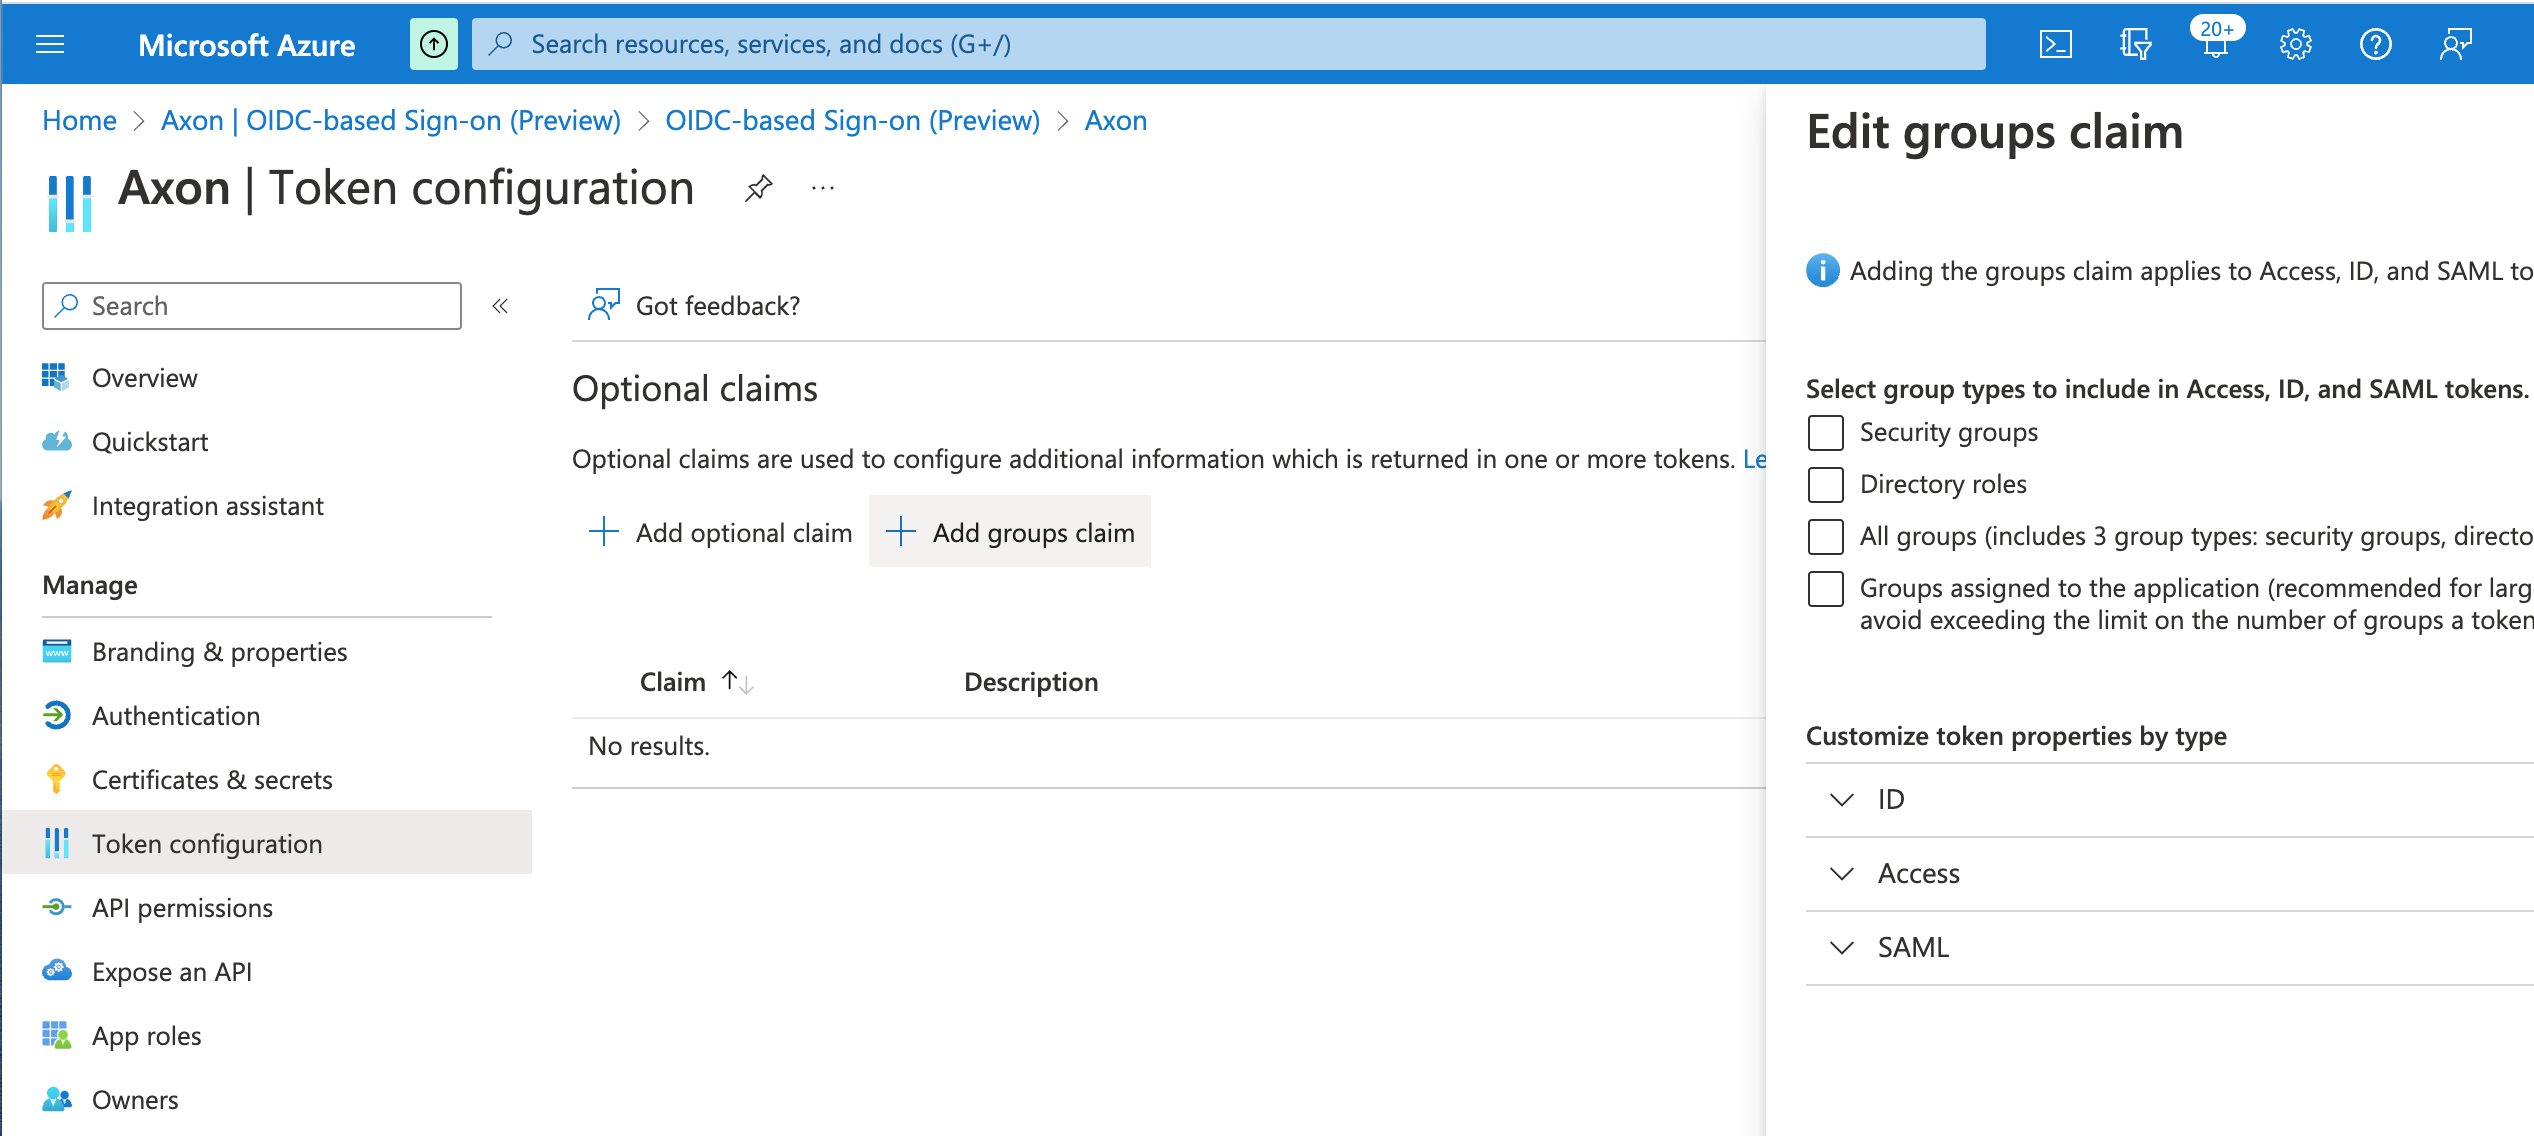
(Optional.) In the left-hand panel, click Token configuration, and then click Add groups claim.
This step is required to perform any automatic role mapping in Axon. Configure the groups claim as needed.Automatic role mapping is not yet available in Axon, but completing this step now will save time in the future.
- In the left-hand panel, click Overview, and then click Endpoints.
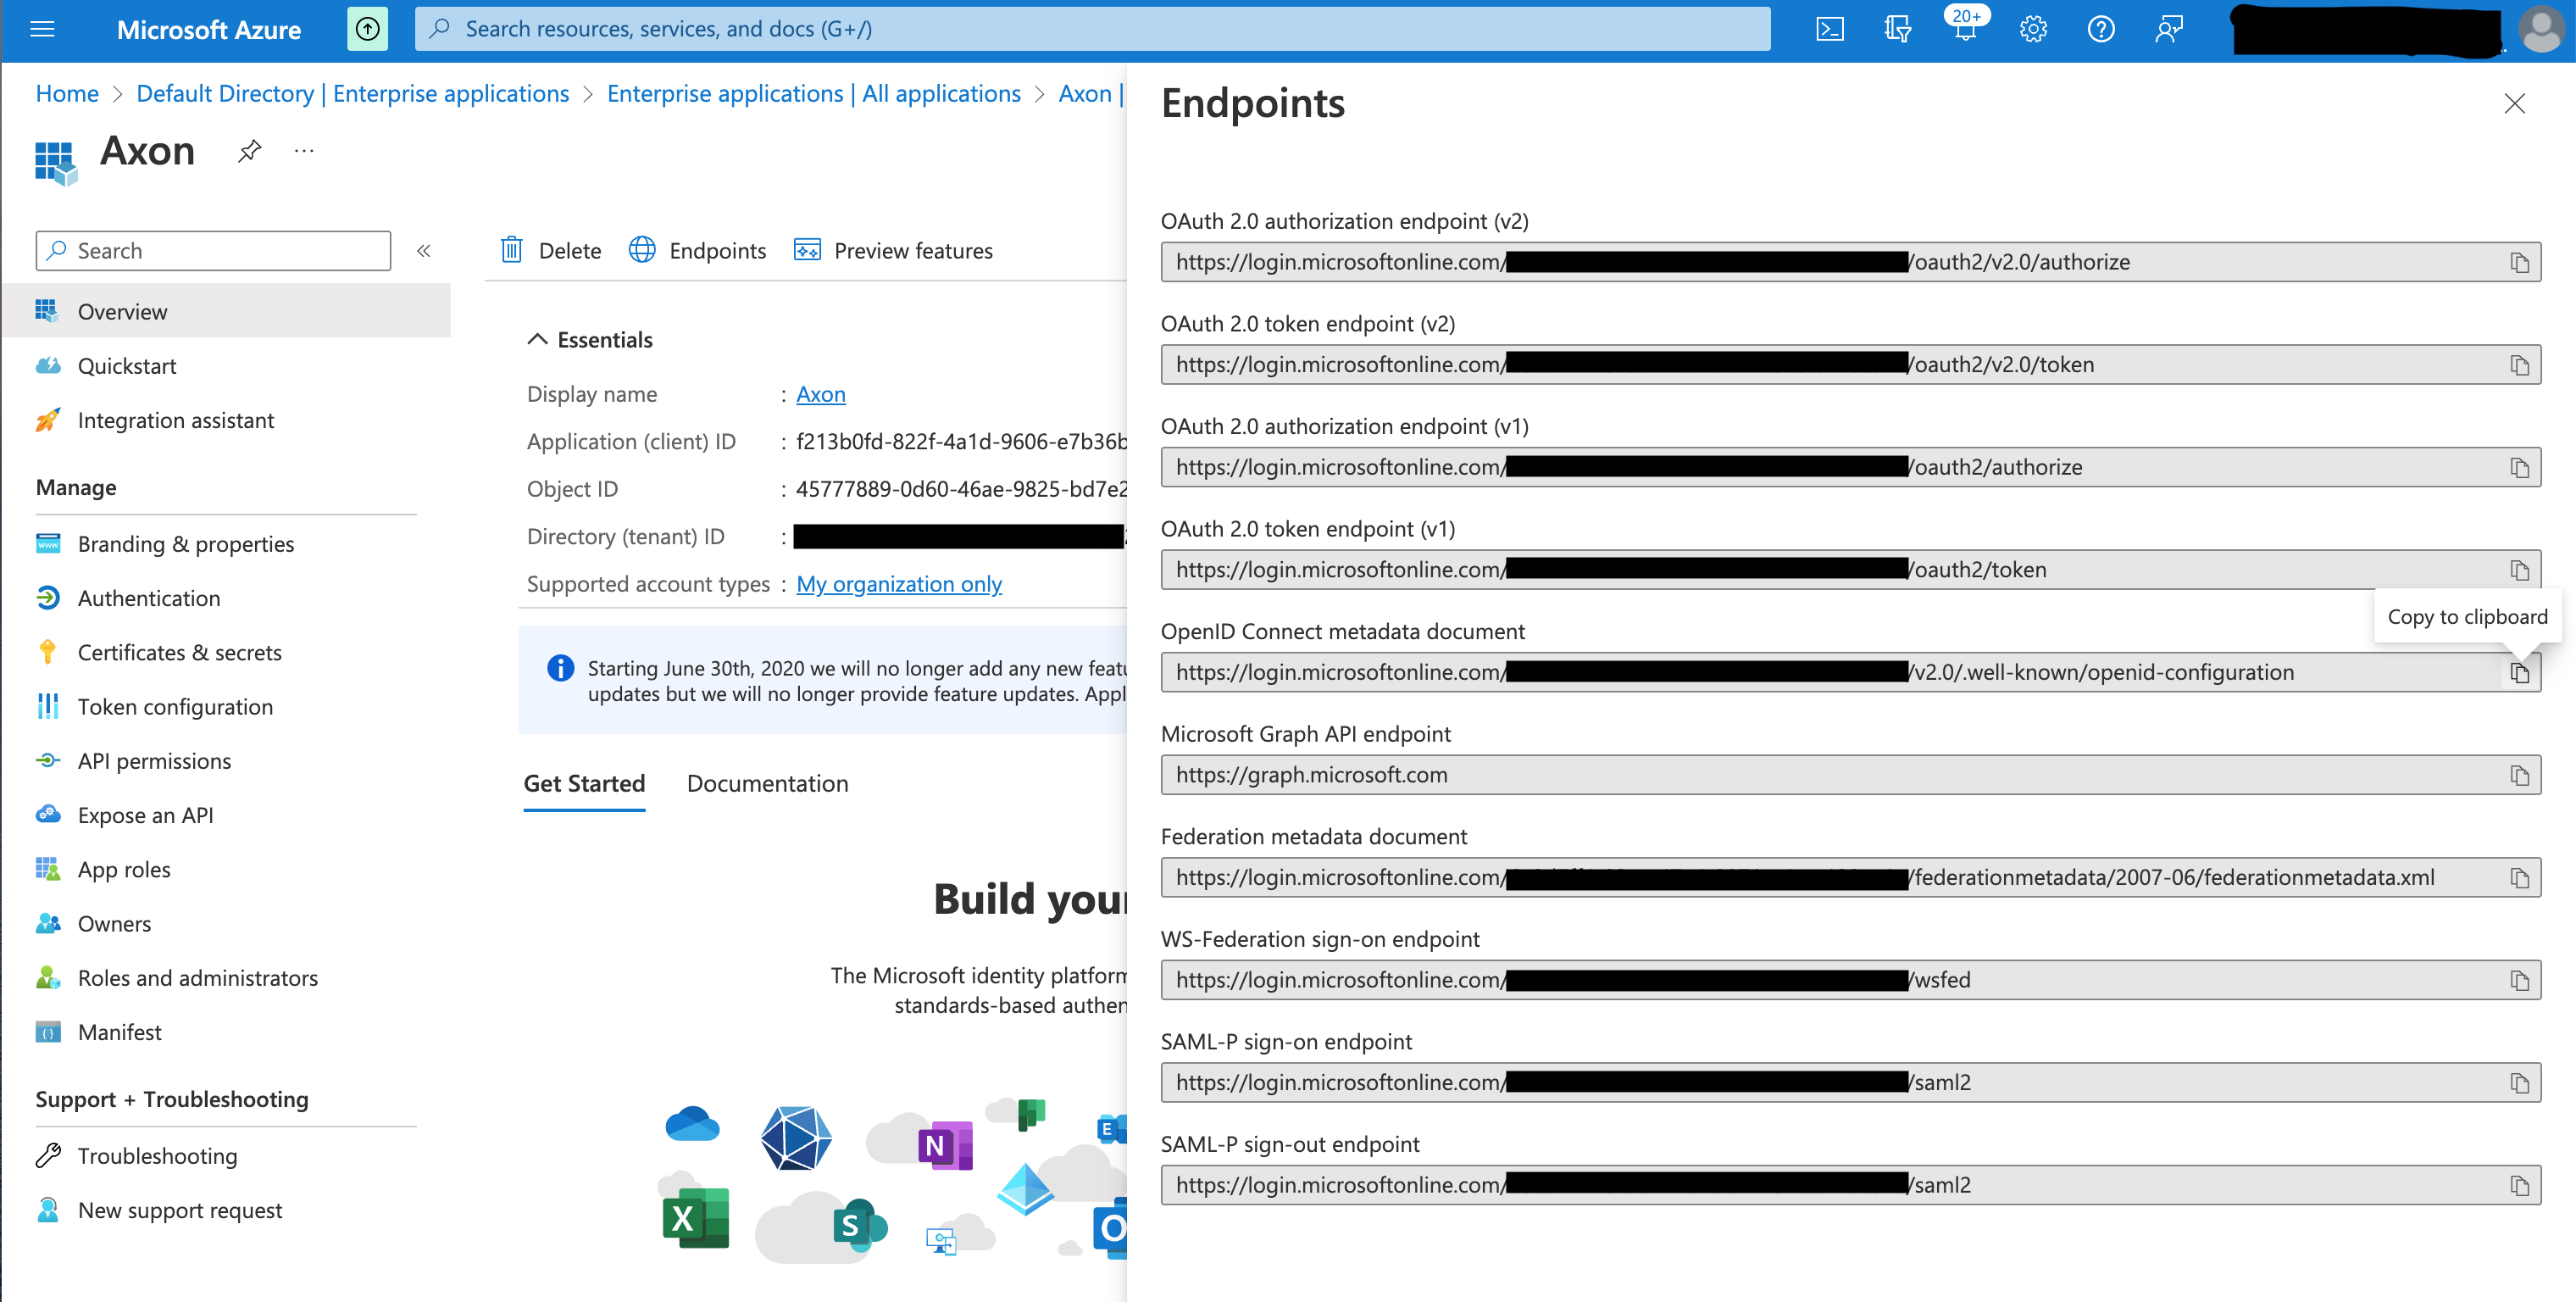
- Copy the URL in the OpenID Connect metadata document field and paste it into your browser.
- From the list of endpoints, copy the authorization_endpoint, token_endpoint, userinfo_endpoint, issuer, and jwks_uri values into a text document. These will all be used to configure this IdP in Axon.
Configure Azure OIDC SSO in Axon
Once all of the steps above have been completed, you can configure the SSO settings for Azure OIDC in Axon.
To configure single sign-on, from the Single Sign-On screen in Axon:
- Click Add SSO provider.
The Single Sign-On Settings window appears.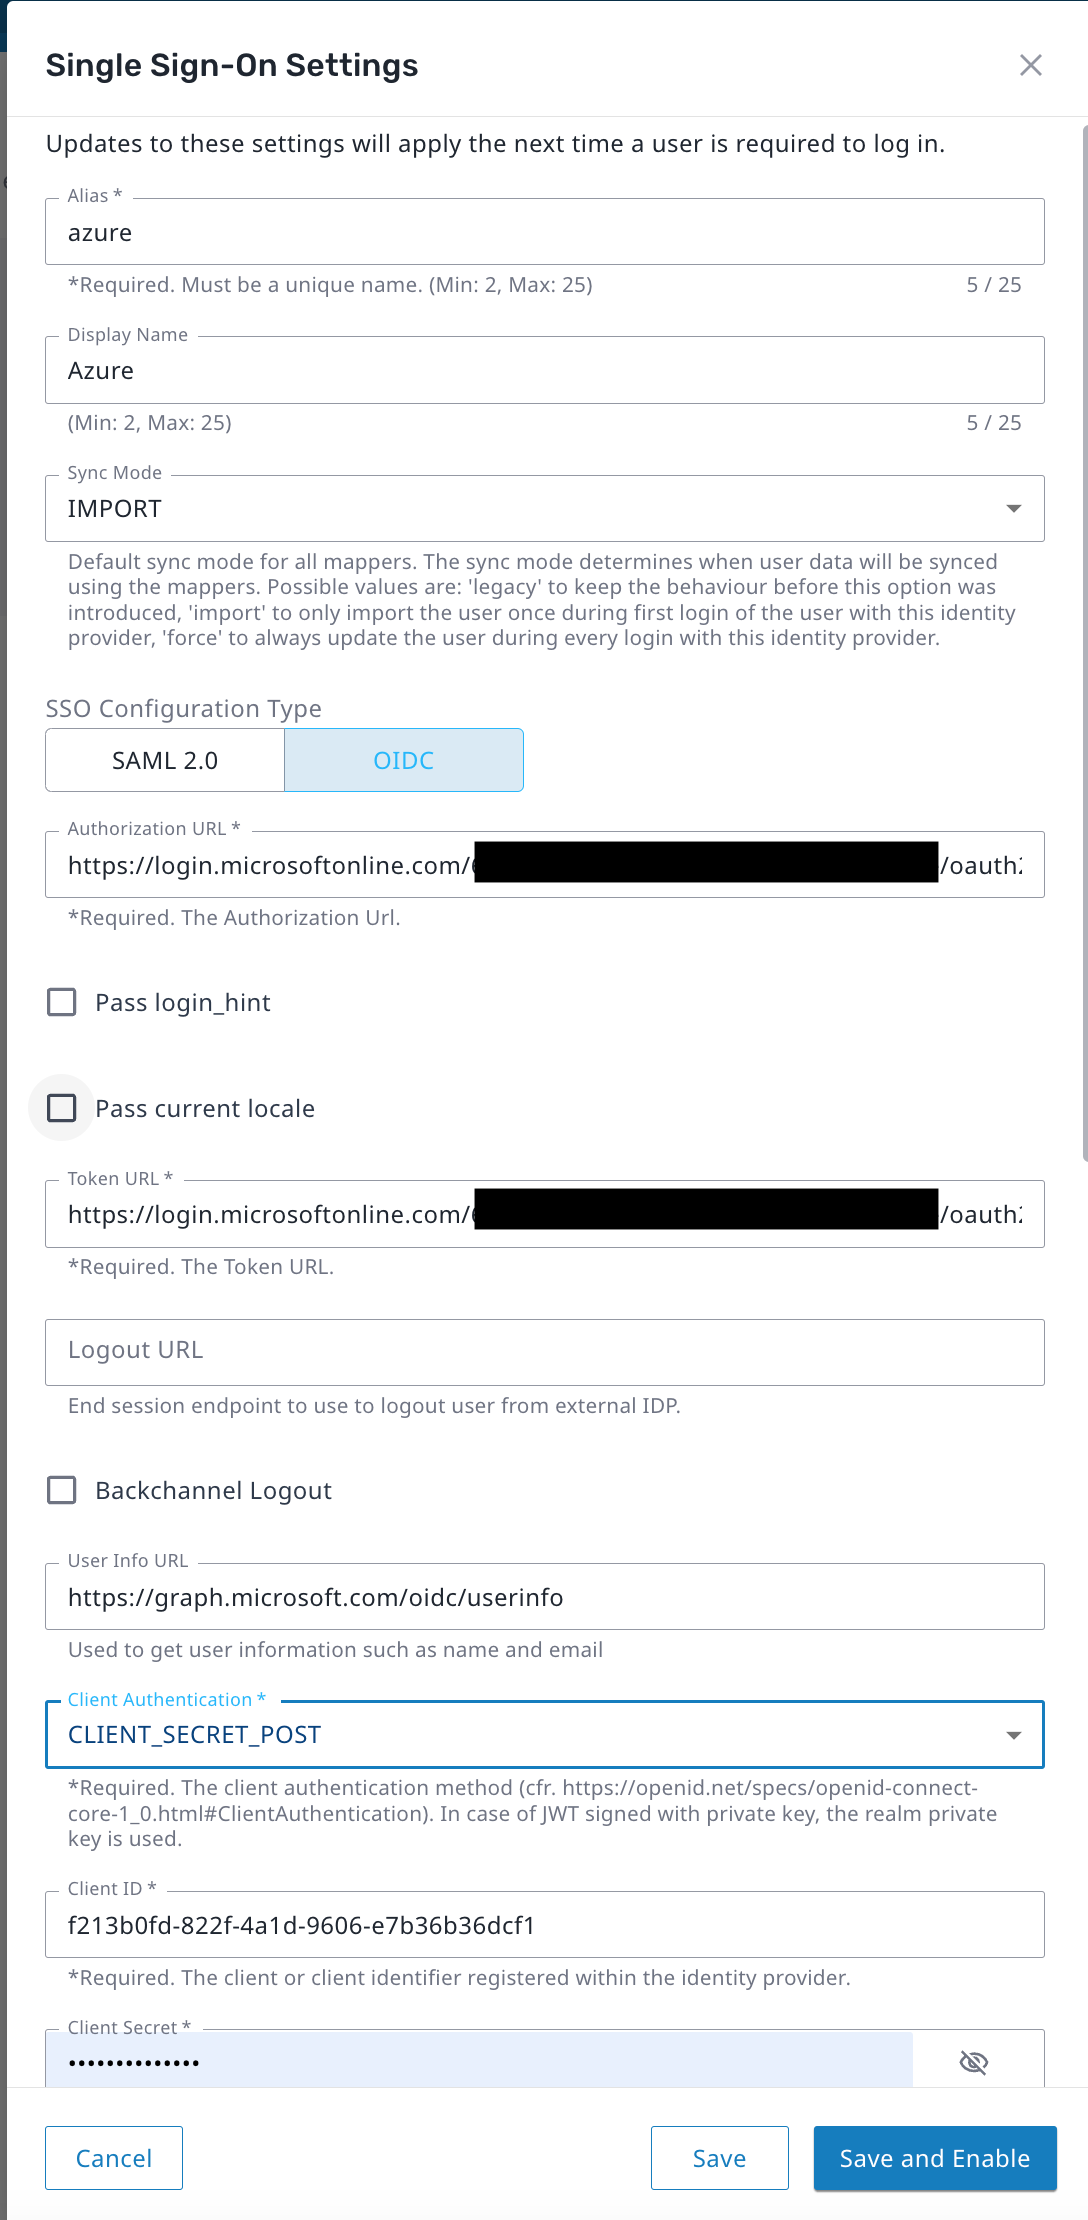
- Enter the Alias configured in Azure above.
- Enter a unique Display Name to use when displaying the IdP within Axon.
- Select OIDC as the SSO Configuration Type.
- Enter the authorization_endpoint obtained in the previous section as the Authorization URL.
- Enter the token_endpoint obtained in the previous section as the Token URL.
- Enter the userinfo_endpoint obtained in the previous section as the User Info URL.
- Open the Client Authentication drop-list and select CLIENT_SECRET_POST.
- Enter the Application (client) ID obtained in the previous section as the Client ID.
- Enter the client secret Value obtained in the previous section as the Client Secret.
- Open the Prompt drop-list and select NOT_SPECIFIED.
- Check the boxes for Validate Signature and Use JWKS URL.
- Enter the jwks_uri obtained in the previous section as the JWKS URL.
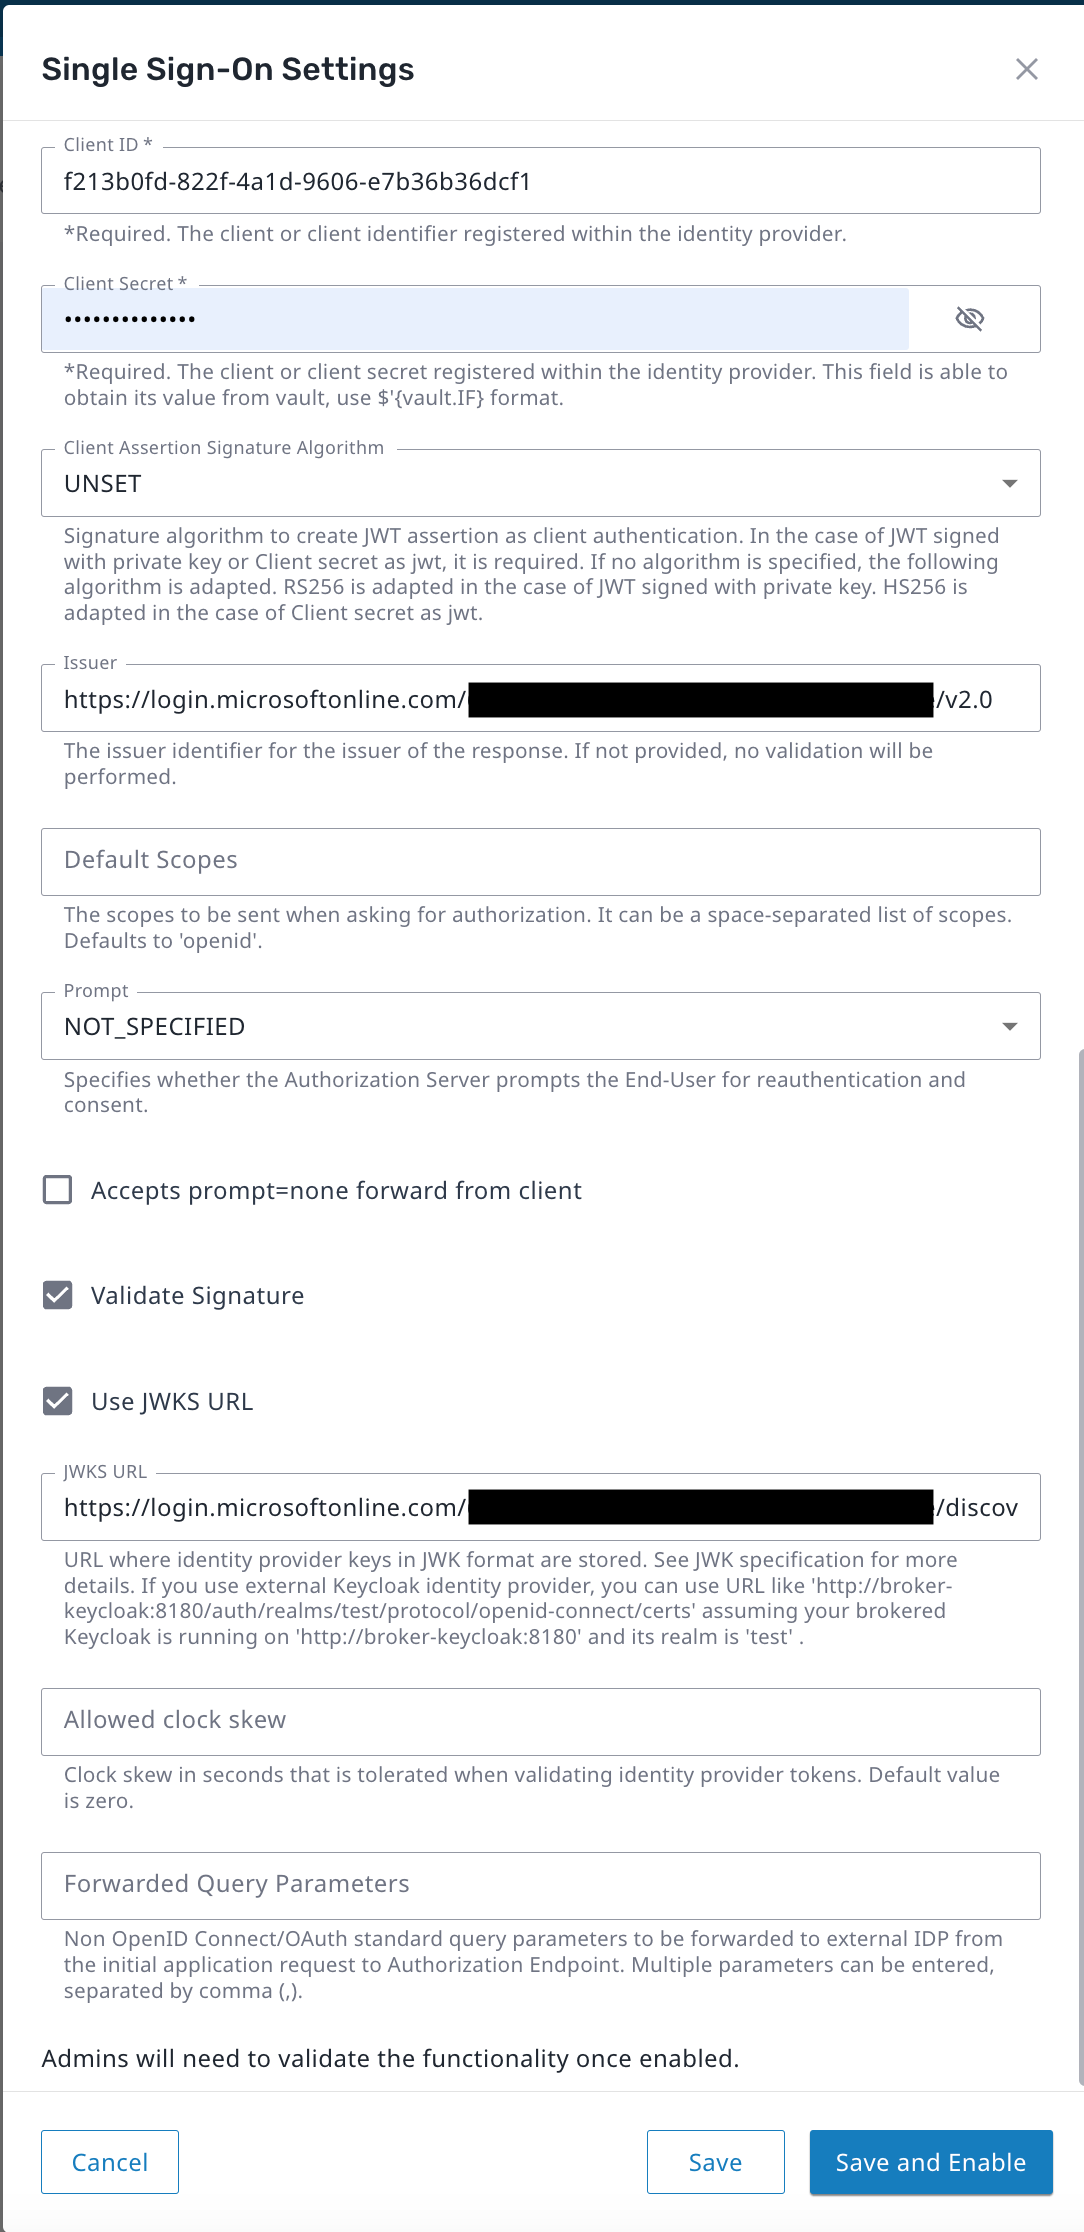
- Click Save and Enable.
- Log out from Axon, and then click Return to Login.
A button allowing for Azure SSO is available.