
Axon Data Export
Axon allows you to easily export raw log data into an Amazon S3 bucket for review outside of the UI.
The amount of data you are able to export is limited by your Axon License.
The export of raw log data occurs during message processing. Once raw log data has been exported to the Amazon S3 bucket, you can utilize AWS Athena to search this data using SQL-style queries.
Only log data can be exported to Amazon S3; no Audit logs or Streaming Analytics logs will be exported.
To view the Data Export screen in Axon, from the Dashboard:
Click the Administration cog in the lower-left hand corner.
Click Data Export in the Overview section.
The Data Export screen appears.
The Data Export screen contains the following three sections:
Section | Description |
|---|---|
Total Exported | Displays the total amount of data that has been exported from Axon to an Amazon S3 bucket. |
Last Activity | Displays the data and time of the most recent Axon data export. |
Settings | Displays the ARN of the Amazon S3 bucket used to collect raw log data from Axon. |
Create a Tenant Bucket
An Amazon S3 bucket is required to receive exported Axon data.
In order for the bucket to properly collect data from Axon, the region setting must be one of the following, depending on your region:
US-based clients: US West (Oregon) us-west-2
EU-based clients: EU Central (Frankfurt) eu-central-1
To create an S3 bucket, from the AWS homepage:
In the left-hand panel, click Storage, and then click S3.
In the left-hand panel, click Buckets.
On the right-hand side of the buckets list, click Create Bucket.
The Create bucket page appears.For the Bucket type, leave General purpose selected.
Name the bucket following the following naming convention:
axon-firehose-<YourAxonTenantName>Configure the bucket’s security settings (such as the Object Ownership and Public access settings) in line with your organization’s guidelines.
Click Create Bucket.
The bucket is successfully created.Click on the name of the newly-created bucket in the list of available buckets.
Click on the Permissions tab.
Under Bucket policy, click Edit.
Modify the bucket policy, entering the JSON policy received during your Axon onboarding process.
Refer to the image below for an example policy: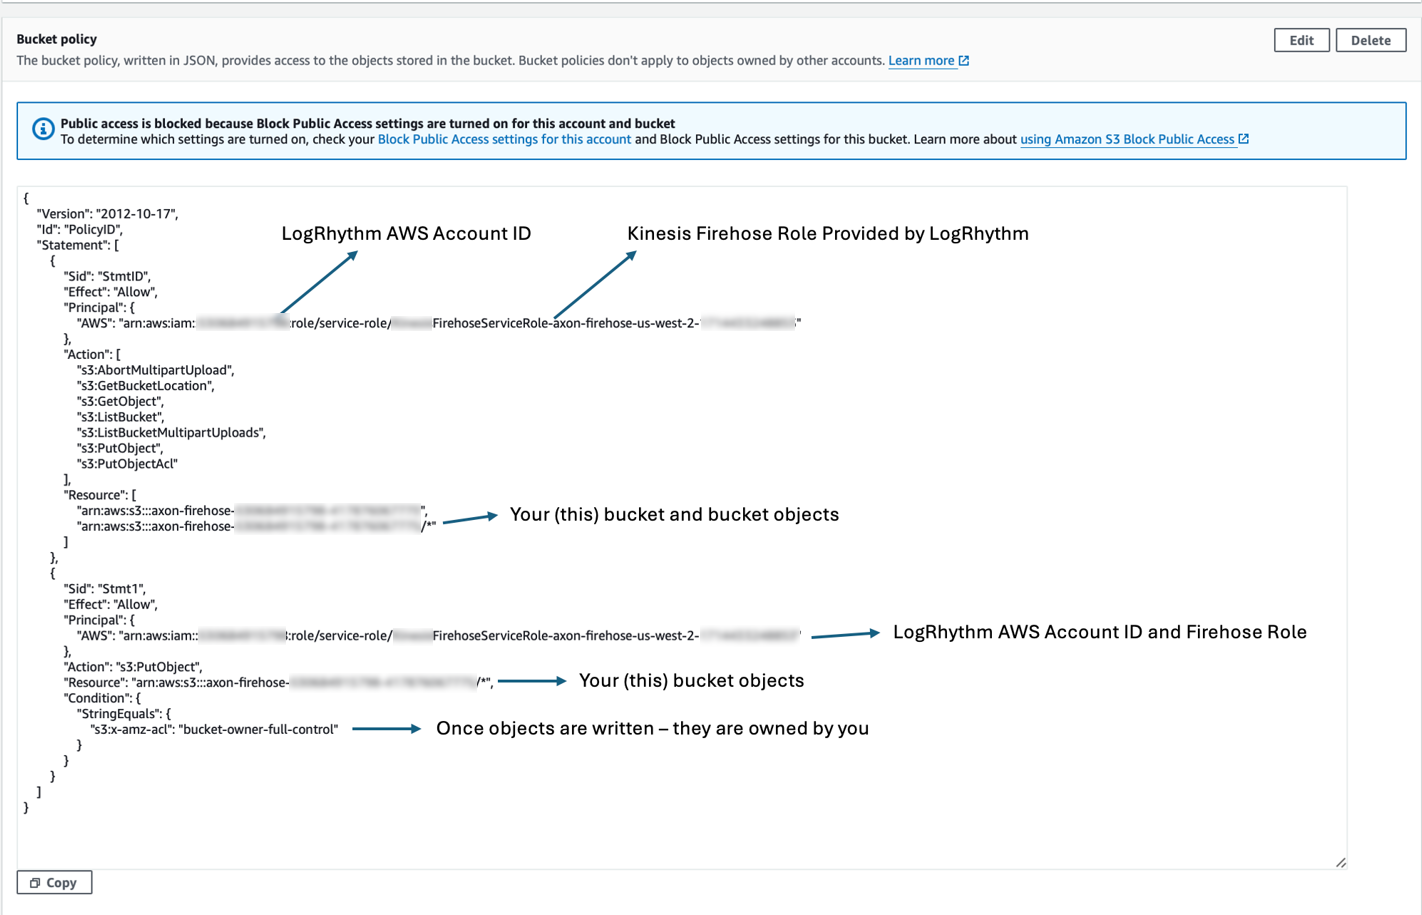
If you did not receive the sample policy when you signed up for Axon Data Export, contact your salesperson or project manager.
Once the policy has been entered, click Save changes.
Save the changes to the permissions.
Return to the list of buckets, click the circle next to the new bucket to select it, and then click Copy ARN.
The ARN is needed to configure the bucket for data export within Axon, so save this in a text file for later use.
Connect Axon to an Amazon S3 Bucket
Once your S3 bucket have been configured, you can connect Axon to the S3 bucket for data export.
From the Data Export screen:
Enter the S3 bucket’s ARN into the External Storage Location field.
The ARN should have a format similar to: arn:aws:s3:::axon-test
Click Connect.
A Successfully connected to the S3 bucket message appears if the test connection was successful.