This page outlines the process required to configure your Microsoft app registrations in preparation for O365 collection.
Office 365 Login URL
The following are the login URLs for various available Microsoft plans. Choose the appropriate URL based on your O365 plan.
|
Plan |
URL |
|---|---|
|
Enterprise Plan |
login.microsoftonline.com |
|
GCC High Government Plan |
login.microsoftonline.us |
Office 365 API URL
The following are the API URLs for various available Microsoft plans. Choose the appropriate URL based on your O365 plan.
|
Plan |
URL |
|---|---|
|
Enterprise Plan |
manage.office.com |
|
GCC Government Plan |
manage-gcc.office.com |
|
GCC High Government Plan |
manage.office365.us |
|
DoD Government Plan |
manage.protection.apps.mil |
Create an Application Registration
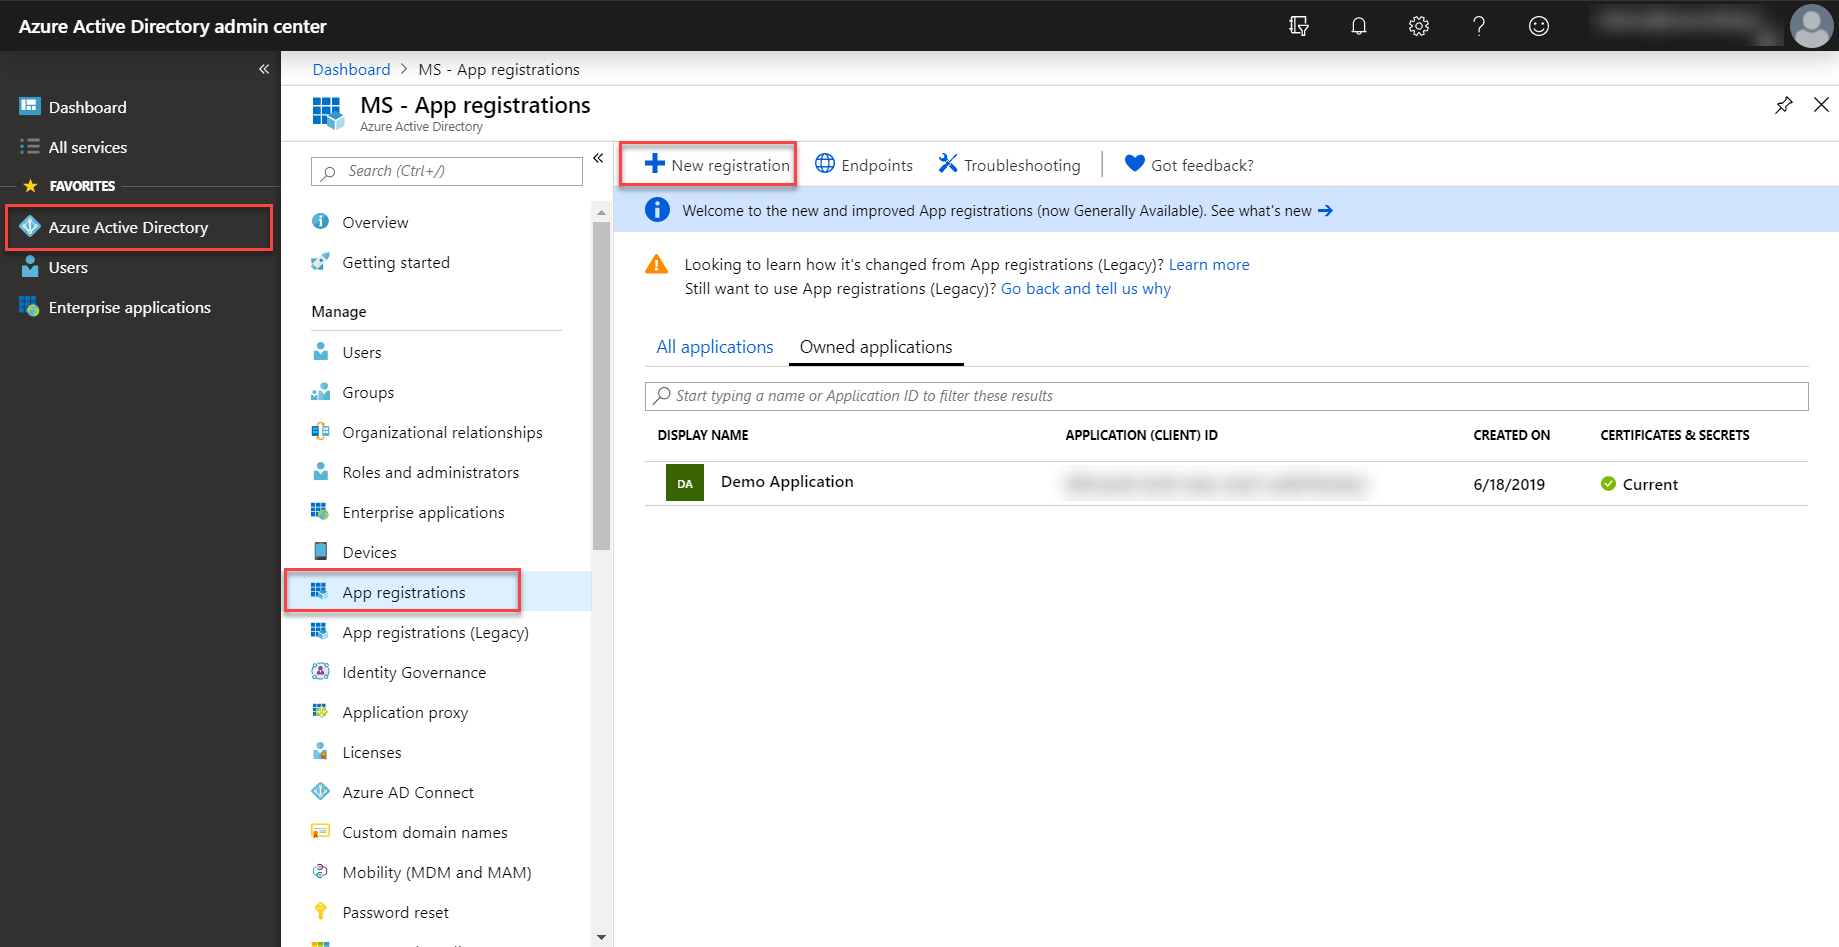
To register an application for collection:
-
Log in to the Azure console at portal.azure.com.
-
Click Azure Active Directory.
-
In the left pane, click App registrations, and then click New registration.
The Register an application page window appears.
-
Enter the application's registration information:
-
In the Name section, enter a meaningful application name to be displayed to users.
-
For Supported account types, select the Accounts in any organizational directory option.
-
Set the Redirect URI to http://localhost.
-
Click on Register to create the application.
-

-
On the app Overview page, copy the Application (client) ID and Directory (tenant) ID for later use.

Specify App Permissions for O365
The next step is to specify exactly what permissions the app requires of the Office 365 Management APIs. To do so, add access to the Office 365 Management APIs to the app, and then specify the permission(s) needed.
-
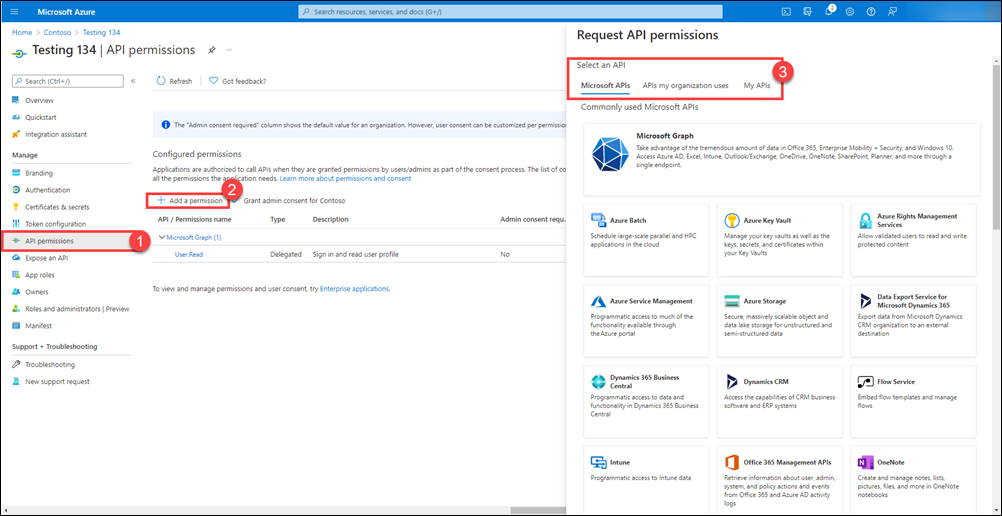
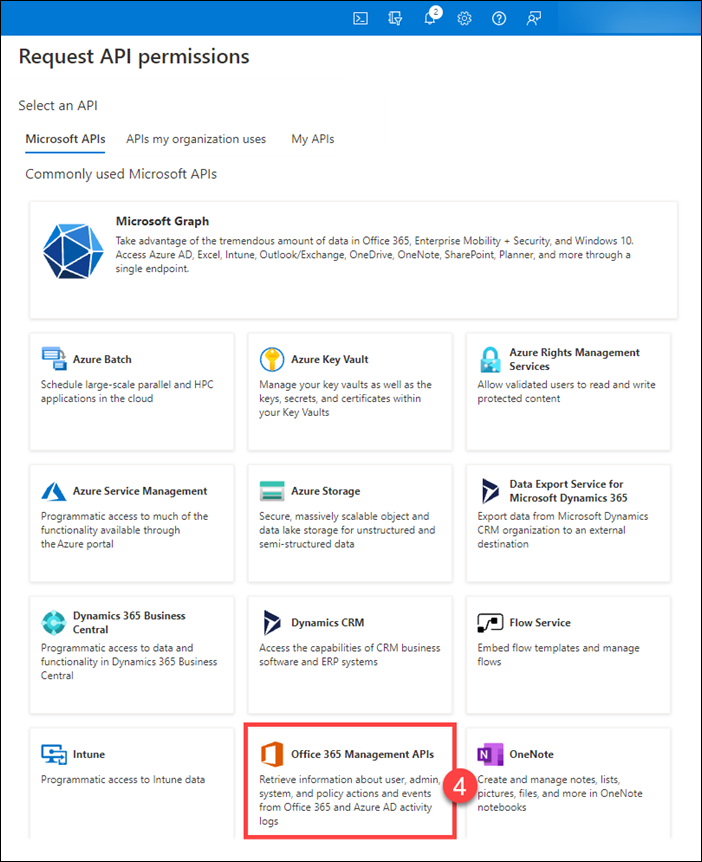
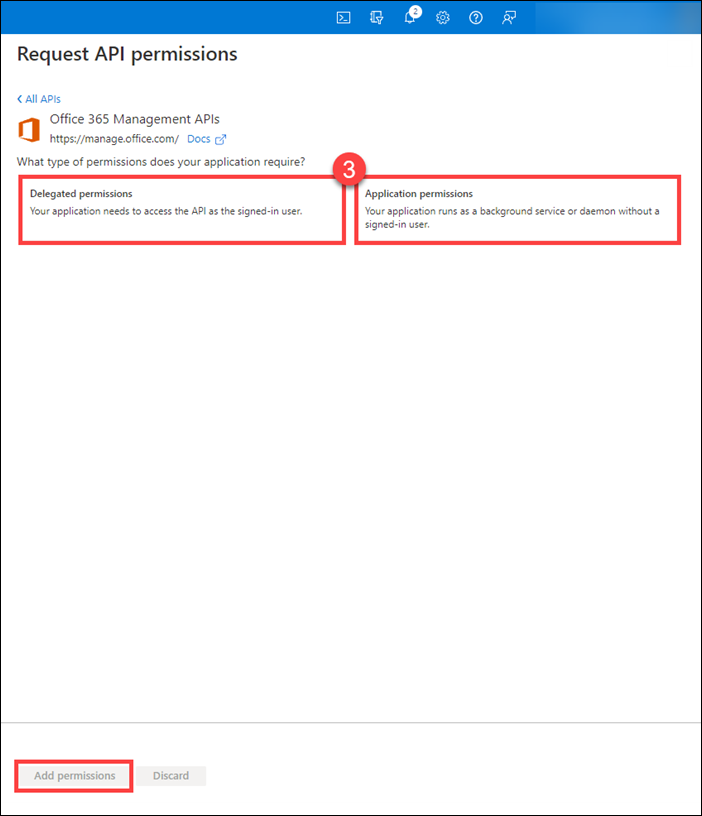
In the Azure Portal, go to App registrations > All applications, select the application, and then select API Permissions (1) in the left pane. Click Add a permission (2) to display the Request API permission (3) flyout page.
-
On the Microsoft APIs tab, select Office 365 Management APIs (4).
-
On the flyout page, select the following types of permissions (3) that the app requires, and then click Add permissions
-
Delegated Permissions. Enables the client app to perform operations on behalf of the signed-in user, such as reading email or modifying the user's profile.
-
Application Permissions. Permissions that enable the client app to authenticate as itself without user interaction or consent, such as an app used by background services or daemon apps.
-
-
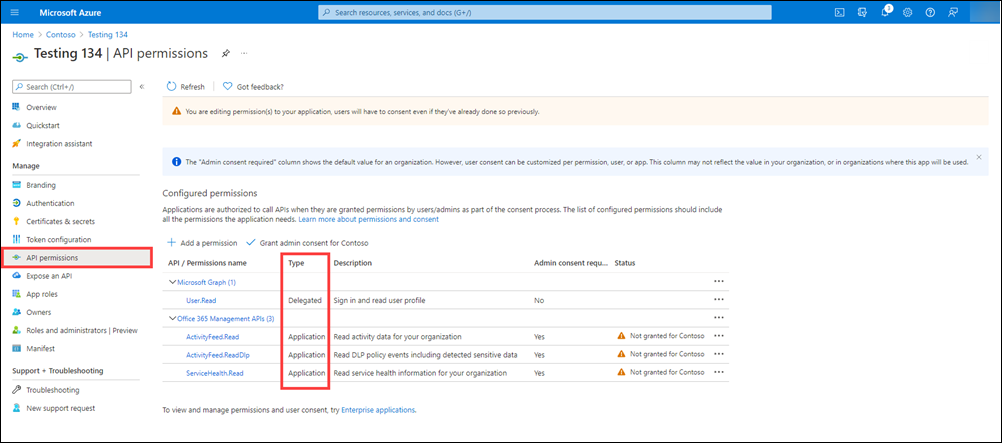
Office Management APIs now appear in the list of applications for which app requires permissions. Select the following permissions:
|
Permission Type |
Permissions to Select |
|---|---|
|
Application |
|
|
Delegated |
|
Refer to the specific API reference for more details about each permission.
-
Select Grant admin consent for "tenant name" to consent to the permissions given to the app.
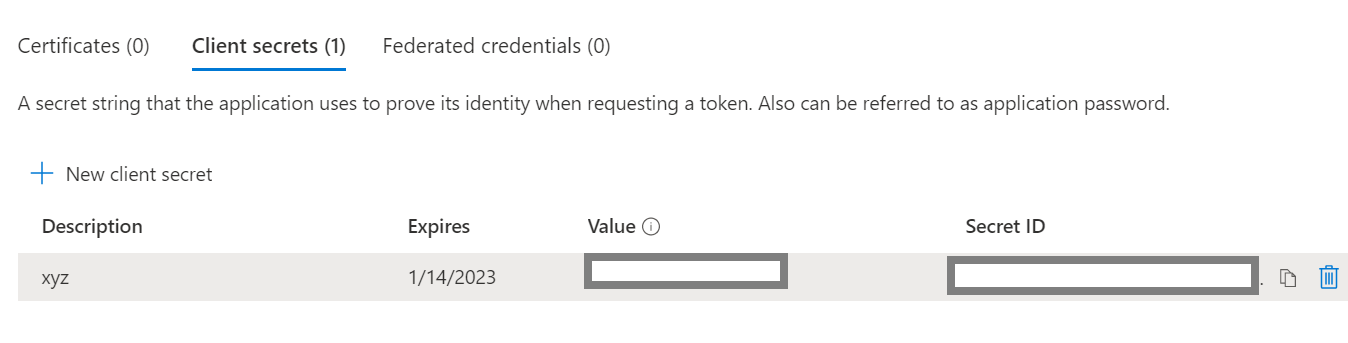
Create the Client ID and Client Secret
The final step in configuring O365 is creating a Client ID and Client Secret. To create these items, from the Azure Portal:
-
Select the application created above.
-
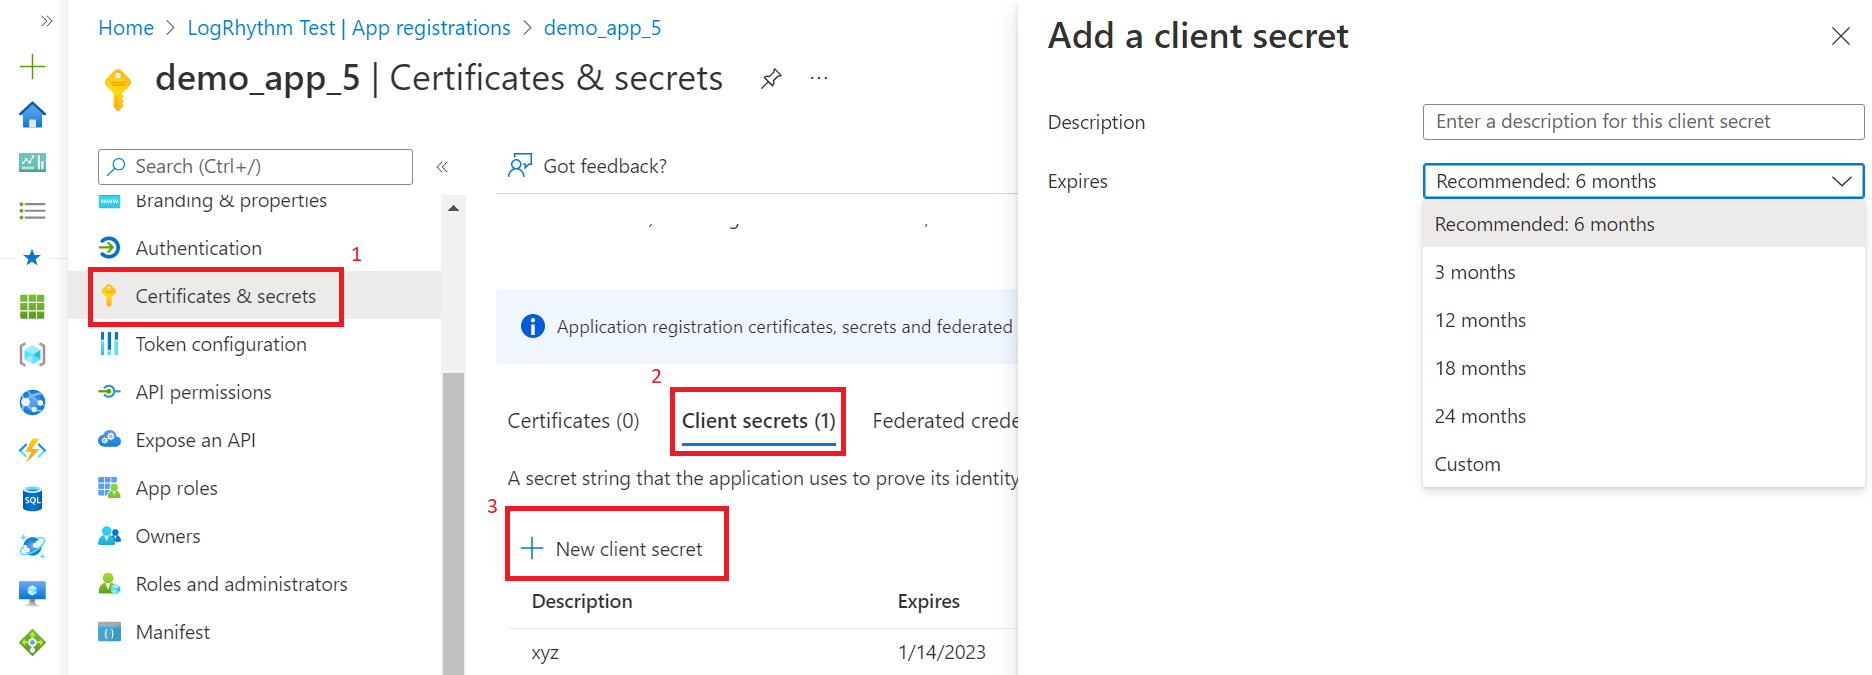
Click Certificates and Secrets, and then Client Secrets.
-
Click New client secret.
The Add a client secret window appears.
-
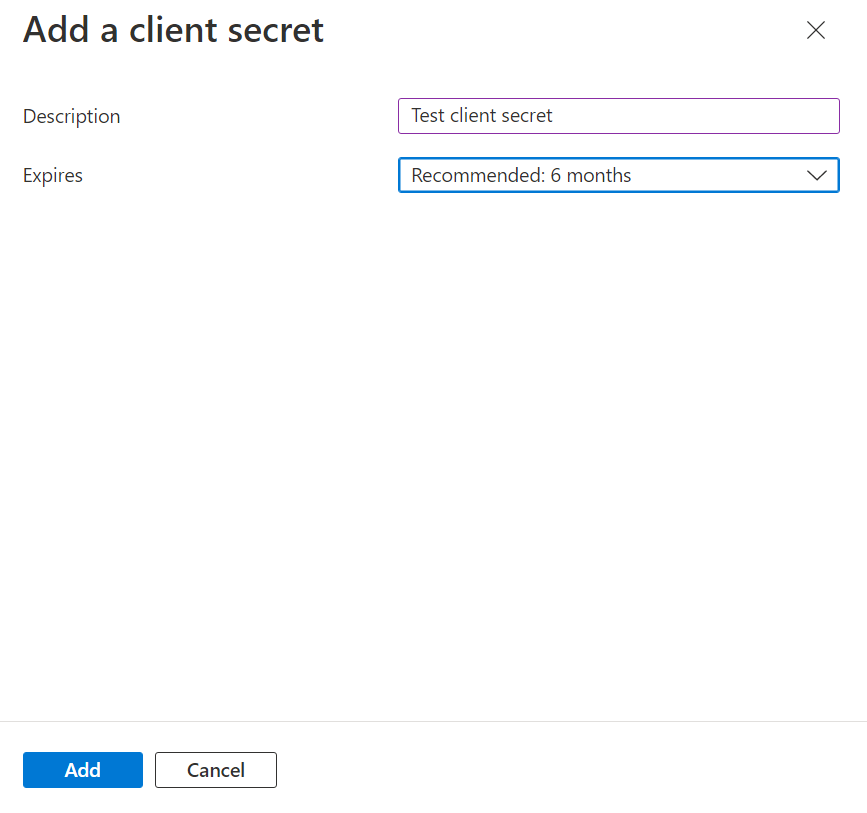
Enter a Description for this client secret.
-
Select the desired expiry period from the Expires drop-list.
-
Click Add.
-
Copy the Value and Secret ID fields, which will be used to initialize the beat.