To configure the Event Hub Beat using Managed Service Identity:
-
In your Azure Portal, click Virtual machines and select the one you wish to configure.
-
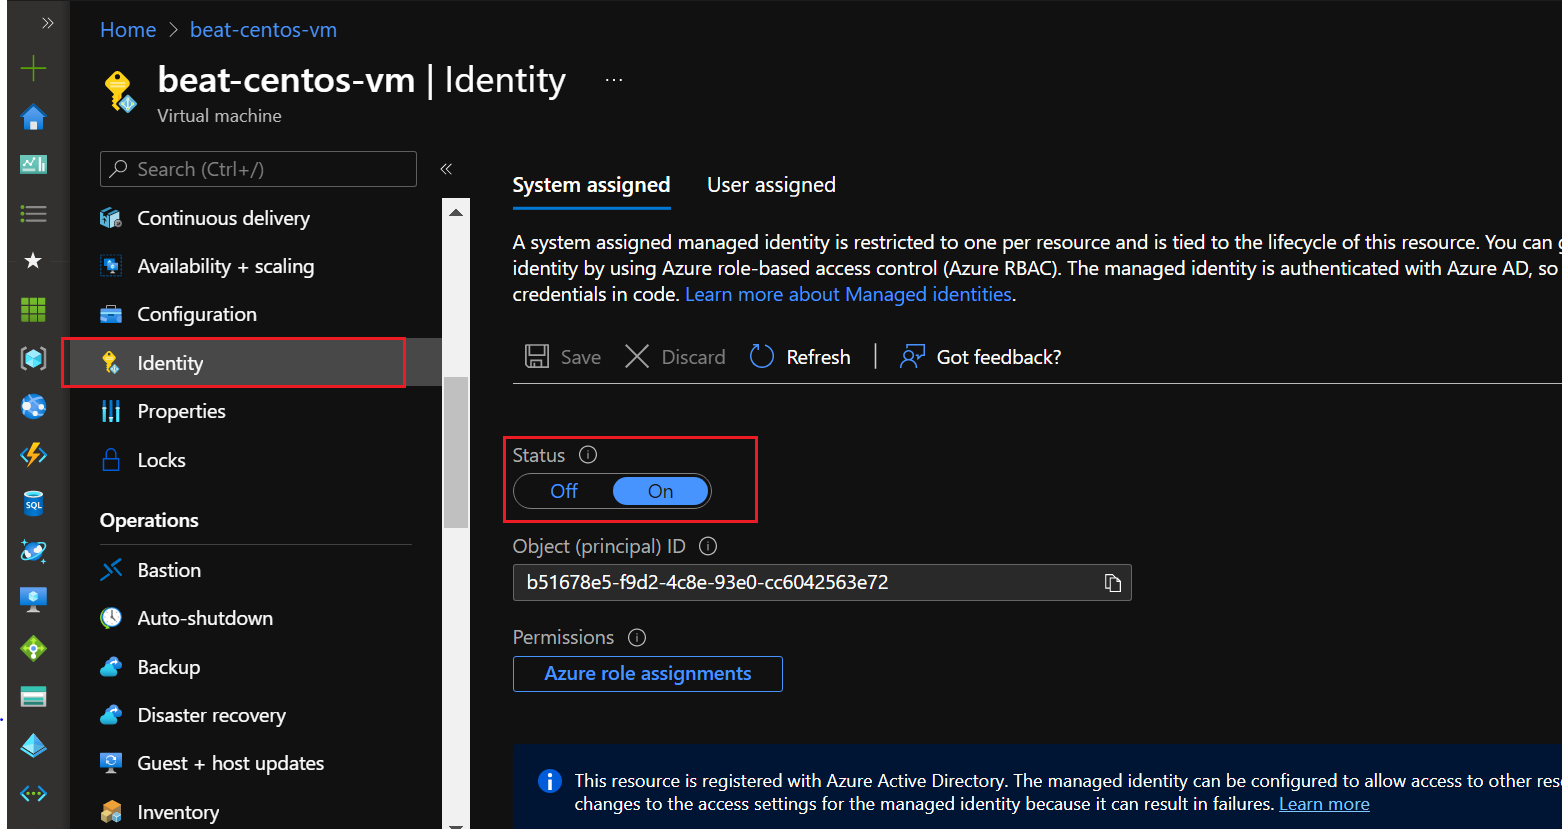
In the menu on the left, click Identity.
-
If the machine is not turned on, set it to On and click Save.
-
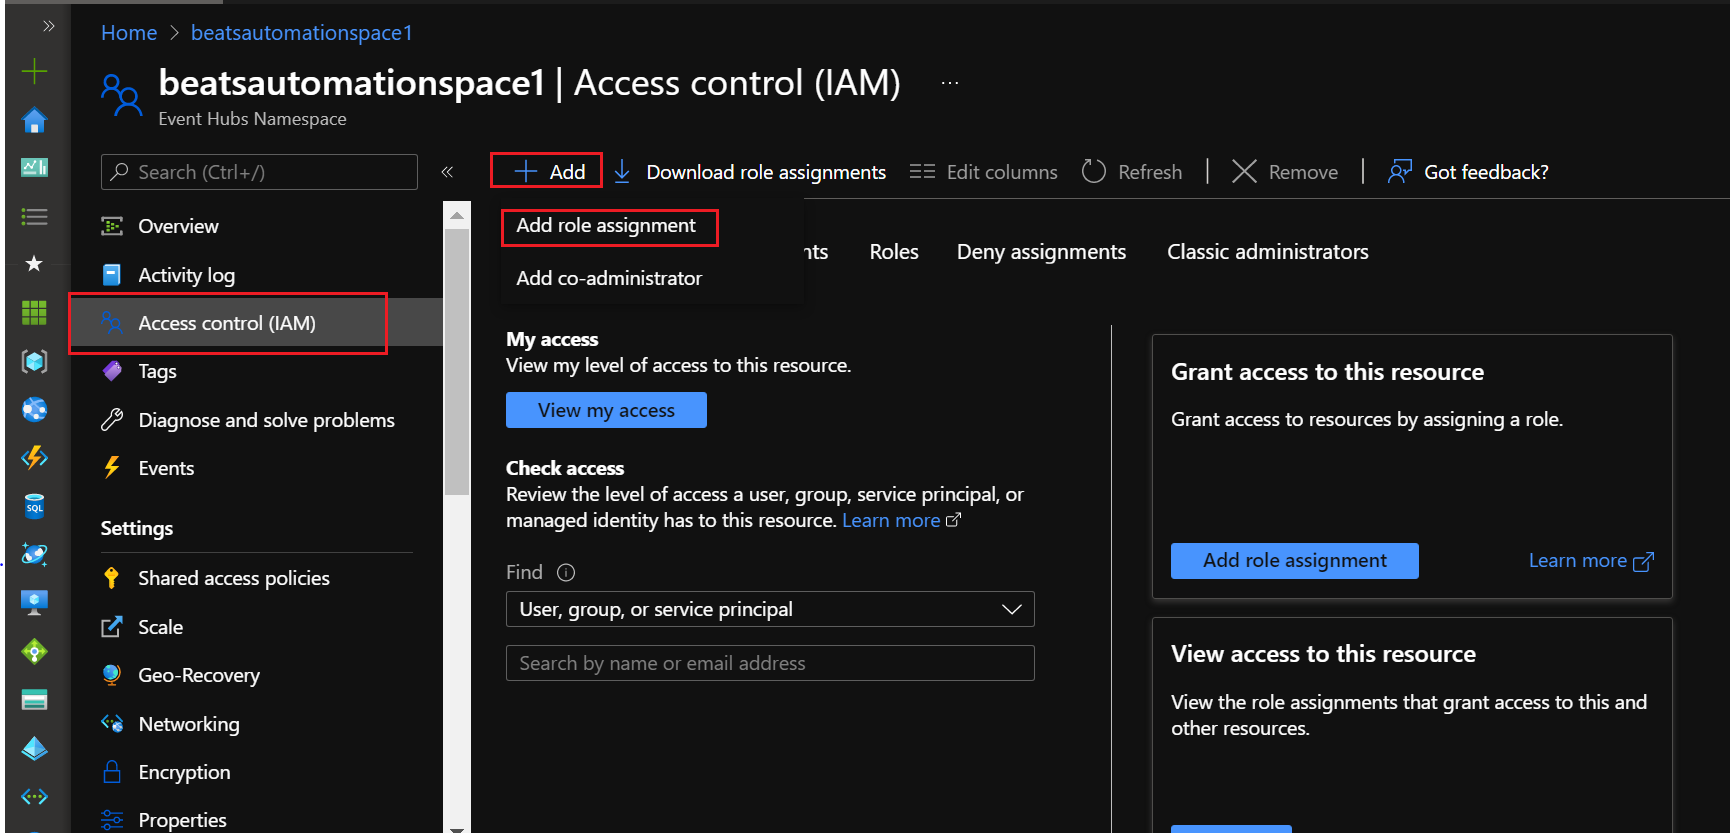
Return to All Services, go to Event Hubs, and select the one you wish to configure.
-
In the menu on the left, click Access Control (IAM).
-
Click Add, Add role assignment, and then the Add a role assignment tile.
If this option is not available to you, you do not have the correct permissions to add a role.
-
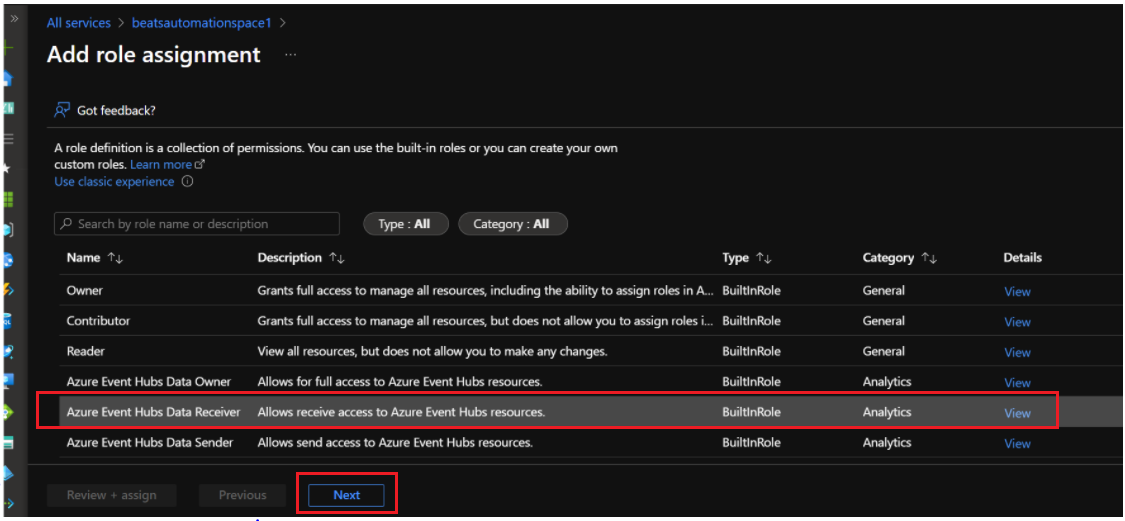
Perform the following steps to add an Azure Event Hubs Data Receiver role assignment:
-
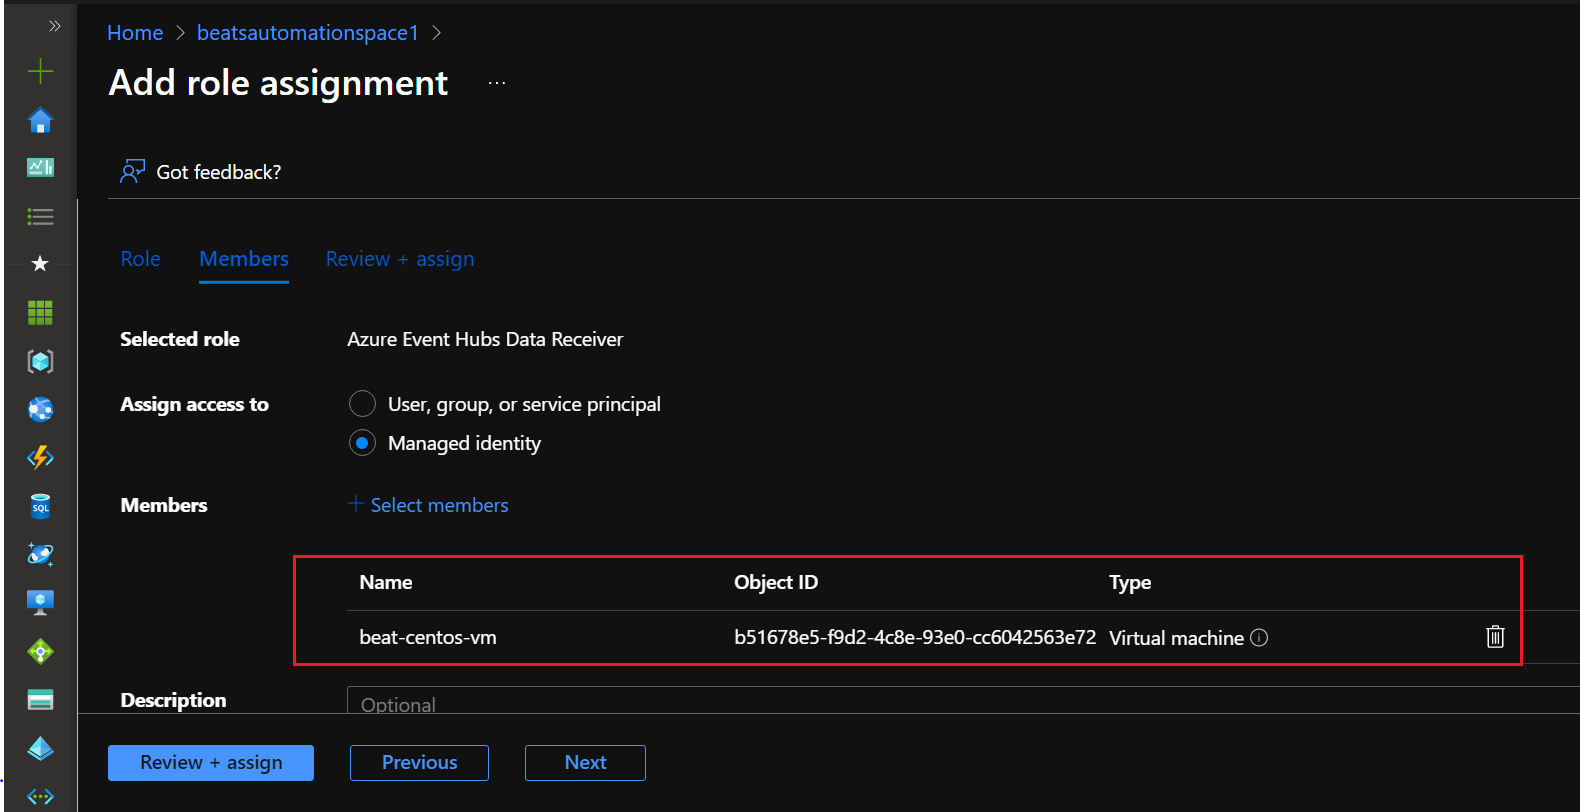
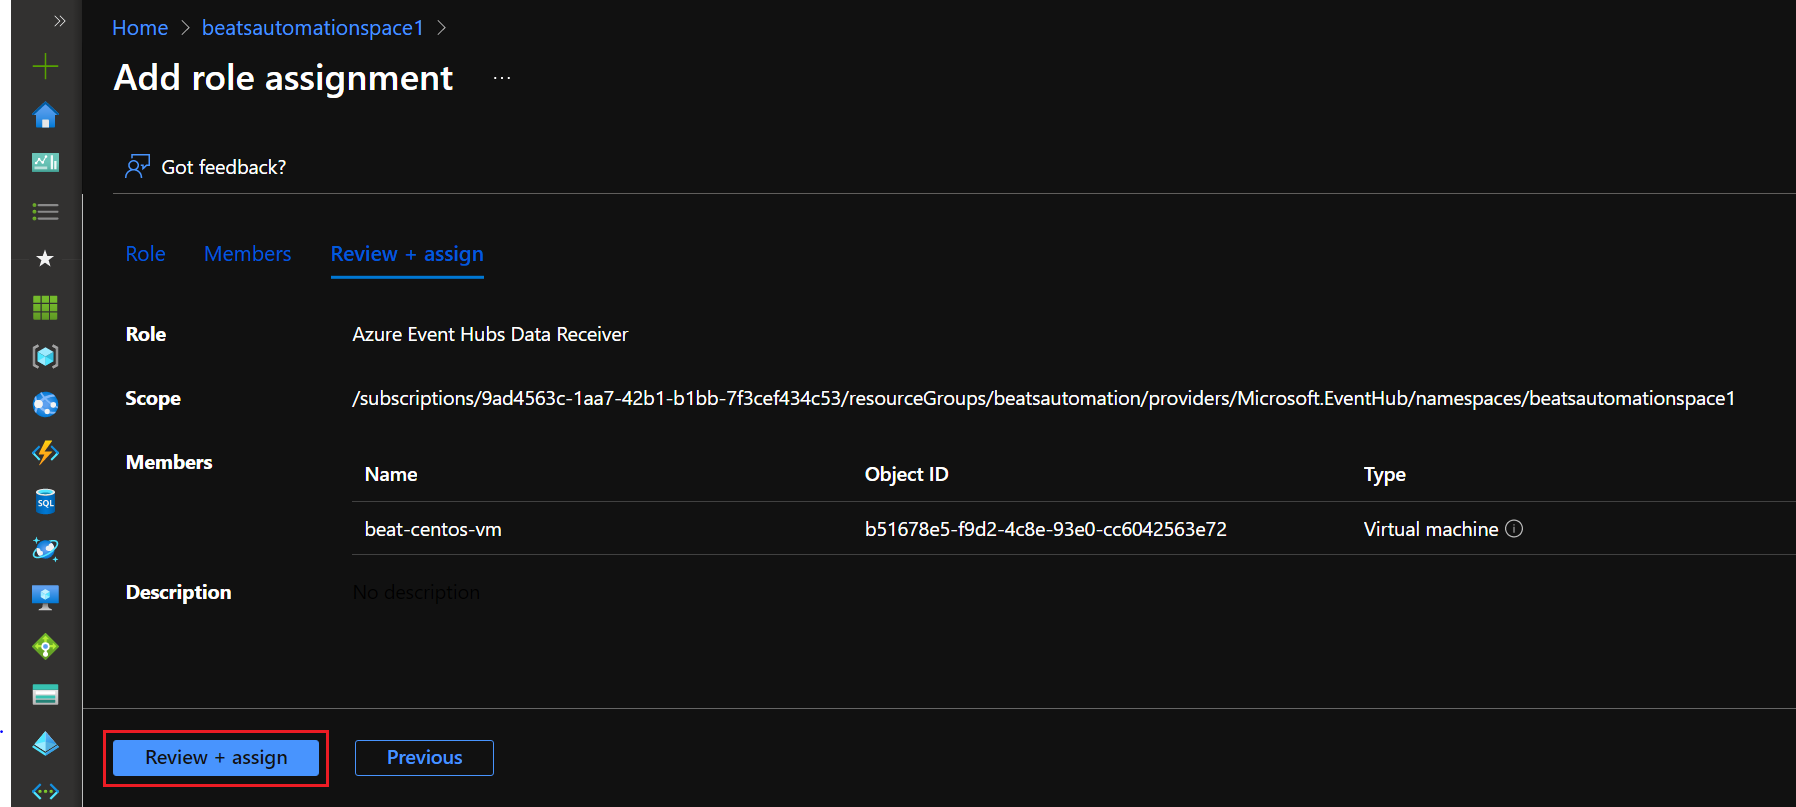
Select Azure Event Hubs Data Receiver and click Next.
-
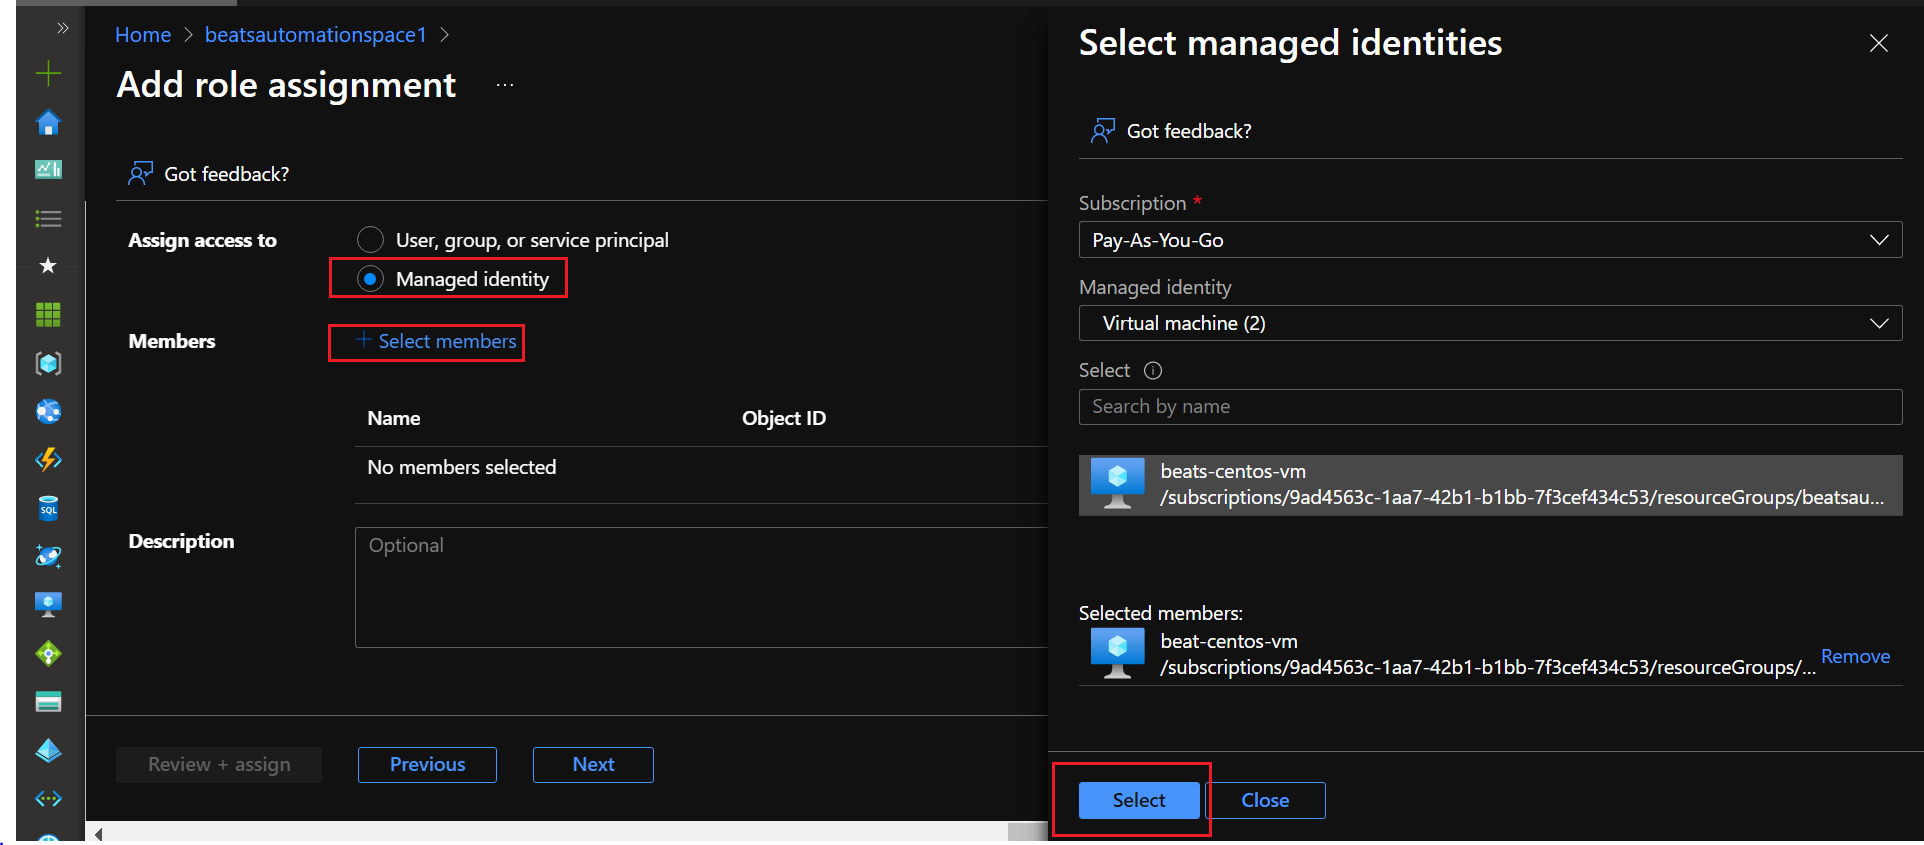
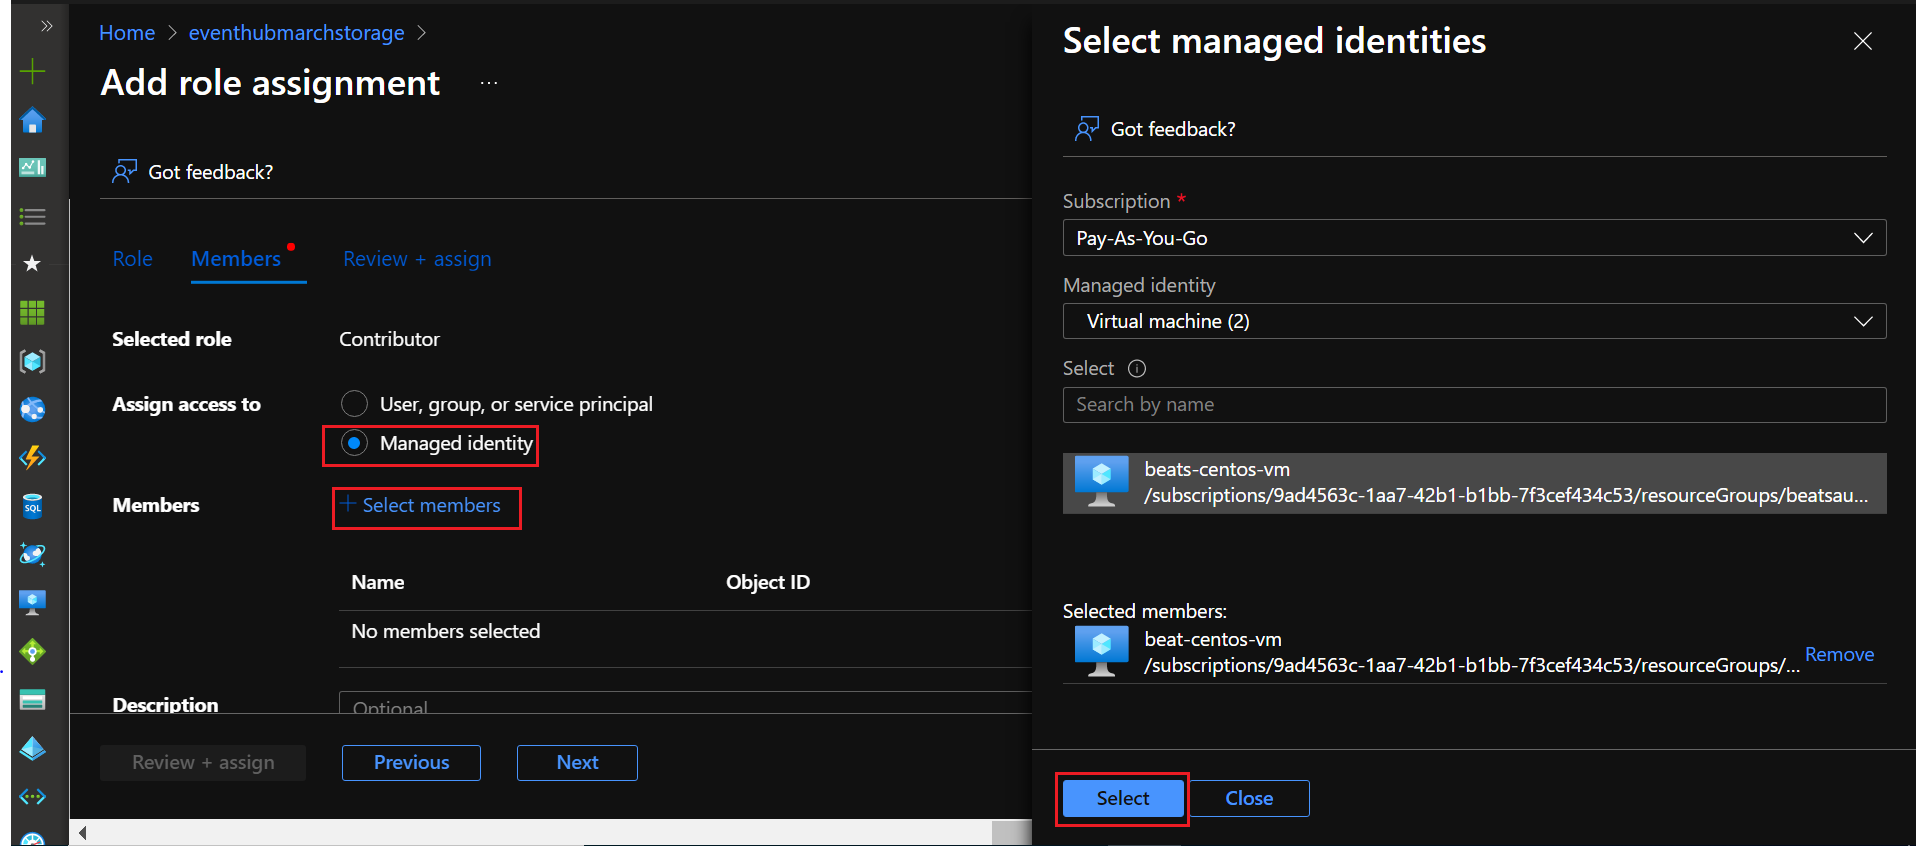
Select Managed Identity, then click Select members.
-
From the Subscription drop-down menu, select Pay-As-You-Go.
-
From the Managed Identity drop-down menu, select Virtual machine.
-
In the Select field, enter the name of your virtual machine.
-
Click on your virtual machine's name when it appears, and then click the Select button.
-
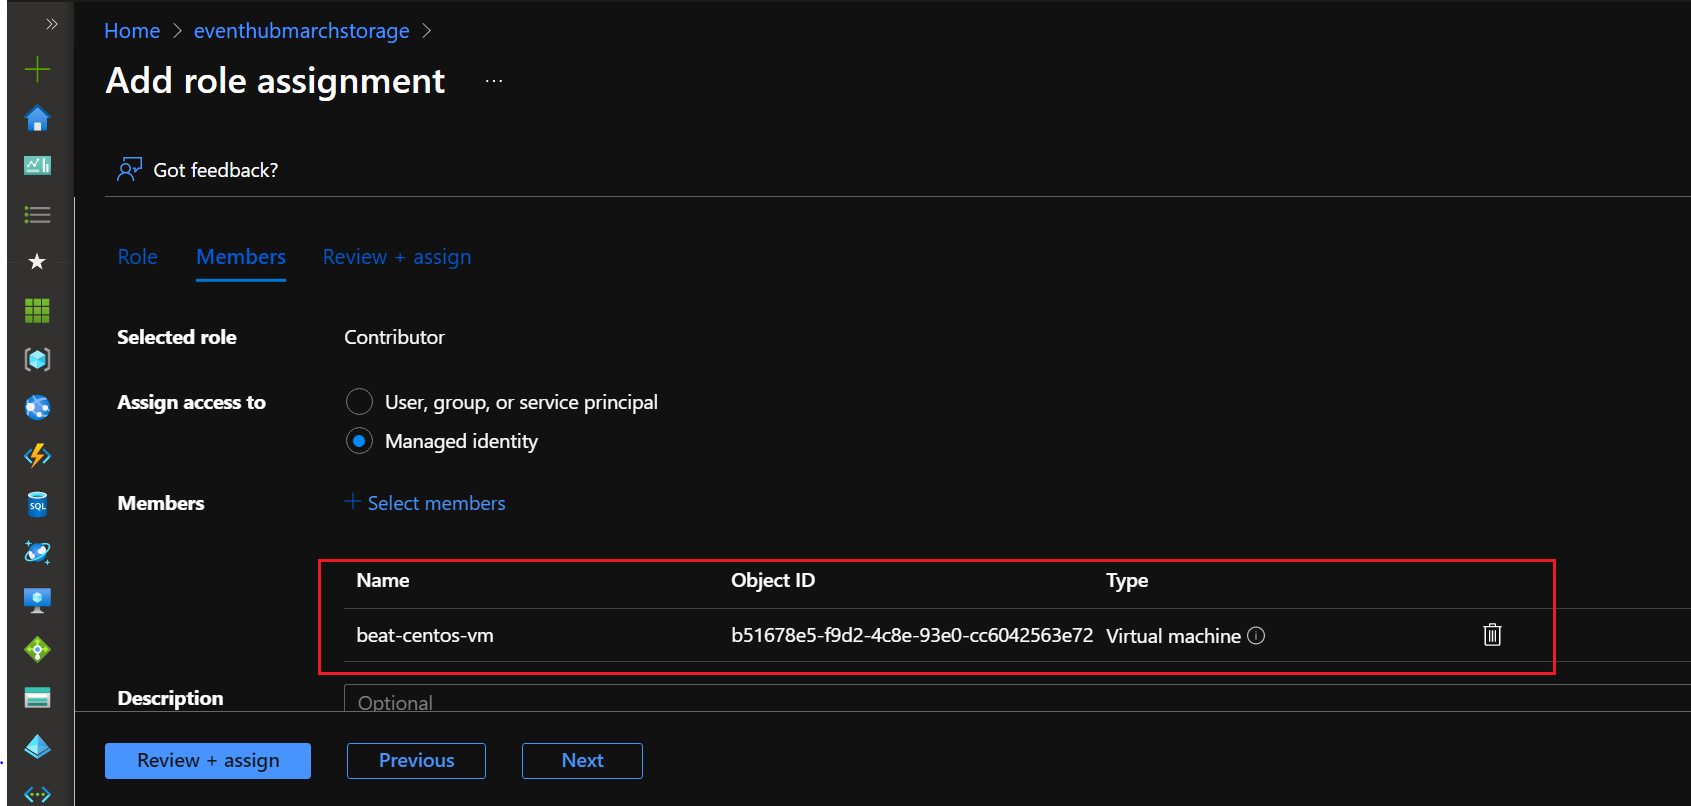
The Added Virtual Machine displays as shown:
-
Click Next, and then click Review + assign.
-
The following message appears after successfully adding the role:

-
-
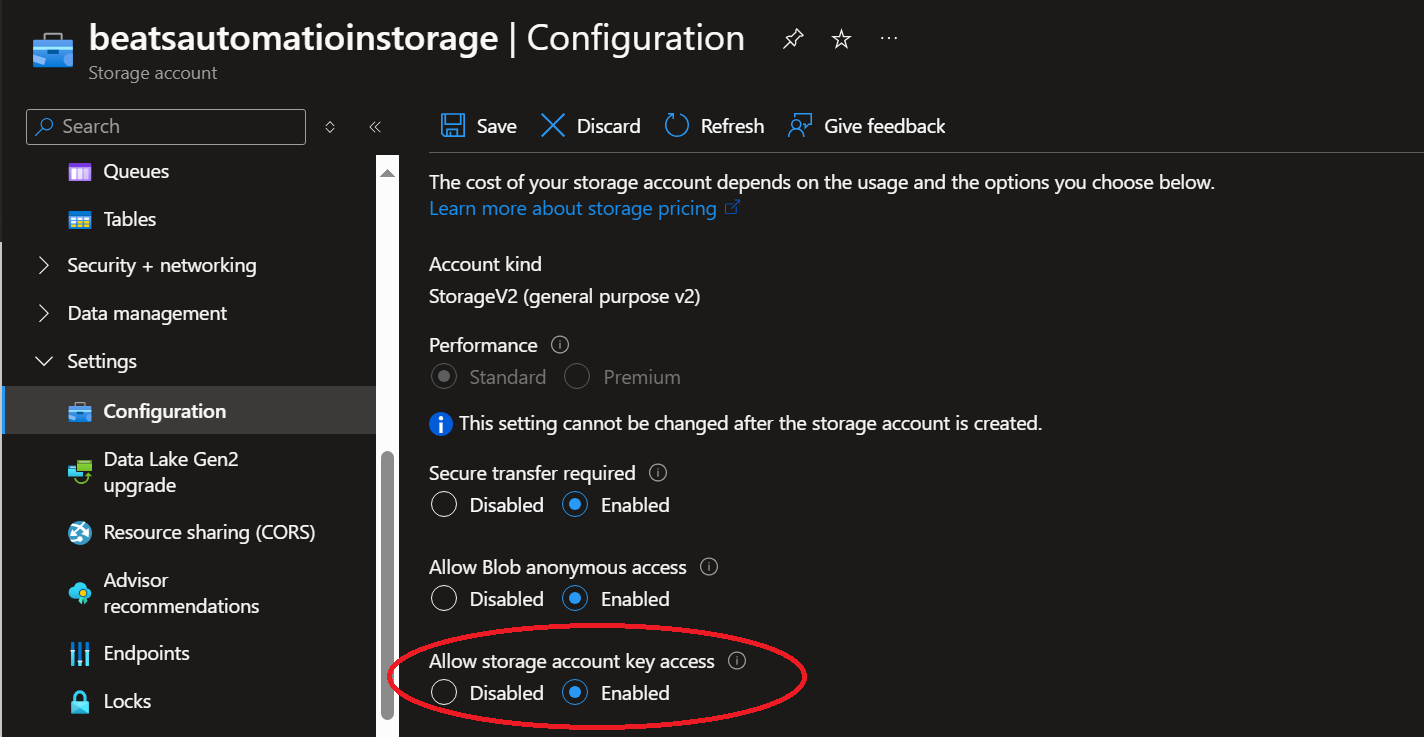
Return to All Services, go to Storage accounts, and select the one you wish to configure.
-
In the menu on the left, expand Settings, and then click Configuration.
-
Under Allow storage account key access, click Enabled.
-
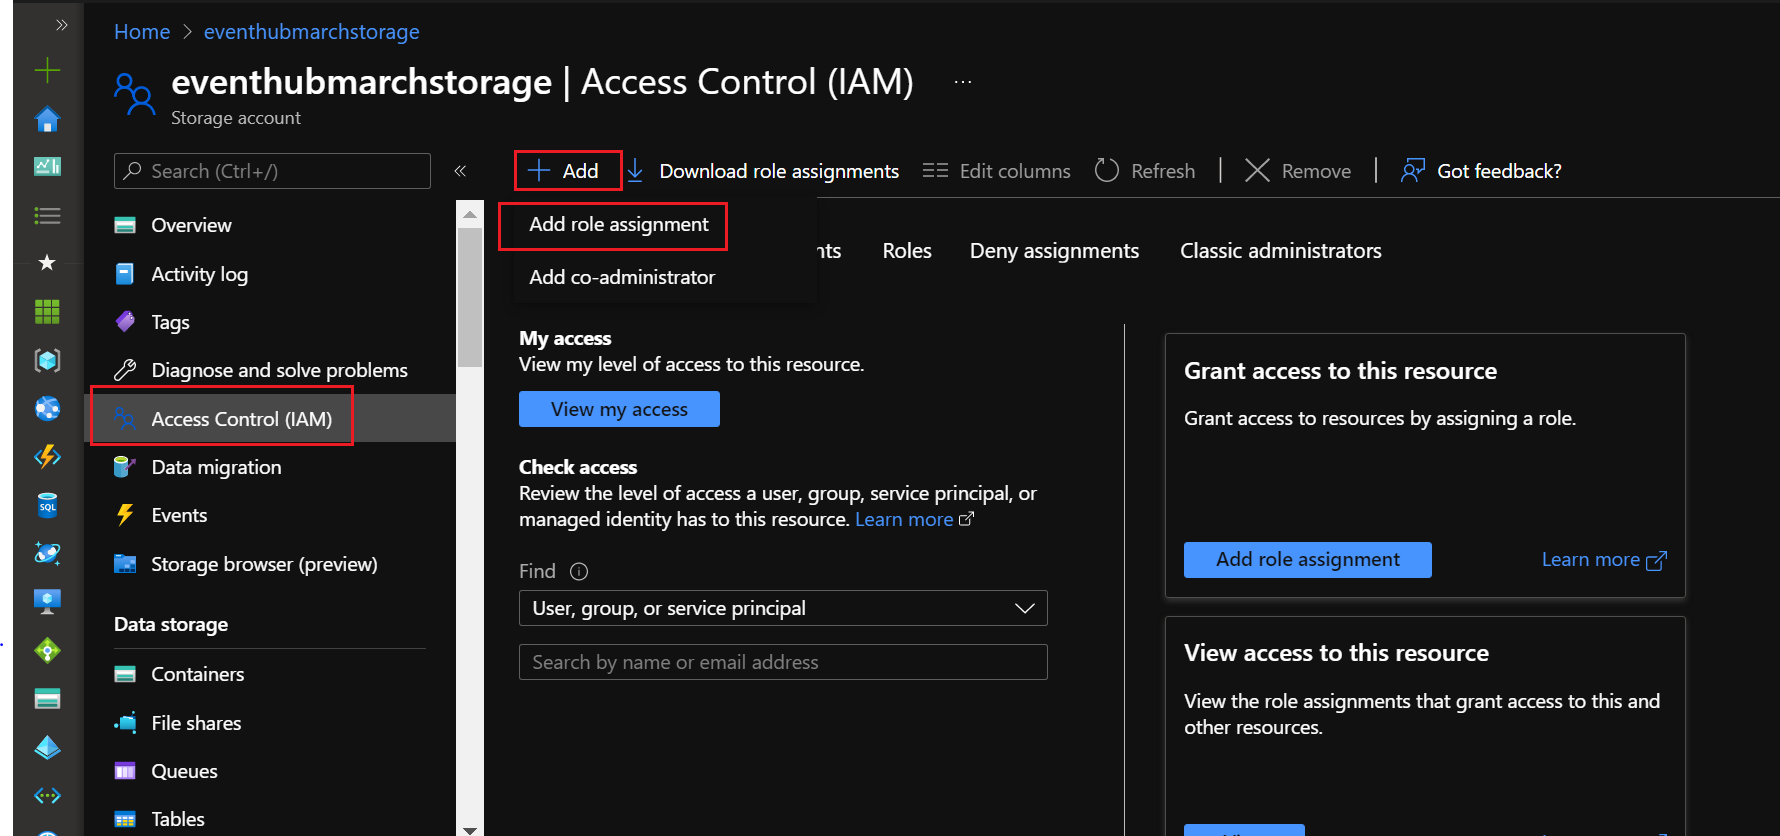
In the menu on the left, click Access Control (IAM).
-
Click Add, Add role assignment, and then the Add a role assignment tile.
If this option is not available to you, you do not have the correct permissions to add a role.
-
Perform the following steps to add a Contributor role assignment:
-
Select Contributor and then click Next.

-
Click on Managed Identity, then click Select members.
-
From the Subscription drop-down menu, select Pay-As-You-Go.
-
From the Managed Identity drop-down menu, select Virtual machine.
-
In the Select field, enter the name of your virtual machine.
-
Click on your virtual machine's name when it appears, and then click the Select button.
-
The added virtual machine displays as shown:
-
Click Next, then click Review + assign.

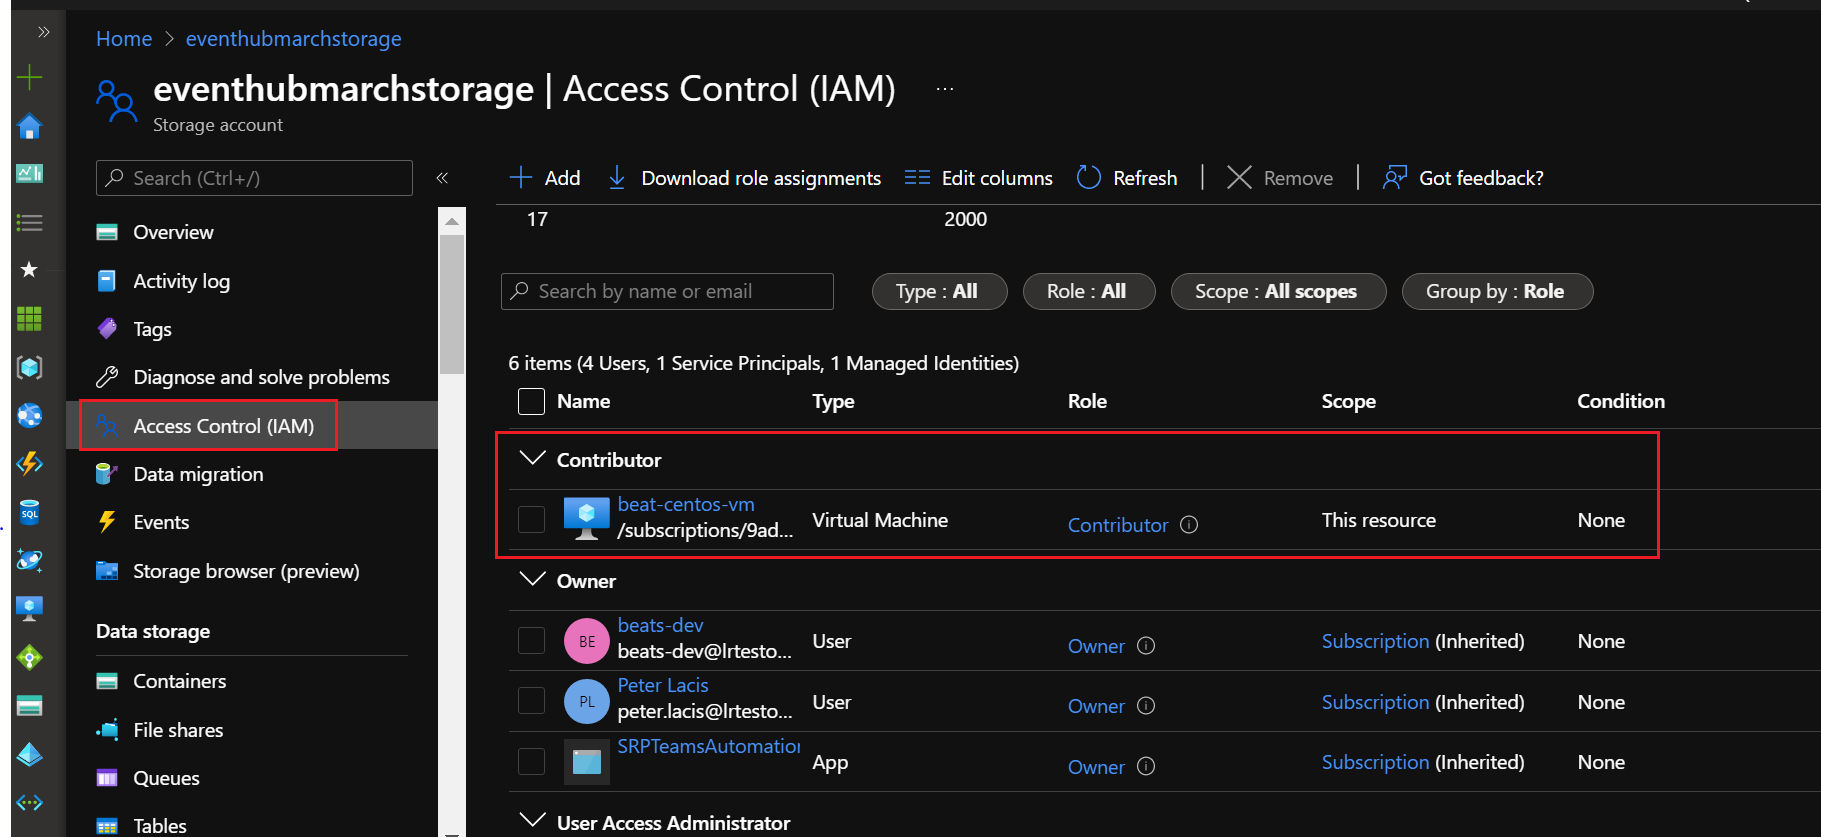
The virtual machine is displayed as a Contributor as shown below:
-